Adventures In Visible Mending
As an Amazon associate, I may earn a small commission if you navigate to Amazon from my site and buy something. This will not result in an extra cost to you.
If you peruse Google or YouTube, you can find many articles and videos about the virtues of visible mending, as well as a myriad of tutorials. Books have been written on the subject. This blurb from the Embroiderers’ Guild of America gives a good description:
“Visible mending is an ornamental approach to repairing an item. Rather than trying to mask the area where the item was damaged, the goal is to highlight these imperfections in a creative, eye-catching way. A combination of techniques and materials can be used to extend the life of an item which is otherwise in good condition, save a small hole, rip or tear. While visible mending is most commonly used to repair items of clothing that are otherwise in good condition, these techniques can also be used to repair upholstery, fabric or canvas bags, knitted or crocheted accessories or any other items that are constructed from fabric, denim or fibers.”

In 2012, for Christmas I knit my favorite sister-in-law a blanket. I don’t normally knit blankets…it takes wayyyy too long and I prefer to crochet them, as crochet is thicker and heavier than knitting (a virtue in blankets) and also goes much faster than knitting. However, I was enchanted by a simple pattern called the “Moderne Log Cabin Blanket” in my Mason-Dixon Knitting book and resolved to try it, using cotton yarn from KnitPicks in four relatively subdued colors. My goal was an elegant blanket, and honestly, it turned out beautifully. Just for the record, this picture is of someone else’s Moderne Log Cabin blanket, since I don’t have a good full size picture of mine.

However. I knit it in worsted weight yarn, and it took 37 skeins. That’s 4,033 yards. That’s 2.2 miles of yarn. All of which I knit in garter stitch, with nary another stitch pattern to relieve the tedium. It was sooooooo boring. I finished with an applied i-cord edging and really, it was lovely. Fast forward to Christmas 2023, which we celebrated at my sister-in-law’s house, and I noticed that there was a hole in the blanket. It had been washed many times, and the cotton yarn had shrunk slightly, and in spots, the individual stitches sort of blurred together and were hard to see. But I was confident I could fix it, so I told my sister-in-law that I was taking it for repair, and walked away with it.
Once I got it home and laid it out (it’s not small), I discovered multiple holes in it. I think there were 12 total, but at a certain point I got annoyed and stopped counting, so I’m not sure. I first tried crocheting a patch over each hole. Using some of the same yarn the blanket was made of, I carefully slip-stitched a chain along the purl bumps a few rows below the hole, and then used that base to make single crochet stitches back and forth, attaching to the sides at the end of each row, until I’d made enough rows to cover the hole and a few rows above it. Then I slip stitched the top of my patch to the blanket. It worked okay. But it was bulky, it pulled on the blanket, distorting the knit stitches, and it was generally just ugly. So I tried a different way.

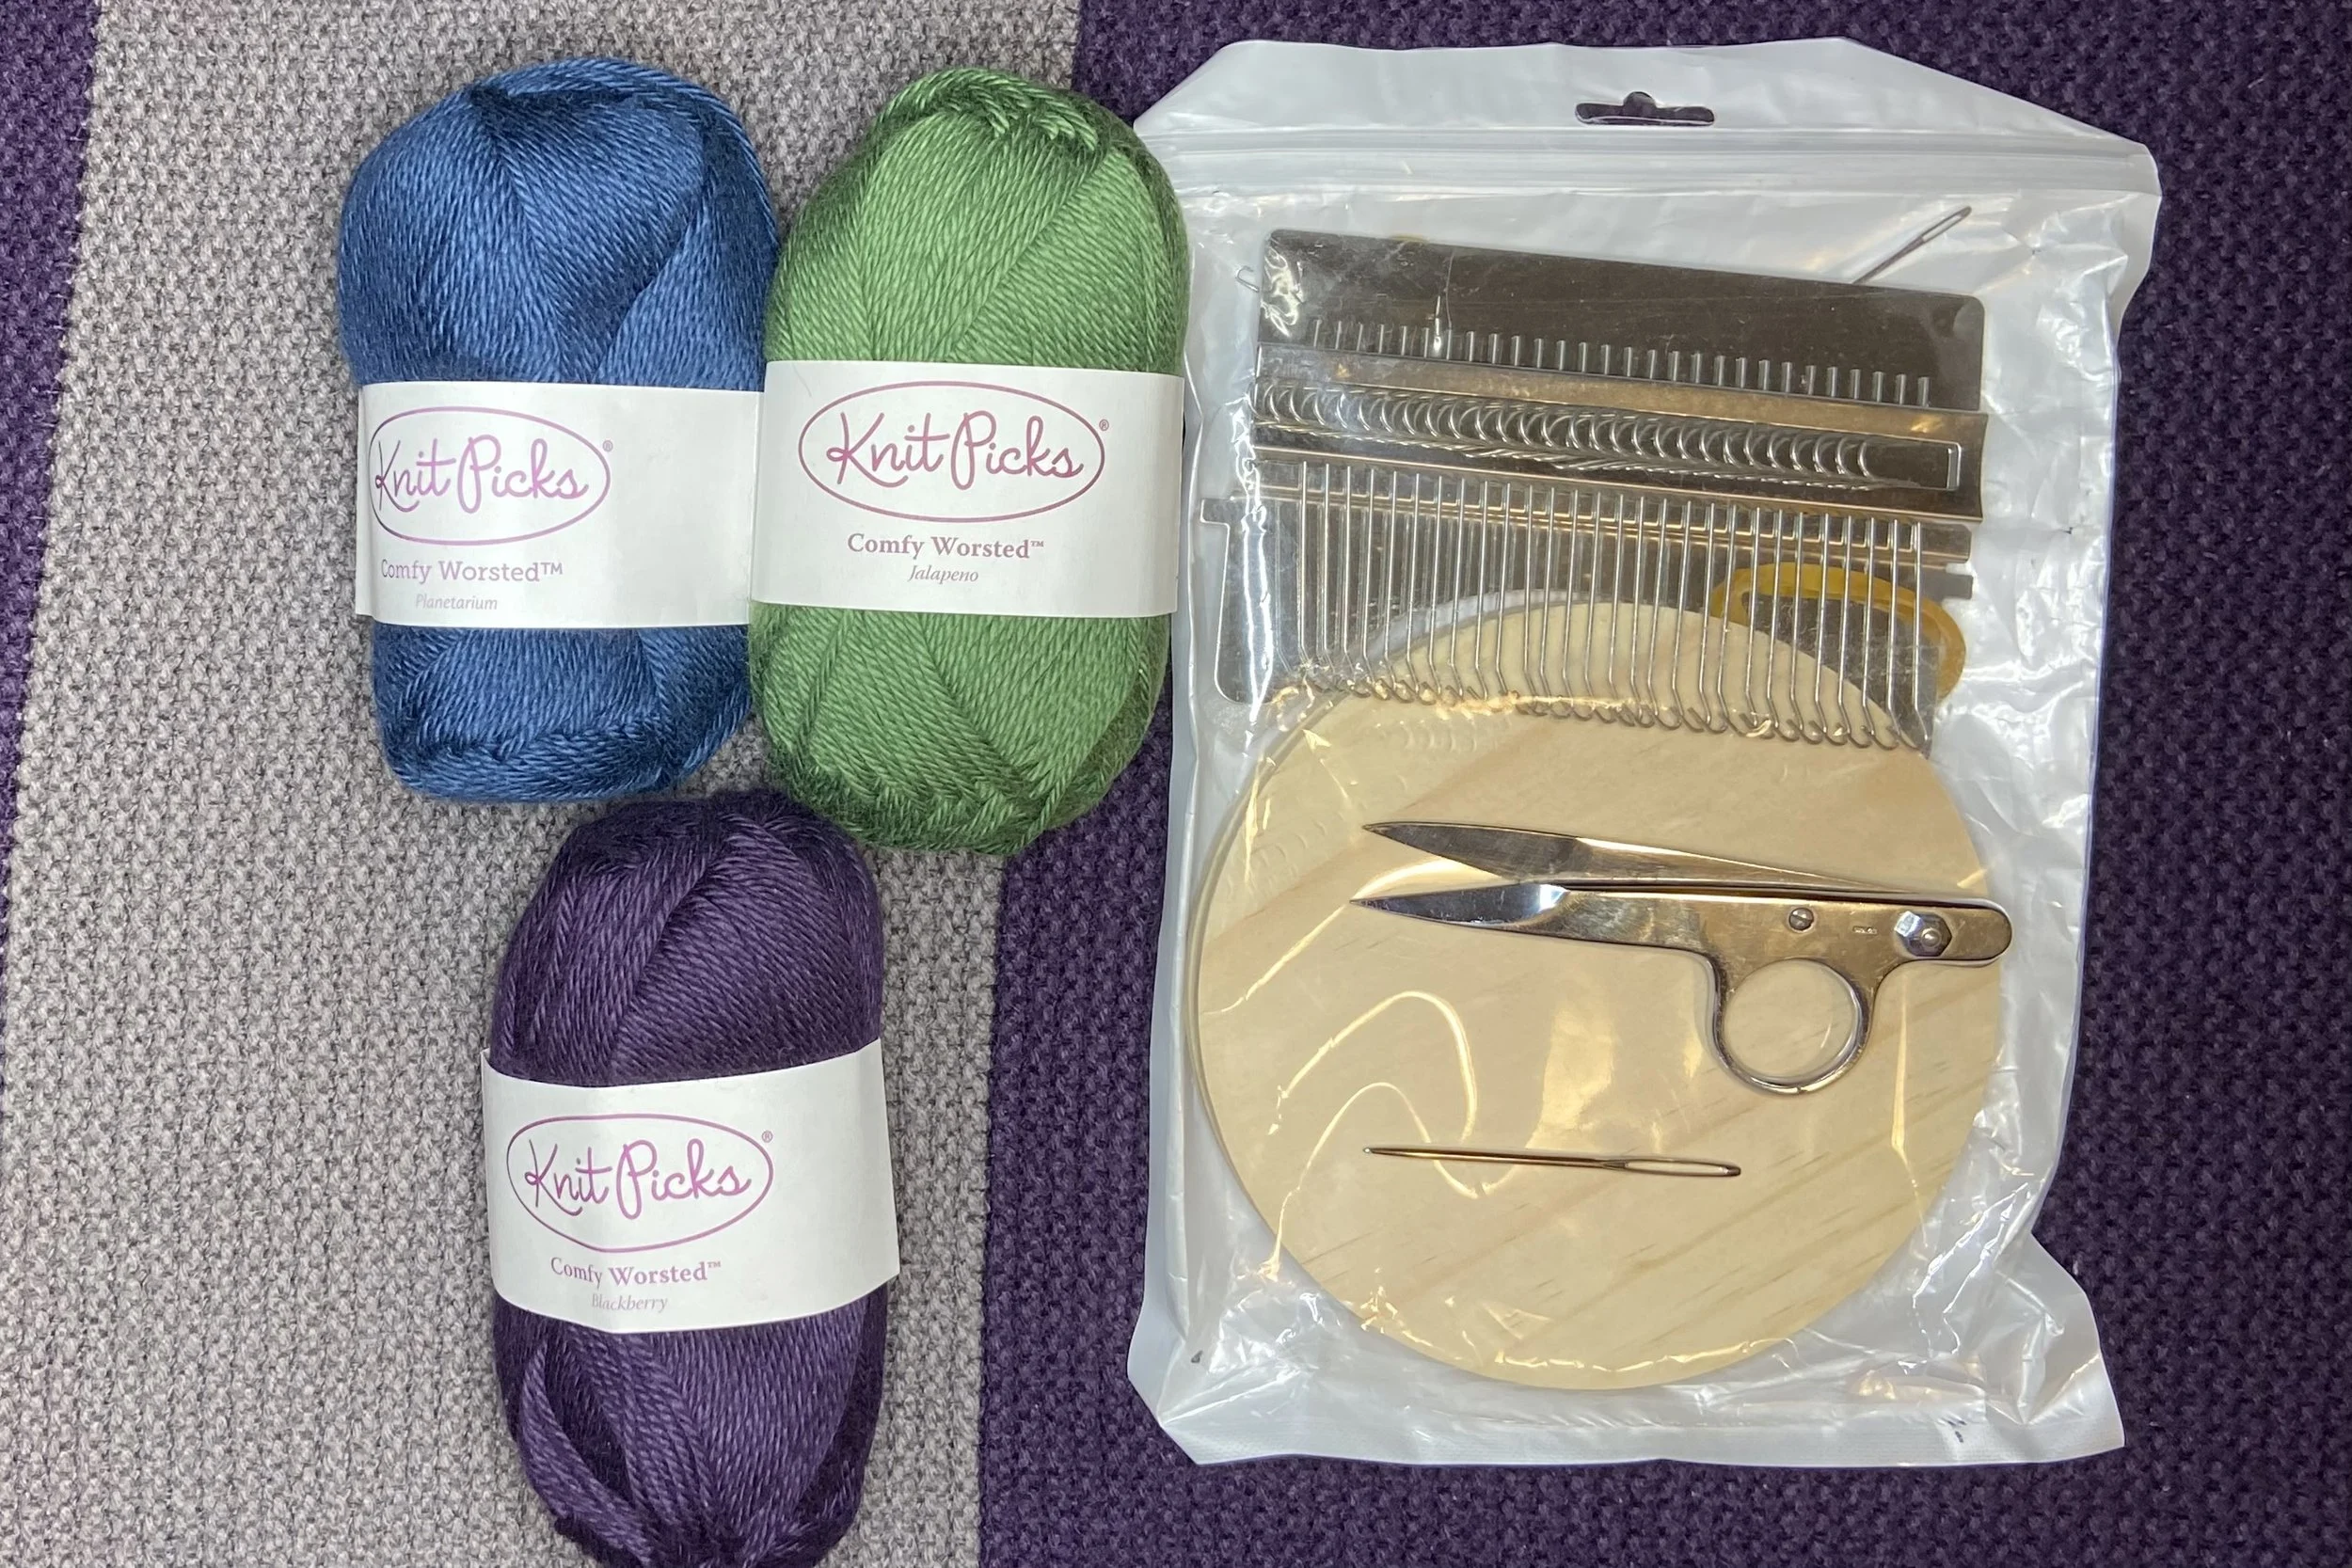
I have a speed-weaving loom I got off Amazon for mending purposes and I thought this would be just the project to break it in. I will say, the first patch I wove looked terrible, but I learned from that one and after that, used my heat-erasable markers to mark the borders of my patch before I started. I think this whole weaving process would have been easier on woven fabric or on stockinette stitch knitting, but garter stitch was what I had to work with.
I drew the bottom and sides of my patch to start, then centered the wooden surface underneath the fabric, and rubber banded it on. Then I attached the top part with the hooks, and rubber banded that on.


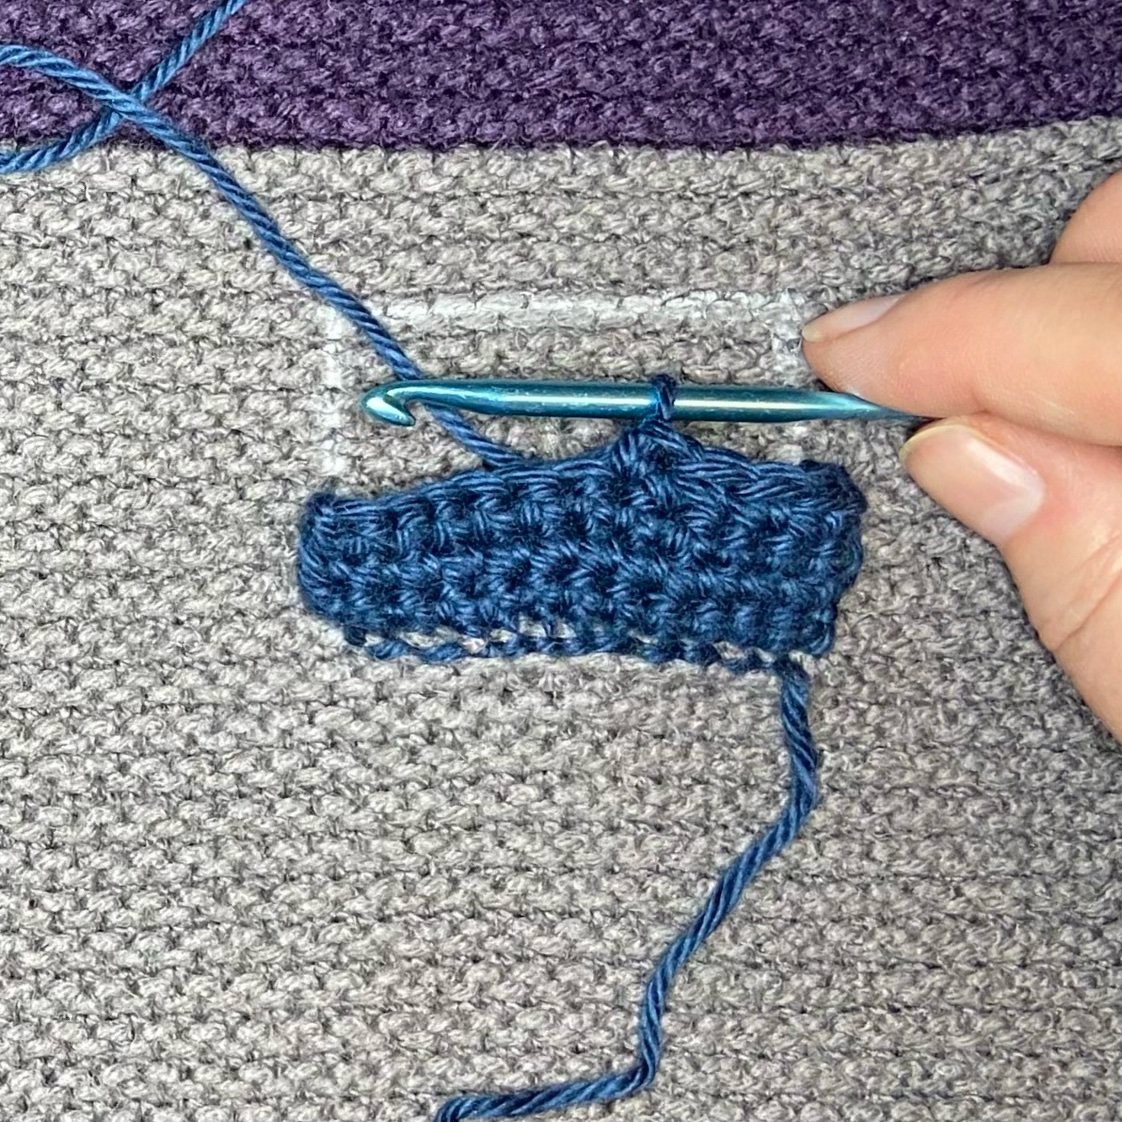
Using a darning needle and a length of my yarn, I put the warp threads in. I had decided, for purposes of precision (yes, I have OCD), to mark and work with the bottom loops of the purl ridges. So leaving about a 6” tail, I brought my needle up underneath the first bump on the bottom left, hooked it over the loop above, brought it back down through the same hole, and then came up underneath the next bottom loop to do it again. As I worked across, I skipped the occasional hook above in order to make the warp threads more or less vertical.


Then I cut the yarn, leaving a tail again, and threaded the needle with the same color of yarn to do the weaving (weft threads, if you care). I started on the left again and came up under the first purl bump I’d marked along the left side. Then I pushed all the hooks to the right, and threaded my needle through. Moving the hooks to the right or left raises one side or other of the yarn loop, allowing you to easily weave “over/under” without actually having to go up and down with your needle. Clever. Once I got to the right side, I snugged the yarn down to the bottom as best I could, then put my needle down underneath the closest purl bump and then back up again over the top of the same bump, pushed the hooks to the left, and fed the needle through the other direction. I continued back and forth in the same way until I’d woven as close to the hooks as I could get.


Once I got to the top, I was done with the weaving part. I detached the part of the loom with the hooks and carefully unhooked it from my yarn loops, and then did the same with the wood support underneath. Once my fabric was free, I grabbed the heat erasable pen again and marked the bottom purl loops where I wanted to stitch down my warp yarn. Then I tacked down the last row of weft yarn the same way I had been doing and brought my needle up underneath the first marked purl loop. From there, I passed the yarn through the top of the warp loop, and then back down through the blanket above the same purl loop. I continued this across until all loops were secured and then I brought the thread to the back of the blanket.


Then on to securing the ends. On the back of the blanket, I ended up with four ends for every patch, two of which were close to each other. For the two that were close to each other, I just tied a knot. The easiest way to secure a knot like this is to start as if you’re doing a regular granny knot but on the first half of the knot, wrap the yarn around the other yarn twice instead of once and tighten it down. It will hold by itself (this is useful information, if you have to wrap presents by yourself and don’t have anyone to put their finger in the middle of a slippery ribbon knot for you). Then finish the knot as usual. This knot is very secure.


For the remaining two ends that were not close enough to each other to tie together, I decided to split the plies, thread one set of plies through my needle, and draw it under a nearby loop. Then I tied those ends together in the same way as described above. Once all the ends were securely knotted, I used my needle to draw them between the blanket fabric and the patch and up through the hole I’d just covered up, then cut off the extra yarn.


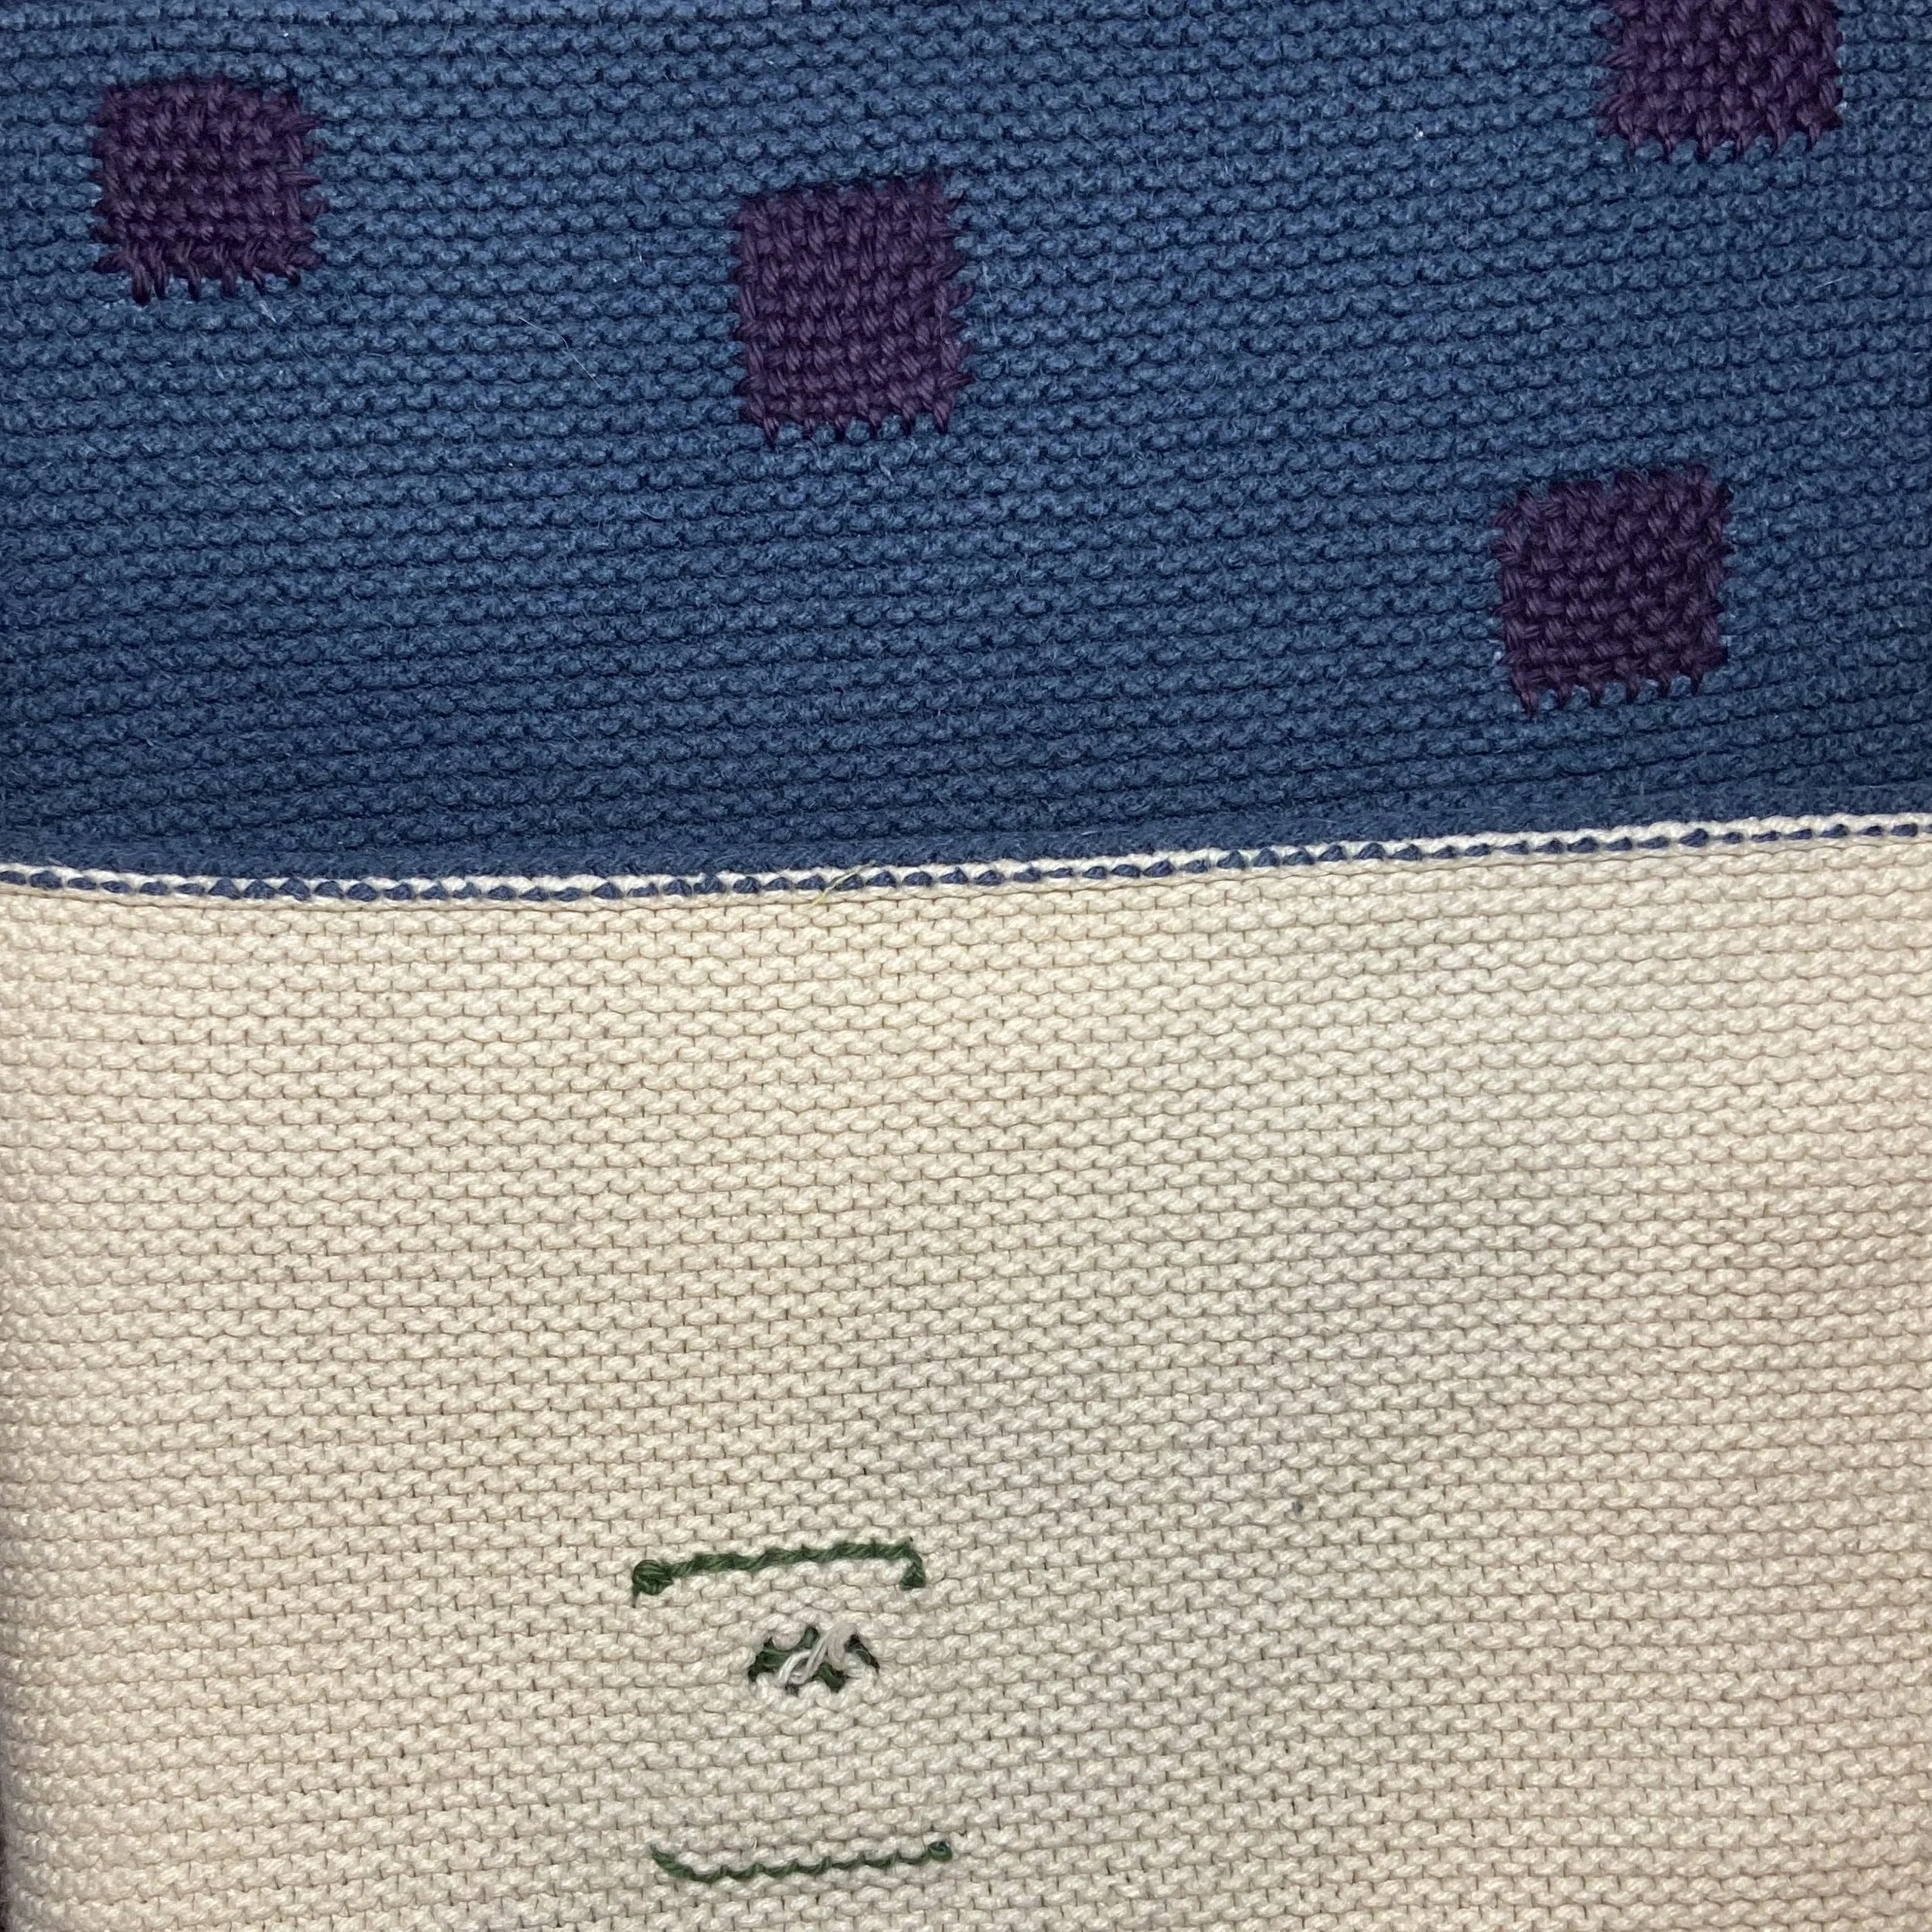
I took a picture of a section of blanket that had a lot of repaired holes in it and sent it to my mother and she texted back that it looked like the blanket had the measles. Not exactly the positive affirmation I was hoping for, but c’est la vie.


After I’d finished fixing all the holes, I went back and tore out my crochet patches and wove over those. The crochet just looked too lumpy and rough compared to the relatively nice-looking woven patches. I did leave my first (ugly) woven patch in place…it illustrates the learning process.
For a final view, I took this picture of the front and back views of the patched holes after I’d used my iron to remove the last bit of the heat erasable ink. This was a fun project, and I’m pleased that the blanket will get more use now that it’s repaired.