Adventures In Mise En Place
As an Amazon associate, I may earn a small commission if you navigate to Amazon from my site and buy something. This will not result in an extra cost to you.

Mise en place, the French term meaning everything in its place, is usually used in the kitchen. But it can be more widely applied to any space where specific organization is required. For example, the part of my studio where I do my sewing. Much like my poor mother and her walkabout knitting notions, I have a cast of “the usual suspects” that I like to have immediately to hand when I’m sewing. I don’t want to look around on my work surface for them, I don’t want to open a drawer to get to them, and I definitely don’t want to get up from the sewing machine and search around in the studio to find them. So I keep these items off to the right side of my sewing machine (which is on a lengthy countertop) since I am right-handed and want to just be able to reach out and pick them up. But somehow, they get moved and shuffled out of position and separated and mixed in with other things…clearly I needed a better solution.
I decided I needed some sort of portable sewing station. My general requirements were two pincushions so I could segregate my roundhead and flathead pins (I feel like there must be a history joke in there somewhere…maybe if I called them Roundheads and Cavaliers?), a place where I could keep my sewing clips and easily just reach in and grab whatever I needed, and a place where my sewing scissors and my little awl would stand ready to hand.
First, I looked around to see what I might already have to adapt to use. I have a nice divided bamboo box that I got off Amazon some time ago, but I couldn’t easily stick my hand in and grab anything (specifically, the sewing clips), so that was out. I also had a lovely lidded box that I got from Goodwill a long time ago and which has been sitting around, waiting to be of service. But it was an odd shape and I ultimately decided that the interior dimensions were not big enough for the two pincushions plus the storage areas.


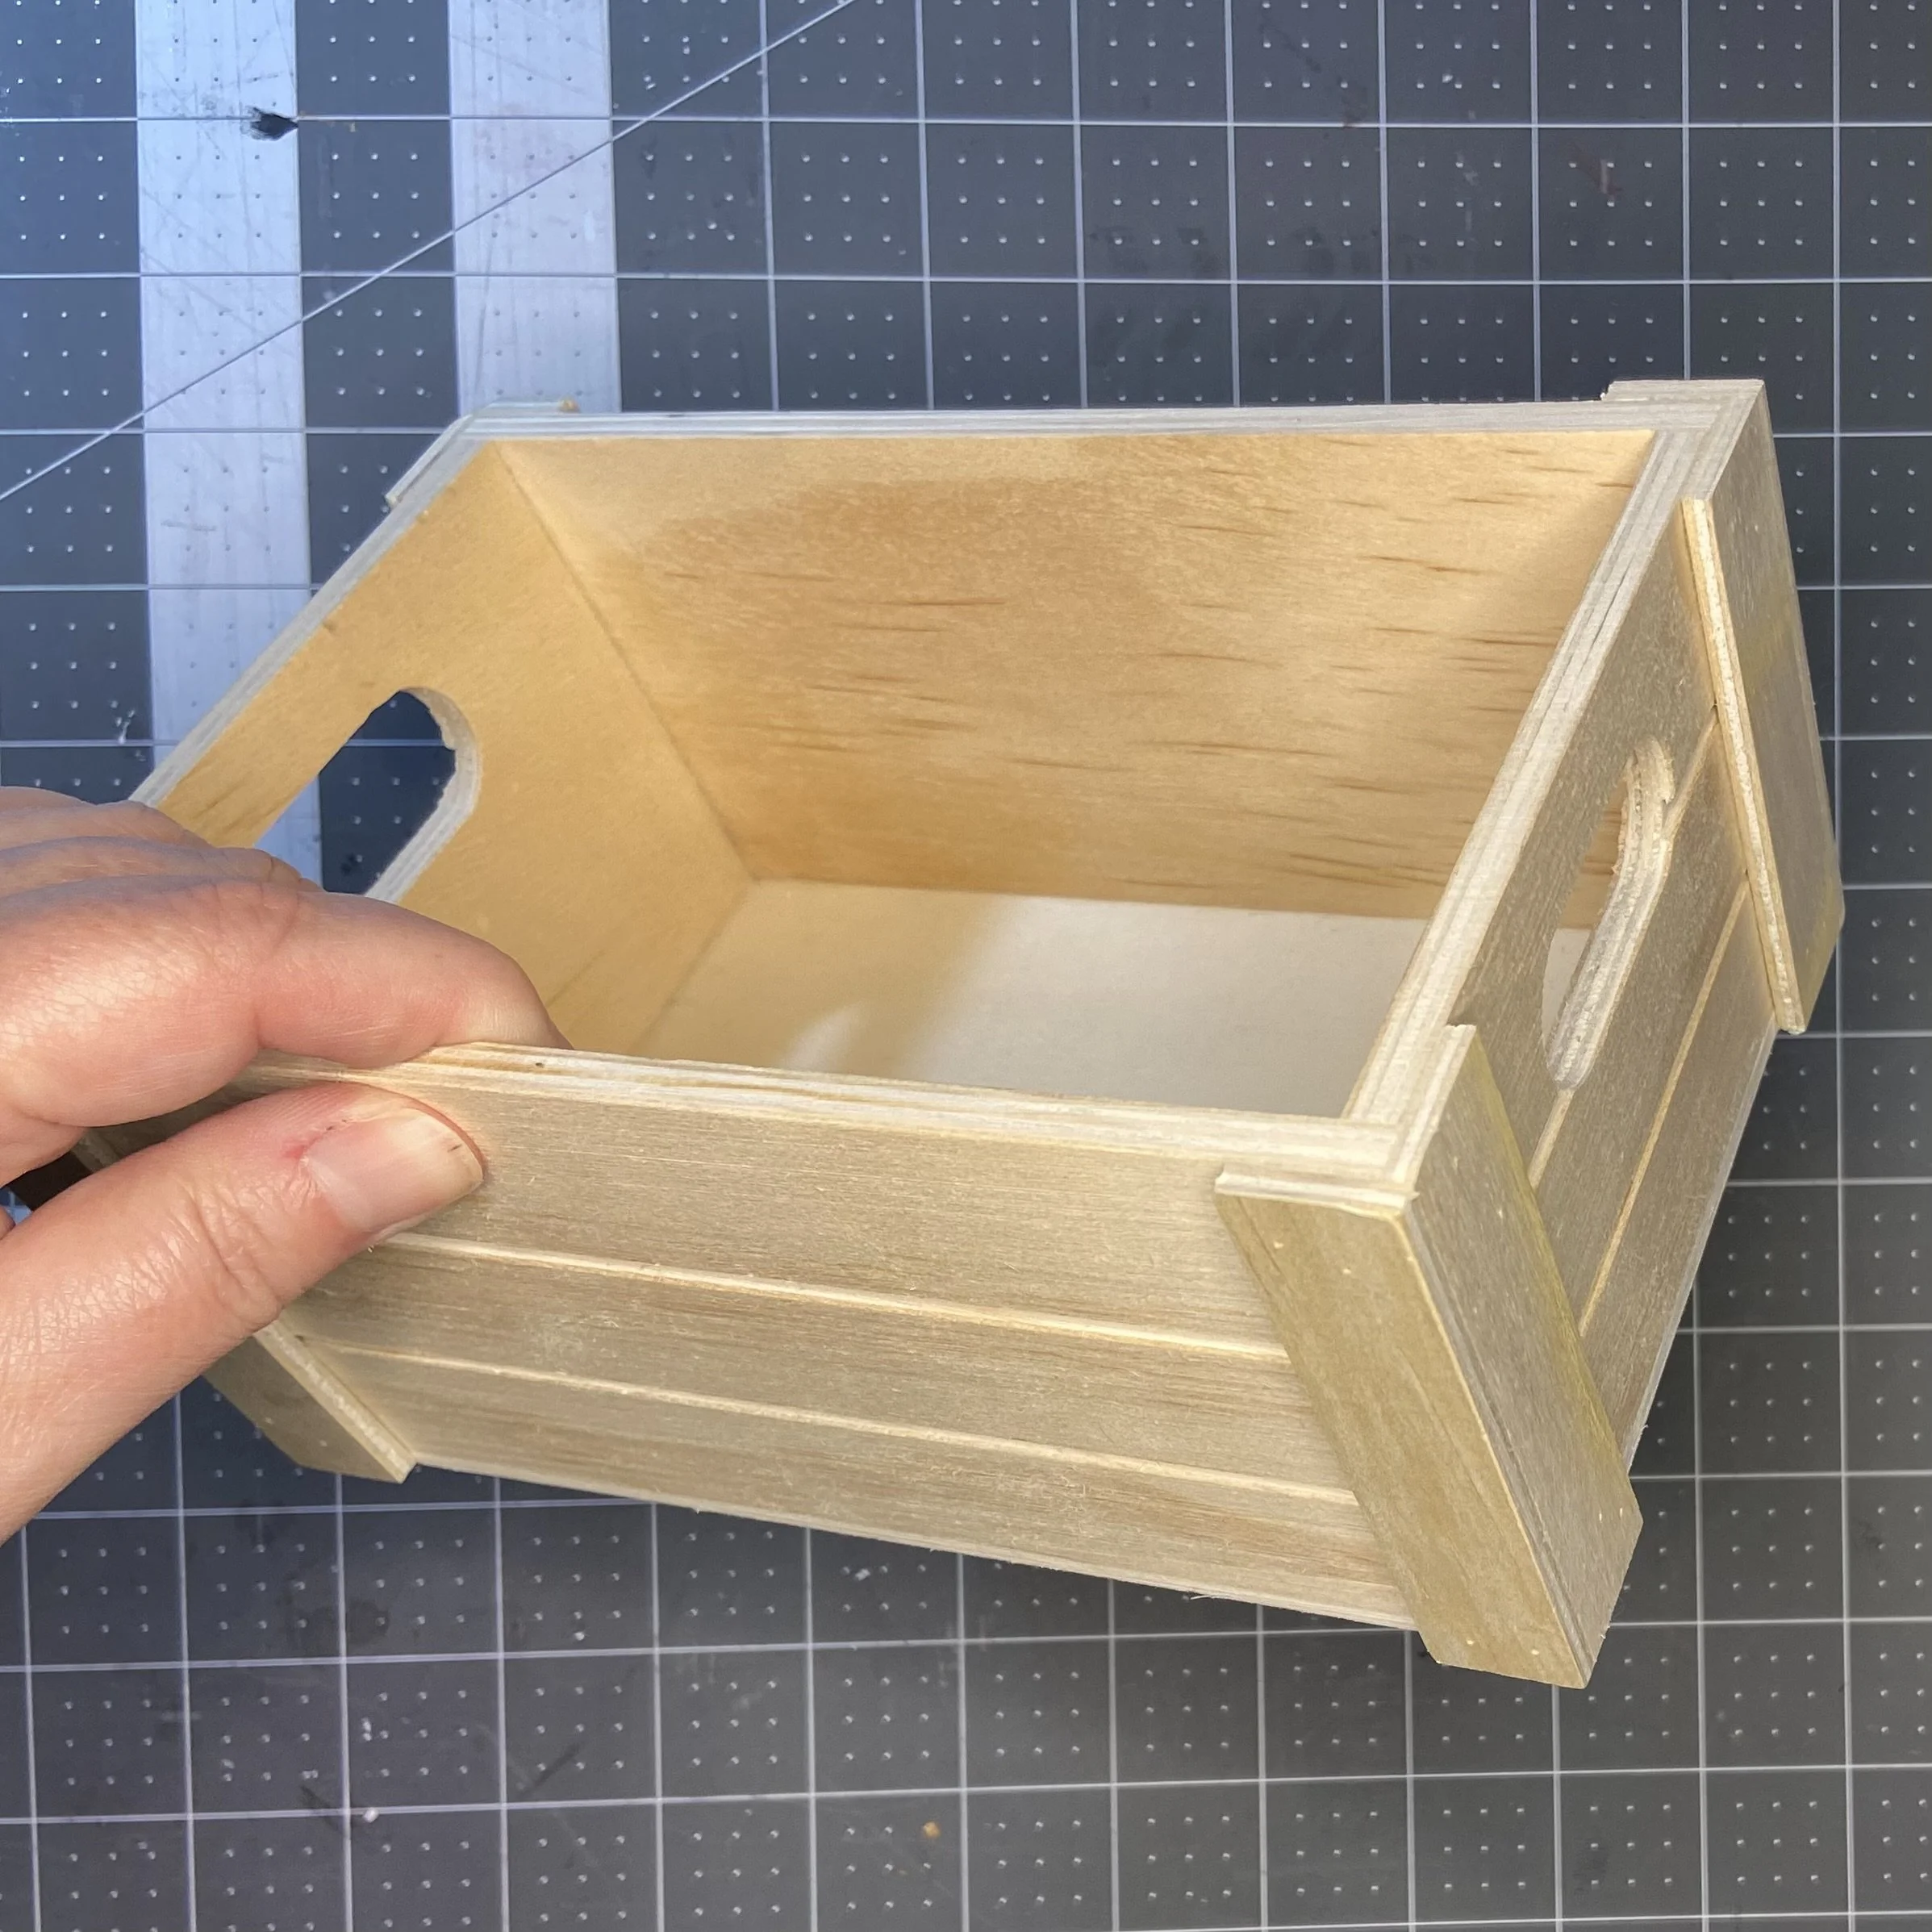
I eventually stopped off at a local craft store and found an unfinished wood box on sale. The interior dimensions were 4.25” x 6.75” and it was 3.25” deep. Perfect. But I couldn’t just use an unfinished wood box. That would be a crime against…well, a crime against the blog. So, I decided to try to make it look somewhat like metal.
My usual combination of black paint and metallic paint worked just fine. I painted the whole thing with copper metallic paint and let that dry. Then I painted it one section at a time with black acrylic paint and immediately wiped off what I could of the paint with a paper towel. This let just a hint of the copper beneath show through.


Next, the pincushions. I rooted around in the stash for fabric left over from the pouch/tray project and also dug out some scrap mat board to serve as the base for my pincushions. I decided that each pincushion would be as tall as the box’s interior dimensions (4.25”) and 2” wide. I’d worry about the depth when I was closer to being ready to actually install them. First, I cut my backing pieces 2” by 4.25” and then tried to fit them into the bottom of the box. I did have to trim them very slightly so that they weren’t too snug.


On to the fabric: I used the backing piece as a pattern and traced a rectangle onto one of the pieces of fabric with my heat erasable pen. Then I used my quilting ruler and my rotary cutter to cut my fabric with a 1/4” border for a seam allowance; this would be the top of the pincushion. Then I cut two pieces of fabric 2” by 5” and two pieces of fabric the same width as the top of the pincushion and 5” long (the grids on the self-healing cutting mat are very helpful for these sorts of cuts); these were the sides of the pincushion.


I didn’t figure out this next bit until I’d already sewn one pincushion and struggled with it a little bit, which is why the fabric appears to have magically changed in the pictures. When sewing this piece, I needed to make sure that I did NOT sew past my drawn lines…not even one stitch. And then when I’d finished joining the sides to the top and was ready to sew the sides together, I was able to join easily where three points came together. On the first pincushion, I sewed very slightly past my lines, and really struggled when I got to the side seams.
So…first I sewed each of the side pieces onto the corresponding edges of the top piece. Then I sewed the sides together, which of course required four seams. As can be seen in the picture below, where the two sides are joined together at the edge of the top piece, there are three corners which must be managed. If one has not sewn past the lines initially, then the corner belonging to the top piece can simply be folded out of the way while the two side pieces are seamed.


Now working on the right side of the fabric, I hand-sewed a running stitch along the open side of my pincushion about 1/4” in from the edge. I tightened it slightly and then stuffed it with fiberfill until it seemed like it was full enough, then stuffed the backing piece in, tightened the thread around the whole thing enough to hold it in place, and tested the fit in my box. I wanted the top of the pincushion to be more or less flush with the top edge of the box. Once satisfied with the height, I sewed the fabric closed over the backing piece.


Then I glued the pincushion into the box with E-6000 glue. Using E-6000 is like getting a tattoo on your face: you’d better be certain because it’s a serious commitment. The glue is messy to use, puts off fumes that are probably hazardous (Ventilate!), and takes a long time to dry (at least 12 hours, but 24 is better). But the serious virtue of the substance is that items that have been glued together by E-6000 remain stuck together for eternity, or until the return of Halley’s Comet, whichever comes first. In order to make my vaguely-box-shaped-but-still-squishy pincushion sort of adhere to the boxy shape I was aiming for, I cut another piece of mat board, dug out some small C-clamps from my disaster of a workbench in the garage, and used those to clamp the piece of mat board against the pincushion, to hold it against the sides of the box while the glue dried. A little hint from someone who learned the hard way…cut a couple smaller pieces of mat board for the other side of the clamp, so that you don’t have metal rubbing against your box and taking off that beautiful paint job you just did. Since I only had the one set of C-clamps, I had to wait overnight for the glue to dry before I could glue in the second pincushion.


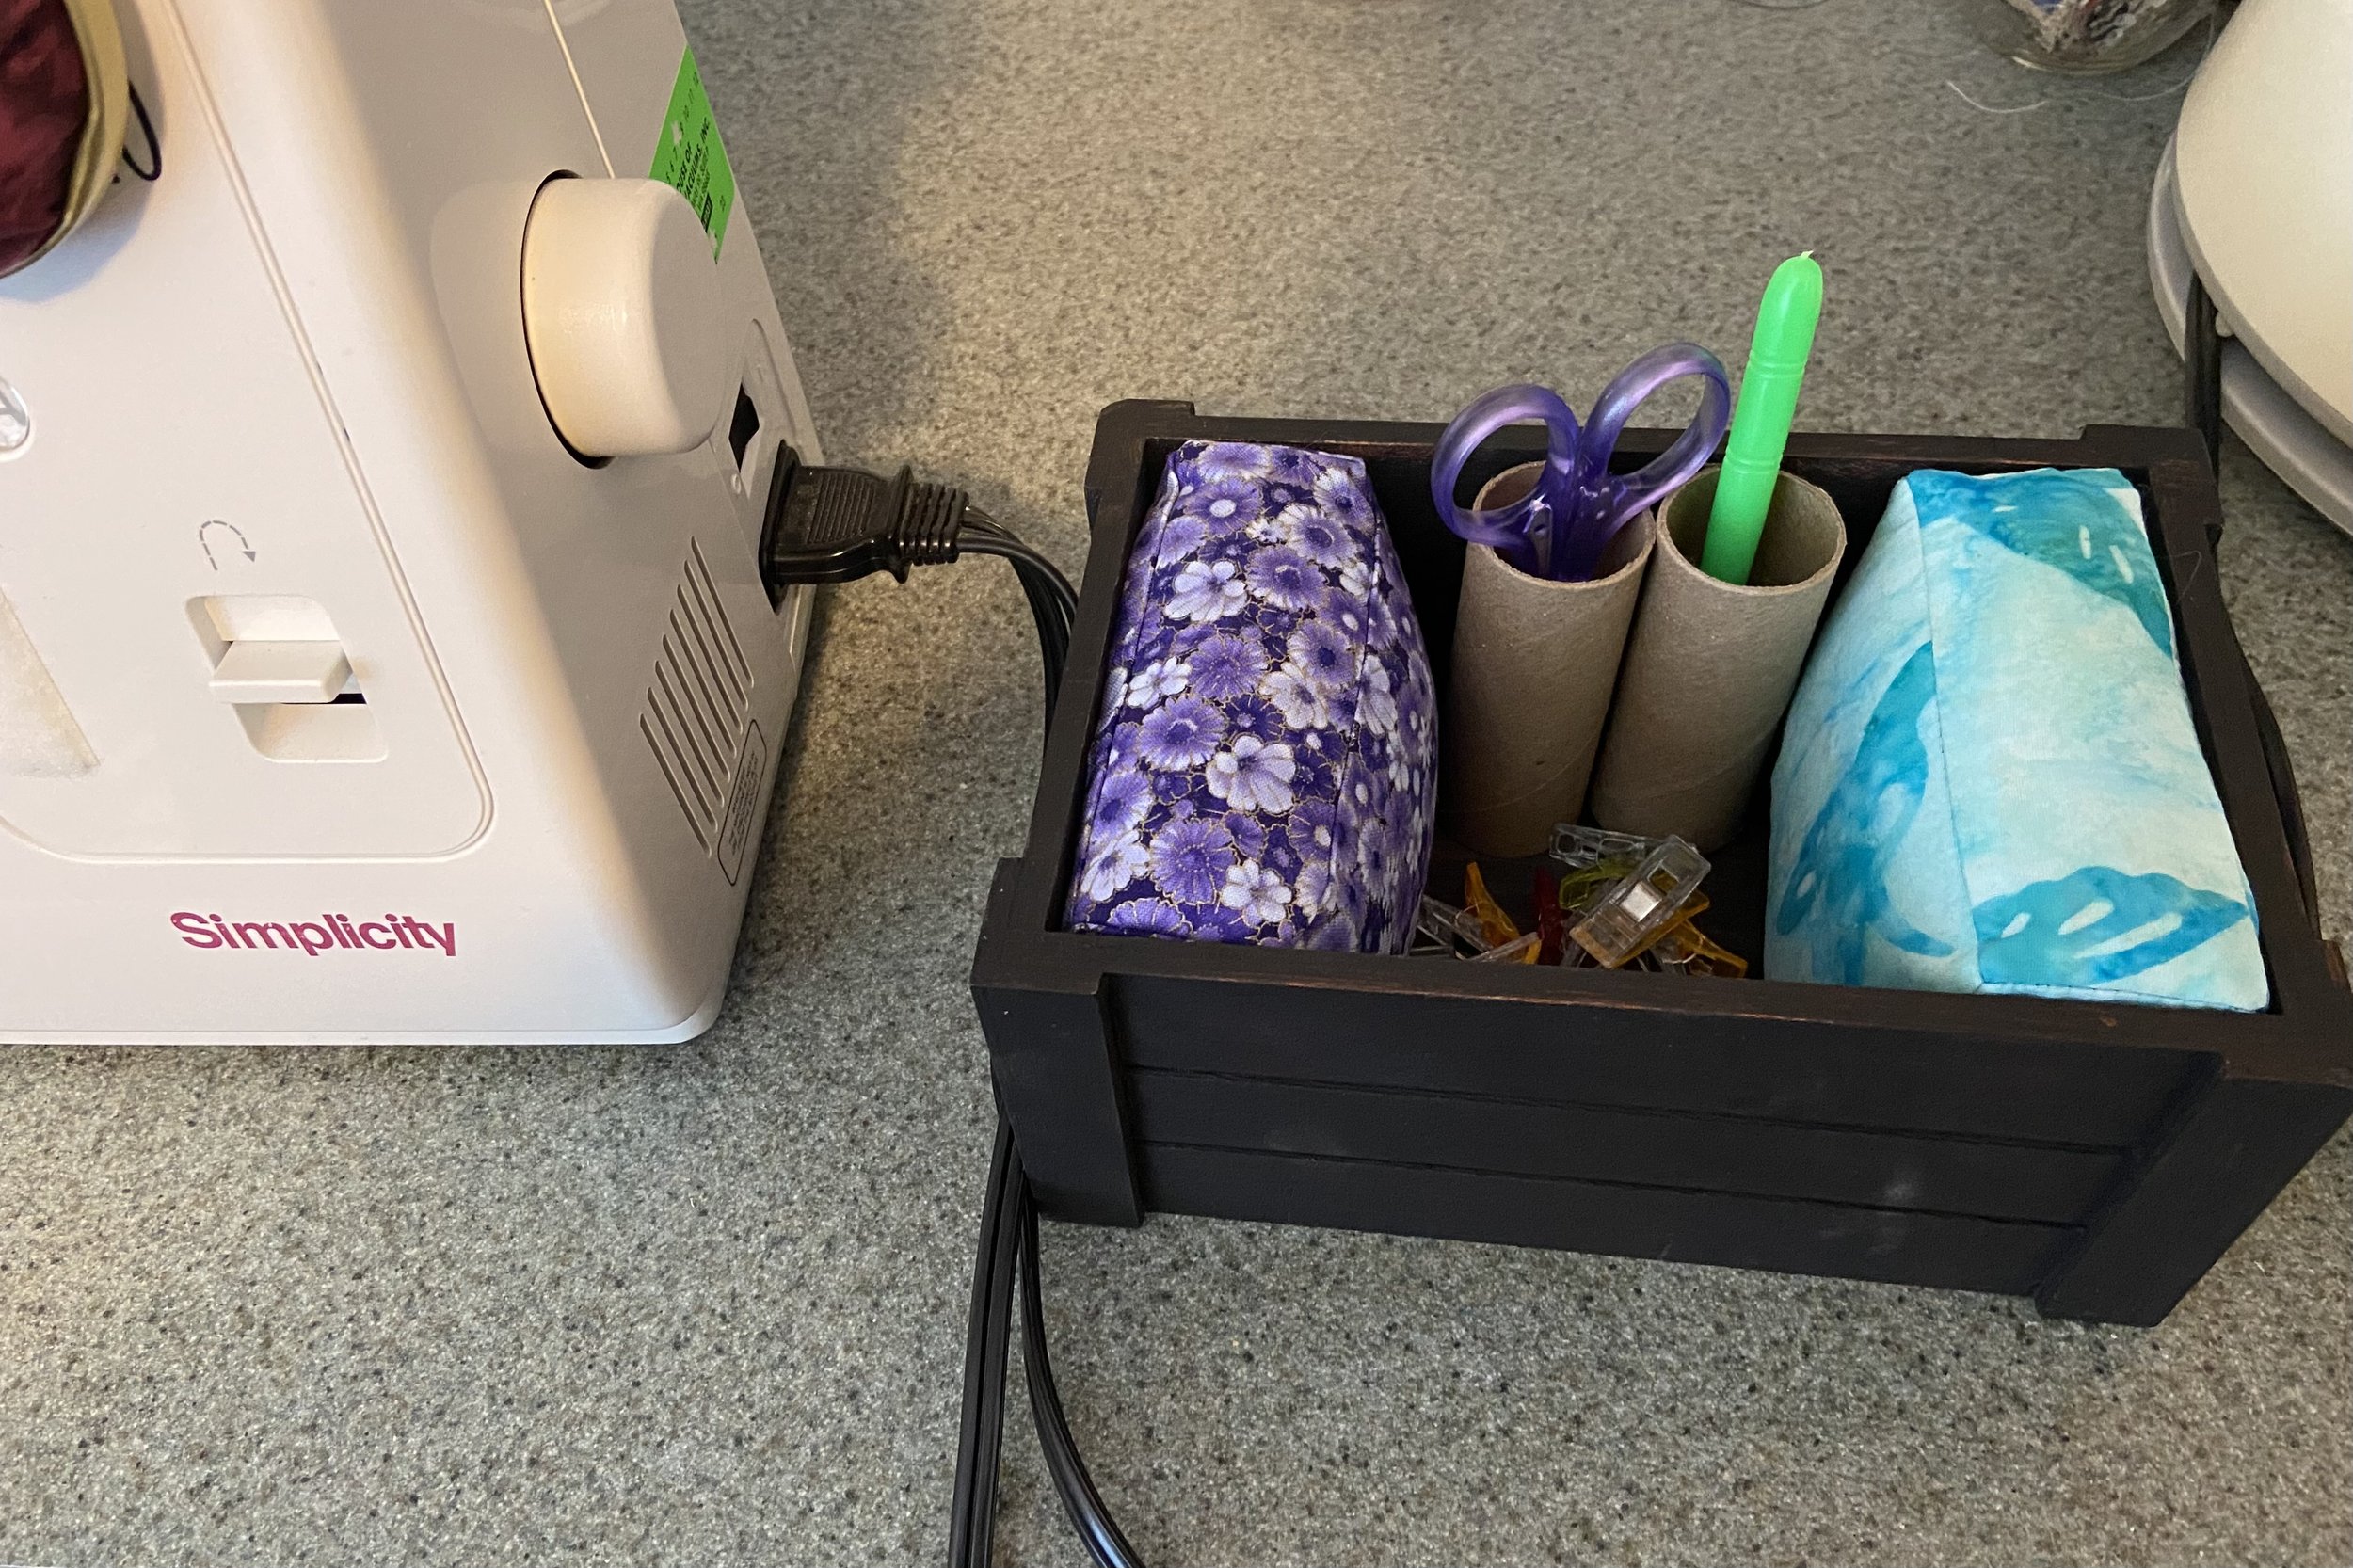
Now, I said at the beginning of this piece that I’d planned to make a couple slots for my little scissors and my awl. It would sit to the right of the sewing machine, as pictured. No, of course I wouldn’t have left those cardboard tubes looking like cardboard. I’m not a barbarian. I would have made them look like copper pipes.

But alas, right about the time I started this project, my main sewing machine stopped working, and I had to switch to using the old Singer, which is installed in its own sewing cabinet. And there is only a 2.5” lip on the right side of the Singer. No way would my beautiful new sewing station fit there. So it would have to sit somewhere else nearby. I still needed my scissors and awl on the right hand side of the machine though, so I thought about putting the tubes on the side of the sewing machine at an angle.

And then I realized that I was overcomplicating everything and I just needed to attach a small box on the work surface to the right of the machine. So I dug through my stash of boxes and found the box that my last iPhone came in. Apple doesn’t just make great electronics…they also make fabulous boxes. (I wonder if they have engineers for their boxes; what a great job that would be…box engineer!) I stuck some Velcro down on the work surface and some on the box and it sits perfectly now and my scissors and awl drop right inside. They are right where I can reach them without looking, but they won’t go walkabout (they’d fallen off the sewing cabinet several times while I was sewing the pincushions). Sometimes, the really simple solution is the best one.
So while my sewing station didn’t contain everything like I’d originally planned, it held both the Roundhead and the Cavalier pins, with the sewing clips nesting nicely in between. And my scissors and awl were right where I needed them to be. So it’s a completely workable combination, even if it isn’t a single system like I’d planned. Here’s the “glamor shot” of the finished box sitting on the sewing cabinet next to the Singer.

Of course, no sooner had I taken the glamor shot than I realized the box needed one more decorative touch, so I dug out some of the faux rivets left over from my “All The Time In The World” art piece and used my Glossy Accents adhesive to glue them on. The Glossy Accents bottle has a lovely precision tip, which made it easy to use in this application. The rivets were the perfect final touch to my sewing station…I love it!

