Adventures In QAYG-Part 1
As an Amazon associate, I may earn a small commission if you navigate to Amazon from my site and buy something. This will not result in an extra cost to you.
QAYG. Quilt As You Go.

Okay, I know I said in a recent post that if I never saw another quilt, it would be too soon. Well, I’m allowed to change my mind, right? This is still America, right? And I had this absolutely gorgeous jelly roll from Connecting Threads that I’ve been holding for the right project. And I wanted to try the quilt-as-you-go method of quilt construction, to see if that worked better than me attempting to quilt an entire blanket in my sewing machine.
My inspiration was this YouTube video, which is a quilt-as-you-go project using a lot of scrap fabric. After I watched this one a few times to make sure I understood it, I did a little more research (translation: I watched more YouTube) and discovered a similar way to join quilt blocks but which did not use long fabric strips added after the fact. I decided to try this second (similar method), and drew up a diagram of my quilt pattern, working off a picture of the original quilt inspiration.


The inspirational quilt used scrap fabric in a sort of crazy quilt way. I liked the way that looked but I did not want to waste a single sliver of my beautiful jelly roll, so I opted to just sew in straight lines. First, I opened up the jelly roll and divided the 40 strips as best I could into dark/subdued colors and light/bright colors. Then I ironed them and cut a total 48 13” strips from all the colors. And then I grouped them into piles of 4 strips (2 dark and 2 light) and sewed them together along the long edge, yielding me 12 pieces of fabric that were 4 strips wide.


Then I needed 30 of the shorter pieces that were 6 strips wide instead of 4. I decided to make those 4.25” long, and so I had to do some math. This was so traumatic that I’ve since blocked it out and cannot reconstruct my process for you here. Which is probably for the best. But I sewed the remaining pieces of the jelly roll into sections that were 6 strips wide and the full length of the fabric, again alternating light/dark colors as best I could. Once I’d sewn those long sections, I cut them into 4.25” lengths, which was much faster than cutting all the strips at 4.25” and then sewing each short strip together individually. After that, I also had to sew 4 strips together and cut those into 4.25” length. I needed 4 of those pieces for the corner blocks. And I cut out the black pieces that would fill up the rest of the quilt blocks.


Then I sewed everything together as indicated in my design diagram. I did my best to make two edges square and not worry about the other edges, as I’d have to trim those down anyway.


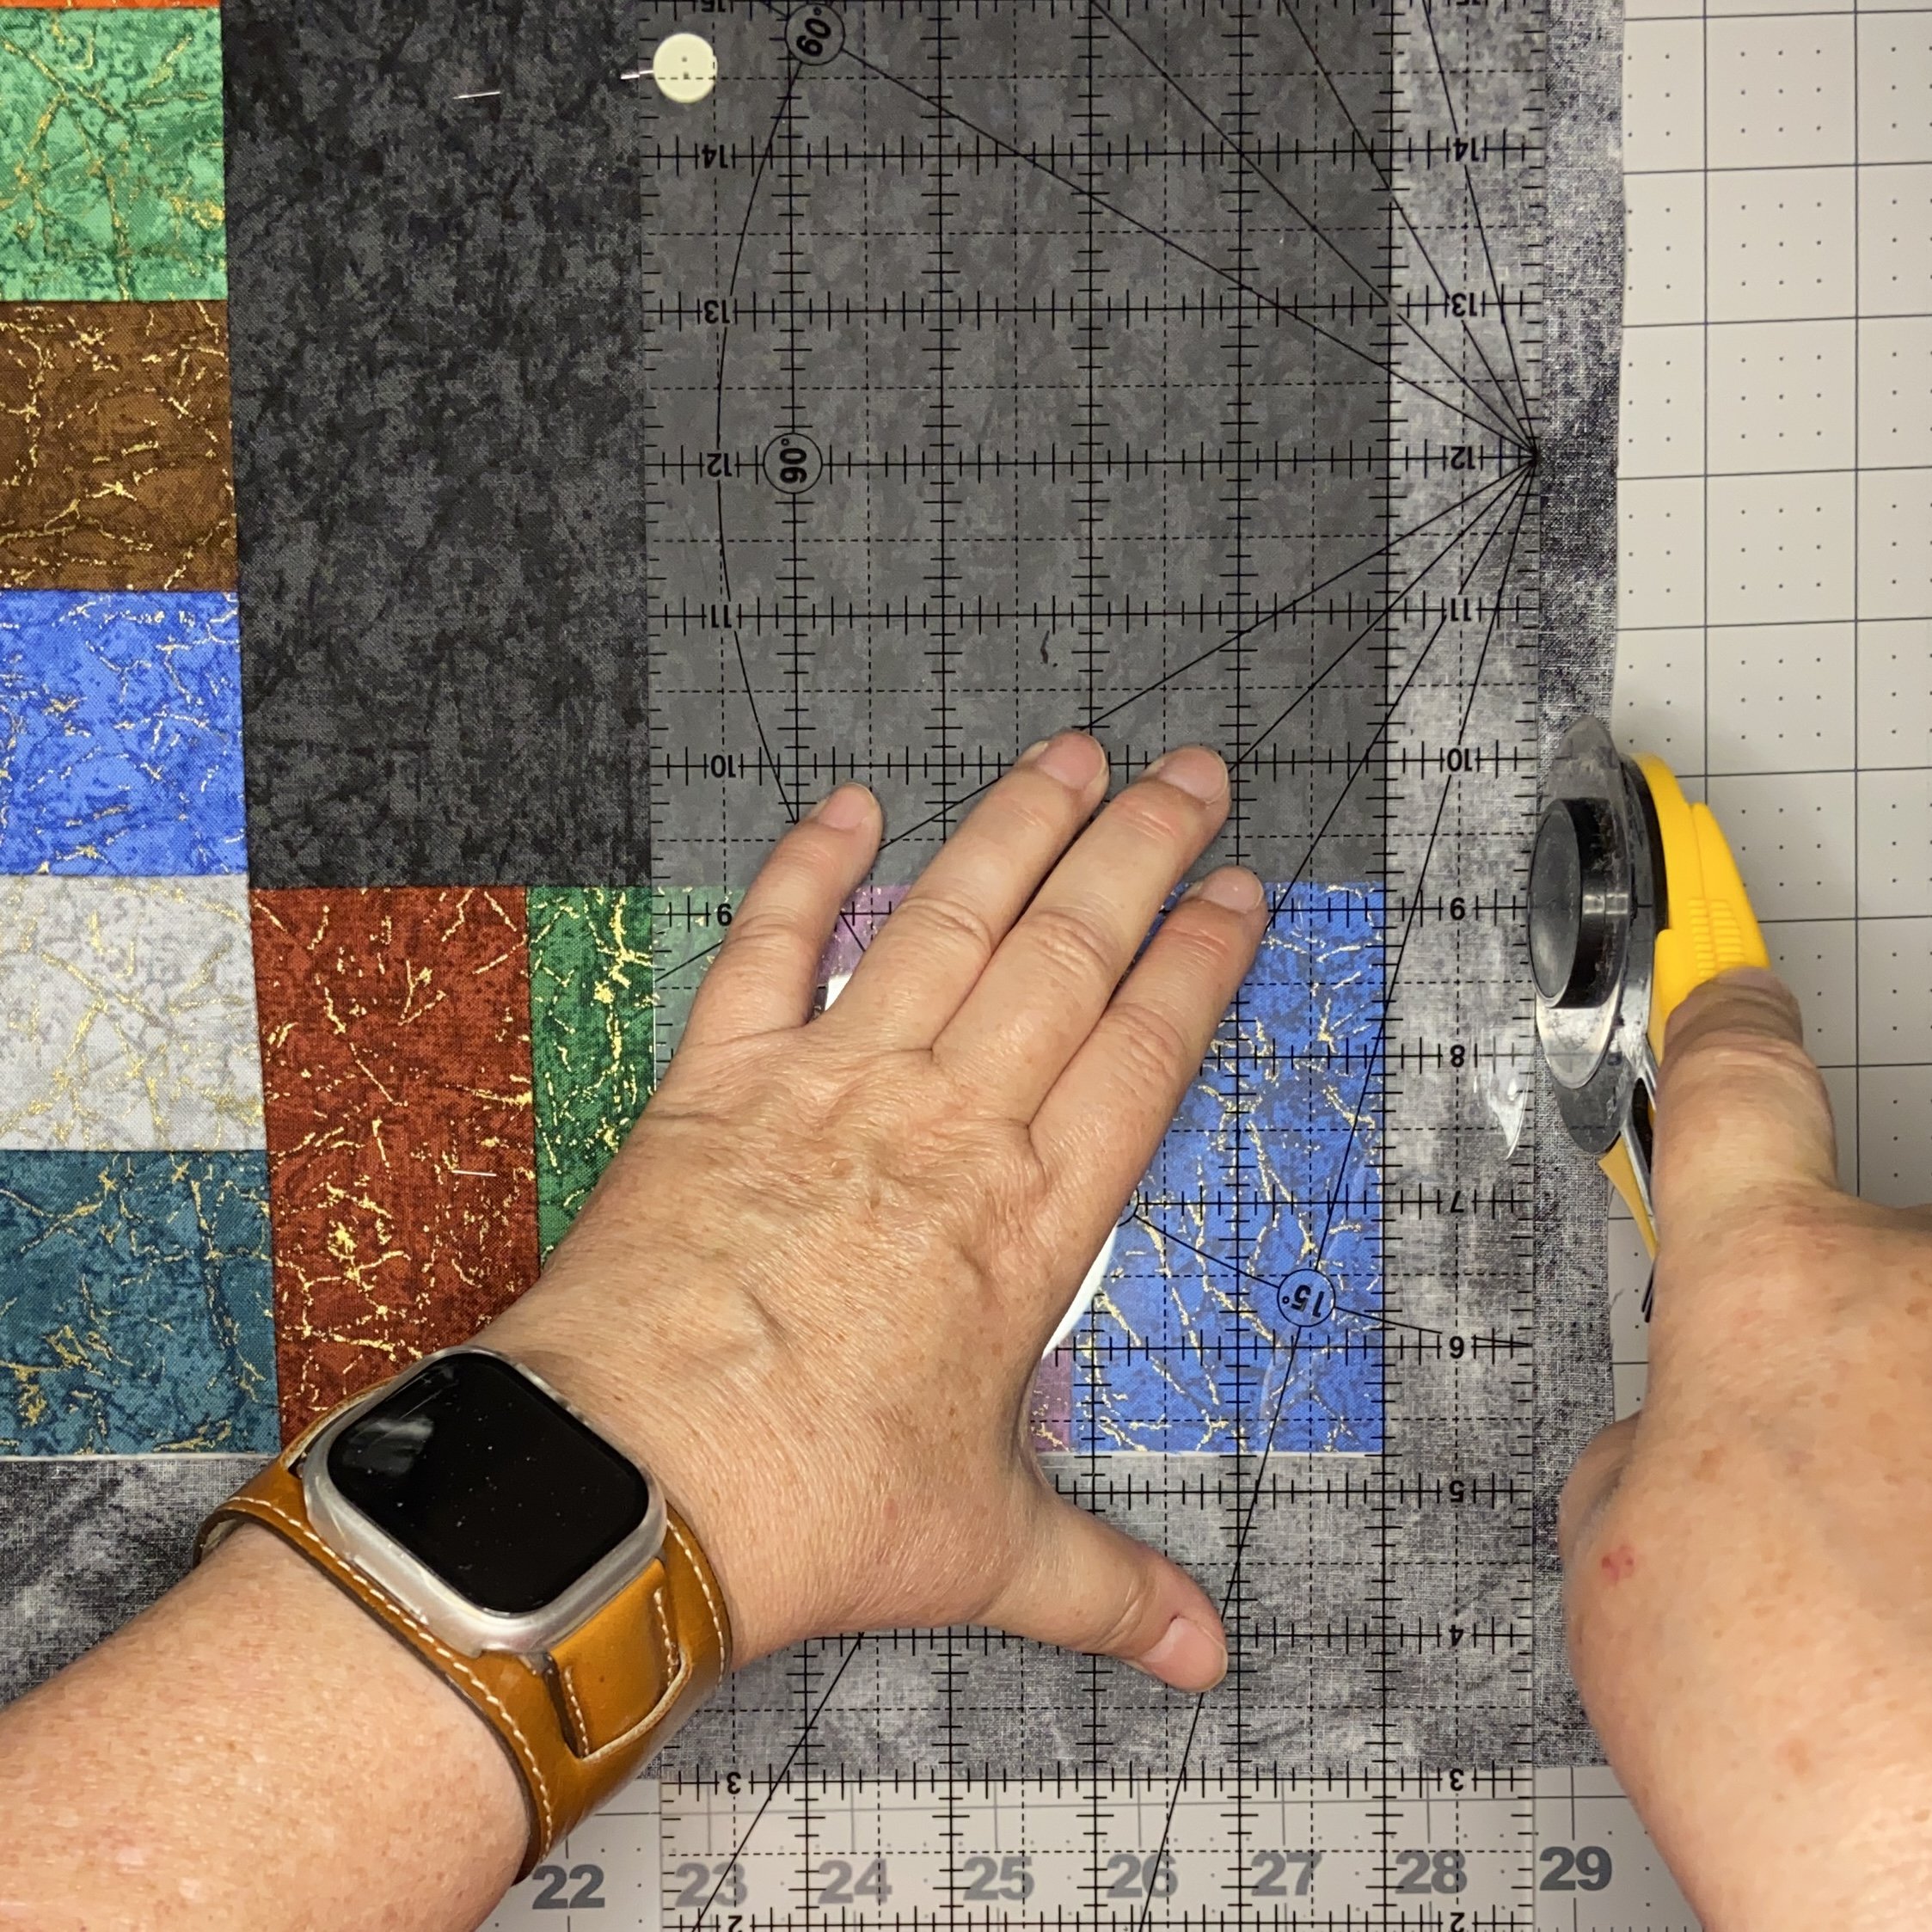
When it came time to trim the blocks, after measuring all of them, it was obvious that 11.5” was the very best size I would get. I started by using my 12.5” quilting square but it quickly became clear that this approach was unnecessarily cumbersome, so I resorted to using a regular quilting ruler and the grids on my cutting mat. I would like to point out to eagle-eyed readers who noticed my cutting mat went from dark gray (and seriously besmirched by my various art projects) to a pristine light gray, that I did not in fact get a new mat. I turned the old one over. The grid is printed on both sides. Genius! Definitely a bargain purchase. Ahem. Back to regularly scheduled programming. I would also like to point out that if one isn’t paying close attention, it’s possible to cut a piece an inch shorter than all the other pieces, in which case, you have to hope you have enough left over jelly roll strips to make a new piece.


After trimming all 30 blocks, I had to cut pieces of batting that were also 11.5” square. I opted to cut them a little larger than the blocks, pin the blocks to the batting, and then use my quilting ruler to cut precisely around the edge. It was about this time that I realized my rotary cutter wasn’t cutting very well. I tried to think about when I had last changed the blade and realized that I have NEVER changed the blade. Amazon has economical refill options and when I’d swapped in a new blade, it cut like a dream. I should have done that ages ago! If you’re wondering why I have a picture here of a stack of quilt blocks pinned together with their batting…well, it just makes me happy.


And finally, I had to cut the backing fabric. I had to buy backing fabric, since I didn’t have enough of anything in my stash. And I thought I’d figured out how much I’d need. I’d assumed I’d be working with the standard 45” wide fabric and decided I needed 11 yards. Which was utterly absurd. I’d actually need 5-6 yards, but I got all tangled up in my own math. When I found the fabric I wanted at the store, it was actually 104” wide, which confused me even more. Honestly, I swear I really can do basic arithmetic, but sometimes, once I’ve made a numerical mistake, I can’t quite recover from it without help. And so the lady at the fabric store asked me what I was making, and got out her calculator and helped me figure out that I really only needed a smidge over 2 yards of the wide fabric. I bought 3 just to be safe. Thank goodness for knowledgeable store employees, armed with calculators.
I pinned each quilt/batting block to its oversized backing piece, and then used my quilting ruler to cut the fabric 1” larger than my blocks on each side. This 1” would let me do my self- binding.
And then I quilted each block with just little bit of swishy back-and-forth stitching…not much, just enough (I hoped). When I’d finished quilting the first few blocks, I realized that the overhang of the backing fabric was a bit ripply, and the fabric had slid around a little bit in spite of being pinned together. This is the same problem I had with my first quilting project, and I decided to stop and obtain a walking foot before I continued quilting. Once I had this, it made a huge difference. For those who don’t know, regular sewing machines have something called “feed dogs”, which are little teeth sitting underneath the fabric being sewn and advancing it for the next stitch. In thick and/or multi-layered fabrics, the pull being on only the bottom can result in the fabric feeding unevenly, which is what was happening. The walking foot has feed dogs that work on top of the fabric in conjunction with the machine’s built in feed dogs, therefore feeding the fabric through more evenly. Once I started using the walking foot, the quilting went much more smoothly…literally.


You can read Part 2 here.