Adventures In Seatbelt Solutions
As an Amazon associate, I may earn a small commission if you navigate to Amazon from my site and buy something. This will not result in an extra cost to you.
As with many of my projects, this week’s offering started with a YouTube video. This one, to be exact. I took inspiration from the video but decided to go about my own construction, which I will share with you now. First of all…what are we making? Well, since I don’t really have a good name for it, I’ll just describe the situation it addresses.

If you are short or heavy (or both, like some unlucky folk), then when you put on an over-the-shoulder seatbelt in a car, it rides uncomfortably up against your neck. Since I don’t want to put my own image on the internet, I stuck Ursa in the car seat to demonstrate. Side note: Ursa is a stuffed bear I knit many years ago…if you are interested in the pattern (which I thought was quite clever), you can find it here on Ravelry.
What I made for this week’s post is a little thing that will hold the seatbelts at a more comfortable angle. I still haven’t thought of any title for it better than “seatbelt accoutrement,” which I think you’ll agree is pitiful. I started by measuring the width of the seatbelt. It was just under 2” wide, which I’m guessing is pretty standard.
I drew myself a little diagram (I’ll spare you the picture…drawing is really not one of my talents) and decided on materials and dimensions. For one seatbelt accessory (better? No, not really…), I used one 6.5”x5” piece of fusible fleece (I like Pellon but any low-loft fusible batting/fleece will do) and two pieces of fabric, at least 7”x6”. If you have a piece that’s a little bigger, that will be fine, since you will be trimming it down later. Fuse the square of fleece to the wrong side of one of your pieces of fabric.


Then pin the two pieces of fabric with right sides together, and sew along the outside edge of the fleece. Get as close as you can to the edge of the fleece without sewing over the fleece. And leave yourself about a 3” opening along the center of one of the long sides of the fleece.
Now you’re ready to start trimming the edges before your turn your project right side out. I recently saw an odd picture on Pinterest showing how to trim the edges of a turning opening so that once the project is turned and the open area brought to the inside, the unsewn raw edges will tuck in nicely and stay tucked in. I thought I’d try it for this project, and really, it works beautifully. First, use an erasable pen to draw a 1/4” line from the opening back along the seam. Do this on either side of the opening and make sure that the line is also about 1/4” from your seam. Then draw a 45º line from the end of that line to the edge of the fabric. Cut along the 45º line but stop when you hit the straight line. If that’s not completely clear, cut on the dotted white line, but not on the solid white line.


Next, you’ll trim the corners of your work at a 45º angle, getting close to your stitches but not cutting your stitches. And last, you’ll trim the rest of the seam down to about 1/4”. I used pinking shears for this, but if you don’t have any, you can use your regular fabric scissors.


Now turn your work right side out. Use some sort of pointy object to help you get the corners pushed out. I have an old bamboo bone folder that belonged to my grandmother that I like for this. If you don’t have a bone folder or something else that will work, you might try this one off Amazon. I like the fact that it has a curve to it like mine does…that helps with pushing out seams.


Once your work is right side out, fold the raw edges to the inside, line them up with the rest of the seam as best you can, and press.


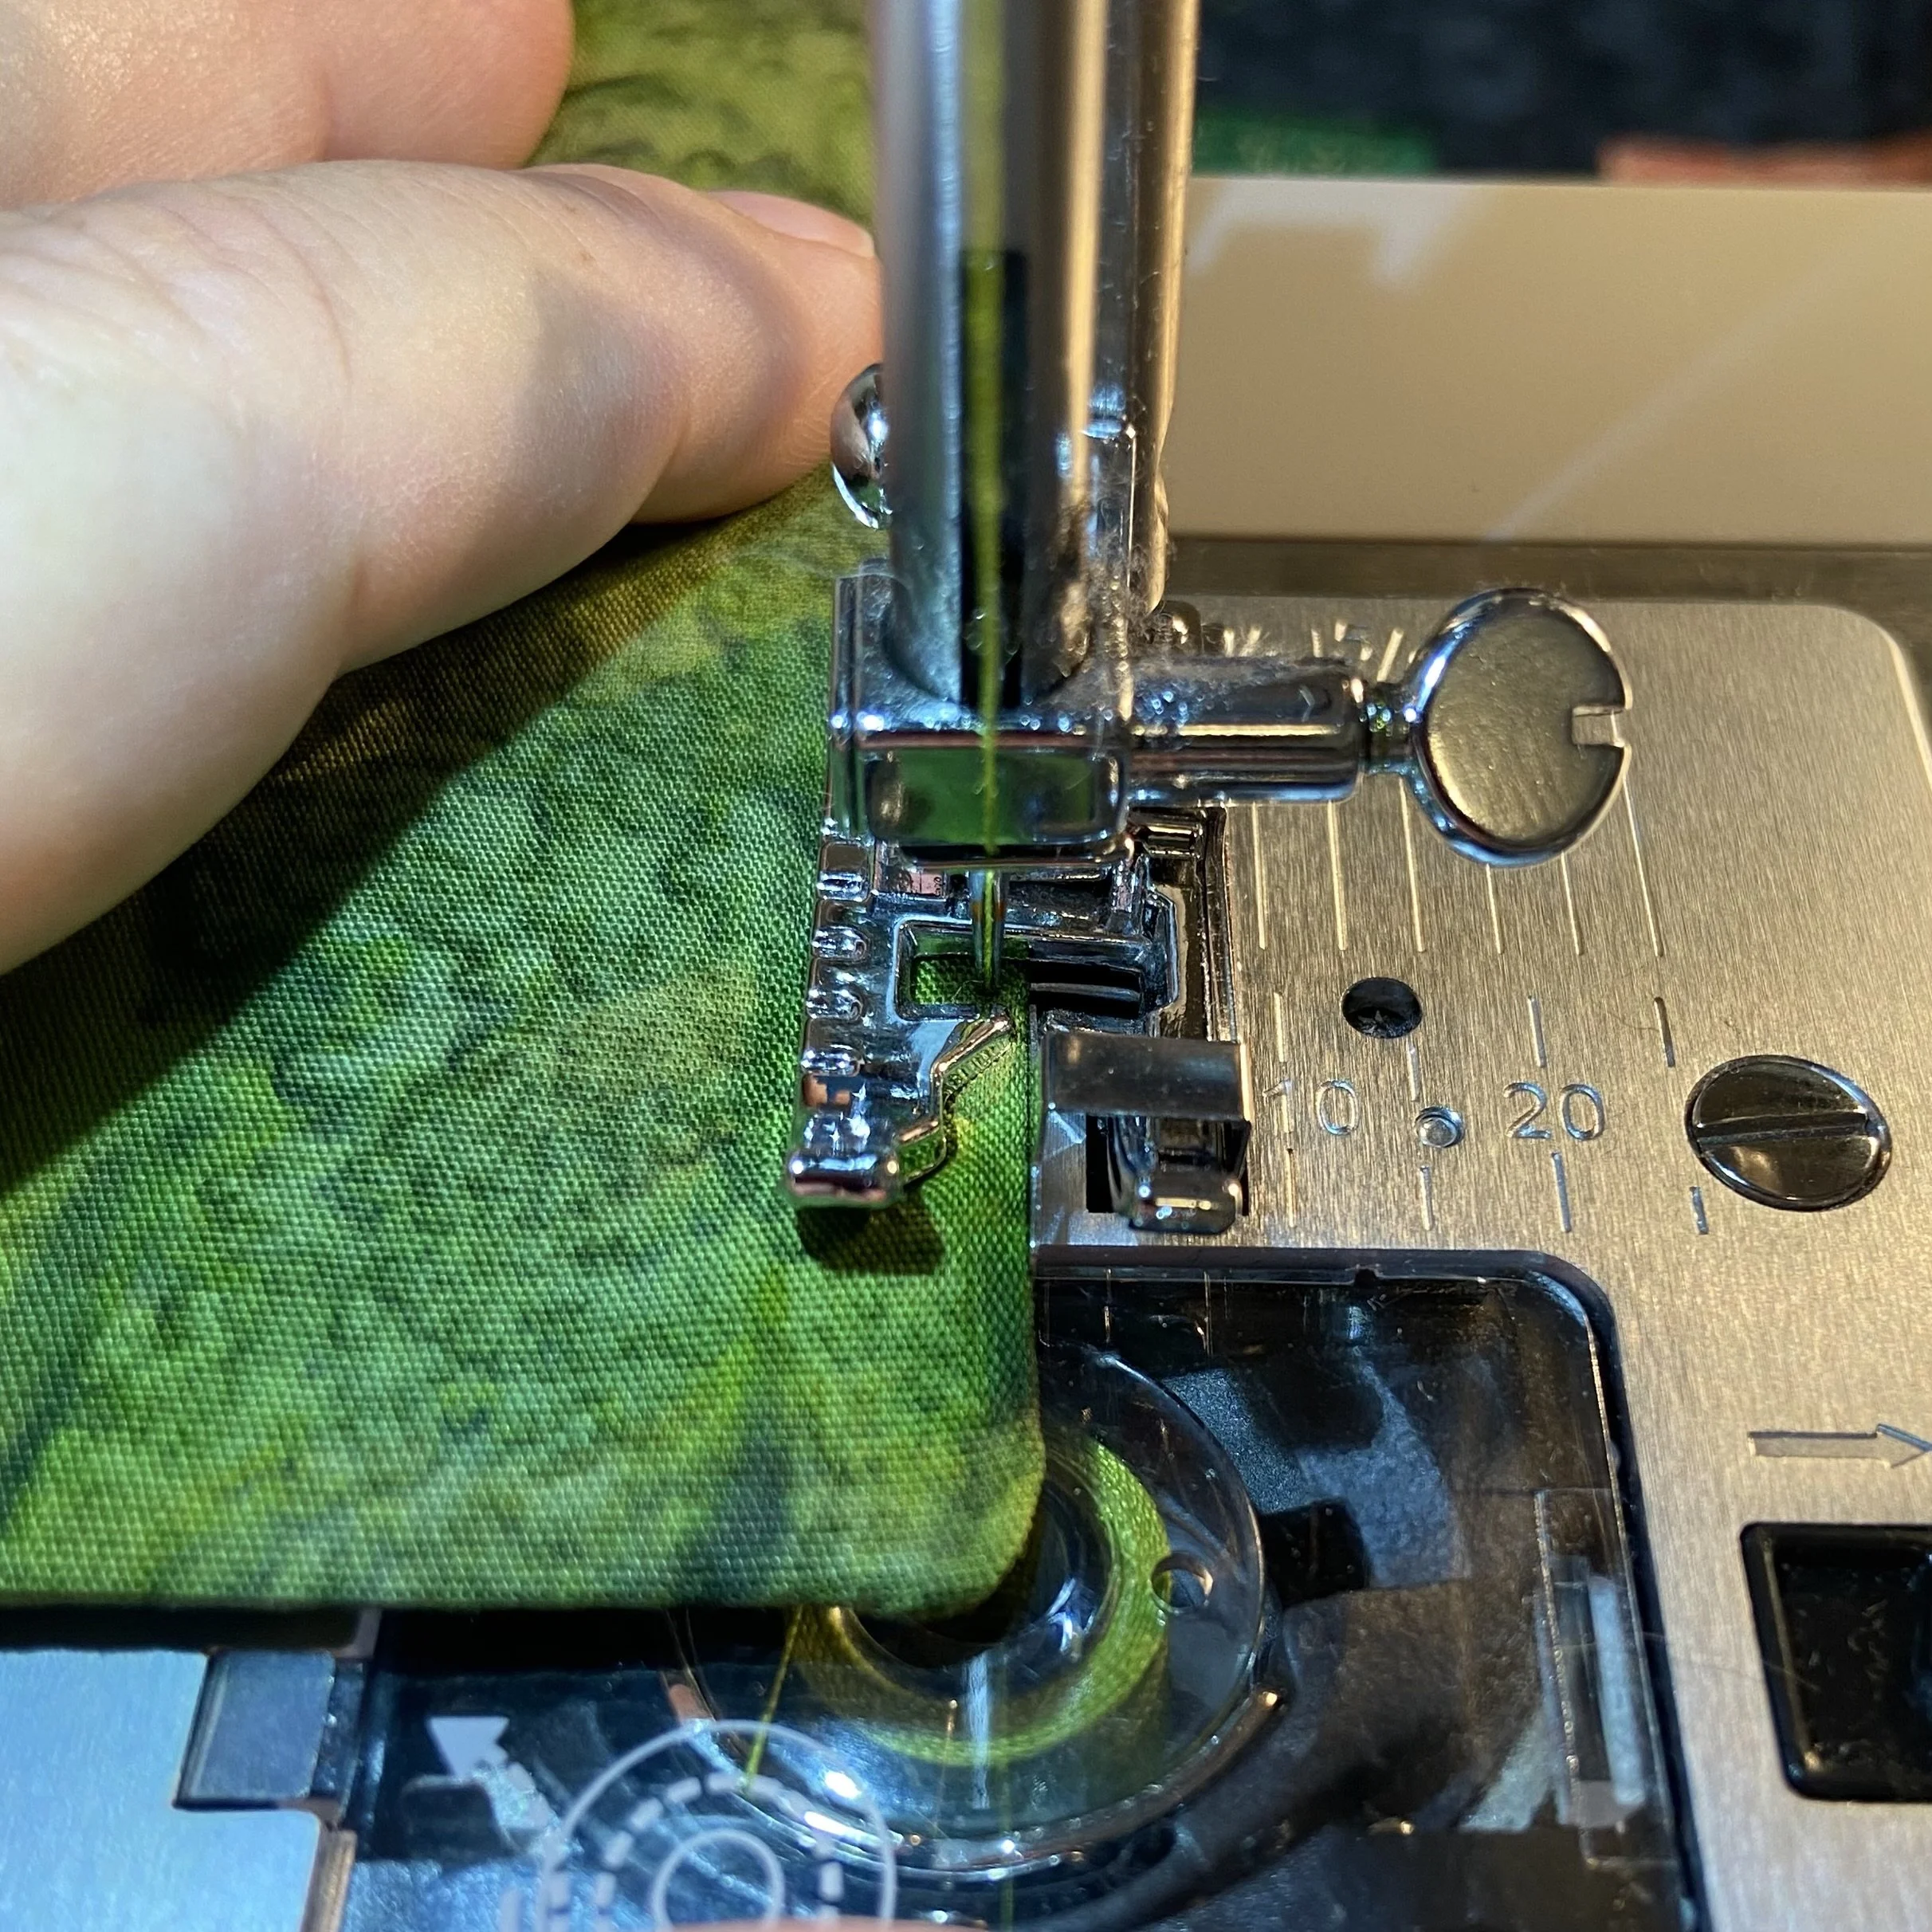
Now top stitch around the whole piece. I like my stitch-in-the-ditch presser foot for this, as you can set the edge of the work against the center guide, and then move your needle placement just a little to the left and stitch a very even seam quite close to the edge. Makes topstitching a cinch.
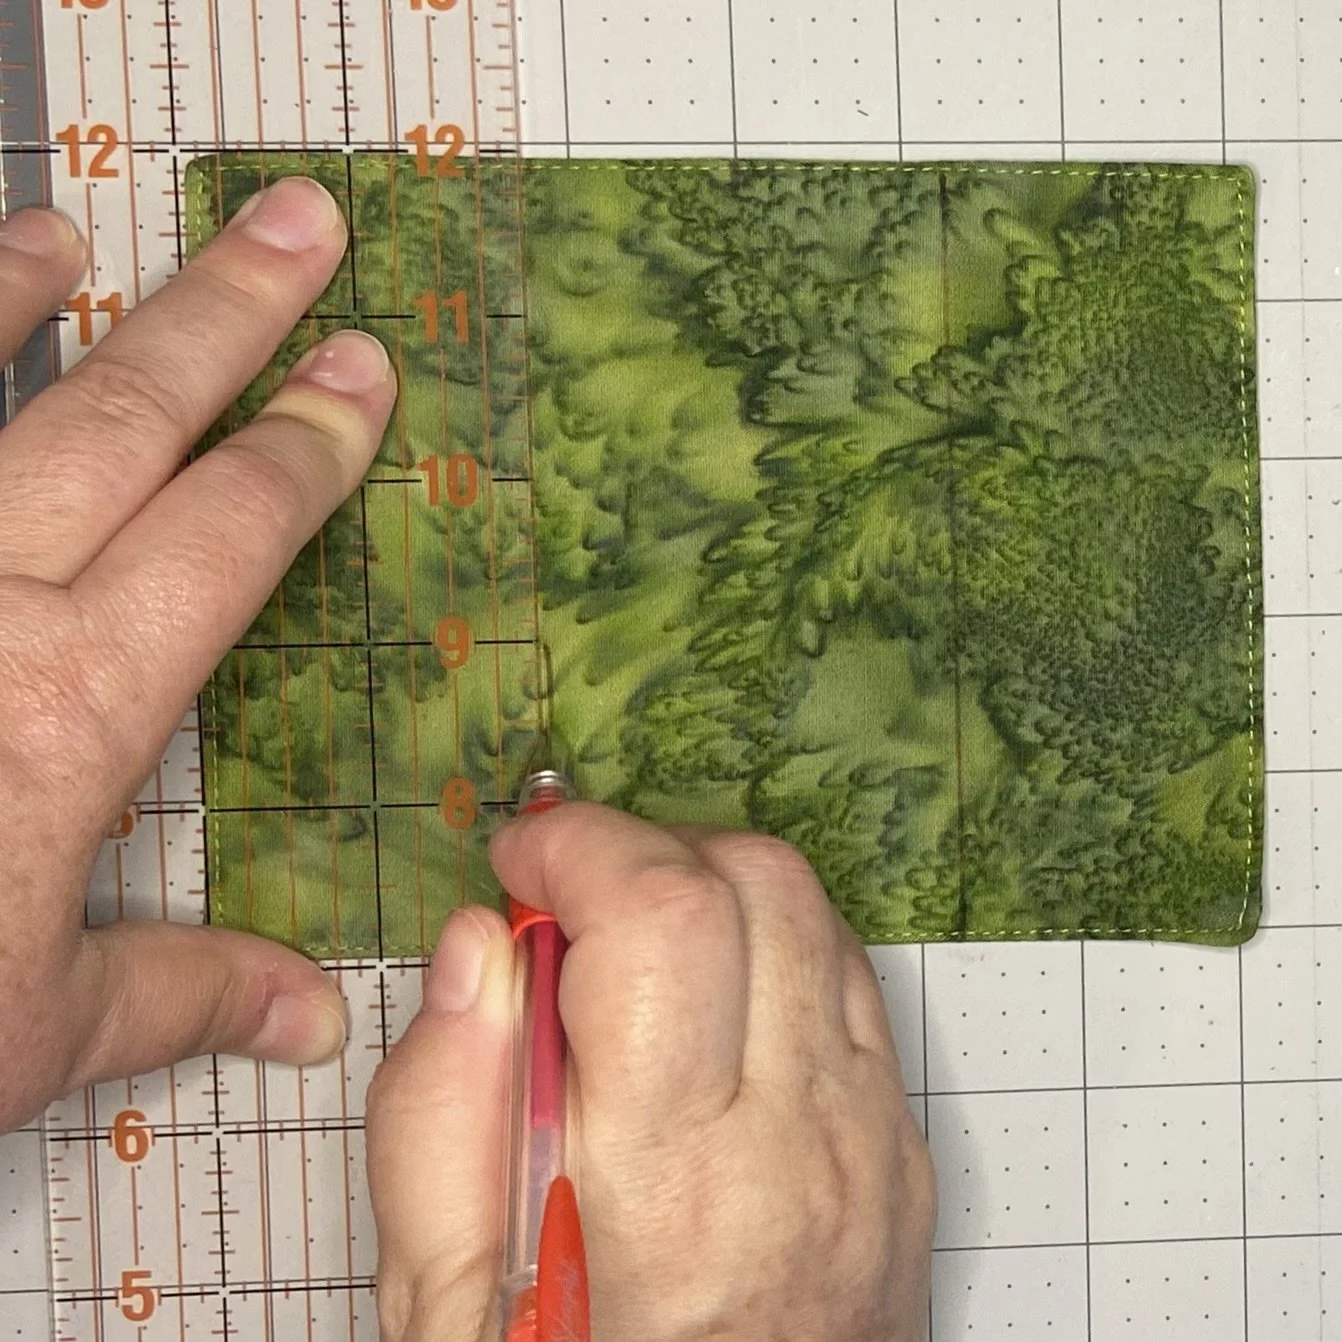
Now we need to mark where we are going to fold. I found and marked the middle of the long edge, and then centered that over a line on my cutting mat. Then I used the markings on the mat to measure 1.25” to either side of the center point, and draw a line with my erasable pen. And then I sewed a seam down each of the two lines I had marked.


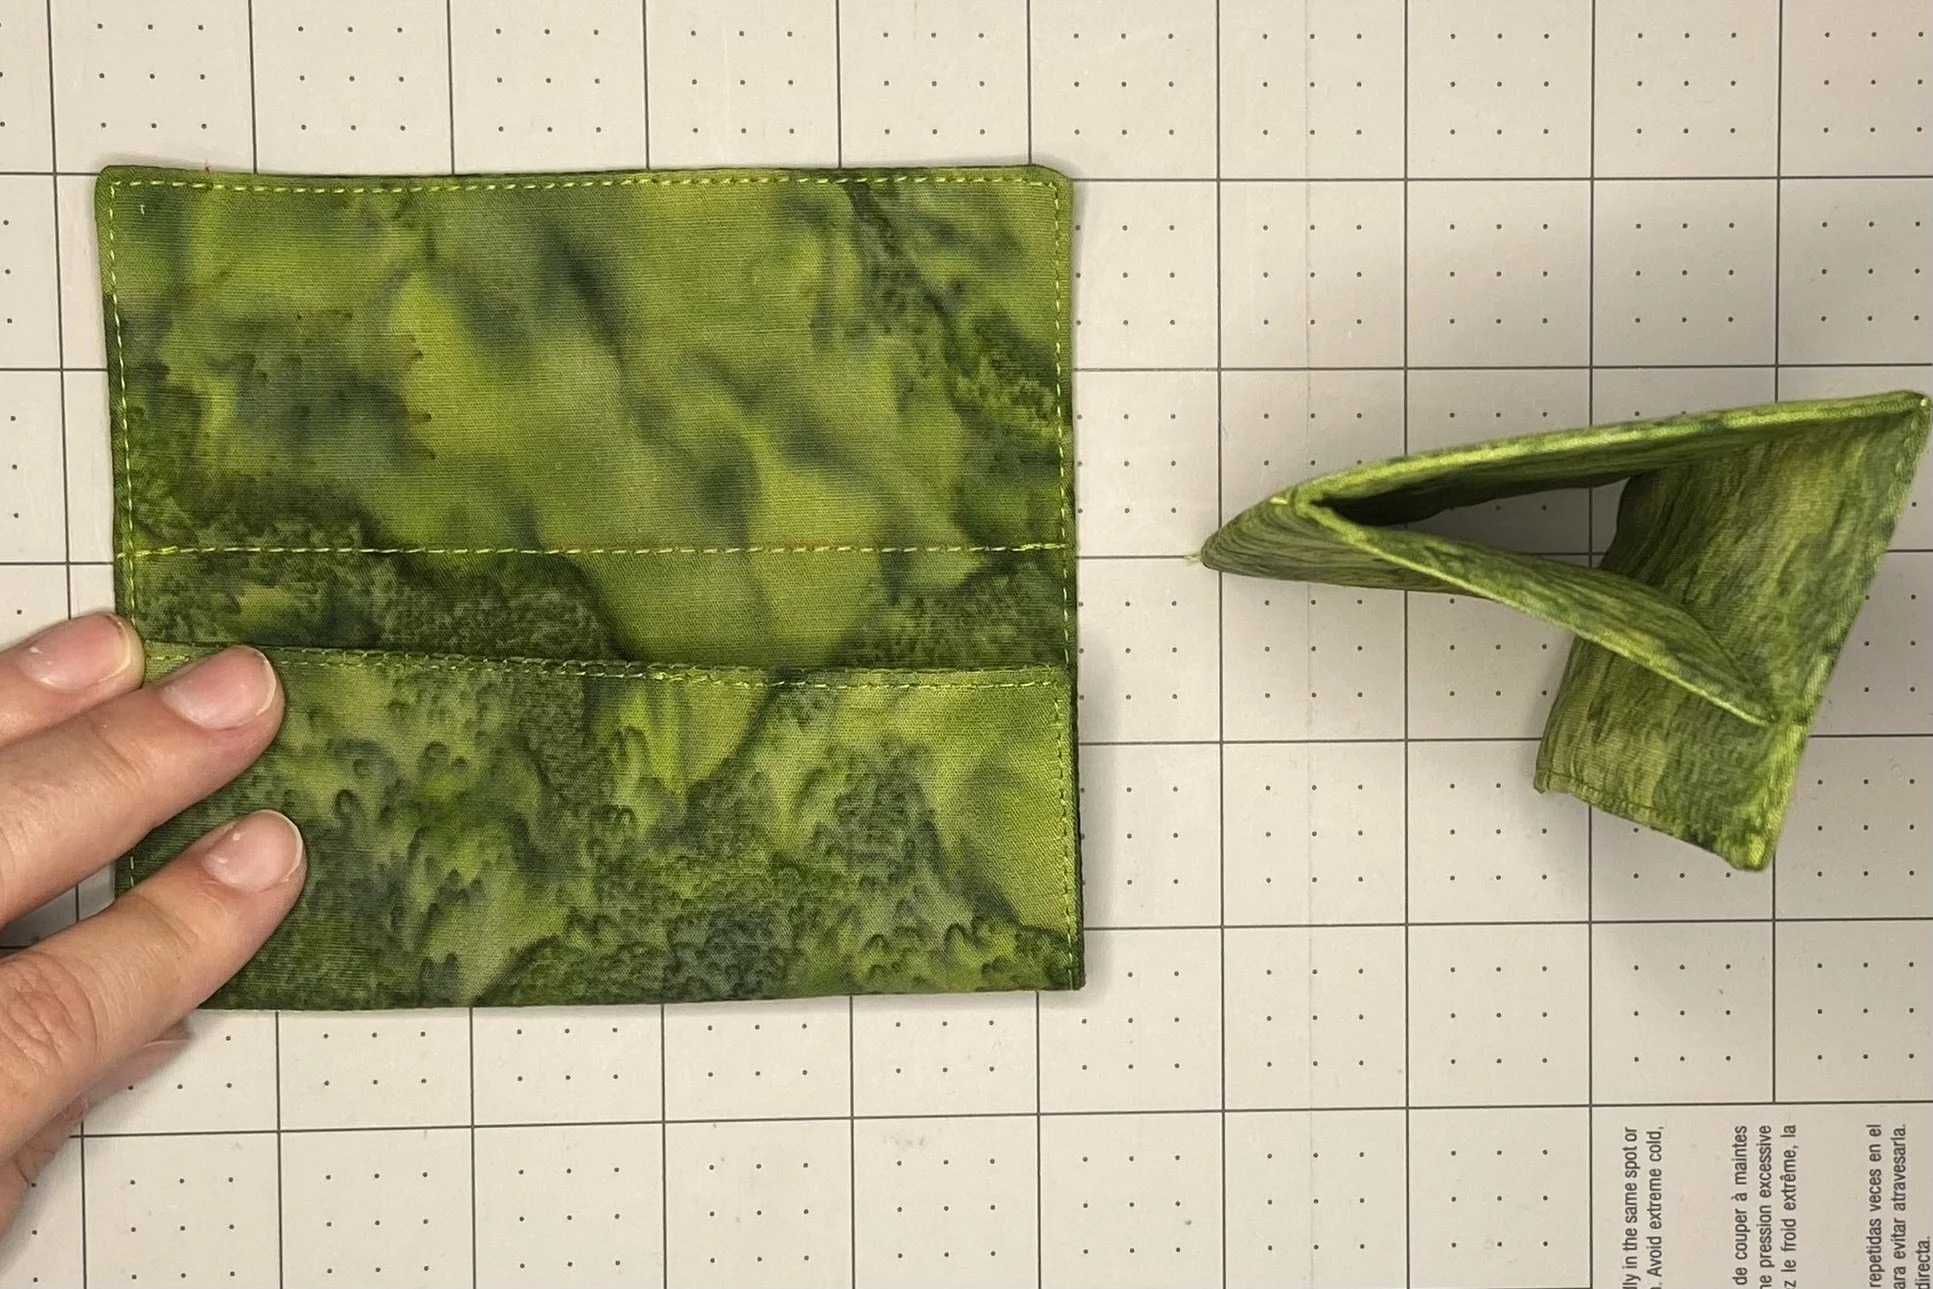
The sewn lines were to encourage a fold, so once the lines had been sewn, I pressed vigorously to get the folds to stay. Now I had a piece that was 5” long and 2.5” wide once both sides were folded in overlapping each other.
The overlap is where I focused next. I needed to be able to secure it in some way. For my prototype (with the sunflower fabric), I placed three of my KAM Snaps. And for the second iteration of the project, I decided to try Velcro. I have always found Velcro to be a little annoying. When it’s being sewn on, it needs to be secured in place and pins never really worked that well. There was always some wiggle, and also the pins distorted the thick Velcro a little, so I never had a completely satisfactory experience sewing on Velcro. Now, there are some folks who will use glue or double-sided tape to hold things instead of using pins. I’ve never done that, because I didn’t want my needle getting all gummed up when it cut through the sticky stuff and then carrying that mess into the machine.
However, for this project, I thought of a way to use double-sided tape instead of pins without ever touching it with a needle. I just used a strip of 1/4” tape down the middle of the Velcro, where it would remain untouched as I sewed around the outer edges. So first I cut my Velcro to size, and then I cut some tape to size and attached it to the back of both pieces of Velcro.

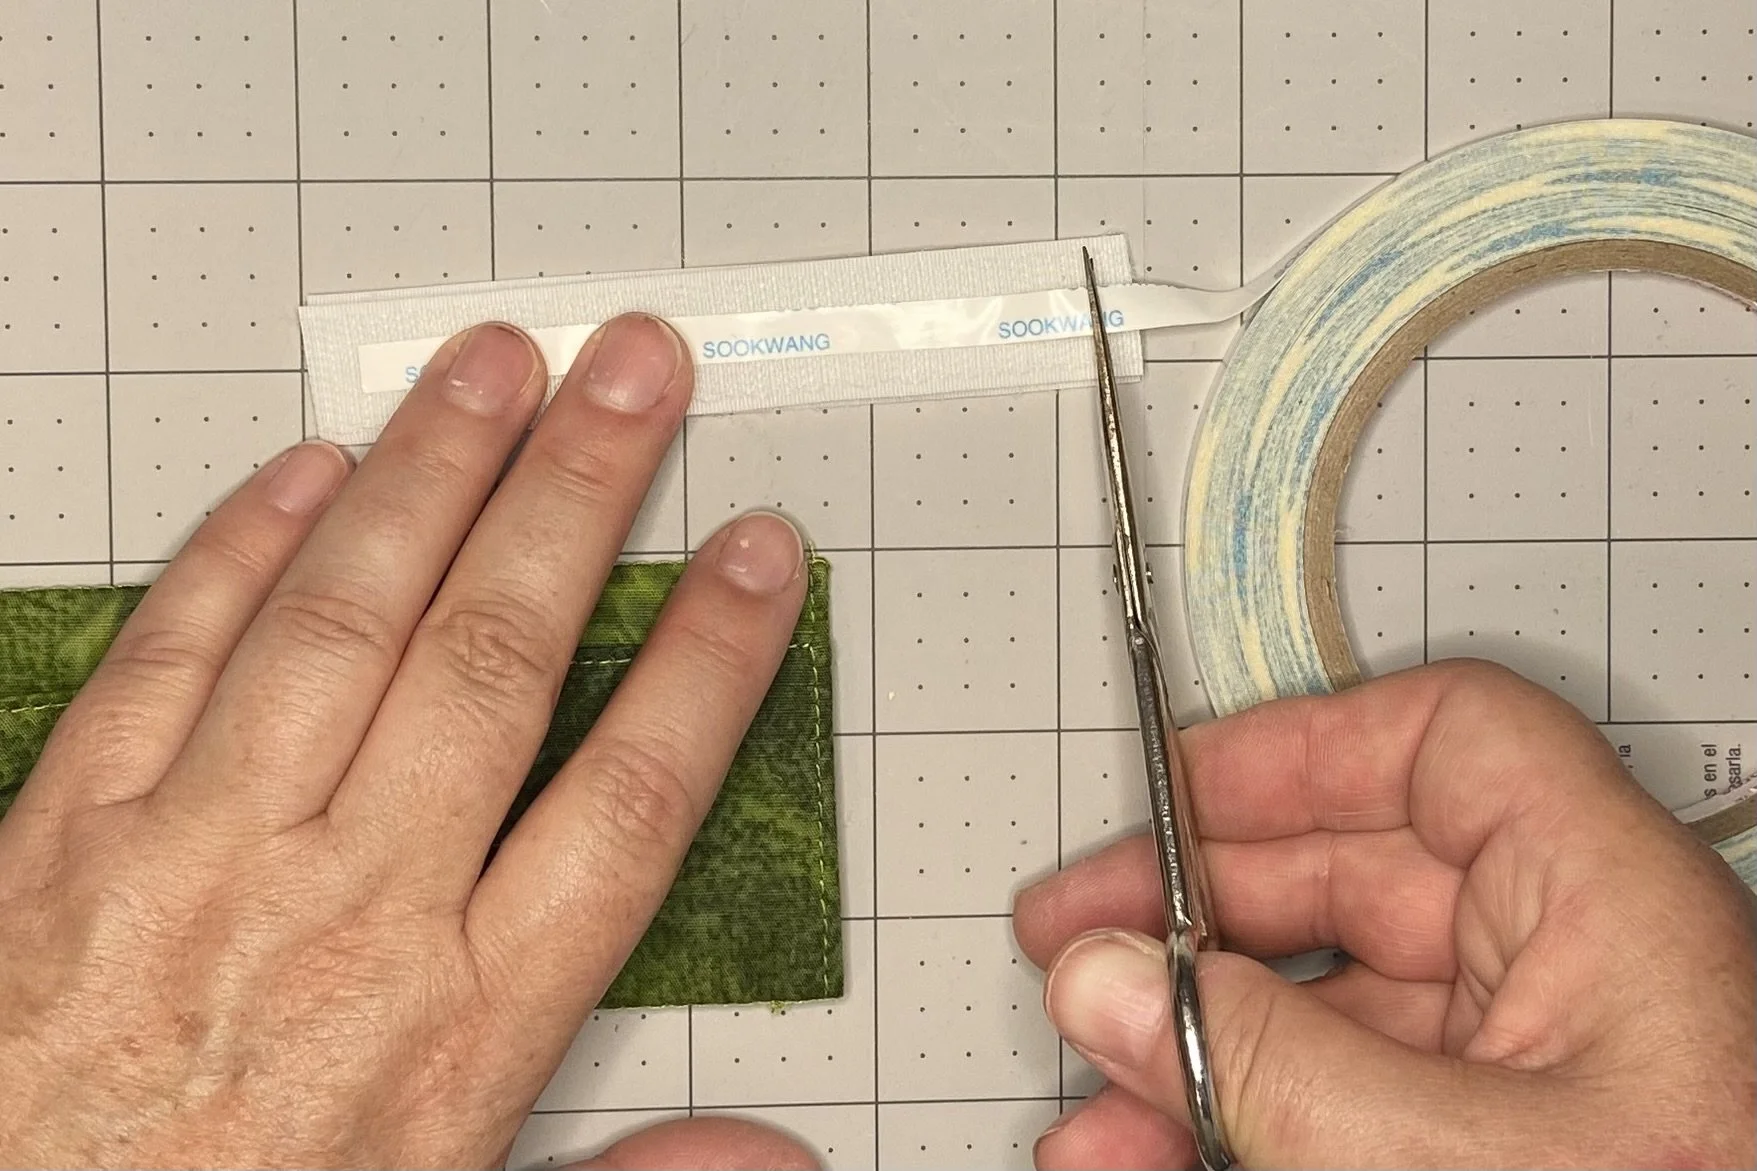
Then I peeled the backing off the tape, stuck it down to one side of the overlap, and then closed the other half of the overlap on top. This got me precise placement of the Velcro and both pieces were stuck down. When I had to separate the pieces for the sewing, I got hold of them, wedged my fingers in between, and carefully worked the Velcro free without dislodging the tape. Then I sewed the Velcro in. Worked great! And no stickiness in the sewing machine.


Here are the two versions side by side. I think the KAM snaps look nicer but they aren’t quite as secure as Velcro. So I think it’s Velcro for the win.
I used my prototype on my own car. It’s easy…just hold the seatbelt in your hand with the buckle off to the side and attach your accessory over both layers of seatbelt. When you put the seatbelt on, just slide the accessory to the point where the belt no longer tries to strangle you but instead rests comfortably on your shoulder.
This is a fun and easy project and would make a great little gift or stocking stuffer. And it’s a great way to use up extra fabric. One fat quarter yielded me three of these little babies.

