Adventures In Surreal Shadowboxing-Part 2
As an Amazon associate, I may earn a small commission if you navigate to Amazon from my site and buy something. This will not result in an extra cost to you.
This post will not make much sense if you haven’t read part one, which you can find here.
Having earlier given up on my idea of placing a crumbling brick wall at the front edge of the piece, I dug through my chipboard supplies for a substitute and came up with a gate and fence. I painted these pieces with black gesso and then with Jewel Effect Paste in black and copper (the copper color no longer available).


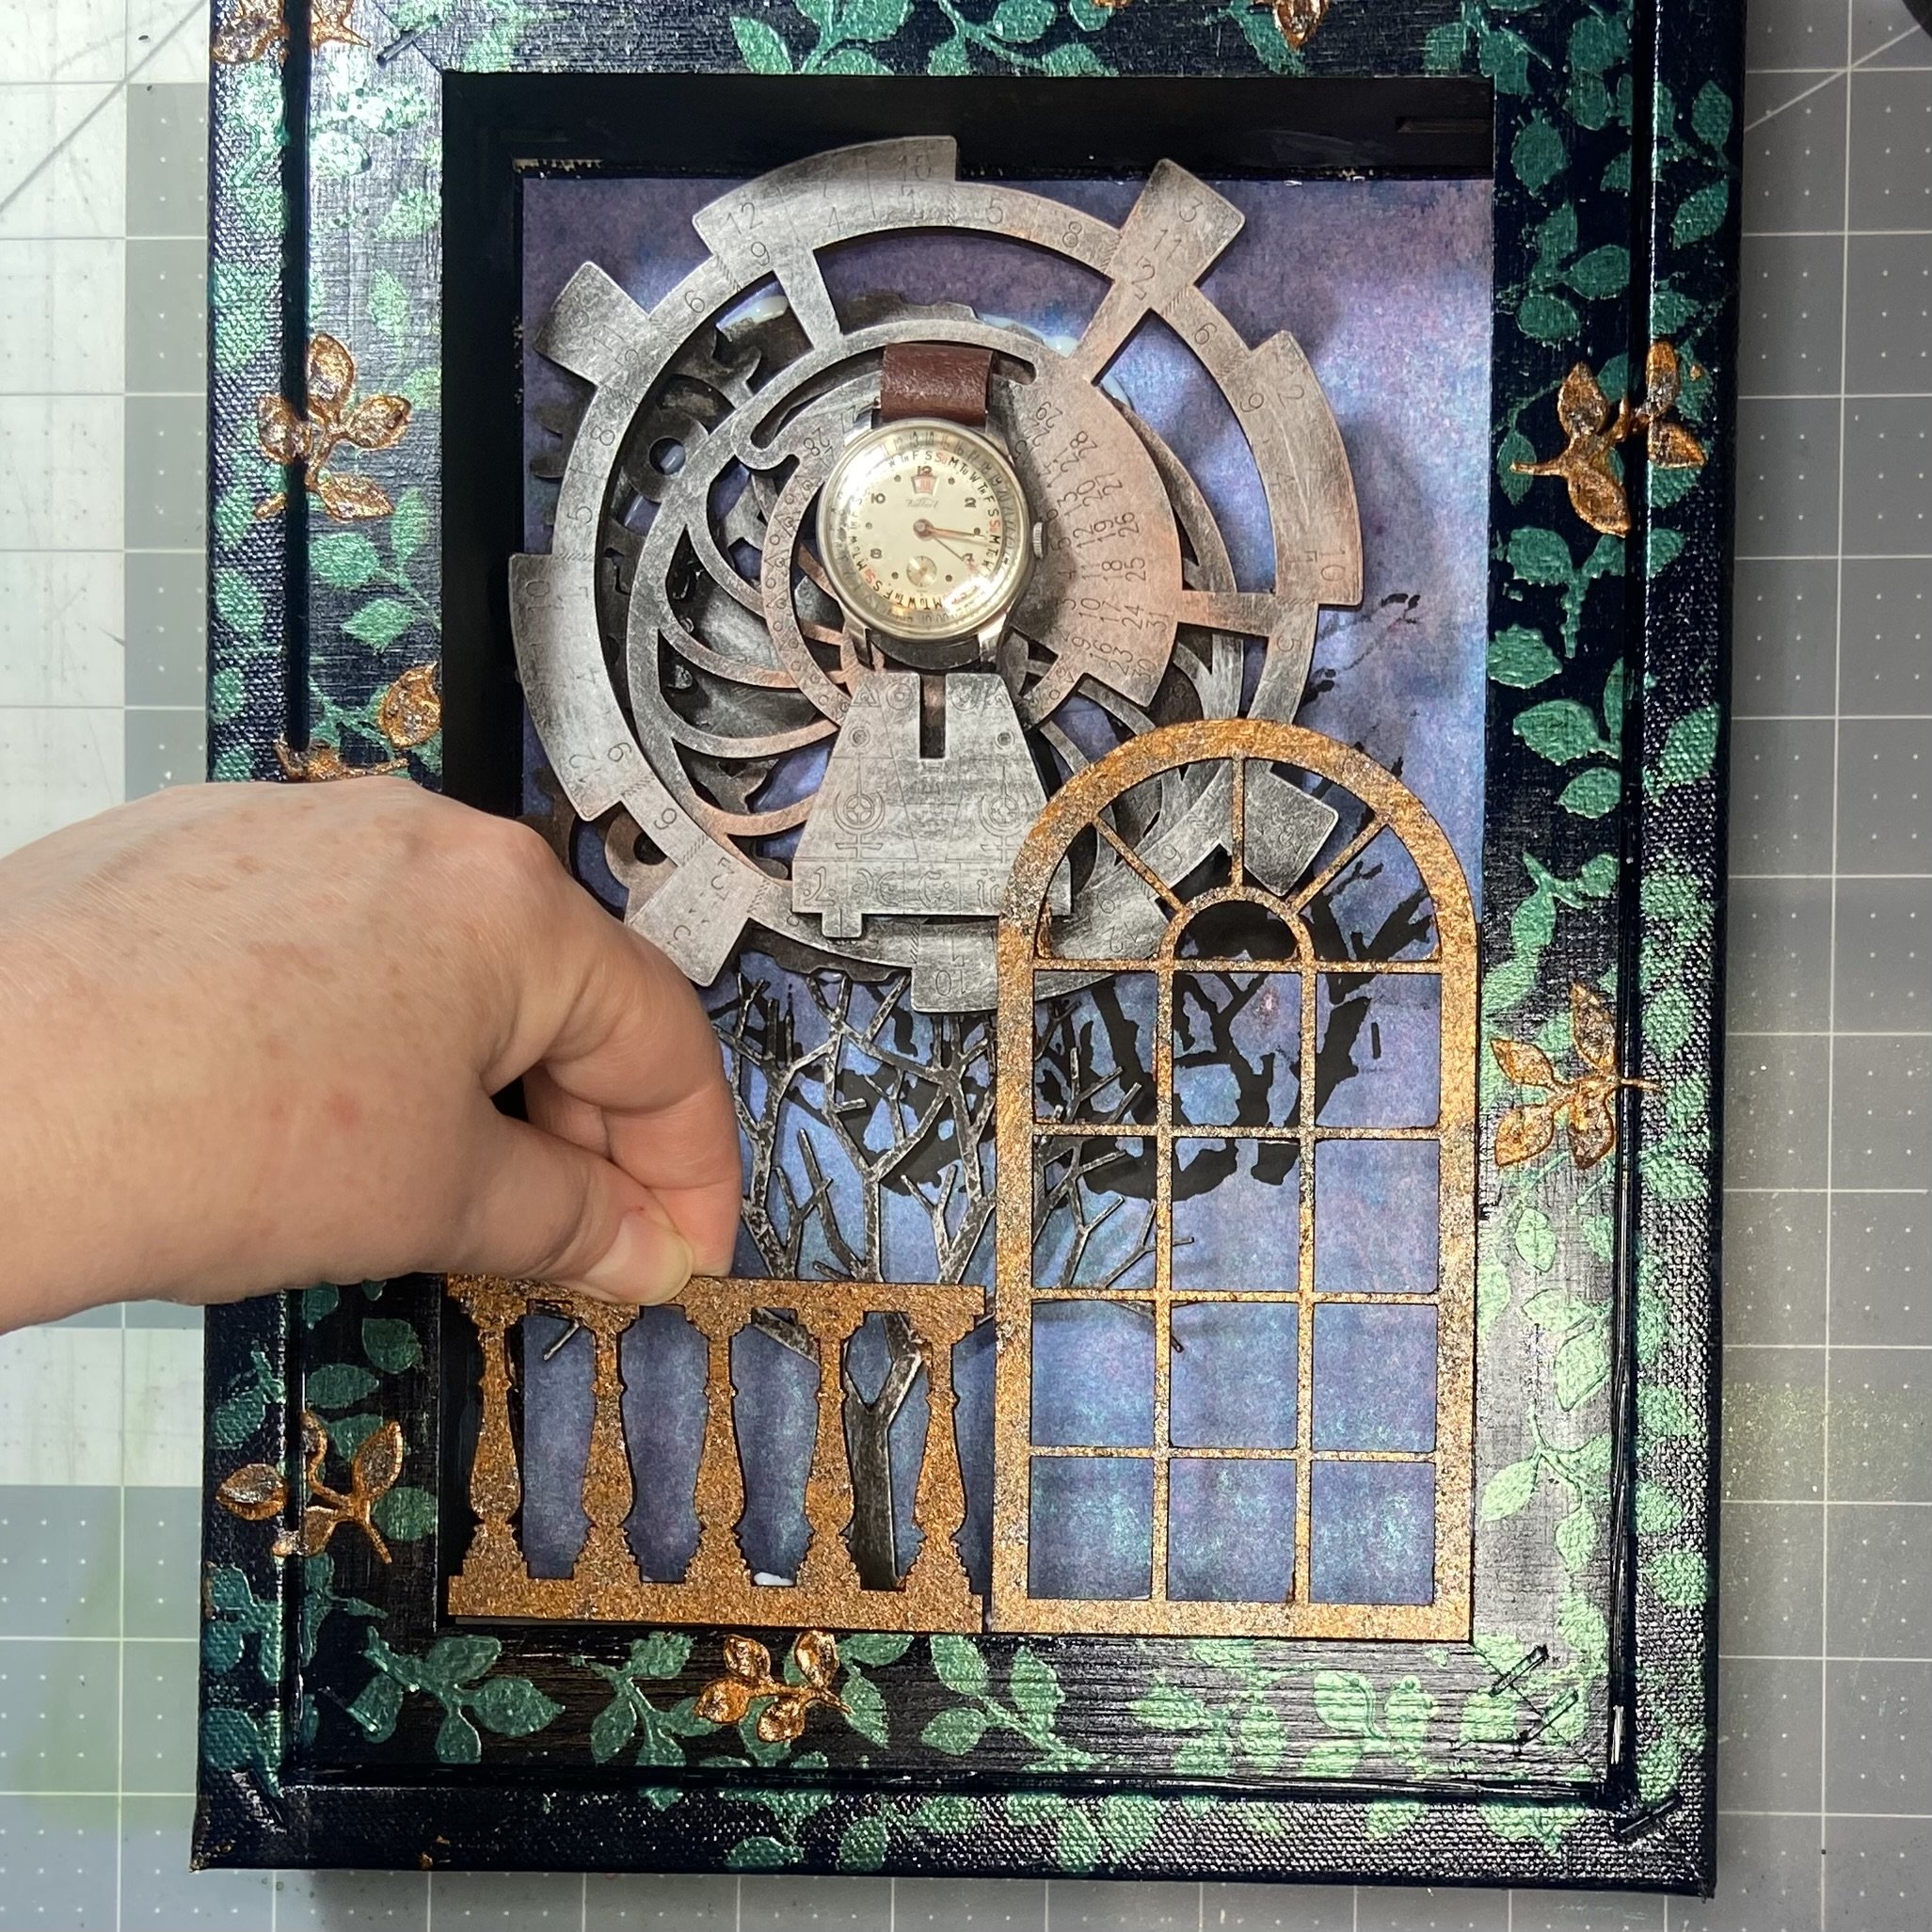
I intended these pieces to stand along the bottom edge of the interior at the front, as sort of the outer layer of the piece. But these were thin pieces of chipboard and as I would be glueing them along their edge, there wasn’t much surface area to glue. So I cut some thin strips of black chipboard that I had tucked into the stash, glued them together into a stack, and then glued them along the inside edges of the frame to give the gate and fence a sort of ledge to provide support and a glueing surface. In the picture, the watch/gear insert was sitting loose in the frame while I tried to decide if I liked its placement.


While the glue on the black chipboard ledge was drying, I decided that I did in fact like the placement of the watch/gear insert, and glued it down with heavy body gel. I did wonder if I was going to have a problem with the insert staying put, since I was glueing it to paper glued to the canvas, rather than directly to the canvas. But it turned out not to be a problem; in the finished piece, the insert seems quite secure. Not surprising, in retrospect, since I was very generous with the glue.


Now it was time to see if I could get the gate and fence to attach properly to the ledge I’d built. Using the heavy body gel, I glued them in, using as many attachment points as I could find. And then I left everything overnight to dry completely.


Next, on to the foliage that I wanted to drape about the piece. I used a little bit of Spanish moss I had stuffed into the stash, although in hindsight, I rather wish I’d sprung for some fake mossy vines, because they would have been much less fragile than the real stuff I used. I went to a local craft store for the rest of what I’d need. I do love buying off Amazon, but sometimes, you just have to go see something in person to figure out what will work. I bought one bunch of leaves and one bunch of flowers, both in the smallest size I could find (artificial, obviously). Then I needed to color everything. For the leaves, I used three different shades of green Lindy’s Gang sprays: Lucky Shamrock Green, Ponderosa Pines Olive, and Cathedral Pines Green. You can get five-packs from Amazon (I got this one and this one initially) but to select the individual colors you really want, best to go straight to the source. I laid out a few sprigs at a time on paper towel, sprayed one side of the leaves with the first color, let it dry, turned them over, and sprayed the other side. I repeated this process for the other two colors of green. And then I repeated it again with more sprigs of leaves until I figured I had enough. I did more or less the same with some long strands of the Spanish moss. All of this happened over several days, while I was working on other parts of the project. It took a long time to do all the layers of paint, what with the need for drying time.


For the flowers, I just used three different colors of acrylic paint I had lying around (a bluish silver, a dark blue, and a purple) and used a brush to dab the color onto the flowers until the white was completely covered. I also found a couple sprigs of flowers that I’d colored for a previous project, but not used, so I tossed those into the flower pile. Why not?


Once all the foliage was dry, I set it all out alongside the canvas, and started to lay out where I thought everything would go. Once I was more or less happy with it, I started to glue pieces down with heavy body gel. This also turned out to be a multi-day process, because I wanted the leafy sprigs to sort of wind around some areas, which involved getting their base glued down first before securing the the rest. So I’d glue some pieces down, set a pot of paint on it to hold it in place, and then leave it until the glue dried. Then I’d move on to glueing the next point of attachment.


At this point, I was mostly done. But in looking at the piece, I felt that some of the copper bits needed to be toned down just a bit. So I brushed some Art Alchemy Antique Brilliance Wax in Lucky Emerald (apparently no longer available) onto the gate and fence, the coppery leaf stencils, and even a bit on the watch/gear piece. It’s a subtle change but I really like it. If you look closely, in certain spots it almost looks like a little bit of moss. I also brushed the wax along the outer edge of the frame, where the front face joins the sides.

After more studying of the piece, I realized that I was unhappy with how the outer edges looked. I’d painted them dark green, of course, and then done the multi-layered leaf stencils, but it still looked…well, not awesome. So I decided to just wrap it in leather. It didn’t really fit with any of the plans I’d had for how I wanted the piece to look, but by this time, I was so far away from my original vision that I figured, what the heck. I cut some more leather from the old coat, and glued it to the outer edges. Then I cut little pieces for the corners, glued those down, and overlapped the flaps I’d made.


To finish off the leather look, I glued down some of the fake rivets I had leftover from the altered clock I’d made previously, being careful to clean away the excess heavy body gel I was using. I really did not want excess glue showing up around the rivets.


Unlike the clock project, it was hard to know when this one was done. But at this point, I felt like I was probably finished with it. I could have added more foliage, but after looking at it for a couple days, I decided it had enough. So…finished! I’m calling it Tempus Fugit. Because I’m a nerd, that’s why. I do rather wonder how I’m going to dust it…maybe I’ll make a teeny-tiny feather duster just for this one art piece.

