Adventures In Unnecessary Alterations
As an Amazon associate, I may earn a small commission if you navigate to Amazon from my site and buy something. This will not result in an extra cost to you.
I might have mentioned previously (a few times) on this blog that I watch a lot of YouTube. And I come across lots of things I end up trying for myself. On the list recently have been altered paper clips. Why alter paper clips? Because. No seriously, that’s the reason. Because.
Most of of the artists making videos about altered paper clips are junk journal aficionados. No, I can’t actually explain what a junk journal is or what one is supposed to do with it (although Google makes a good stab at it). But the general artistic look is along the lines of the pictures below. They are pretty but I have no desire to make or have such things for myself. However, I do like to look at them…


While I don’t aspire to the junk journal aesthetic exactly (which is good, because I think it’s probably beyond my capabilities), I was quite intrigued by the hidden/altered paper clip idea and I thought I’d give it a try. After watching multiple YouTube videos on different methods, I took a whack at it myself. My first few attempts at copying someone else’s method didn’t go very well, so I just sort of struck out on my own and made several via a method of my own design. I completely encased the paper clip in card stock before putting a decorative strip of paper over the top. This resulted in a total of four layers of card stock, plus the decorative strip of paper. They are very sturdy but so stiff and thick that they are difficult to put on and take off of regular weight paper. Below is the gallery of my first real attempts.


Frustrated with the clumsiness of these first clips, I tried again, and this method is the one I will be detailing. First, I started with a piece of card stock and folded it in half. After putting a paper clip on the fold to get the length of the paper right, I then trimmed the paper down, leaving at least 1/2” below the end of the clip. In retrospect, probably leaving 3/4”-1” would have been better. I wanted to do two different styles…one where the edge of the altered clip was mostly flush with the edge of the page, and one where the top stood up a little proud, like a sort of tab. So for the clips where I wanted a tab top, I didn’t shove the clip all the way down over the fold. I also made sure to trim the front and back separately, since the two legs of the paper clip are not the same length.
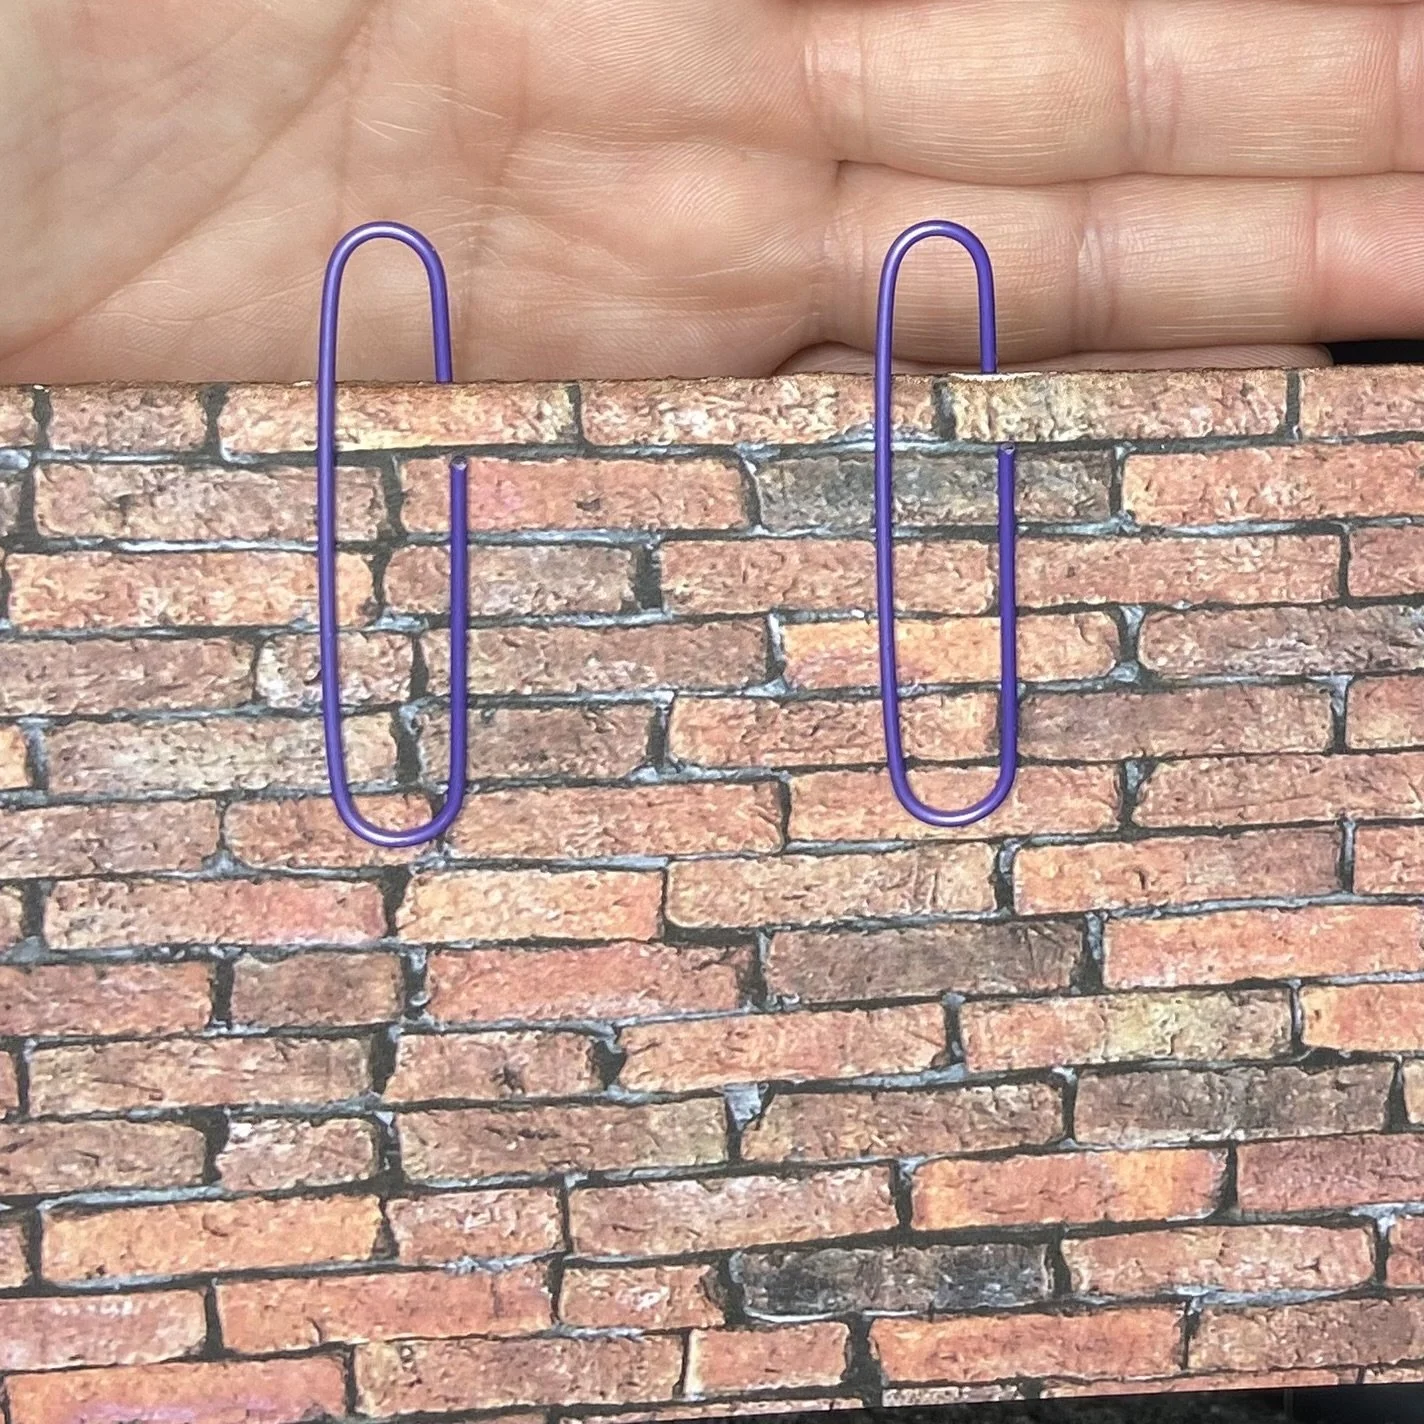

I used my corner chomper to round the corners on the tab-style clip, and then rubbed some distress ink on all the edges, getting rid of the white paper core visible on the edges and also antiquing it just a little. After that, it was time to put the paper clip back onto the folded edge and secure it somehow. You could use some heavy duty glue like E-6000 or you could use a little bit of packing tape, but what I chose to use was my 1” wide double-sided tape. I put a little square of it down, securing the paper clip to the card stock on both sides.


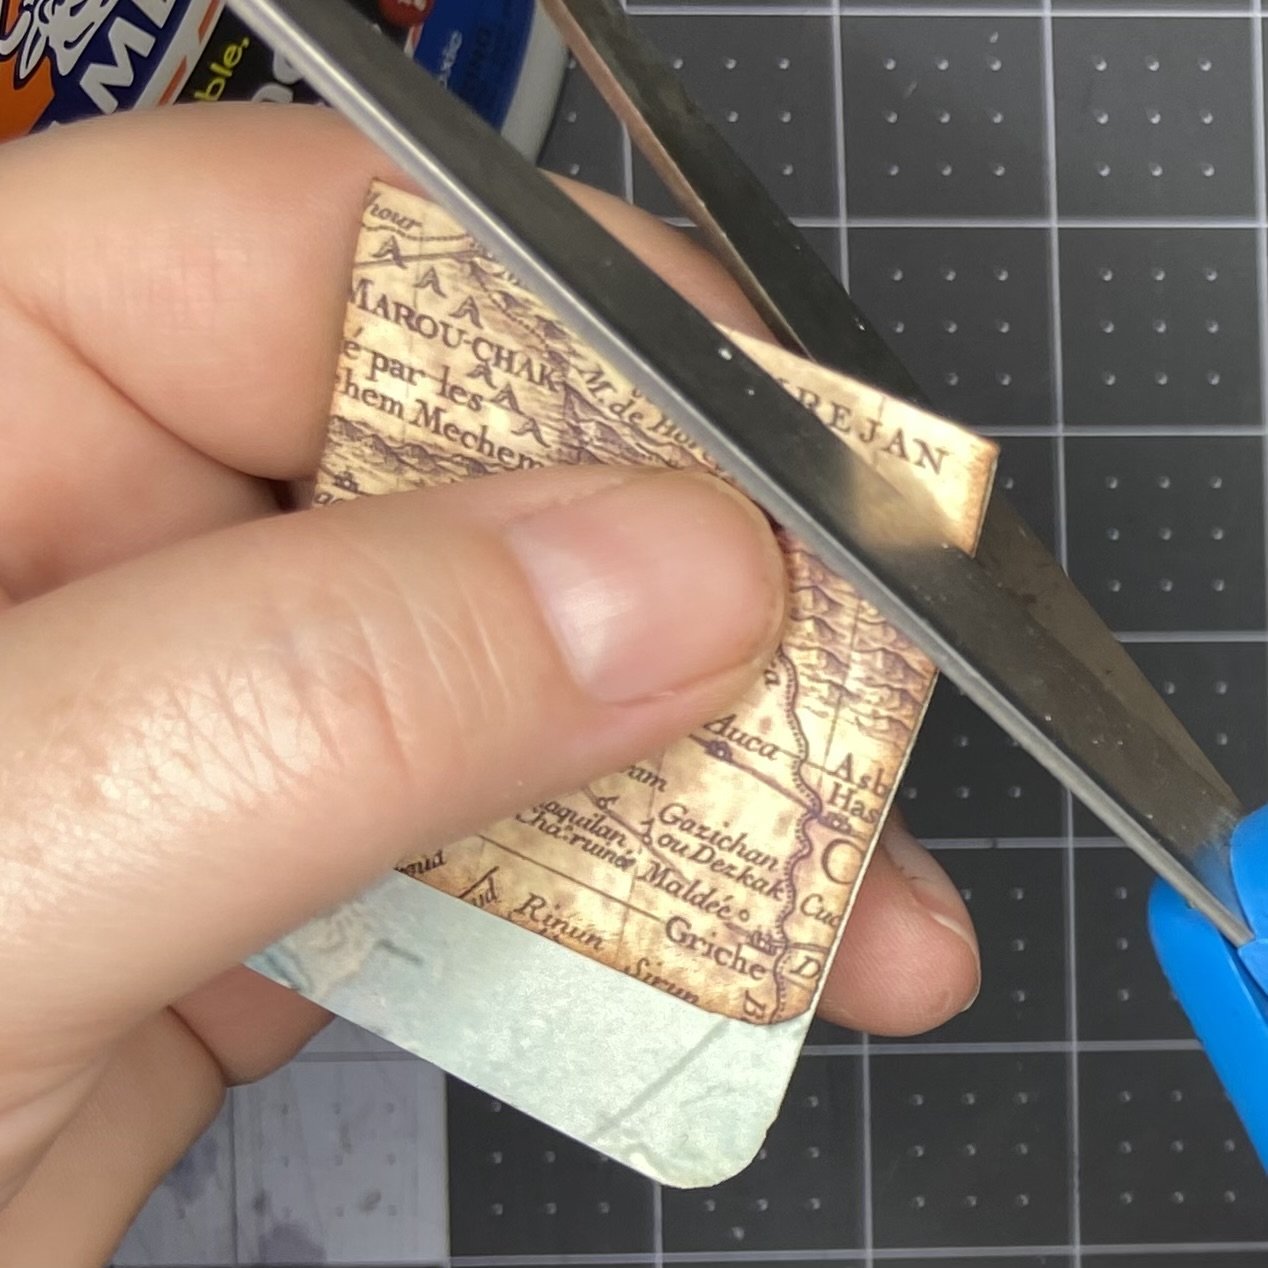
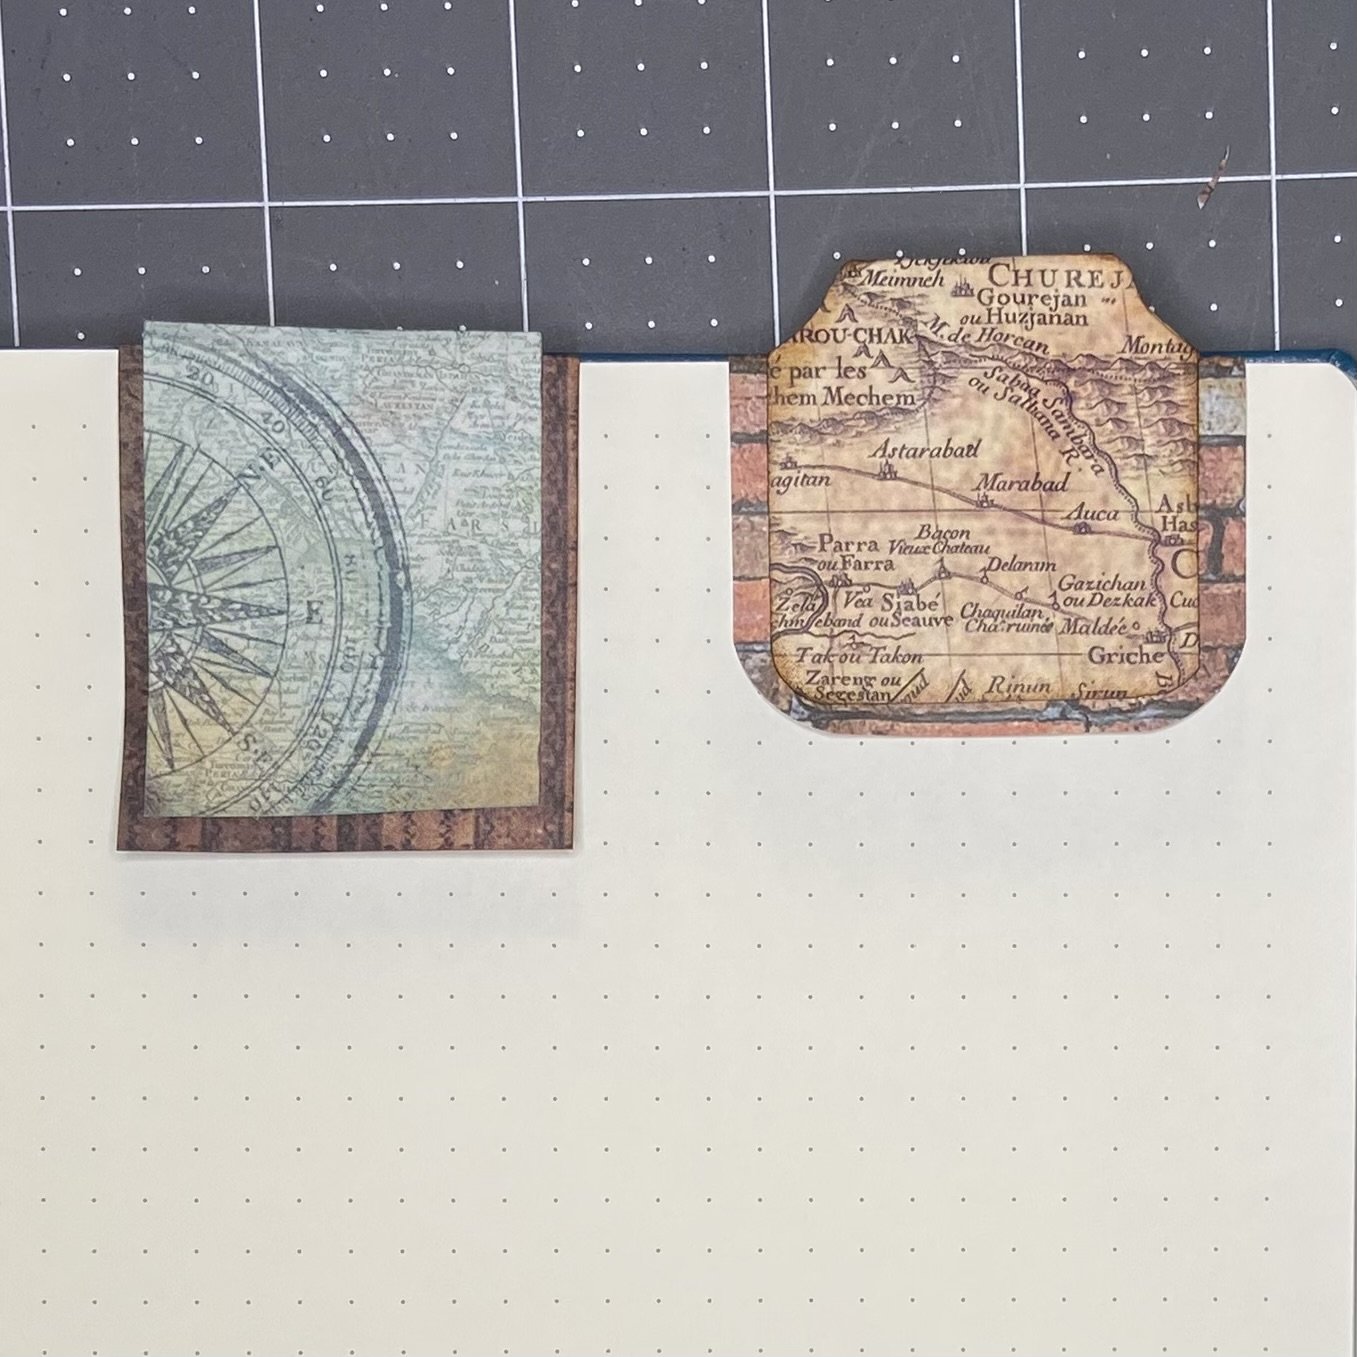
Then I needed to prepare a cover layer to actually hide the paper clip. I trimmed an appropriate piece of card stock slightly smaller than the first layer and rounded the corners (only for the tab style…I left the flush style with square corners) and inked all the edges again. I also cut a little curve out of the corners on the folded edge of the tab style, so that later, the top would look more like an actual tab. Then I smeared Elmer’s Glue on the cover paper, pulled the backing away from the double-sided tape, lined everything up, and stuck it together. I did struggle with this on some of my earlier attempts, because I hadn’t left the under layer and then the corresponding over layer long enough, so the bottom of the paper clip was visible. That is to say NOT hidden. So just make sure to leave yourself a little extra room at the bottom edge (the edge that is not folded) to make sure you don’t run into the same problem.
And done! These are my favorite clips on a blank page of my bullet journal. I think they are really cute, even if they do fall far short of the junk journal aesthetic. And they slide on and off the page easily, unlike my first attempts. These are quite quick to put together, and a really good way to use up the scraps of card stock that seem to accumulate in every stash. And if you’re a little more artistic than I (pretty low bar, there), then you can layer on a bunch of your decorative scraps as well, maybe slap on a little washi paper…why not? I’m think these will make cute little gifts as well as being just the thing to decorate my bullet journal.