Adventures In The Wardrobe-Part 2
As an Amazon associate, I may earn a small commission if you navigate to Amazon from my site and buy something. This will not result in an extra cost to you.
If you haven’t already read Part 1, then this post won’t make much sense. You can find Part 1 here.
Once the PVA glue between the thin cardboard and the mat board front cover was dry, I was ready to glue the mat boards to my fabric. I made sure I had at least an inch of margin around the edges as I glued down my front and back covers on the fabric, with the spine in between. For spacing, I referred to SeaLemon’s YouTube video. I did make sure to lay the front cover with the inset side facing the fabric (after I glued the first one down the wrong way and had to pry it back up). Around this time, I realized that I needed to start numbering the wrong side of the covers by book, so that I wouldn’t glue the wrong book into the wrong cover (or the wrong spine label on, as it happens). Again, all seven covers were pressed under a heavy book (and my toolbox) and left to dry for a day.

“Out damned spot!”—Lady MacBeth
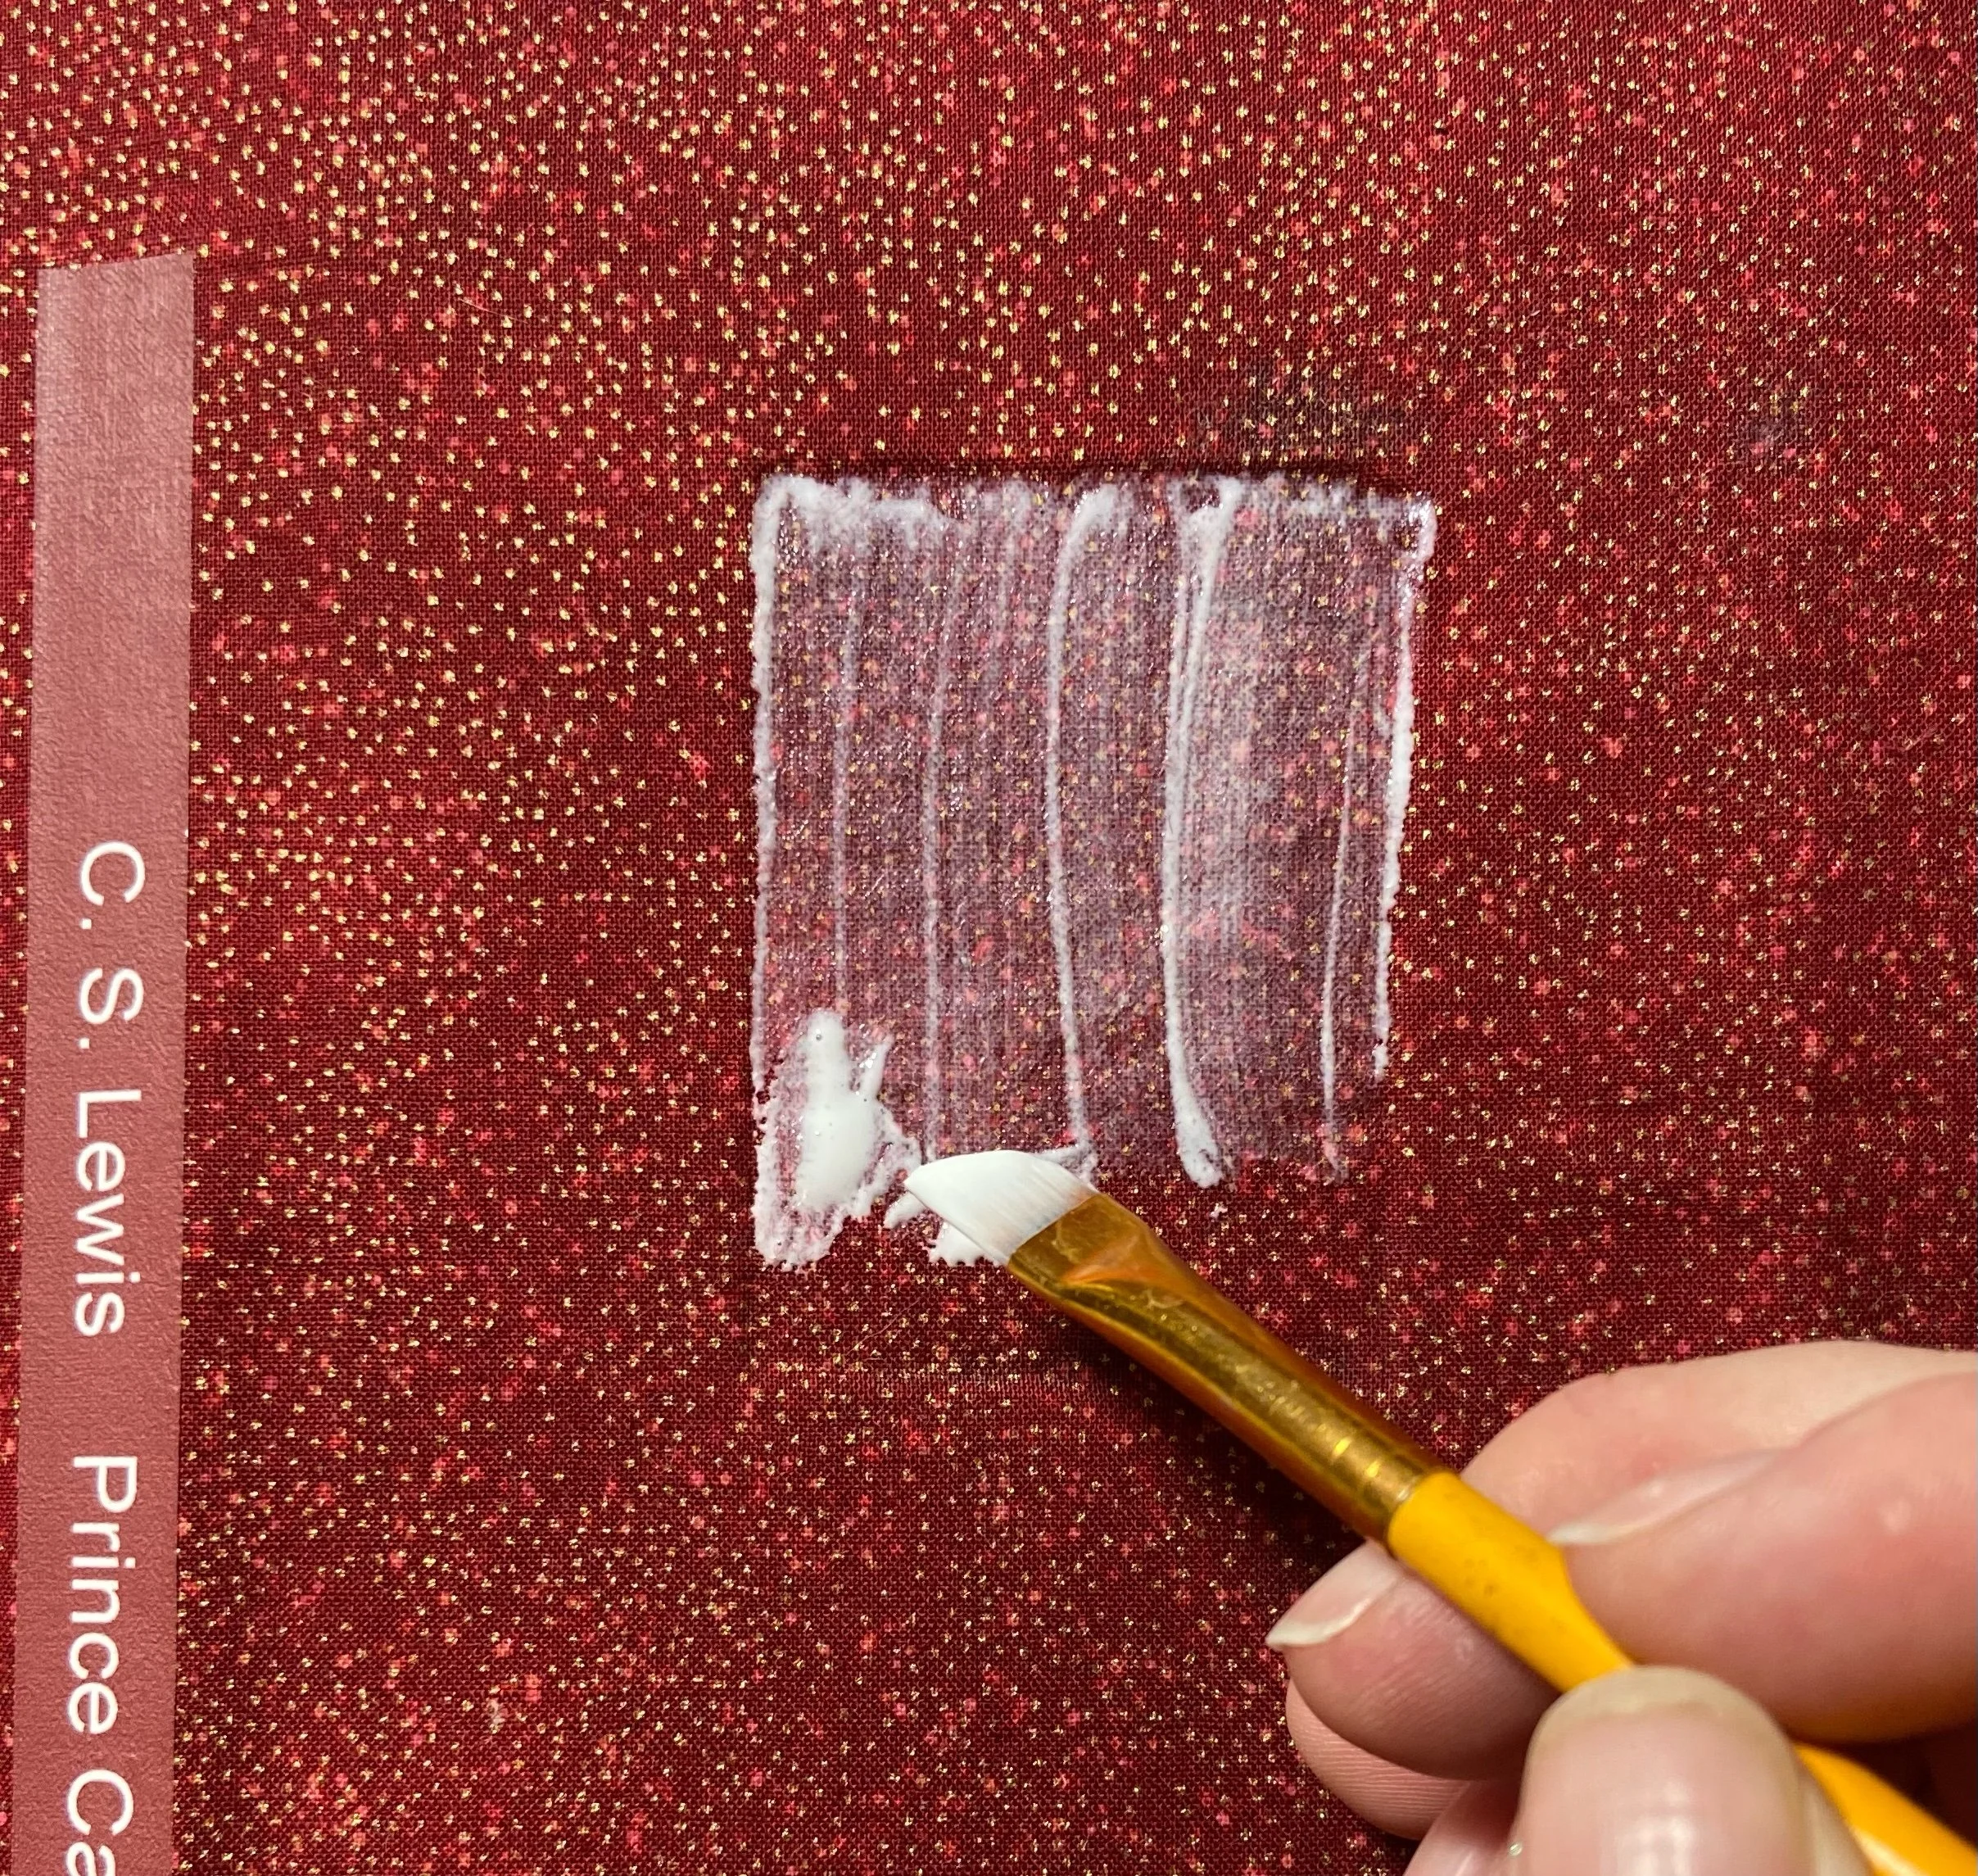
When I pulled all the covers out a day later, I noticed that in a few places, the PVA glue had seeped through the fabric and was visible on the cover. This was dismaying, as I had thought the glue would dry clear and that the interfacing I had fused onto the fabric would prevent such leakage. At least in part, this occurred because I did not smooth out my layer of glue perfectly and so there were little spots here and there where a particularly thick section of glue soaked through. Also, I think had I used a different method of making book cloth, the glue would probably not have soaked through. Here, my OCD kicked in, manifesting in my need to make things perfect. I tried multiple methods to remove the visible glue spots, none of which succeeded. I spent a day thinking about other ways to fix the problem, and ultimately it came down to completely re-doing the covers that were besmirched. There were two problems with this solution: first, I had used up all my gold-speckled red fabric, so any new covers would need to use a different fabric, thereby disrupting my “matched set.” And second, I didn’t have the heart to do all that measuring and cutting and gluing all over again. I decided to strive for some personal growth in accepting that this project would not be perfect, and left the covers as they were, glue spots and all. Darn it.
Next, the spines. The printed spine labels needed to be ironed on, so clearly that needed to happen while the covers were still completely flat. I somehow stopped paying attention to the numbers I’d written on the inside of the covers, indicating which cover went with which book, and ironed the spine label for The Last Battle onto the book spine for The Lion, the Witch, and the Wardrobe. Fortunately, I immediately realized my mistake and did my best to scrape it off. Only about half of the label came off. Now a bit freaked out, I decided to try ironing the correct label over the remaining half of the incorrect label, but I forgot to pull the paper backing off the label first. This meant that I fused most of the paper backing to the original incorrect label. More freaking out, and more attempts to pull things off the spine. I got about half the paper off but the rest was stuck fast.
At this point, I clearly needed to take a breather and calm down. I used my self-imposed timeout to print new labels to replace the ones I’d destroyed, and cut them to the right size. Then I slowly and carefully applied the labels to the rest of the books (correctly, for a change) before I went back to the first book. I made one more effort to scrape off whatever I could without damaging the fabric underneath, held my breath, and tried ironing the correct label over all the carnage. And it worked. (A tiny miracle.) I ended up with a (mostly) clean set of spine labels, although I did slightly damage the spine label for The Last Battle by not ironing the bottom area quite enough. Again, decided to apply “personal growth philosophy” and live with it.


Onward to the inset illustrations. I applied glue to the inset spaces of each cover and glued down the pictures. I set the cardboard piece I’d cut out of each inset over its corresponding picture to apply pressure into the negative space, and then again set all the covers under a heavy book to dry for a day. After they were dry, I used Mod Podge spray (you can get it here) in several light layers to seal and protect the pictures.


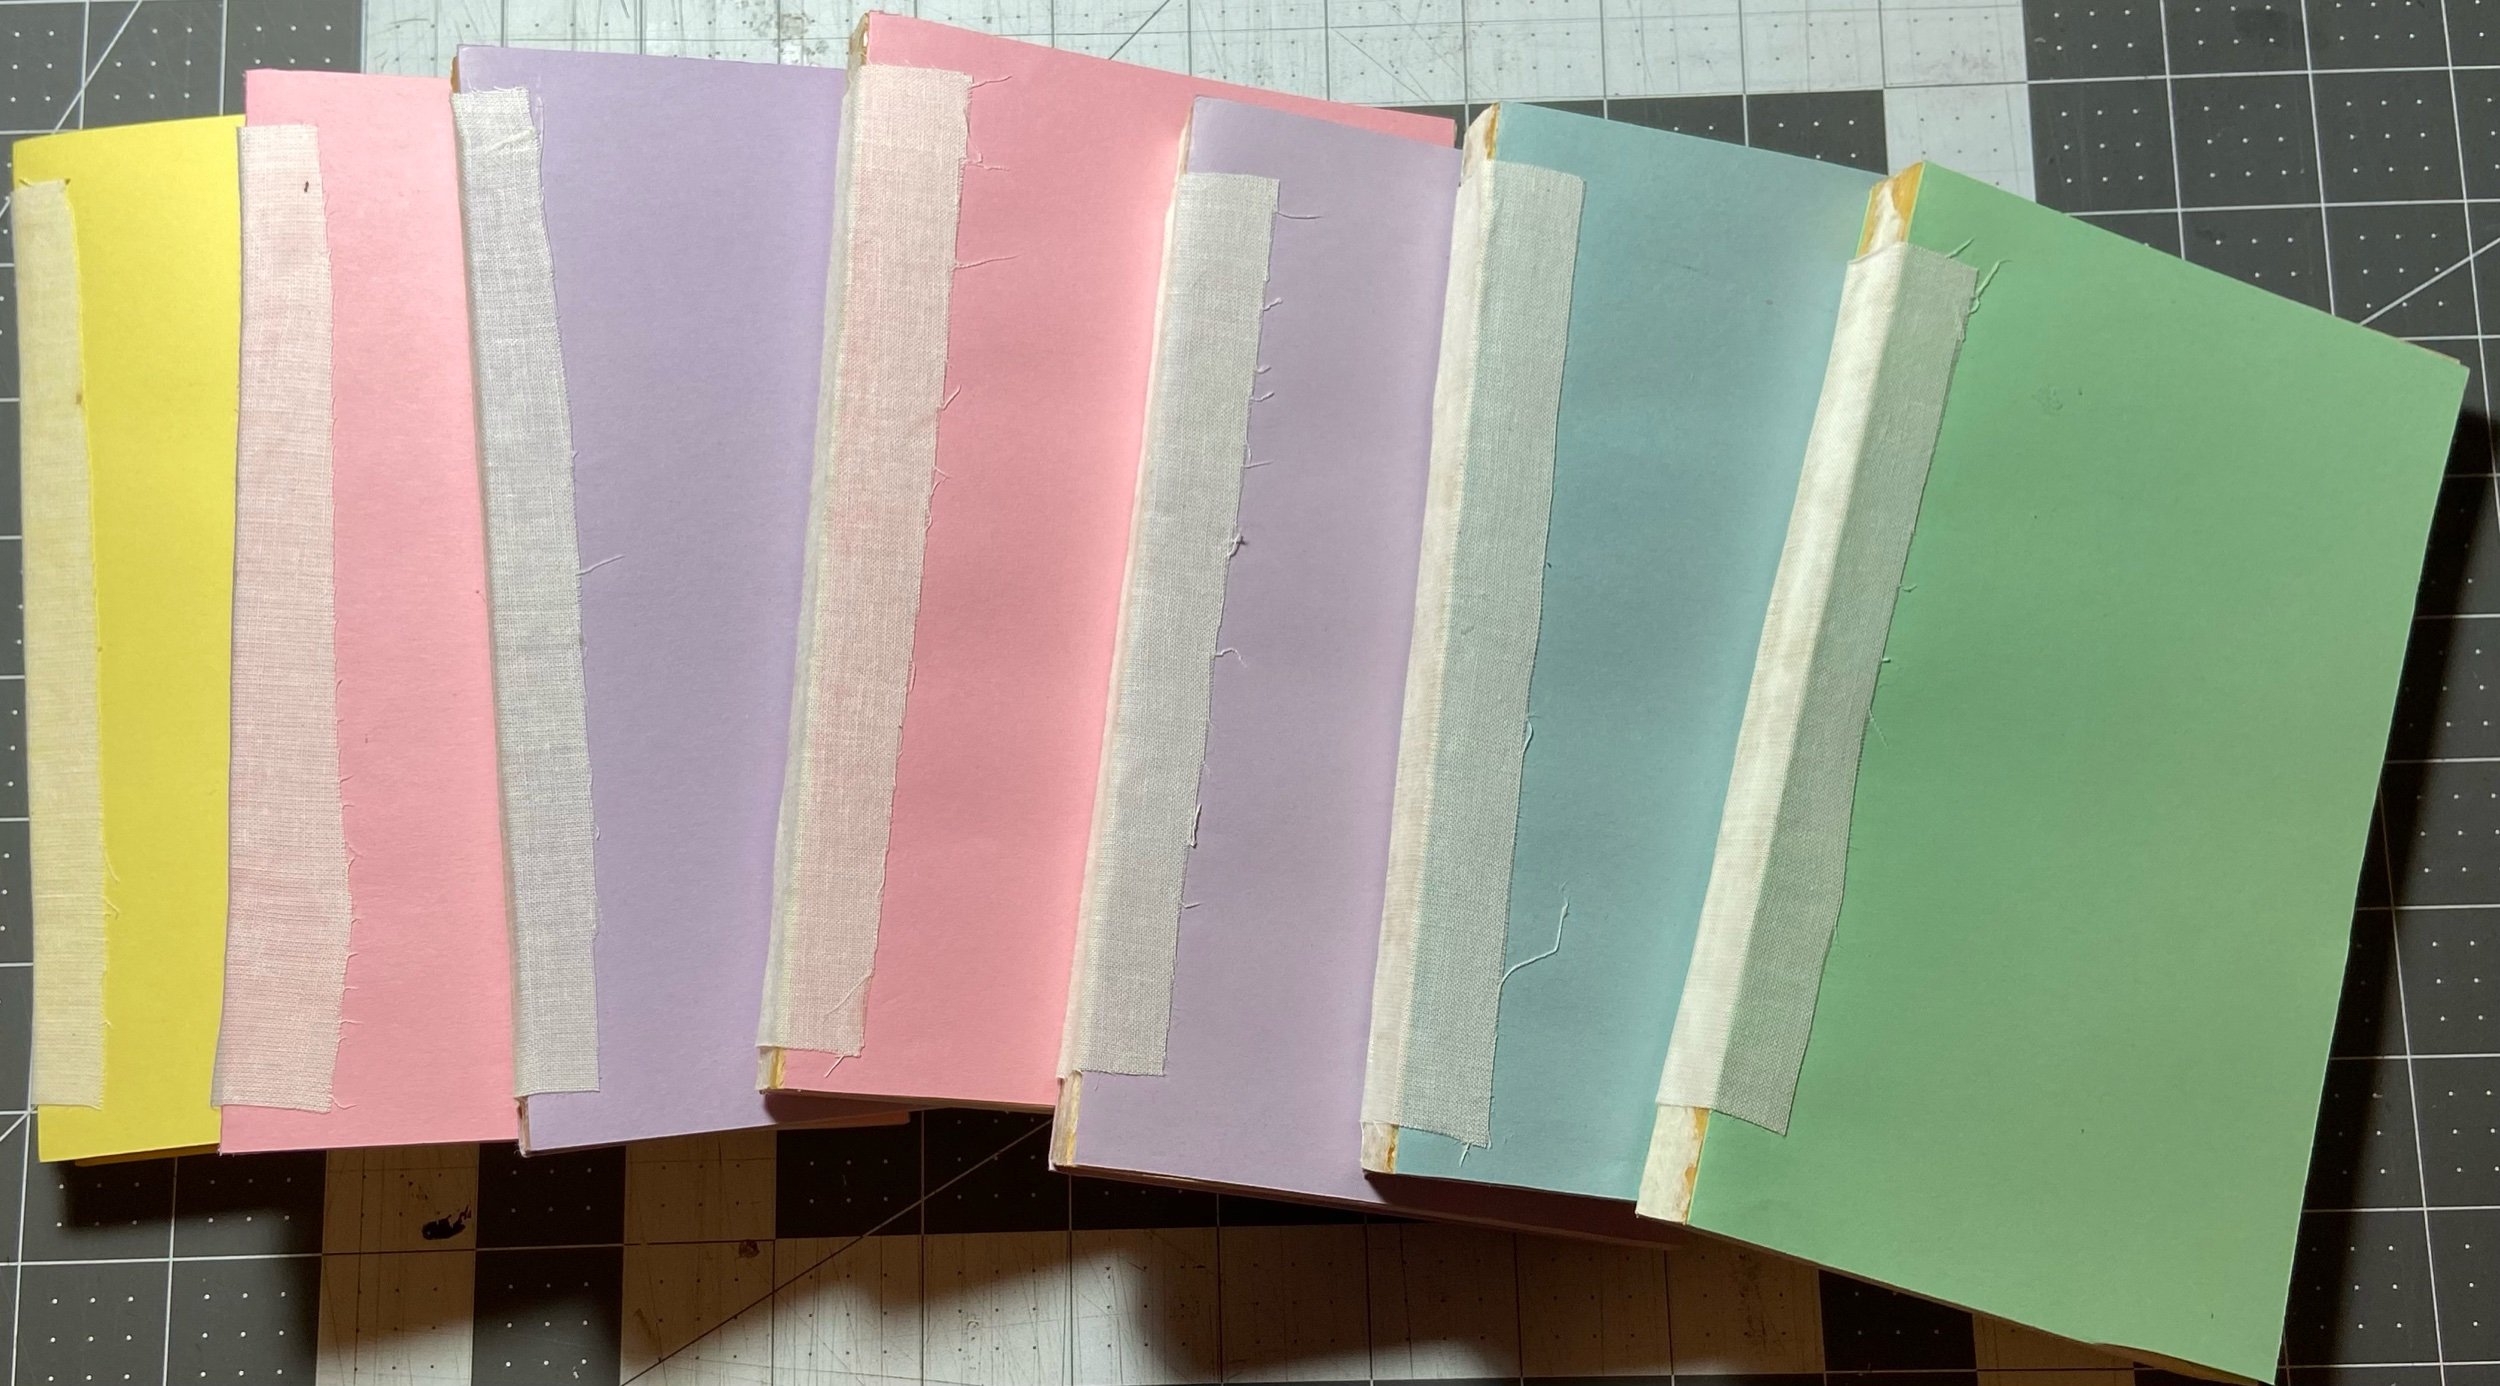
While those were drying, I turned my attention to the coverless books. They needed end papers, for which I’d purchased this pack of acid free pastel paper. I cut two pages (twice the width of the book) for each book. They had to be carefully glued on to the spine edge of the first and last pages of each book, so I masked off the folded edges of my papers to be sure that I got glue only in the right place, and then glued the pages to the front and back of each coverless book. Since the old paperbacks are fragile, I opted to add a bit of muslin to each spine, which would support the spine and also make the later attachment to the covers stronger. This would have been a good time to add a ribbon bookmark…just glue it along the spine and then glue the muslin over it. But…it did not occur to me until I’d already glued all the muslin, and was pressing the books under some weight to let the glue dry. Oh well…next time. In case you are wondering, the warping caused by the moisture of the glue absolutely flattened out once the books had been pressed and the glue had dried. In retrospect, I wish I’d used heavier paper for this part of the project, as I think I’d have found it easier to attach to the covers later.


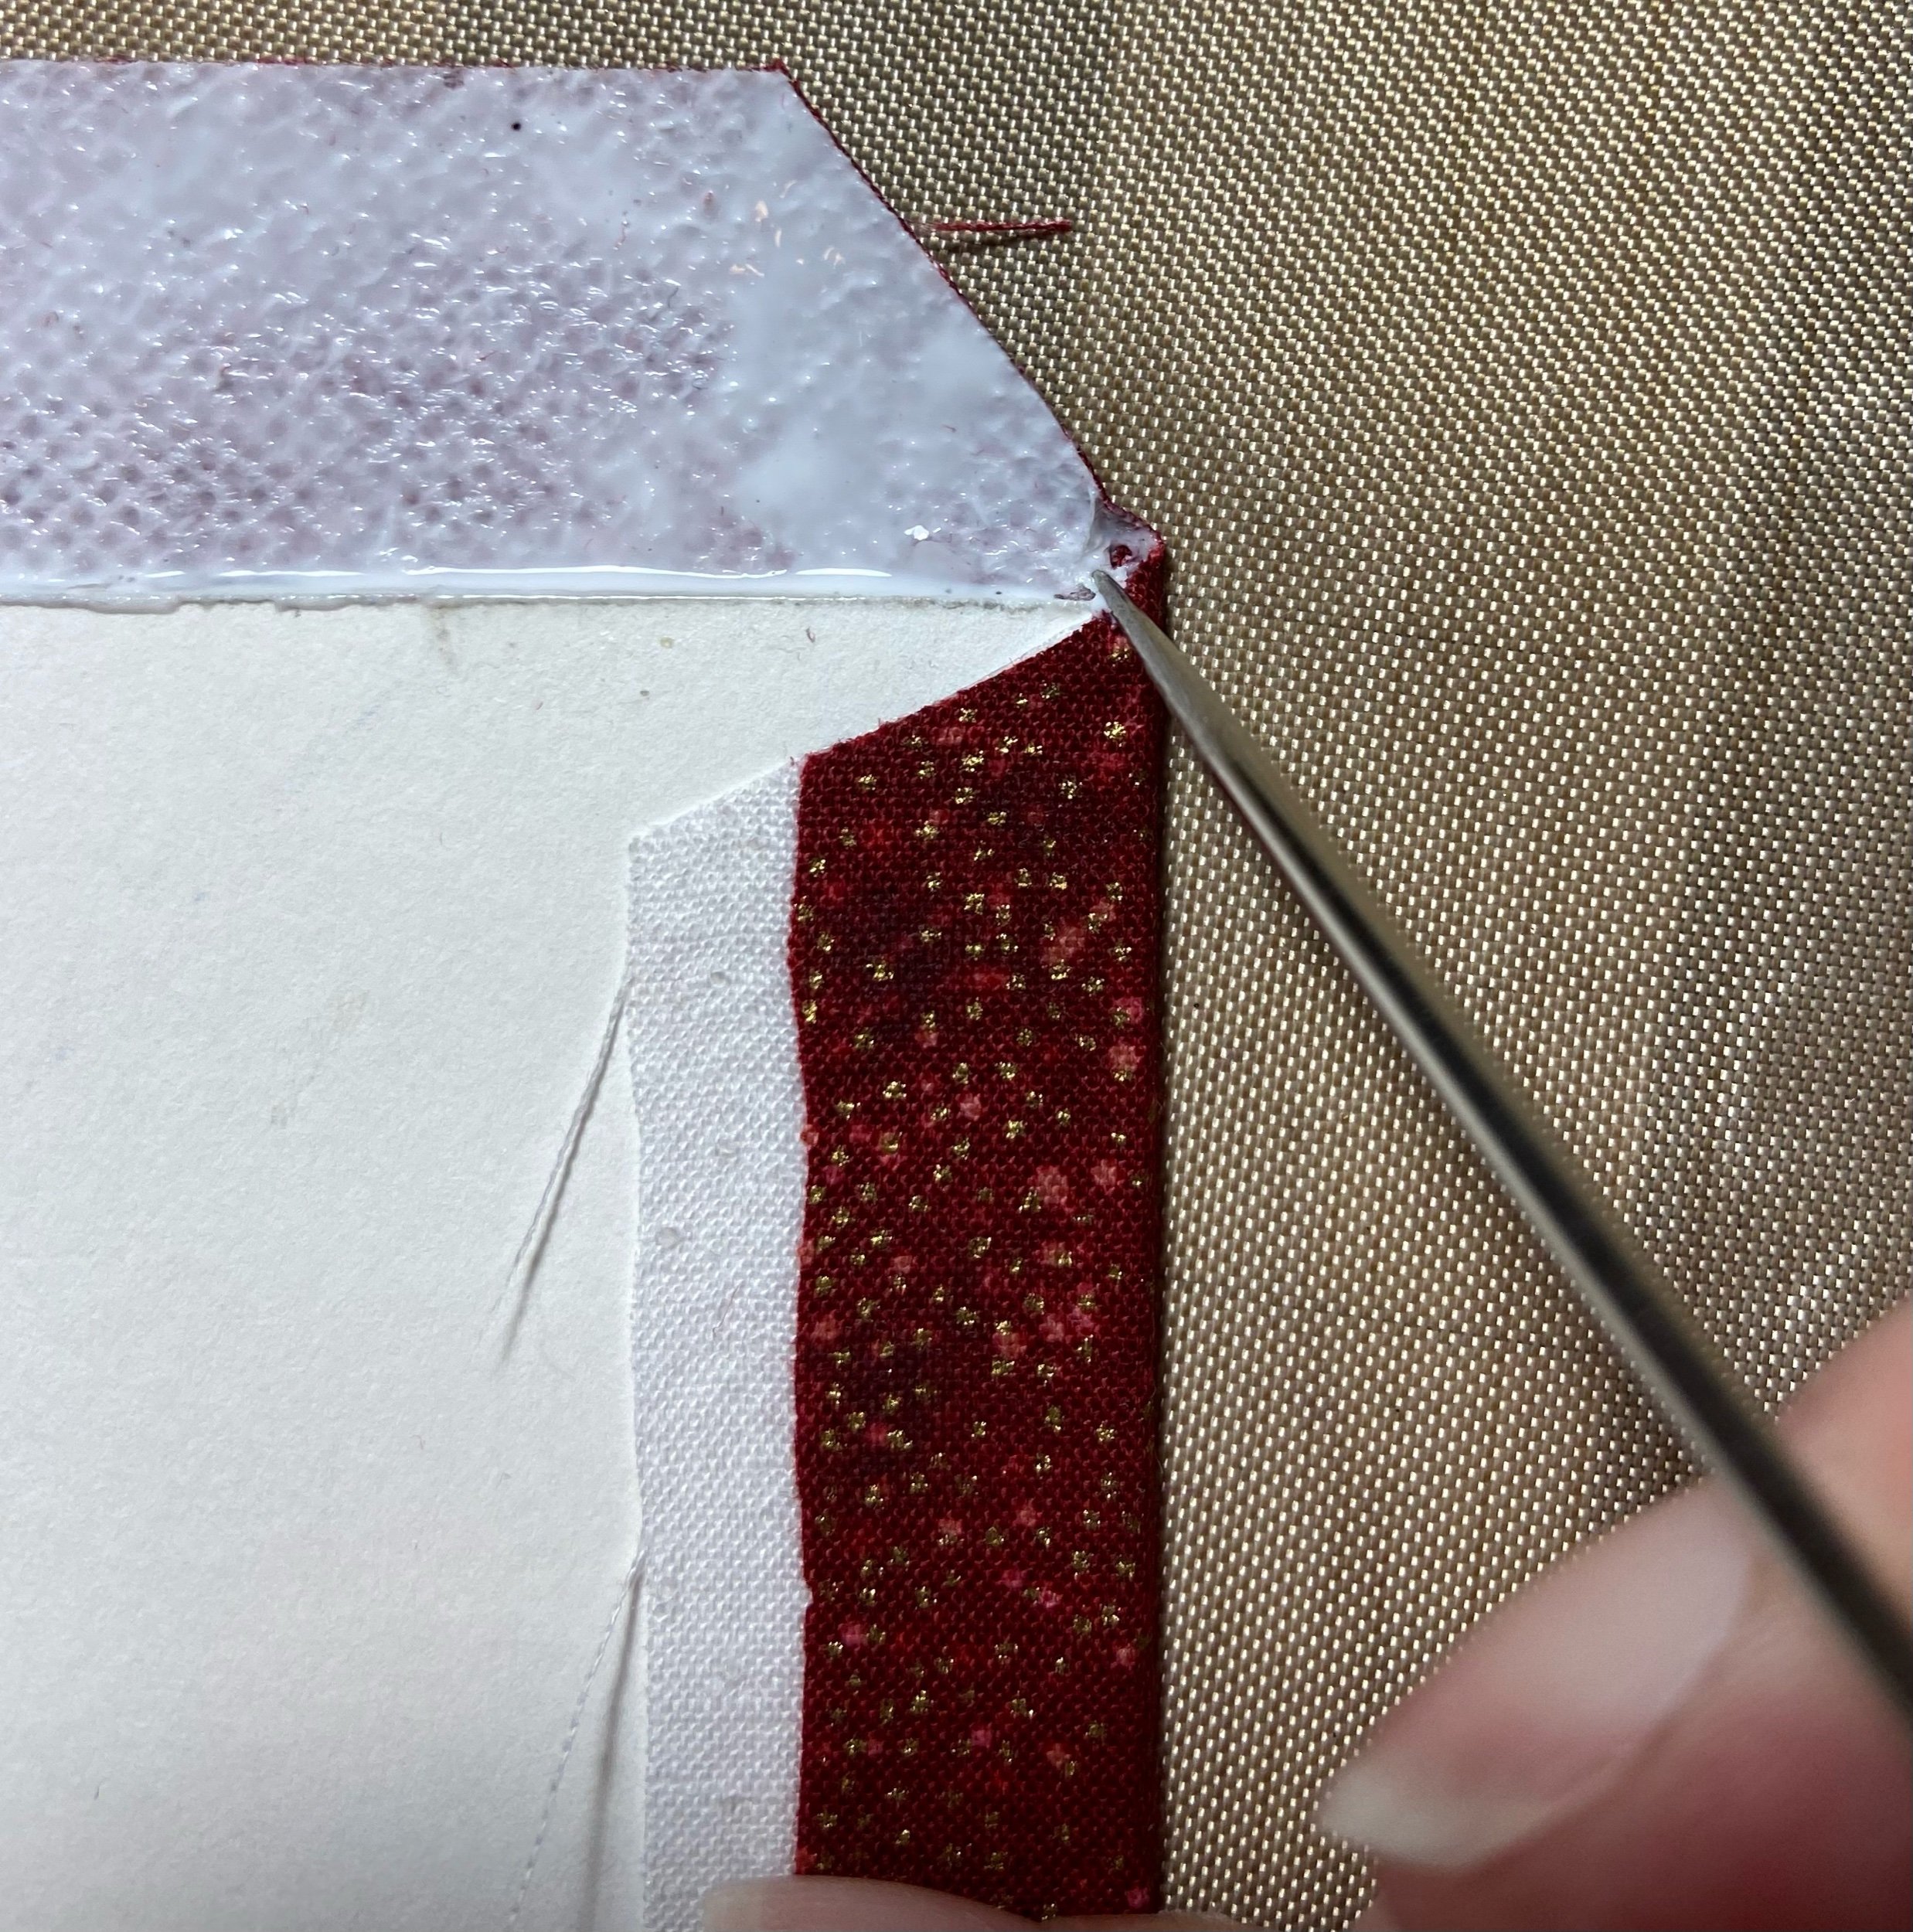
I was almost ready to attach the covers to the books, but first I needed to trim the fabric edges and glue them down. I trimmed so that I had a 3/4” margin on all sides. Then I trimmed the corners at a 45° angle, but left a bit of fabric to fold over the corners. On to glueing: I did the top and bottom, and then the sides, folding that little bit of fabric over the corners before I glued the sides down. This is where I again had occasion to regret using just fusible interfacing on fabric rather than making a more proper book cloth; as I was trying to glue the edges down, the interfacing came loose from the cloth in some places, particularly on the corners I was trying to glue down over the book board. This made it much harder than it should have been to get the fabric securely fastened to the mat board. Pressed everything under a heavy book to dry.


I had my coverless books and my covers all prepped and ready for final assembly! I confess, I was quite excited about seeing everything come together into an actual hardback book.

The method was to glue one side of the endpapers (the side that the muslin wrapped around) to the front and back covers and leave the spine unglued. I first tried applying the glue to the papers themselves and then laying it over the book cover. This was difficult, both because the paper immediately started to warp and curl from the moisture of the glue and also because it was difficult to center the book into the cover. So I next tried applying the glue to the front and back covers, then setting the book in so that it stood against the spine and I could clearly see when it was centered. Then I closed the front cover and then the back cover and pressed the book with my hand. Of course, then I had to open the covers again and do my best to smooth out the wrinkled papers with my fingers and a bone folder. It didn’t look perfect, but experience suggested to me that it would look better once the books had been pressed and the glue had dried. I did insert a sheet of waxed paper between the glued endpapers and the rest of the book, to keep moisture from seeping in. Then of course I piled everything into a stack, and put a heavy book on top of it. And my toolbox.


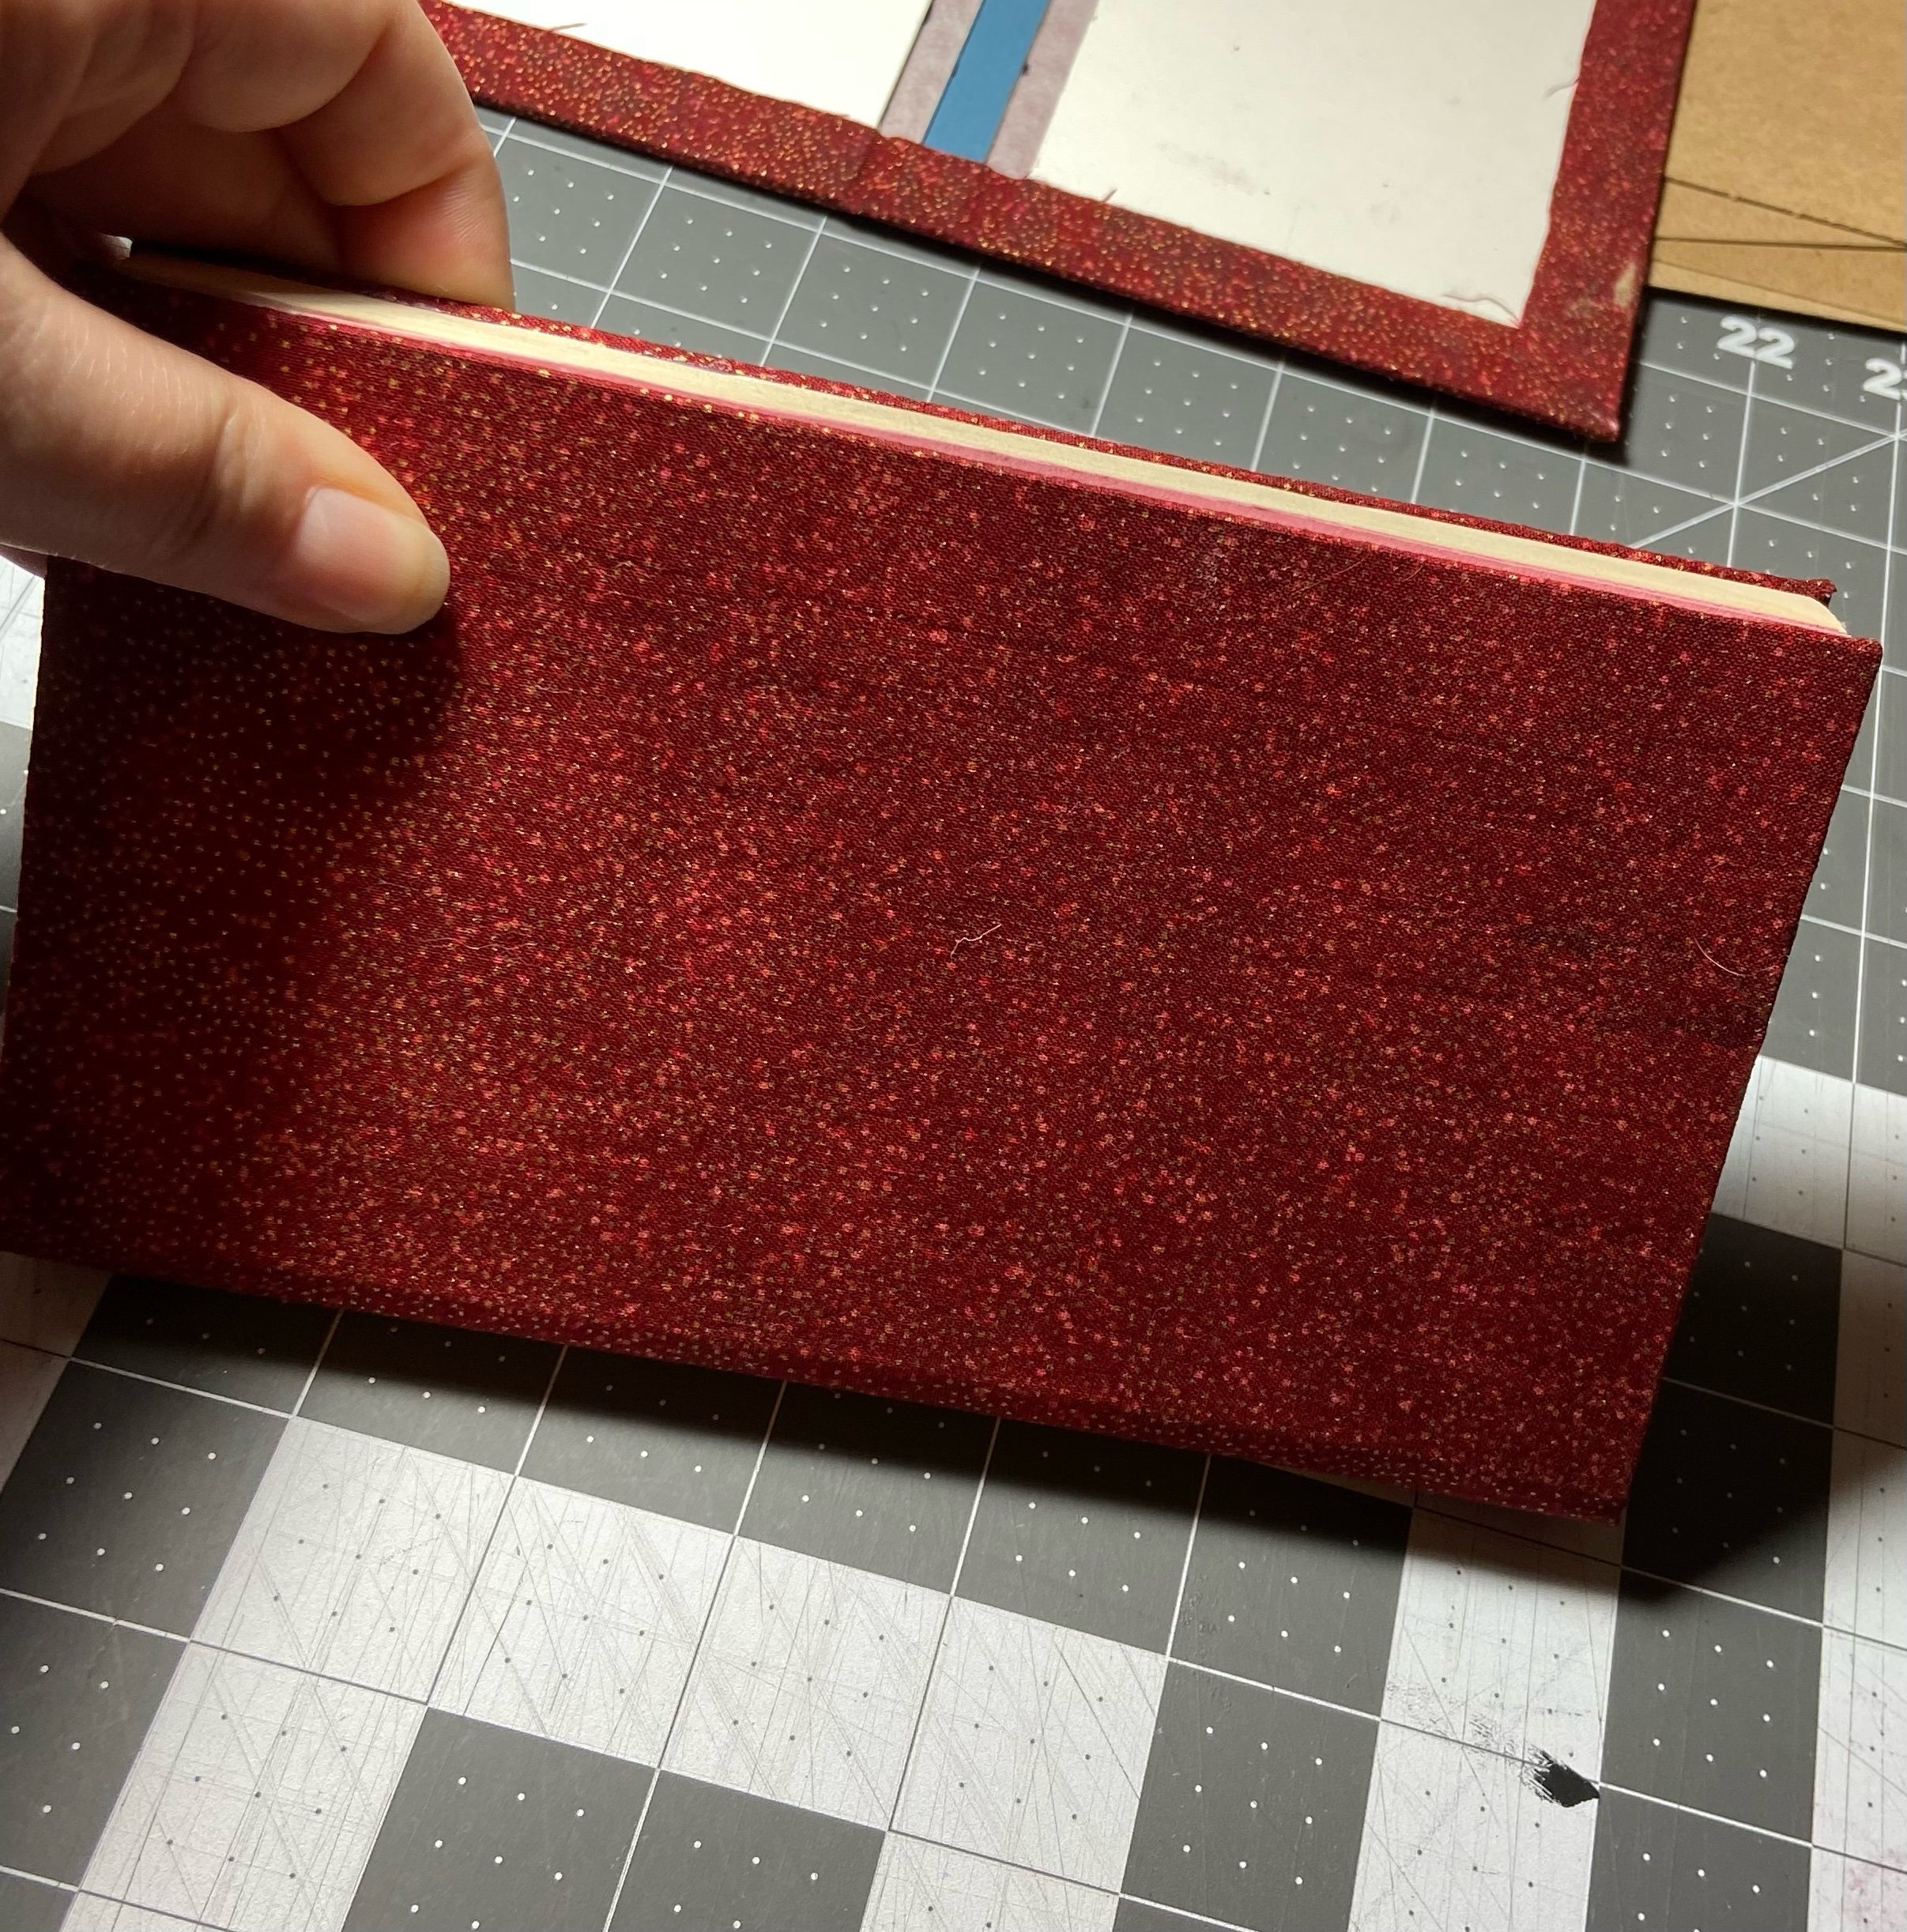


Done. They are far from perfect, but because this was my first attempt at bookbinding (and in the interests of personal growth and triumph over OCD), I can accept them and love them for what they are: a careful attempt to preserve my beloved childhood books. And I do love them.
Read to your children. Turn them into readers who discover the childhood magic of a beloved book (or 20).
