Adventures In Anthropomorphic Gamers—Part 2
As an Amazon associate, I may earn a small commission if you navigate to Amazon from my site and buy something. This will not result in an extra cost to you.
This will not make much sense unless you have already read Part 1, which you can find here.
I dragged out an old thick glass plate (with little glass knobs for feet) that I used to use under candles, and used an immense amount of heavy body gel to attach it to the underside (the bumpy side) of the clay base. This turned out to be a complete waste of time and material, as the glass detached from the clay as soon as I started moving the base around. I gave up on the glass stand, and gave the now-dry clay base a coat of white gesso to seal it as best I could.


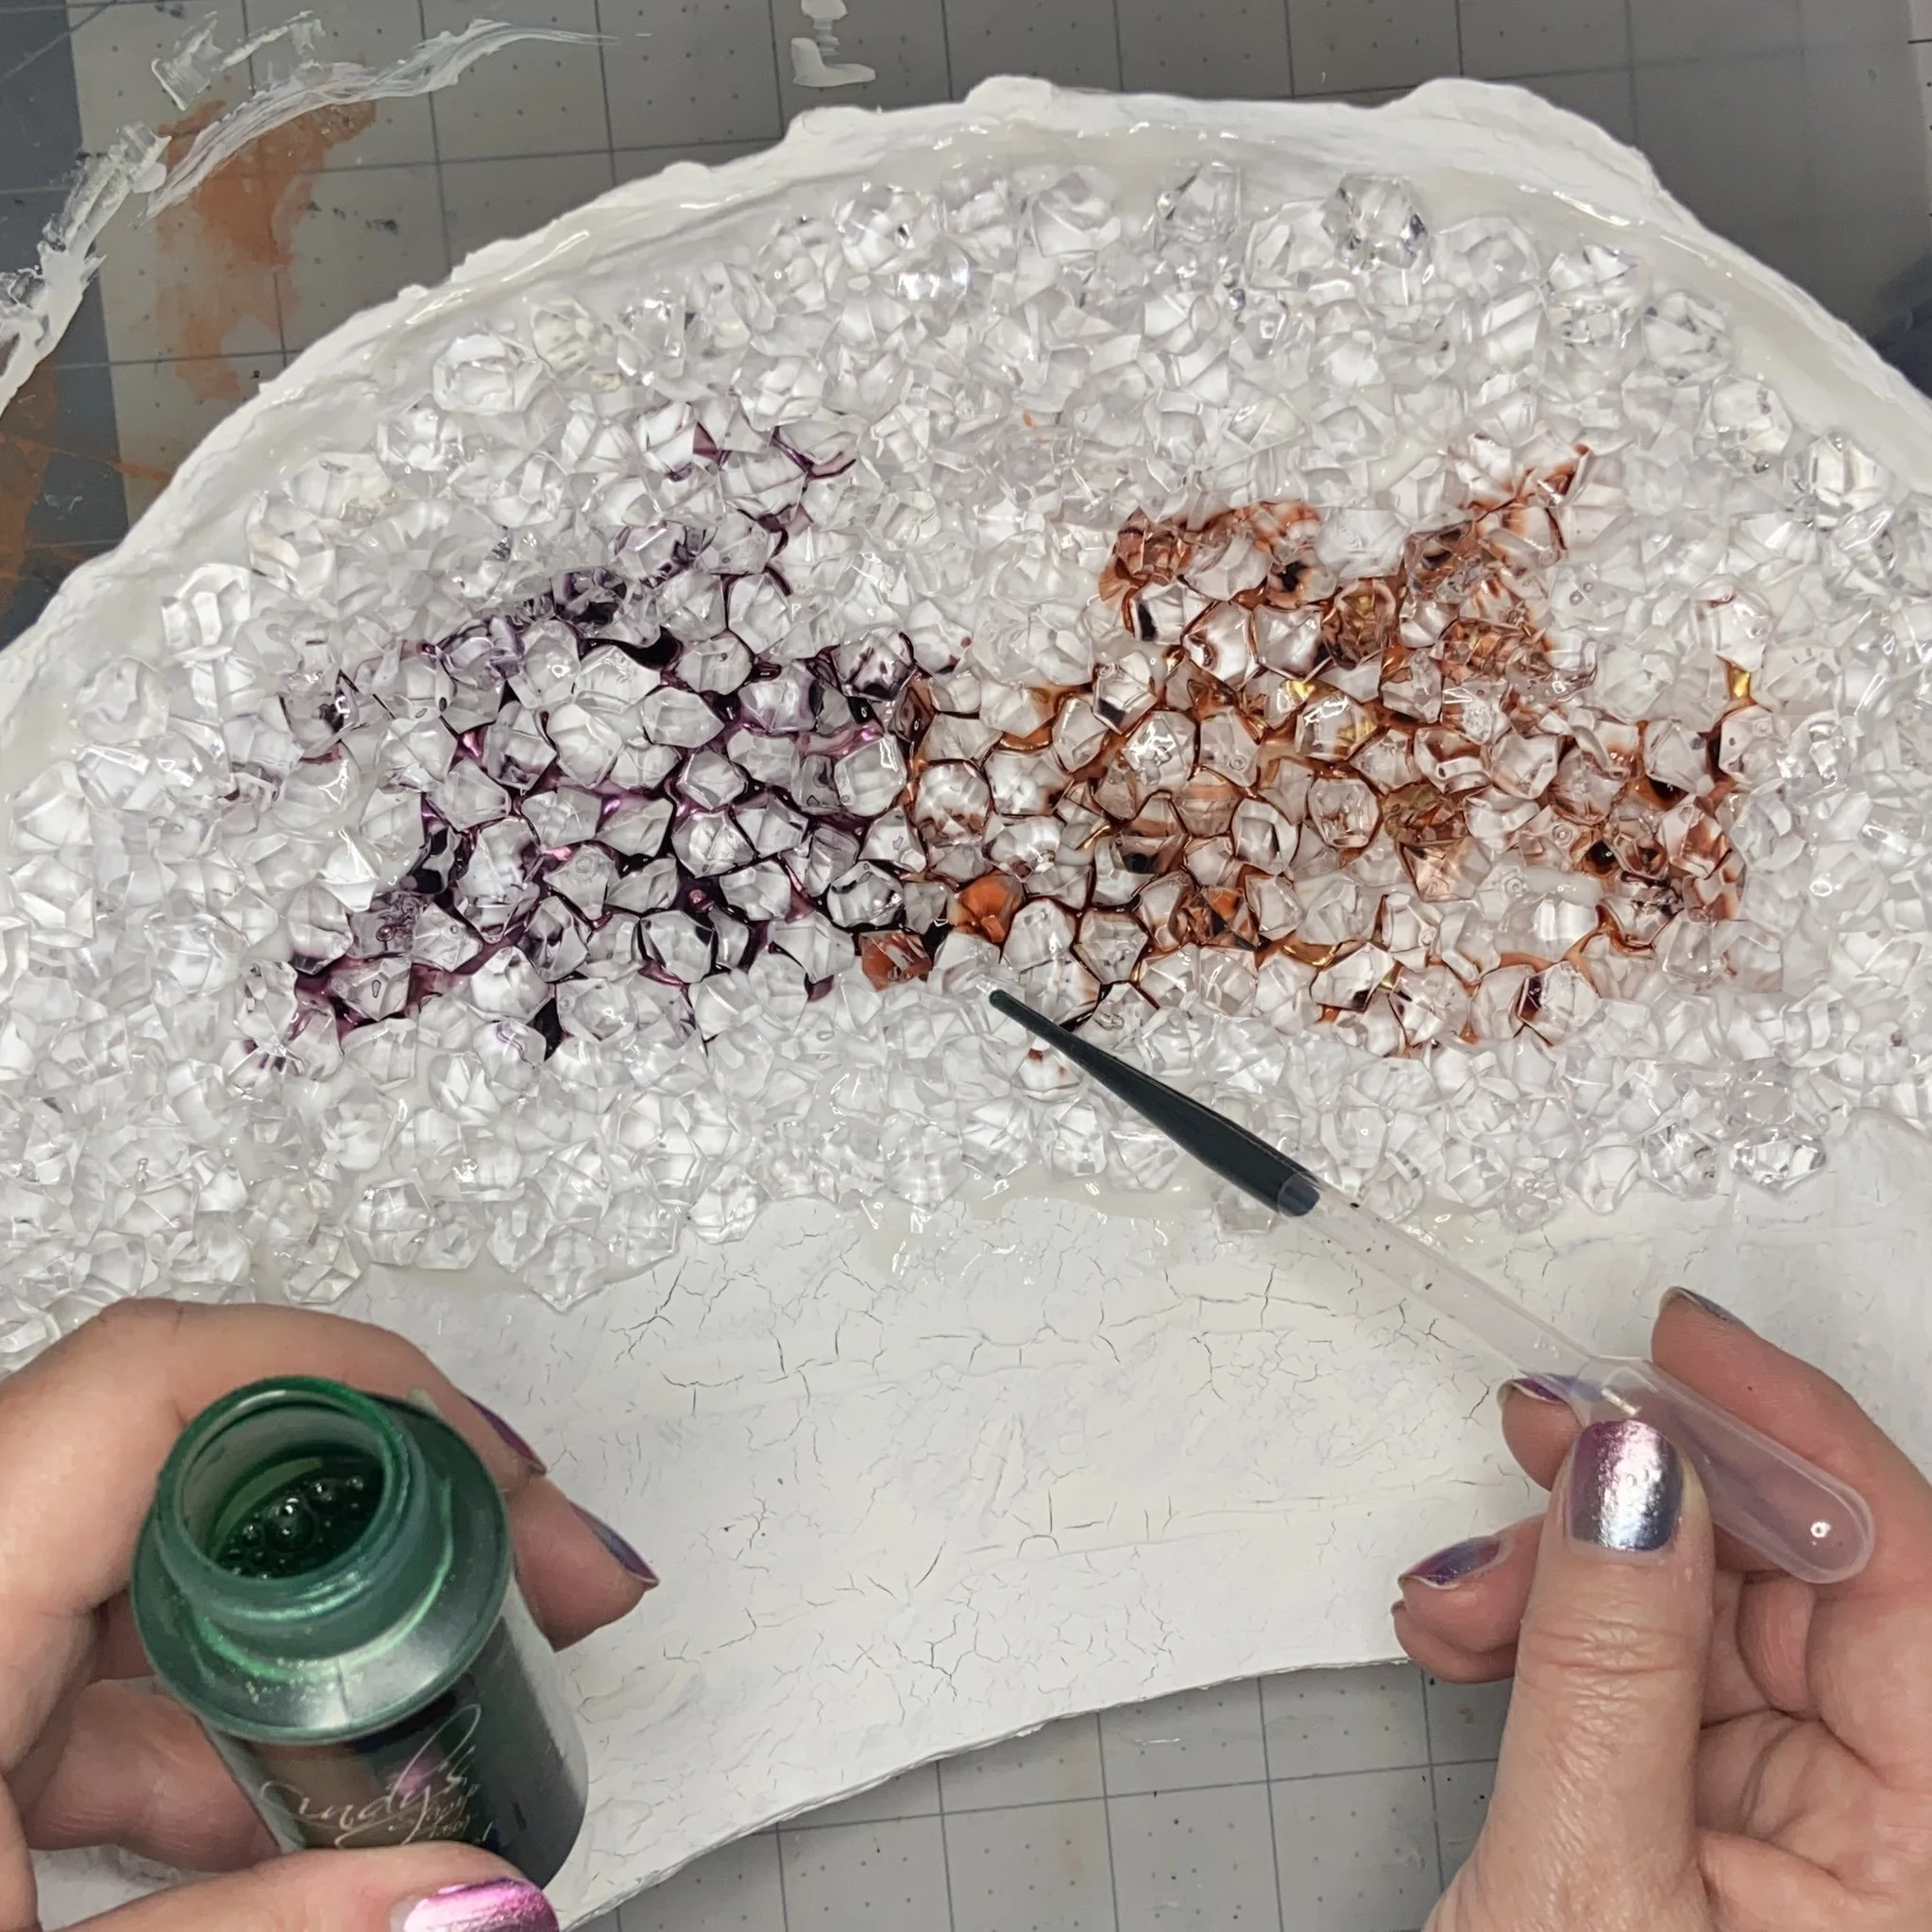
For the crystalline look of the interior of the geode cave, I’d bought a bag of little plastic “crystals” off Amazon. I trimmed the geode cave a bit so that it would fit properly (mostly) against the base, and then I used more heavy body gel to start attaching my little plastic crystals onto the interior of the cave. I left this to dry for a day, and then went in with my chosen Lindy’s Gang sprays and used a little pipette to add the color between the crystals to the translucent dried heavy body gel. I left the bottom couple inches of the cave clear of gel and crystals, as I’d need that space later.


I stuck the glass stand back under the clay base to elevate it just slightly, and then used an IMMENSE amount of heavy body gel to attach the cave to the base. It had to sit for several days to dry, which gave me time to ponder how much easier it would have been to build the whole structure as a single piece of cardboard, cut and glued into shape. Oh well…the only way out was forward, at this point.


It seemed to me that having just the single point of attachment between the cave and the base was just asking for it to come apart. So I took some cardboard strips and glued them at an angle along each side where the cave and base came together. Yes, I actually used clothes pins to hold the cardboard in place until the glue dried. Use what you have! In addition to providing more support, the cardboard strips would also smooth the transition between round cave and flat base. I’d smooth it the rest of the way with modeling paste.
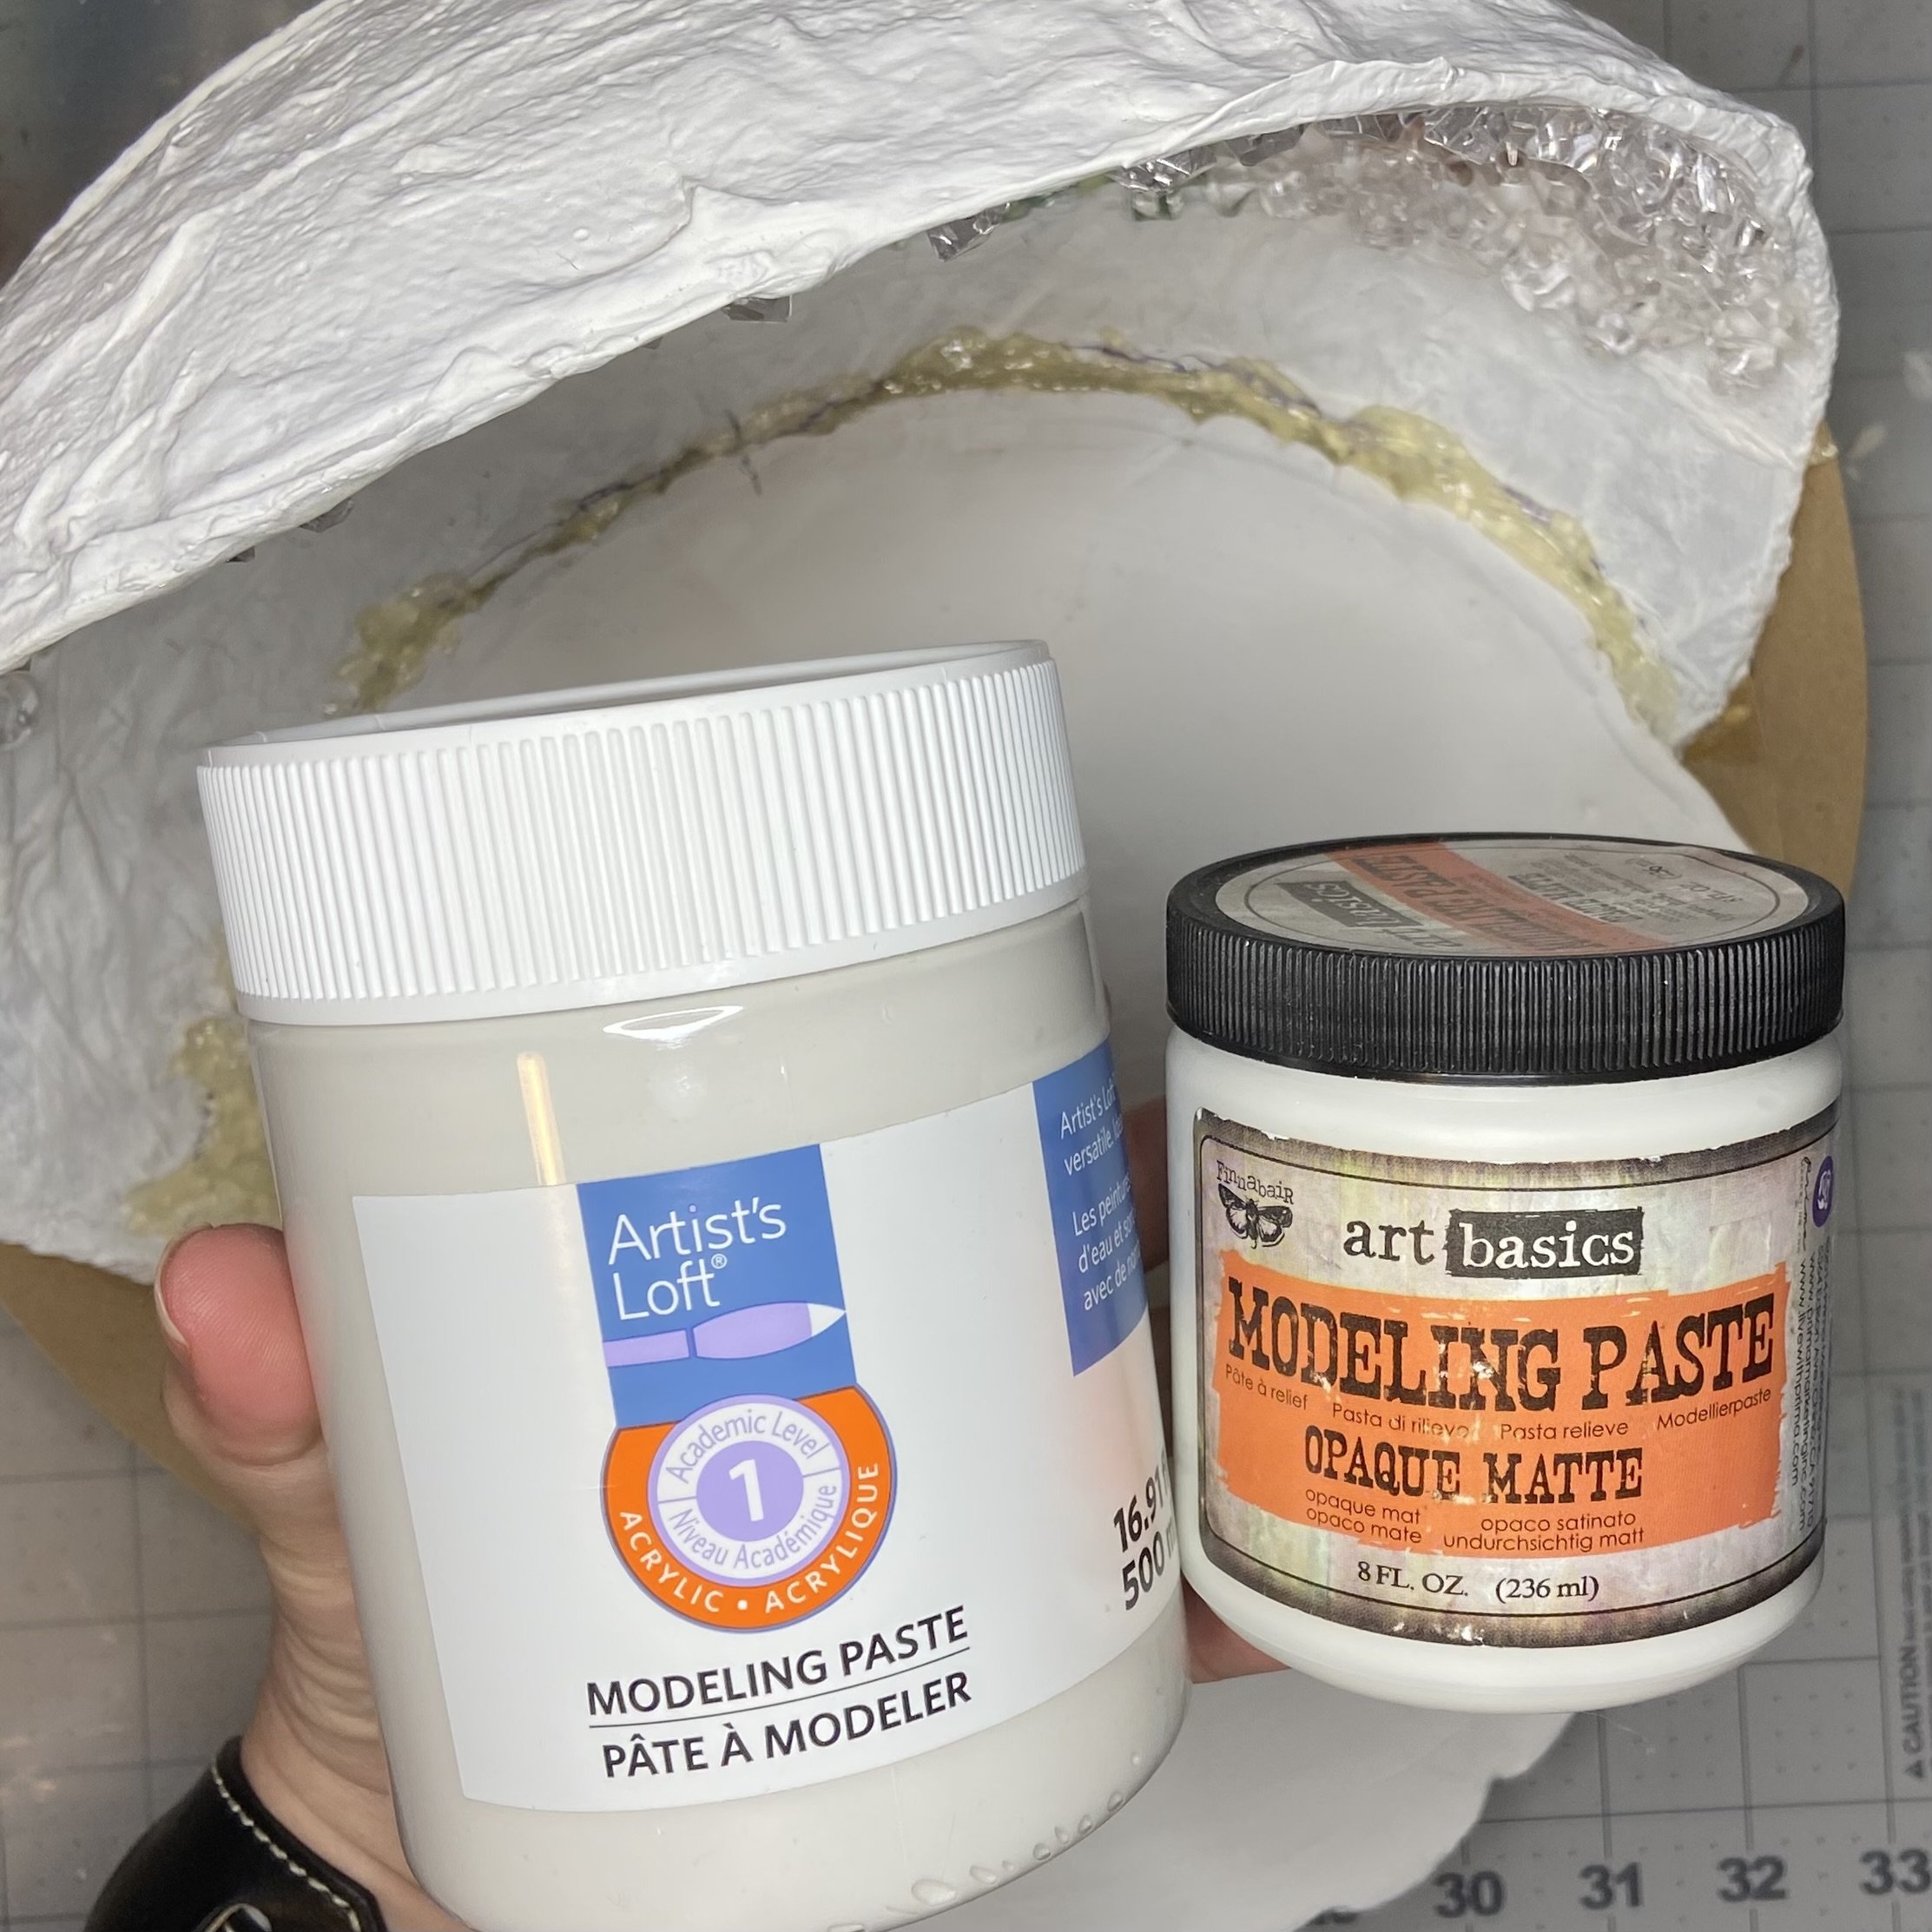
Speaking of modeling paste…I had some of my Finnabair modeling paste left over from some previous projects and a whole jar of Artist’s Loft modeling paste as well. I have to say, both work but the Artist’s Loft stuff is a putty gray and required a couple coats of white gesso to cover up. The pristine white Finnabair stuff is much better. I used the modeling paste to smooth the interior curve where the cave meets the base (where I’d left a crystal-free space), and to cover up the cardboard support pieces. And then I added a little more anywhere I felt was needed to make the curves of the piece look a little more natural. I used my palette knife to apply the paste and then my (gloved) finger to smooth it out.

I’d originally planned to make the outside of the geode cave look as much like rock as I could manage, but as with most of my artistic plans, I had to adapt when things didn’t go my way. Instead, I covered the entire outside of the cave with Mod Podge and then rolled it in clear glitter, pressing hard to make the glitter stick. Sparkly!


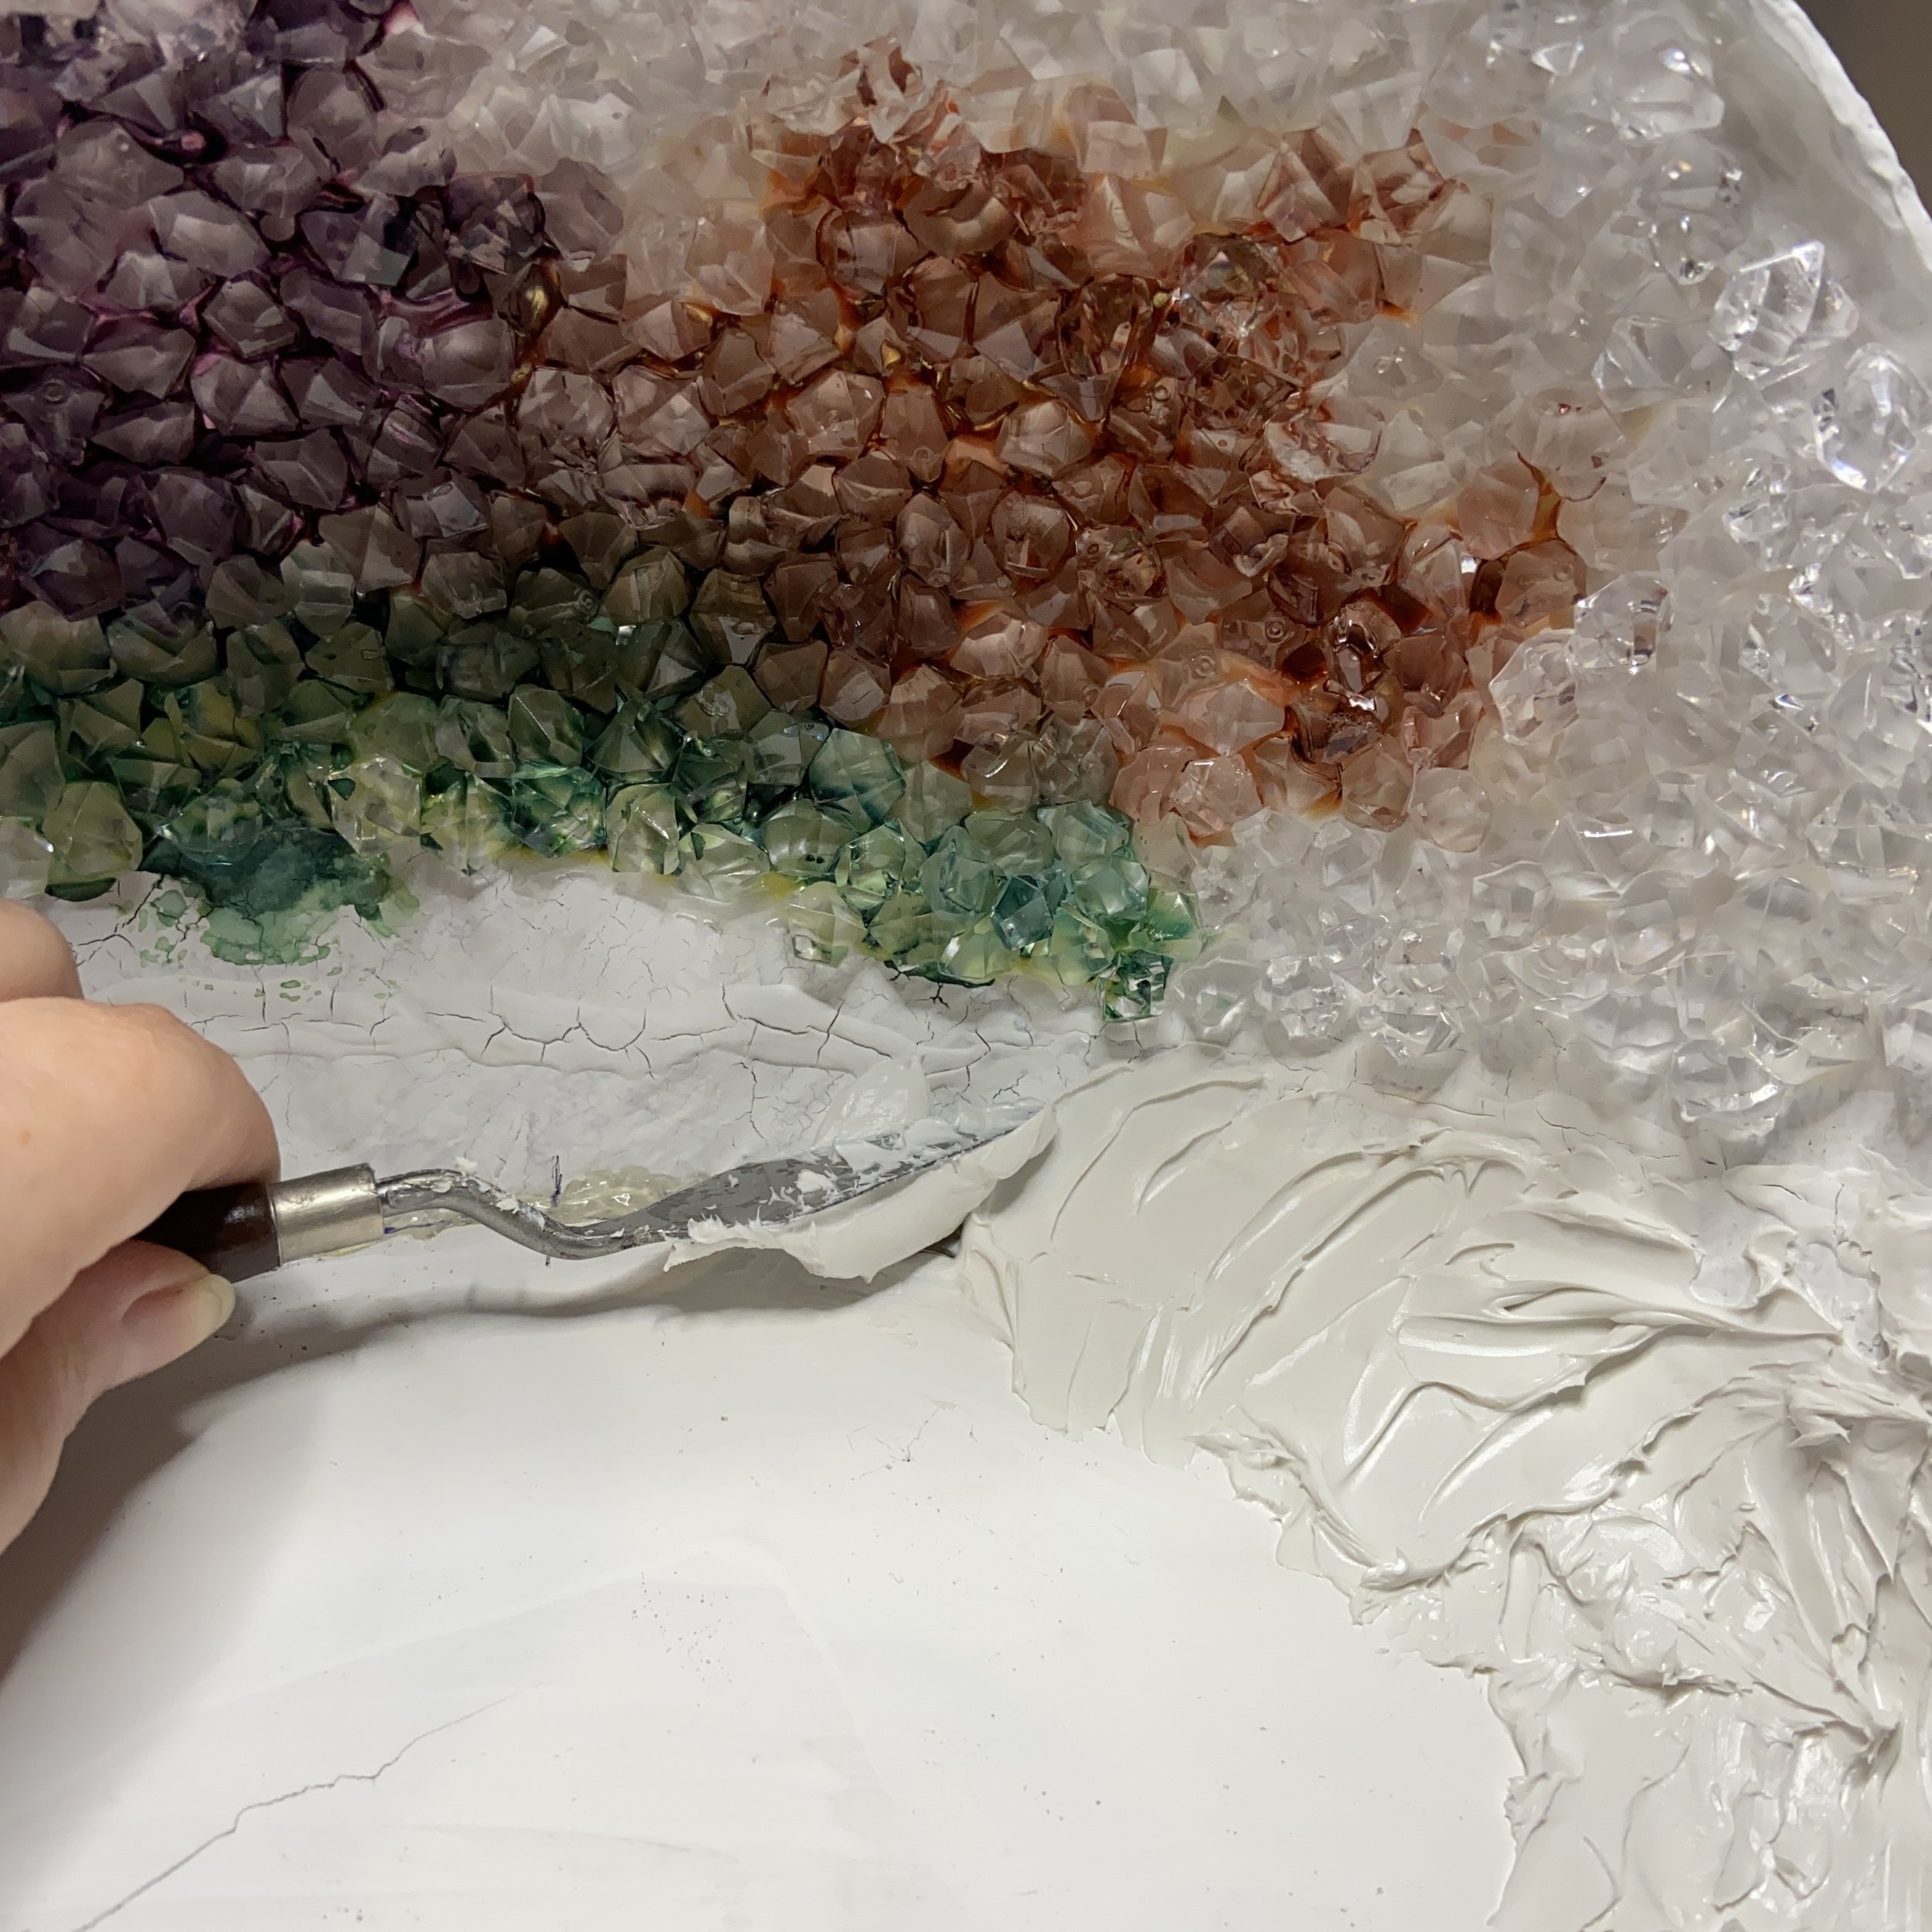
While the Mod Podge and glitter were drying, I used my heavy body gel to attach crystals to the last part of the cave, bringing them down to the level of the base. I waited for that to dry before adding my green Lindy’s Gang paint.


Finally (finally!) I was ready to start the actual dragon/game installation. I cut about 2” off the top of a Pringles can, and then cleaned the inside of that part of any grease and particles. Then I glued on the lid and used white gesso to cover the very bright red outside. It took 6 coats of gesso! Once that was done, I used heavy body gel to glue it to the center of the platform. Once that glue was dry, I used more modeling paste to smooth the transition between the platform and the Pringles “podium.” Once that was dry, I used white gesso to cover that and also to cover up as best I could the green shimmery paint that had leaked down past the crystals and onto the back of the platform.


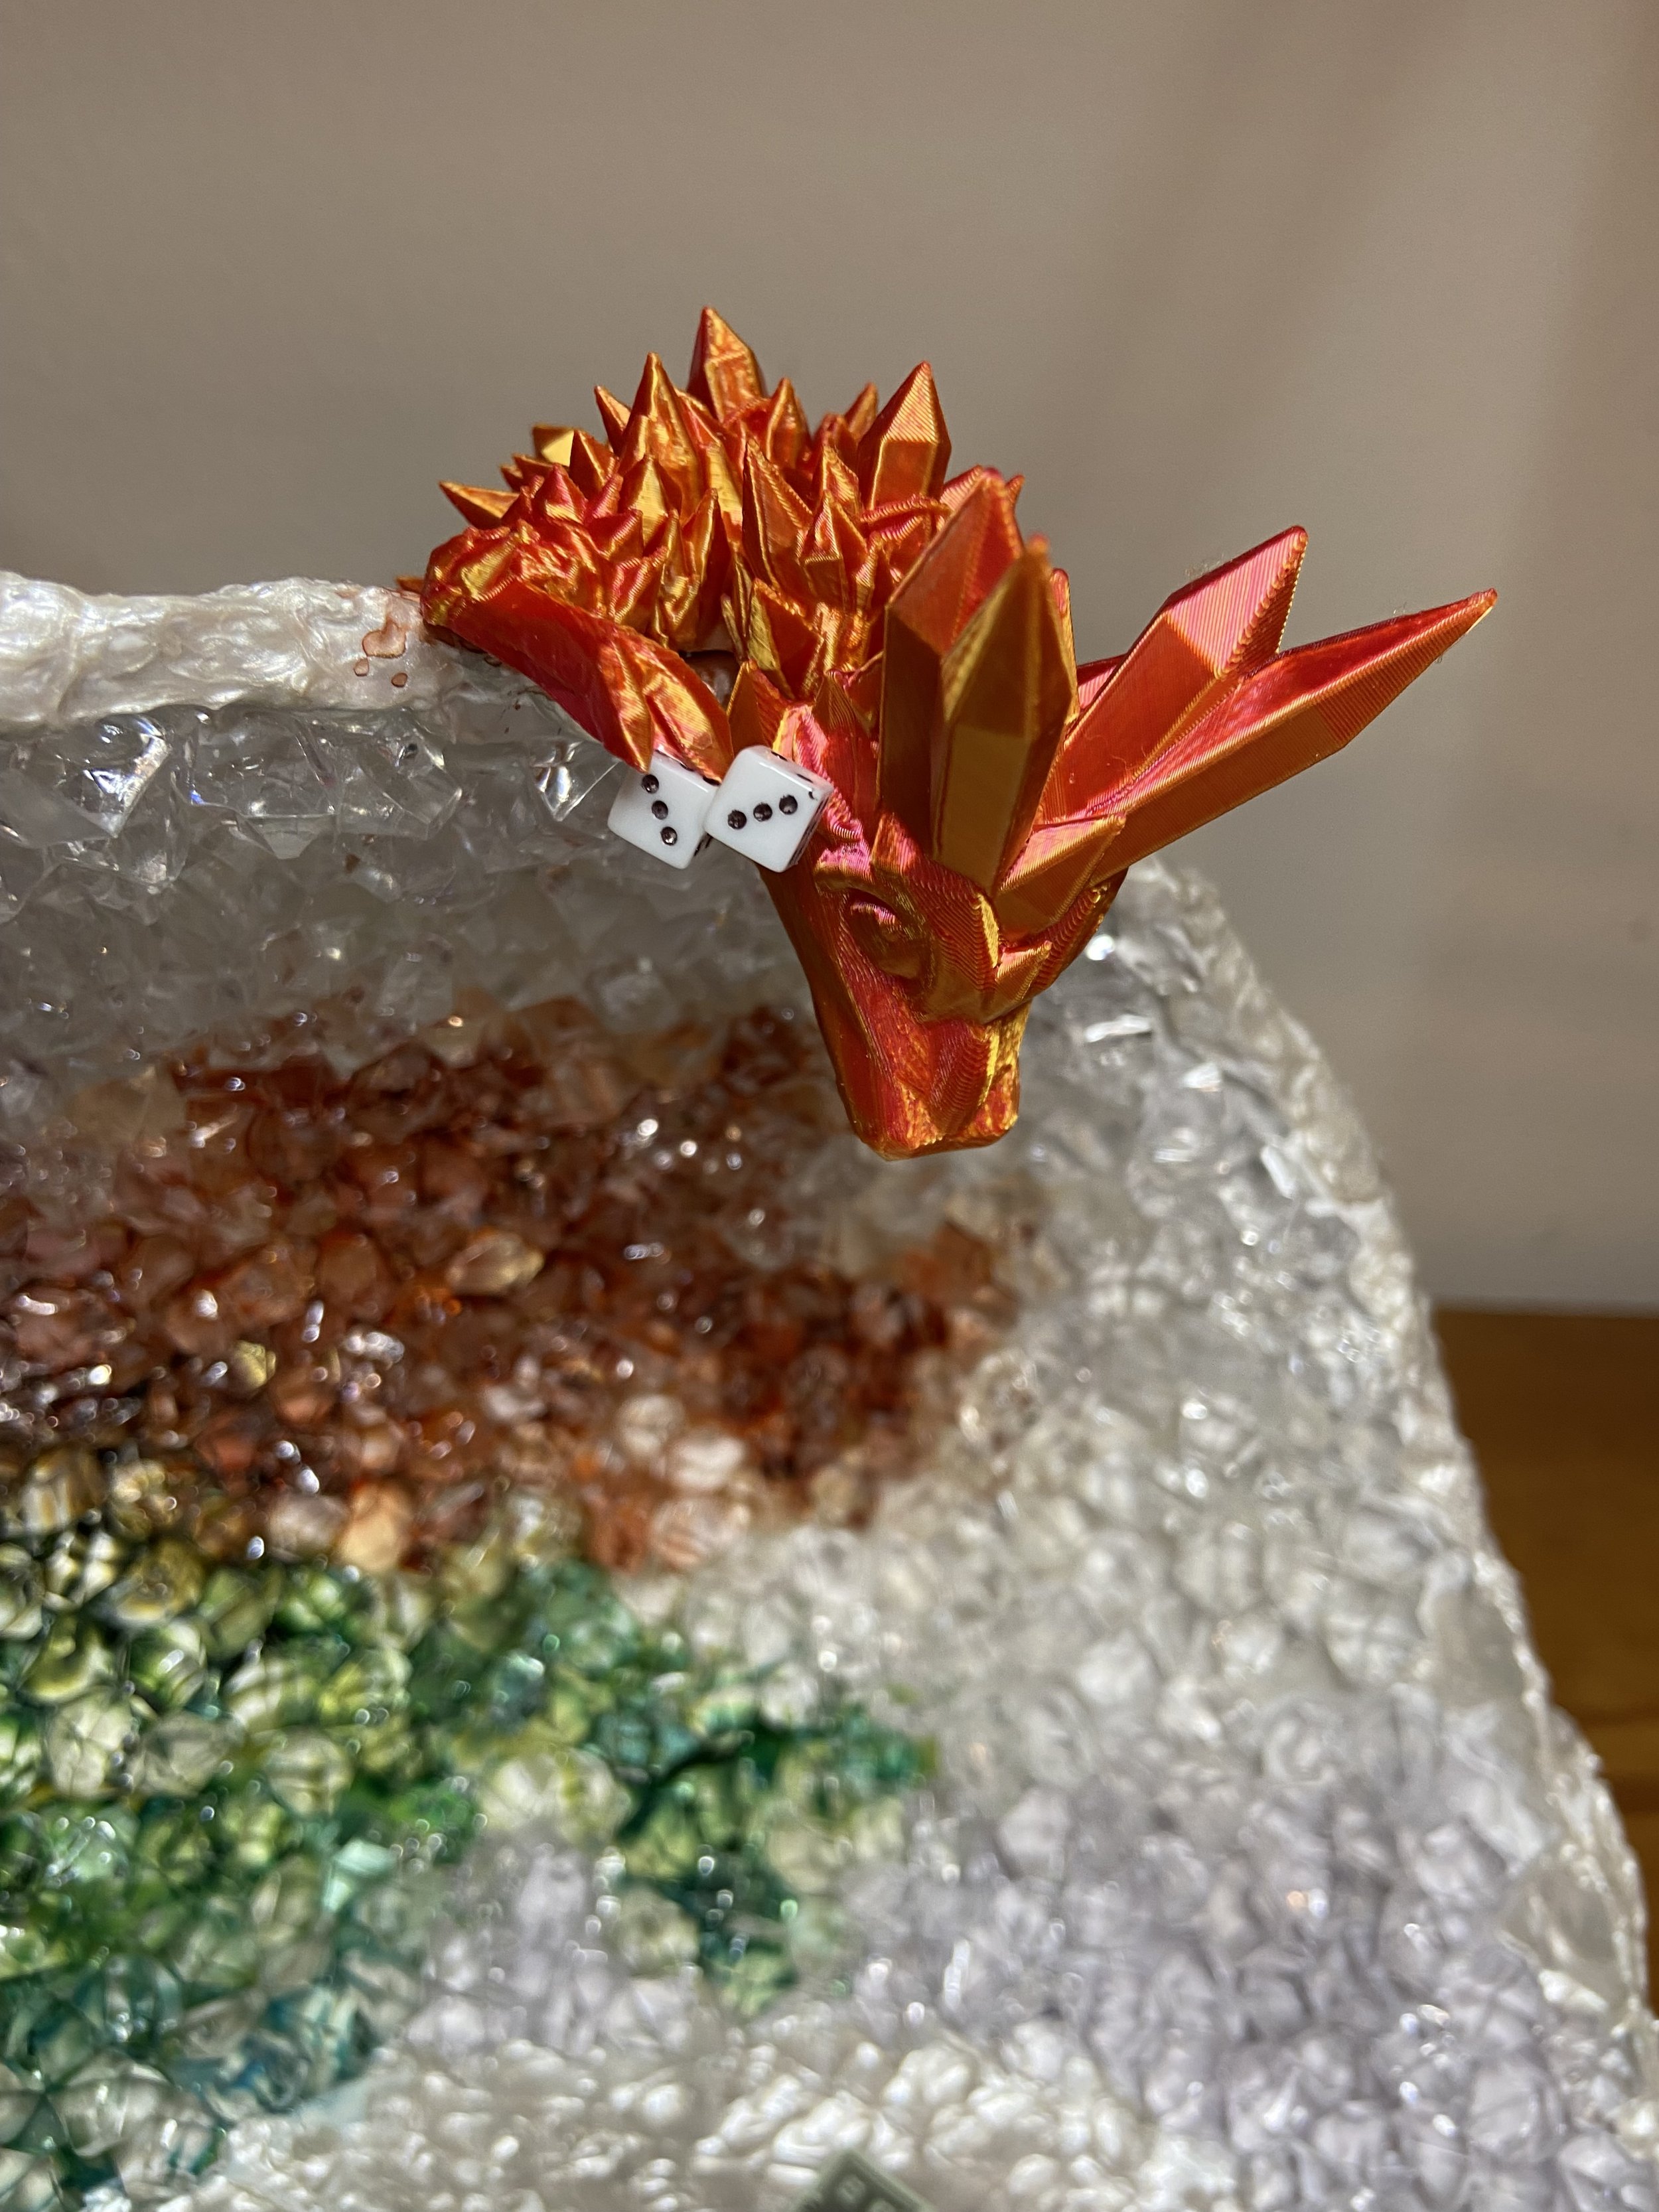
While that was drying, I worked on setting up my Monopoly game. I glued some of the cards onto the board, glued down three player tokens in various positions, and glued down some houses and hotels onto a few properties. This was where I noticed that the proportions of some of the game pieces weren’t quite right. But all my gripes about proper proportions went out the window when I saw the dice. They are absolutely perfect, and so cute!


And then finally, I got to use my white icing paste! I’d been looking forward to this. I dabbed it around the outer edge of the geode cave (where I’d put some modeling paste to make the edges look less edge-y and more rock-y). Then I continued down onto the platform, using my palette knife to give it texture, rather than smoothing it flat. I also applied it to the sides of the Pringles podium and a little on the top (the clear lid) where the Monopoly game would not cover it completely.


While I left this to dry, I considered the fact that my whole geode platform wasn’t laying flat, mostly because the glass base came off and I’d decided not to glue it back on. The geode cave papier-mache edge extended down past the edge of the platform, and in fact, rested on that edge. Over time, I was concerned that this would weaken the connection between the cave and the platform. It needed to be reinforced. I decided to cut a couple pieces of corrugated cardboard and glue them into the space to smooth the transition between cave and platform, and hopefully removed any pressure that was being applied. This actually also leveled out the platform to an acceptable degree.


And then it was time to add the dragons and the game to the geode piece. I used heavy body gel to glue the board to my little Pringles podium, and then glued down various little bits of paper that were the properties and the cash. And I glued the dragons into various positions around the piece. By this time, the whole piece struck me as more comedy than fantasy, so I’d renamed the players Larry, Moe, and Curly.
Moe was first up. I glued my dice together and then glued them to his front foot. While that was drying, I added a little Lindy’s Gang spray to the place where he would sit. Then I glued him over the top edge of the geode cave with his little dice-toting foot extended. My hope was that it would look like the crazy dragon was casting his dice from a height, because…ummm…why not?


Next up was Curly (the purple dragon). I wanted him down on the platform, but I wanted him to look like he was standing on all fours with his head raised. This was challenging because of the many articulated joints in his body. I applied heavy body gel all along his underside and messed around a bit trying to figure out how to keep him in place until the gel dried. I ended up propping his body up with a little piece of wood. To keep his head up, I mashed more gel into his neck joints along the top side, and then propped his head on one of my Lindy’s Gang bottles until everything dried. This did end up working, but I had to leave it overnight without touching it before I could remove my makeshift scaffolding. I also applied a little Lindy’s Gang purple paint to the platform where he was standing, but the Lindy’s Gang paint doesn’t adhere very well to the icing paste, so it’s not really visible.


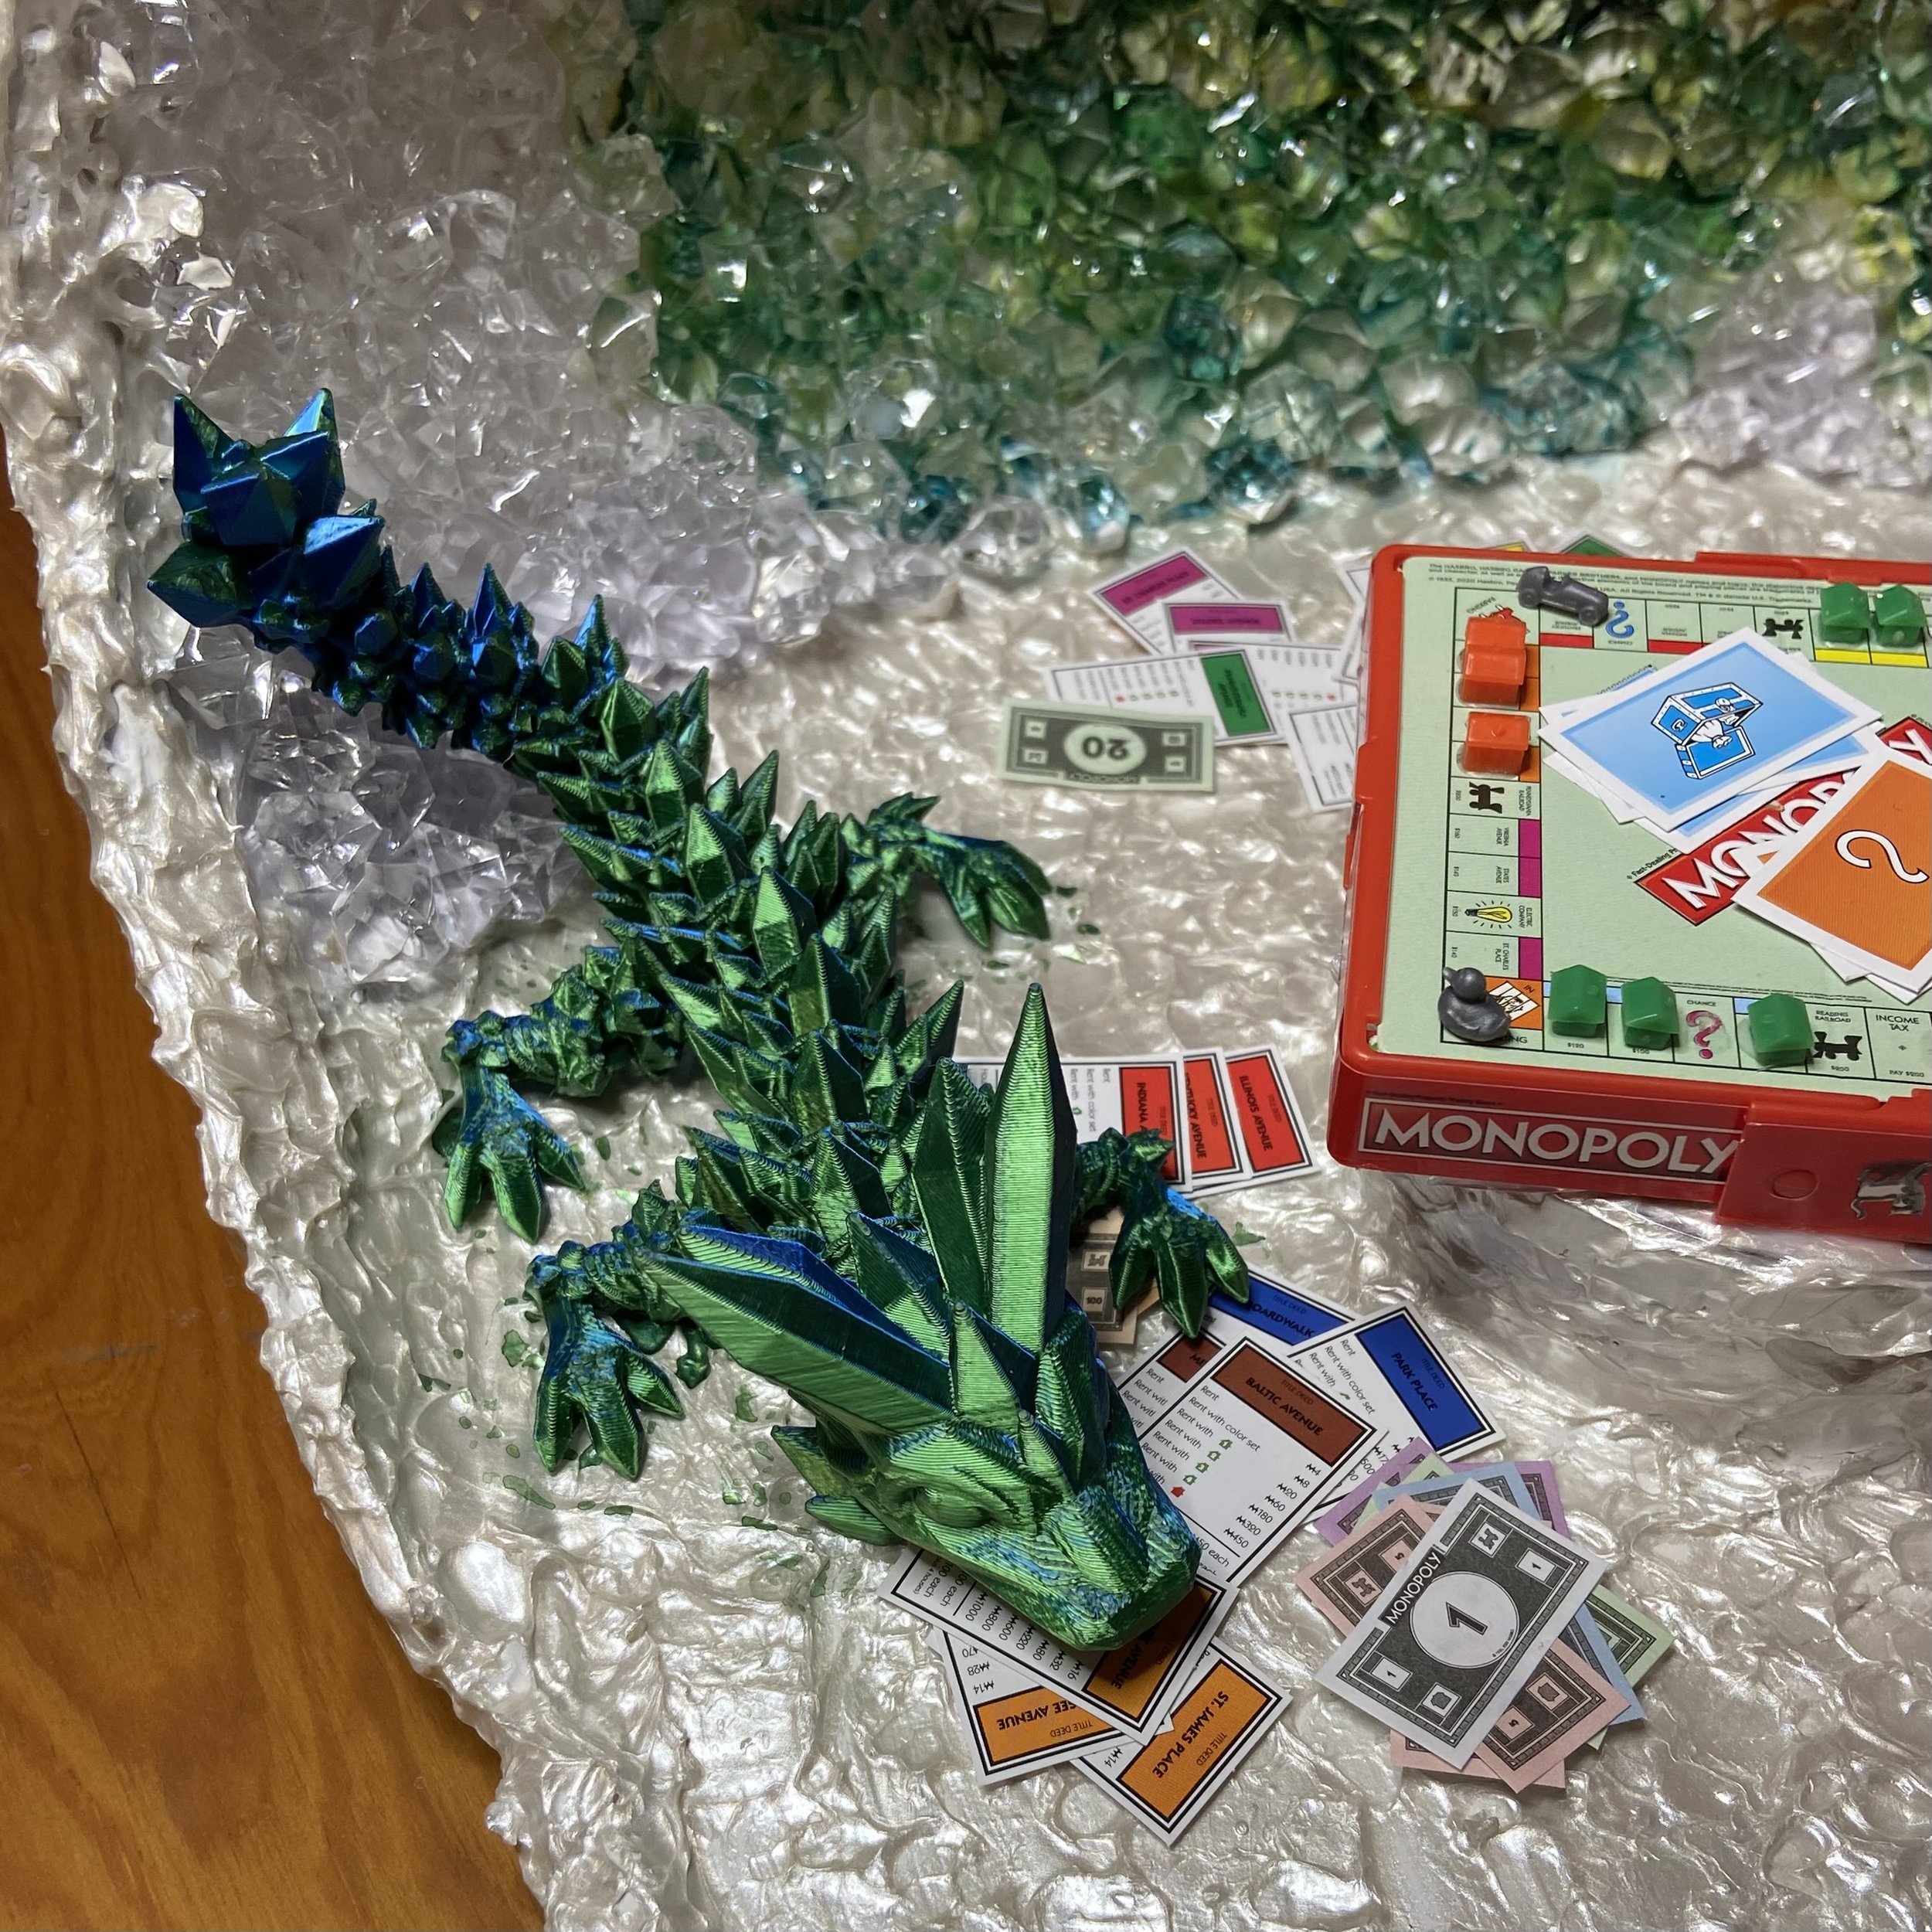
And finally, Larry (the green dragon). I placed him on the platform opposite Curly, with his tail draped a little up the crystal wall of the geode cave. I positioned him flat on the platform, so he was much easier to glue down.
And…done! It’s not quite what I envisioned, and it’s hardly high art. Okay, nothing I make could reasonably be considered high art, but I’m quite proud of a couple of my pieces. Just not this one. Nevertheless, while it does not make my heart go pitter-pat with joy and delight every time I see it, it does make me smile. And it does make me happy. And it does tickle my sense of humor. And all of my mistakes and detours notwithstanding, it was fun to make.
