Adventures In Book Nookery
As an Amazon associate, I may earn a small commission if you navigate to Amazon from my site and buy something. This will not result in an extra cost to you.
I keep a list on Amazon. Well, I keep a lot of lists. I keep a list of gift ideas for each of my family members, I keep my own personal wish list of things I’m considering purchasing, I keep a list for each blog project I do which uses a lot of Amazon products. And I keep a gift list for myself of things that I would like to have but can’t really rationalize purchasing for myself. If someone asks me what I want for my birthday or for Christmas, I can just give them access to the list. It’s handy.
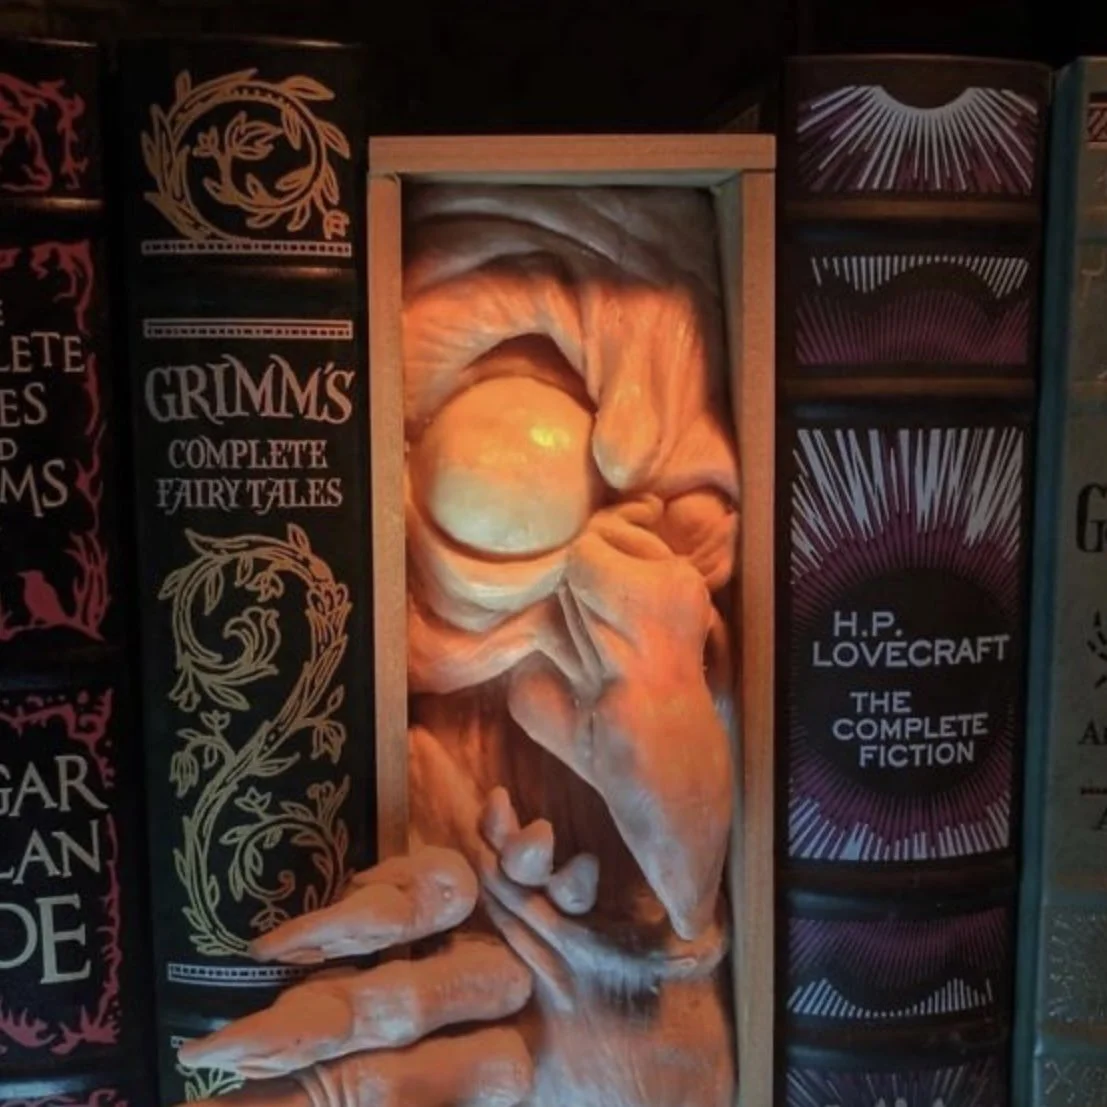
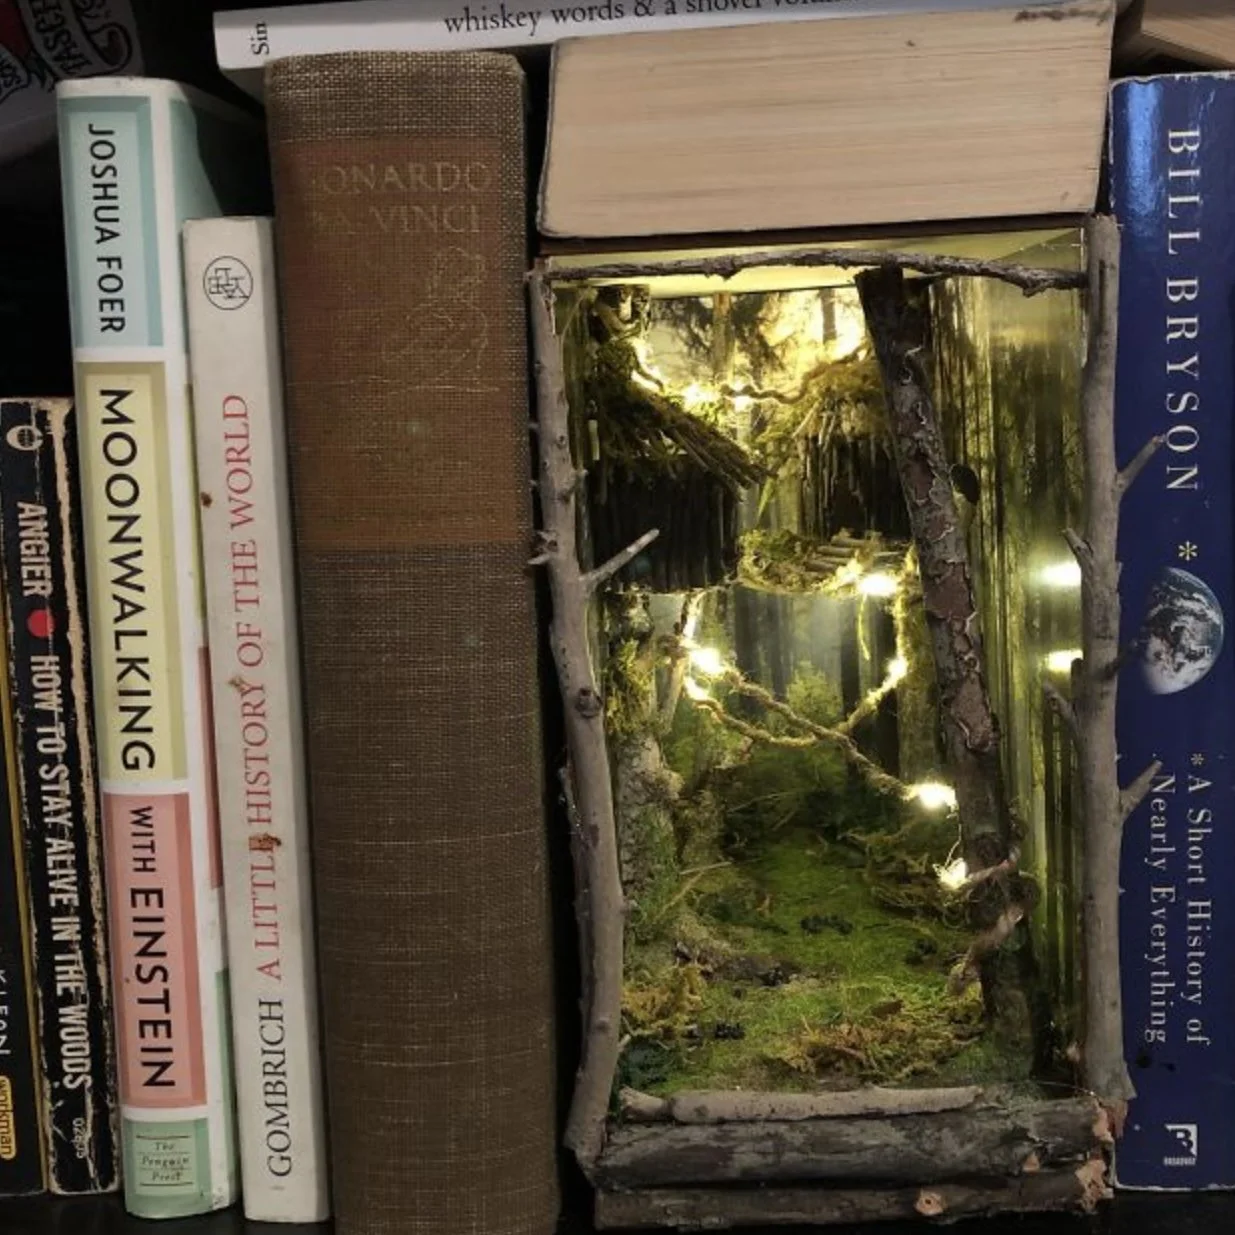
One item that’s been on my personal gift list for a couple years now is a book nook kit. What’s a book nook? Oh, it’s a little installation that sits on your bookshelf between stacks of books and which has a little scene inside. It can be anything. From modern street scenes to various types of libraries to Lovecraftian horror to forest scenes, there’s surely something for every bibliophile.
I finally gave up on the idea that anyone was going to buy me the book nook in my list, and bought it for myself, my rationale being that I could get a blog post out of it as well as a lovely addition to my bookshelves. (Rationalization: a key human skill for survival.) The kit I bought is from China (I think…or possibly Japan) and is quite lovely. It’s called Library of Books (not the most inspirational name) and I have yet to think up a better name for it myself. It’s not that I can’t think of anything…rather that I can’t narrow down my many choices. Oh well, that’s a problem for future me. (Kicking the can down the street: another key human skill for survival.)
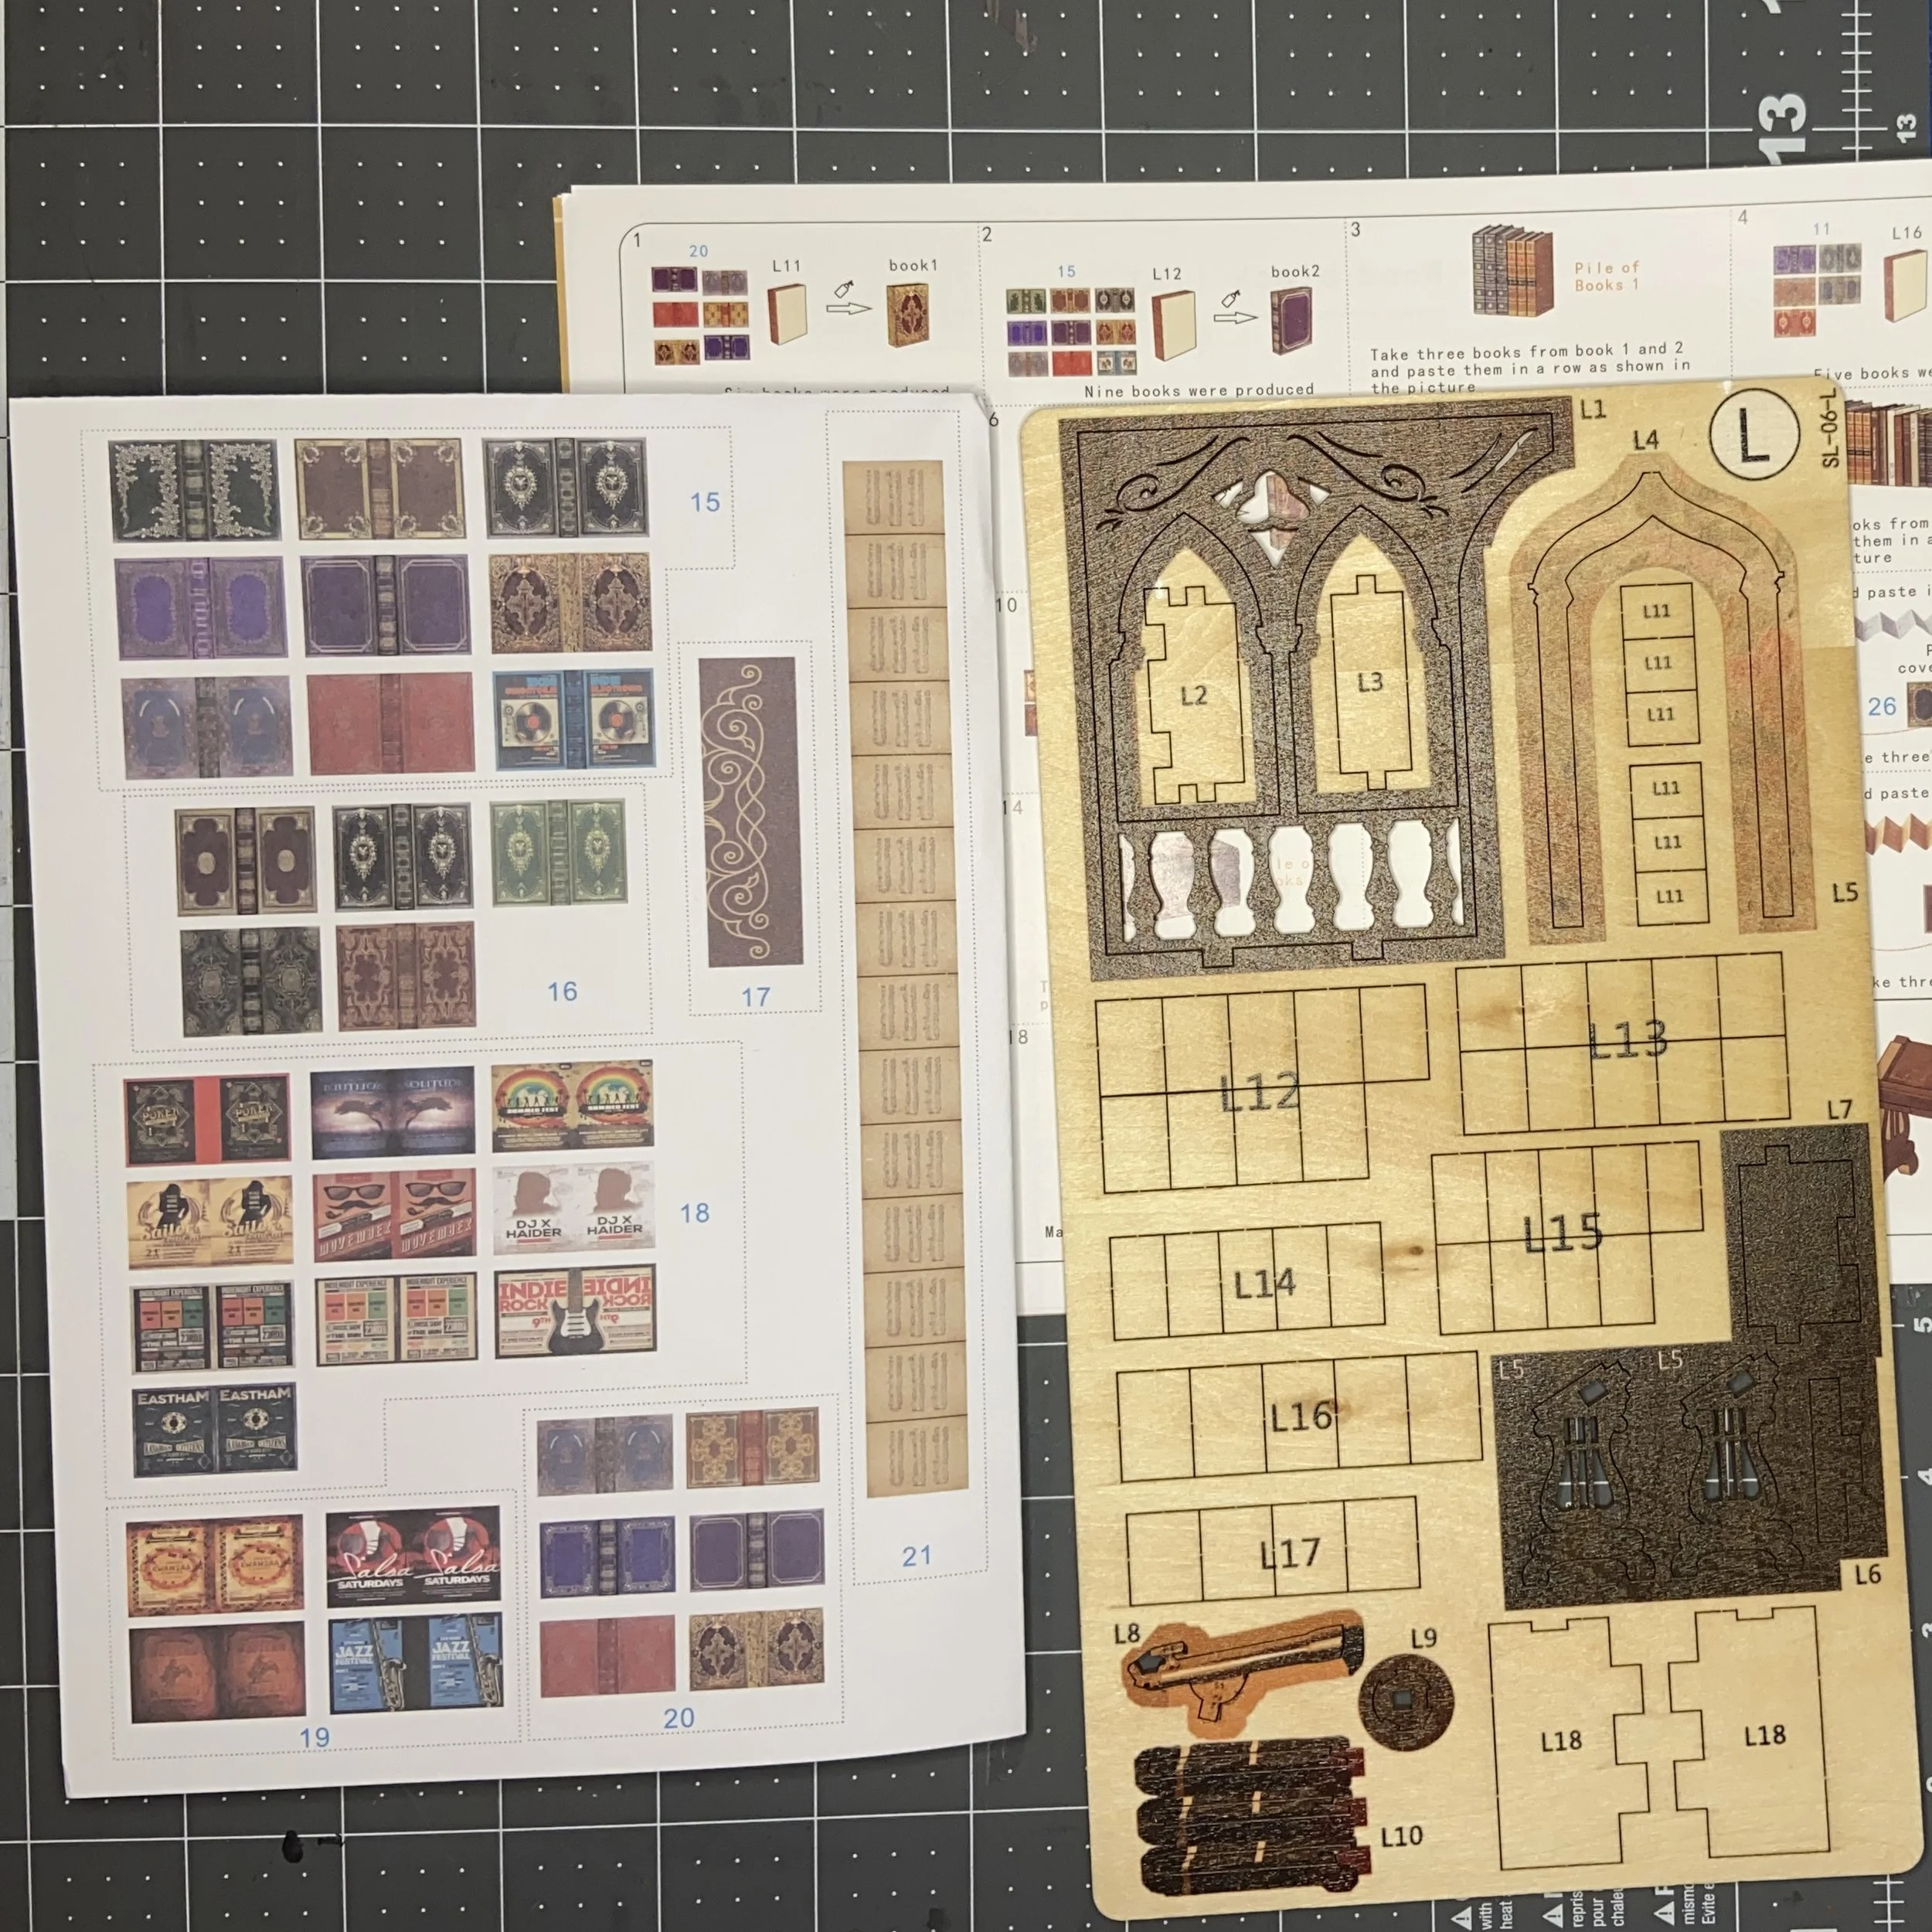
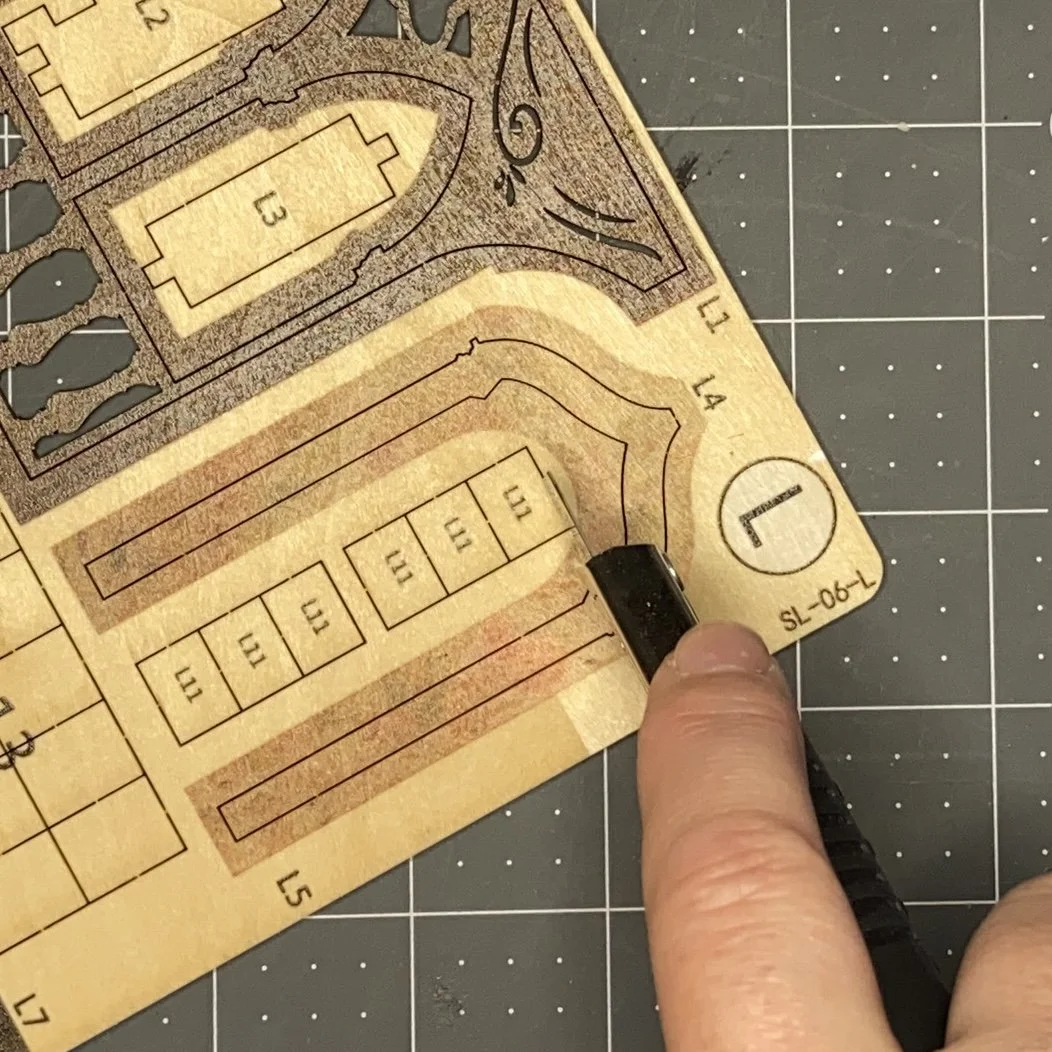
When I got the kit and opened it up, I found illustrated instructions (heavy on illustration and very light on actual words), multiple sheets of MDF with pictures printed on them and shapes stamped out of them, a utility knife, some cheap but very sharp small scissors, a clear plastic ruler, a tiny nail file, a sheet of printed images, the lighting kit, and a few other bits and bobs. Each MDF sheet is labeled with a letter, and each image/shape on the sheet is labeled with that same letter and a number. The sheet of printed images had the images grouped and numbered. With the instructions, this all seemed pretty straight forward. I did do a YouTube search before I started this project, to see if anyone had done a visual tutorial. I only found one and it was somewhat (okay, not very) helpful.
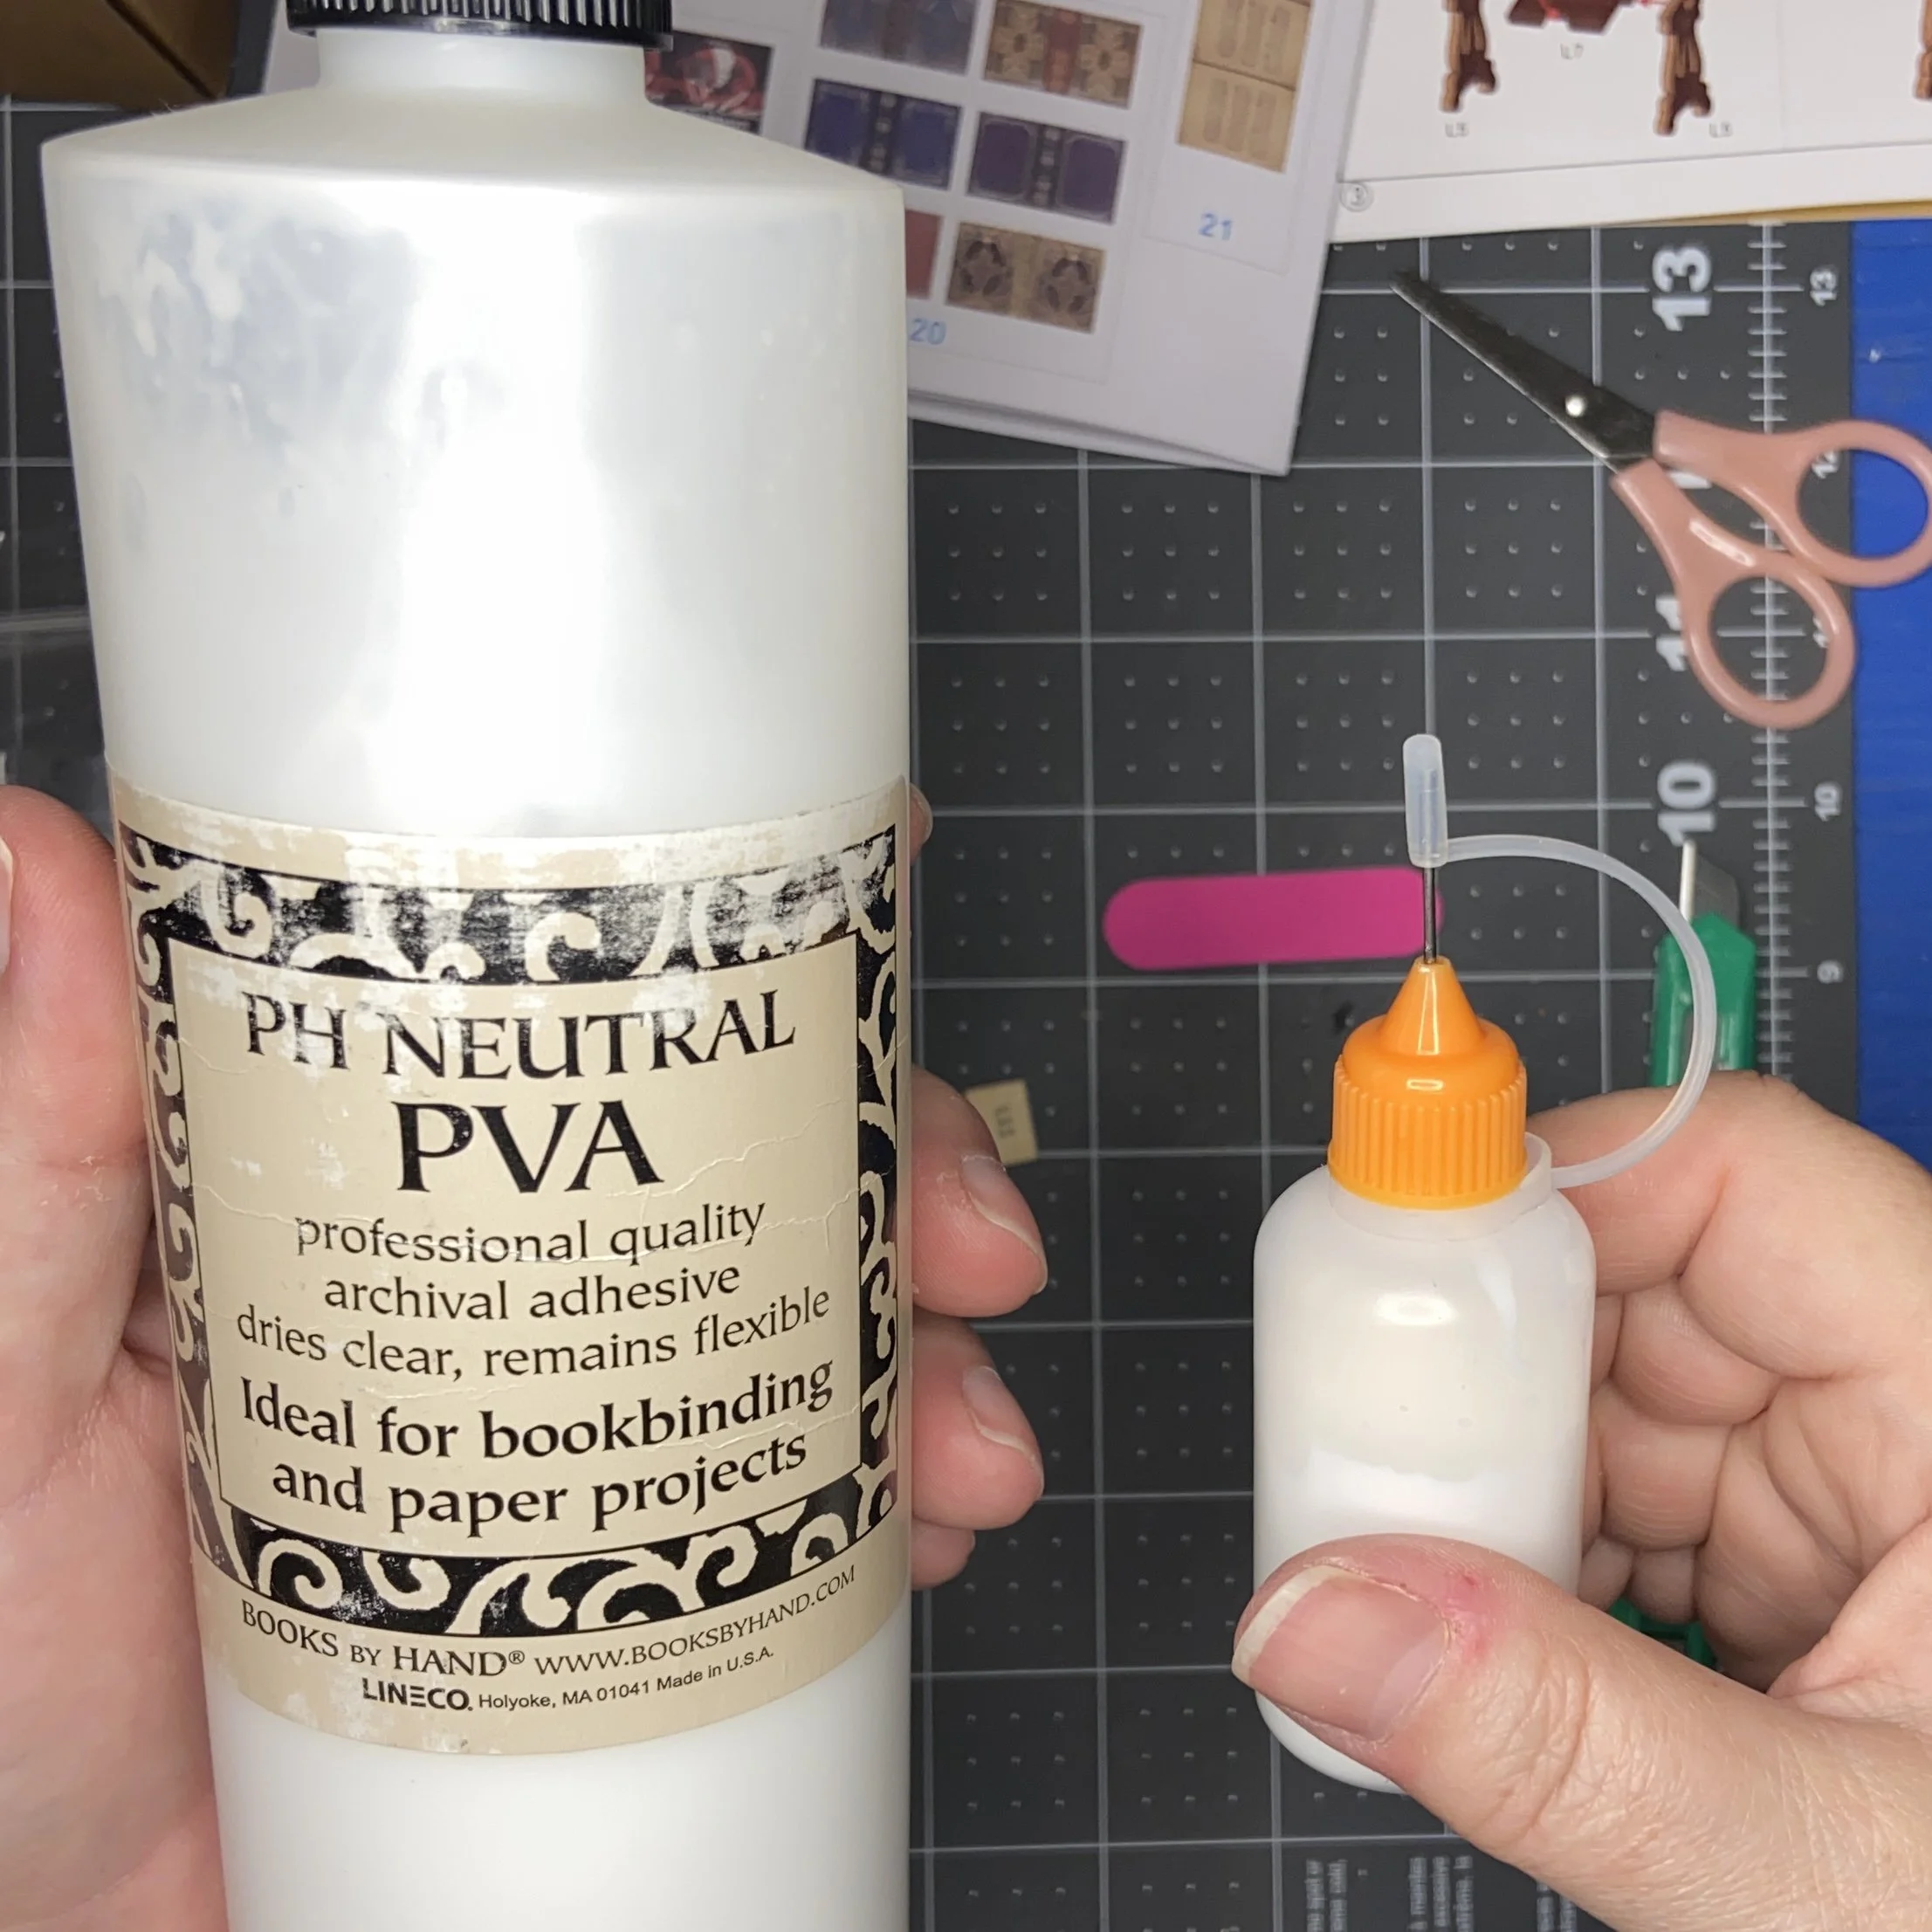
I started following the instructions step by step, which meant I started by making books. The instructions don’t actually say to use glue, but it’s clear that glue was needed but was not included in the kit. I opted to use my bookmaker’s glue, dispensed from one of the precision-tip applicator bottles I’ve had for years.
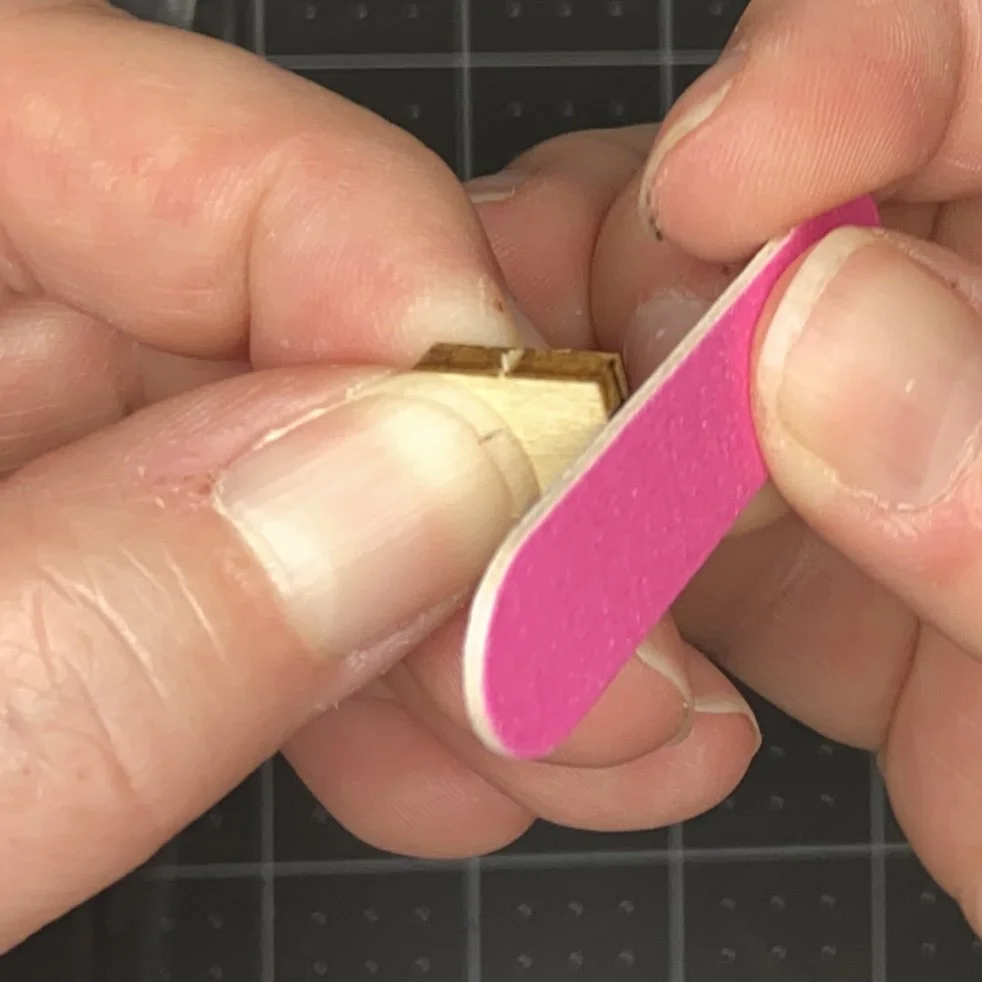
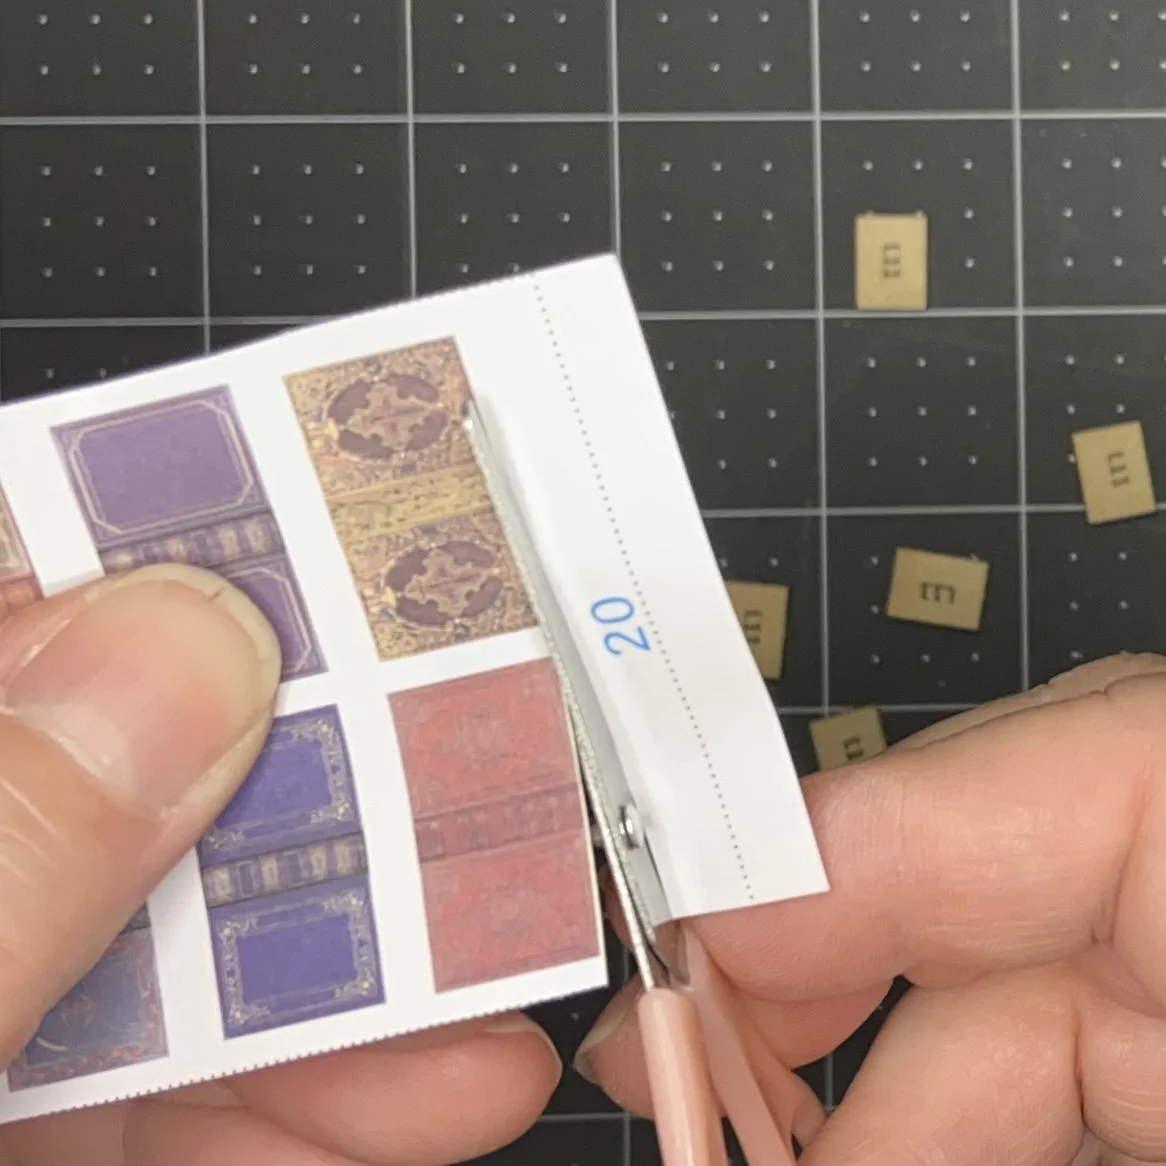
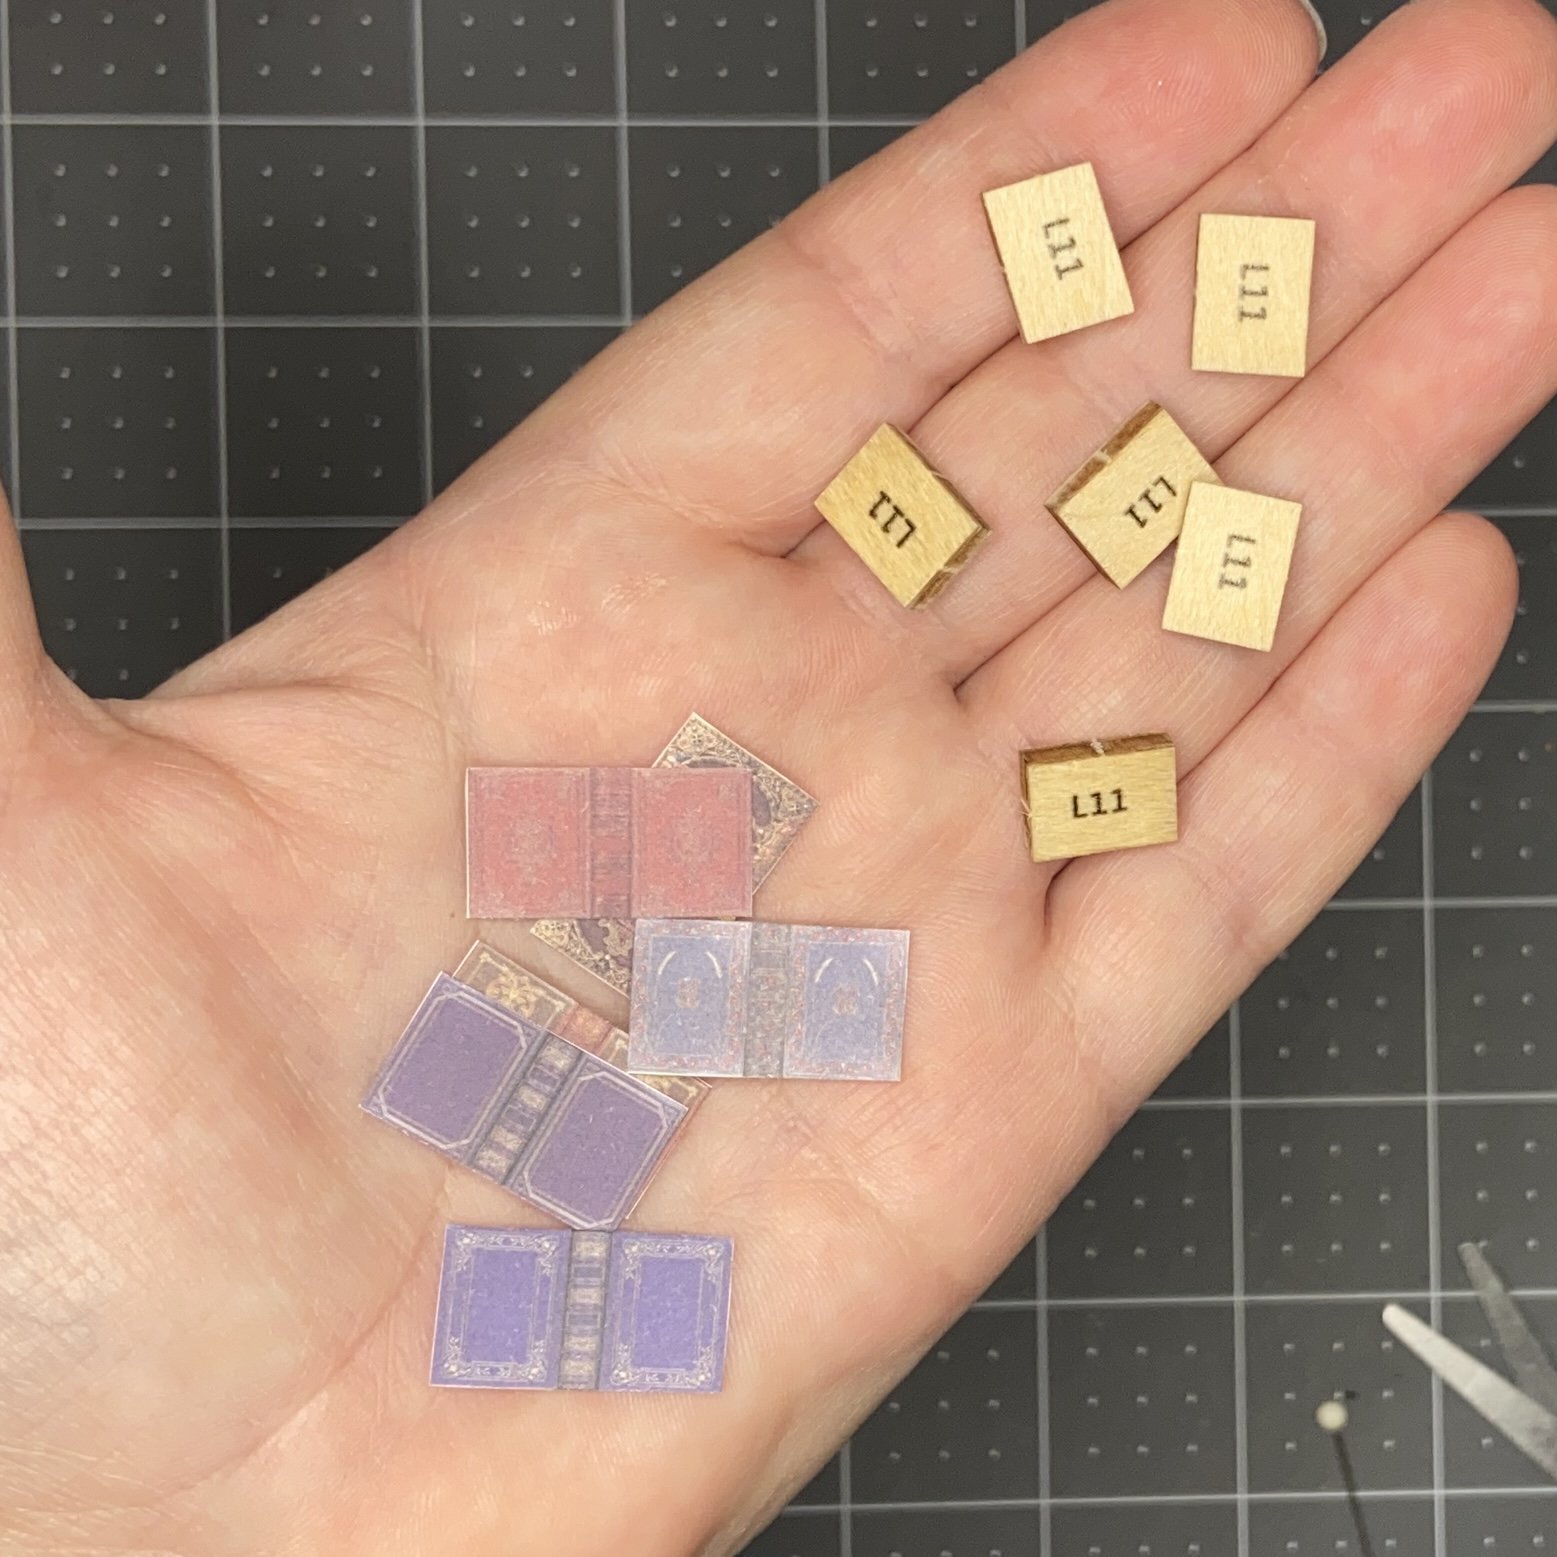
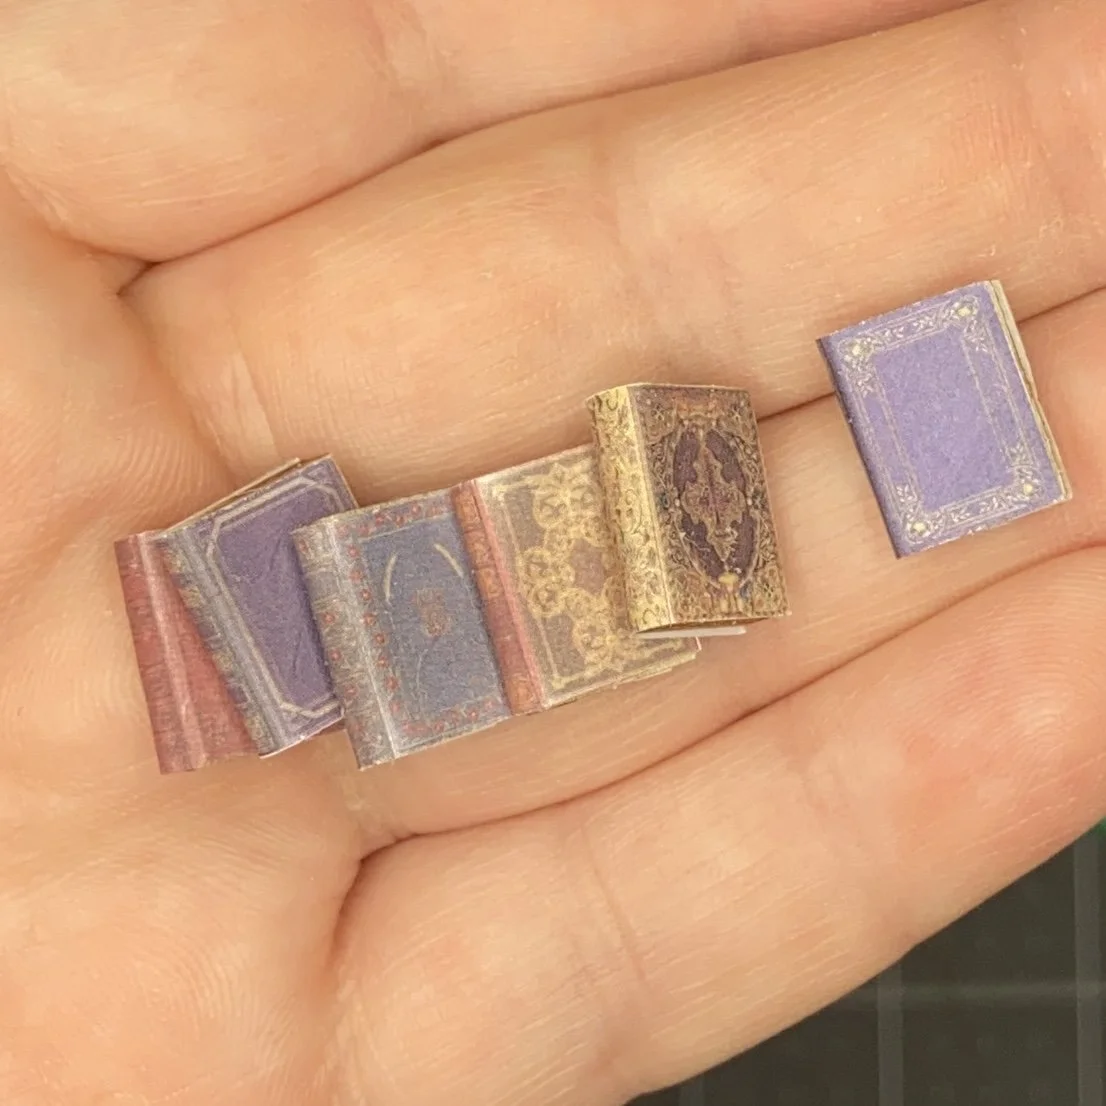
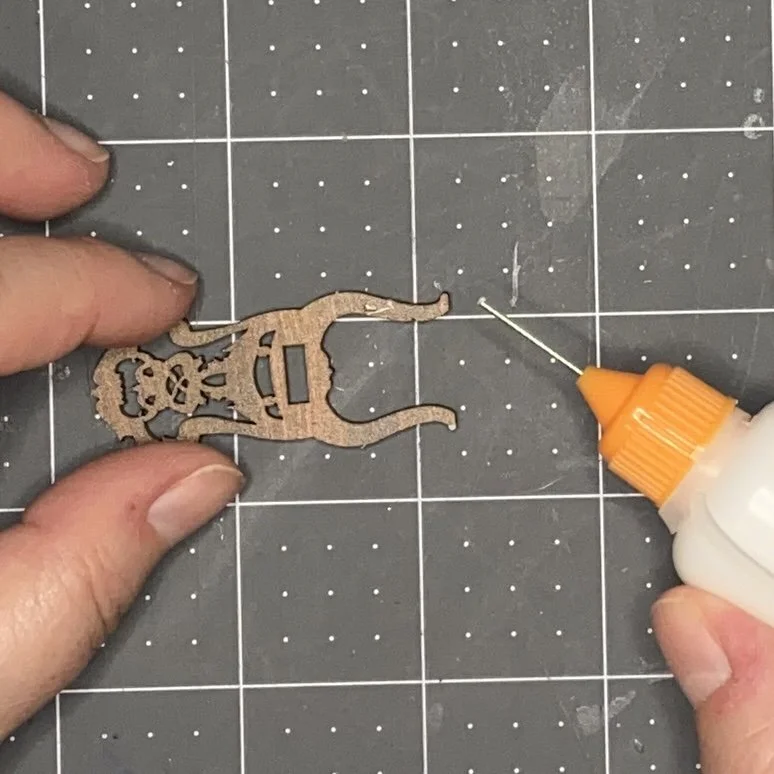
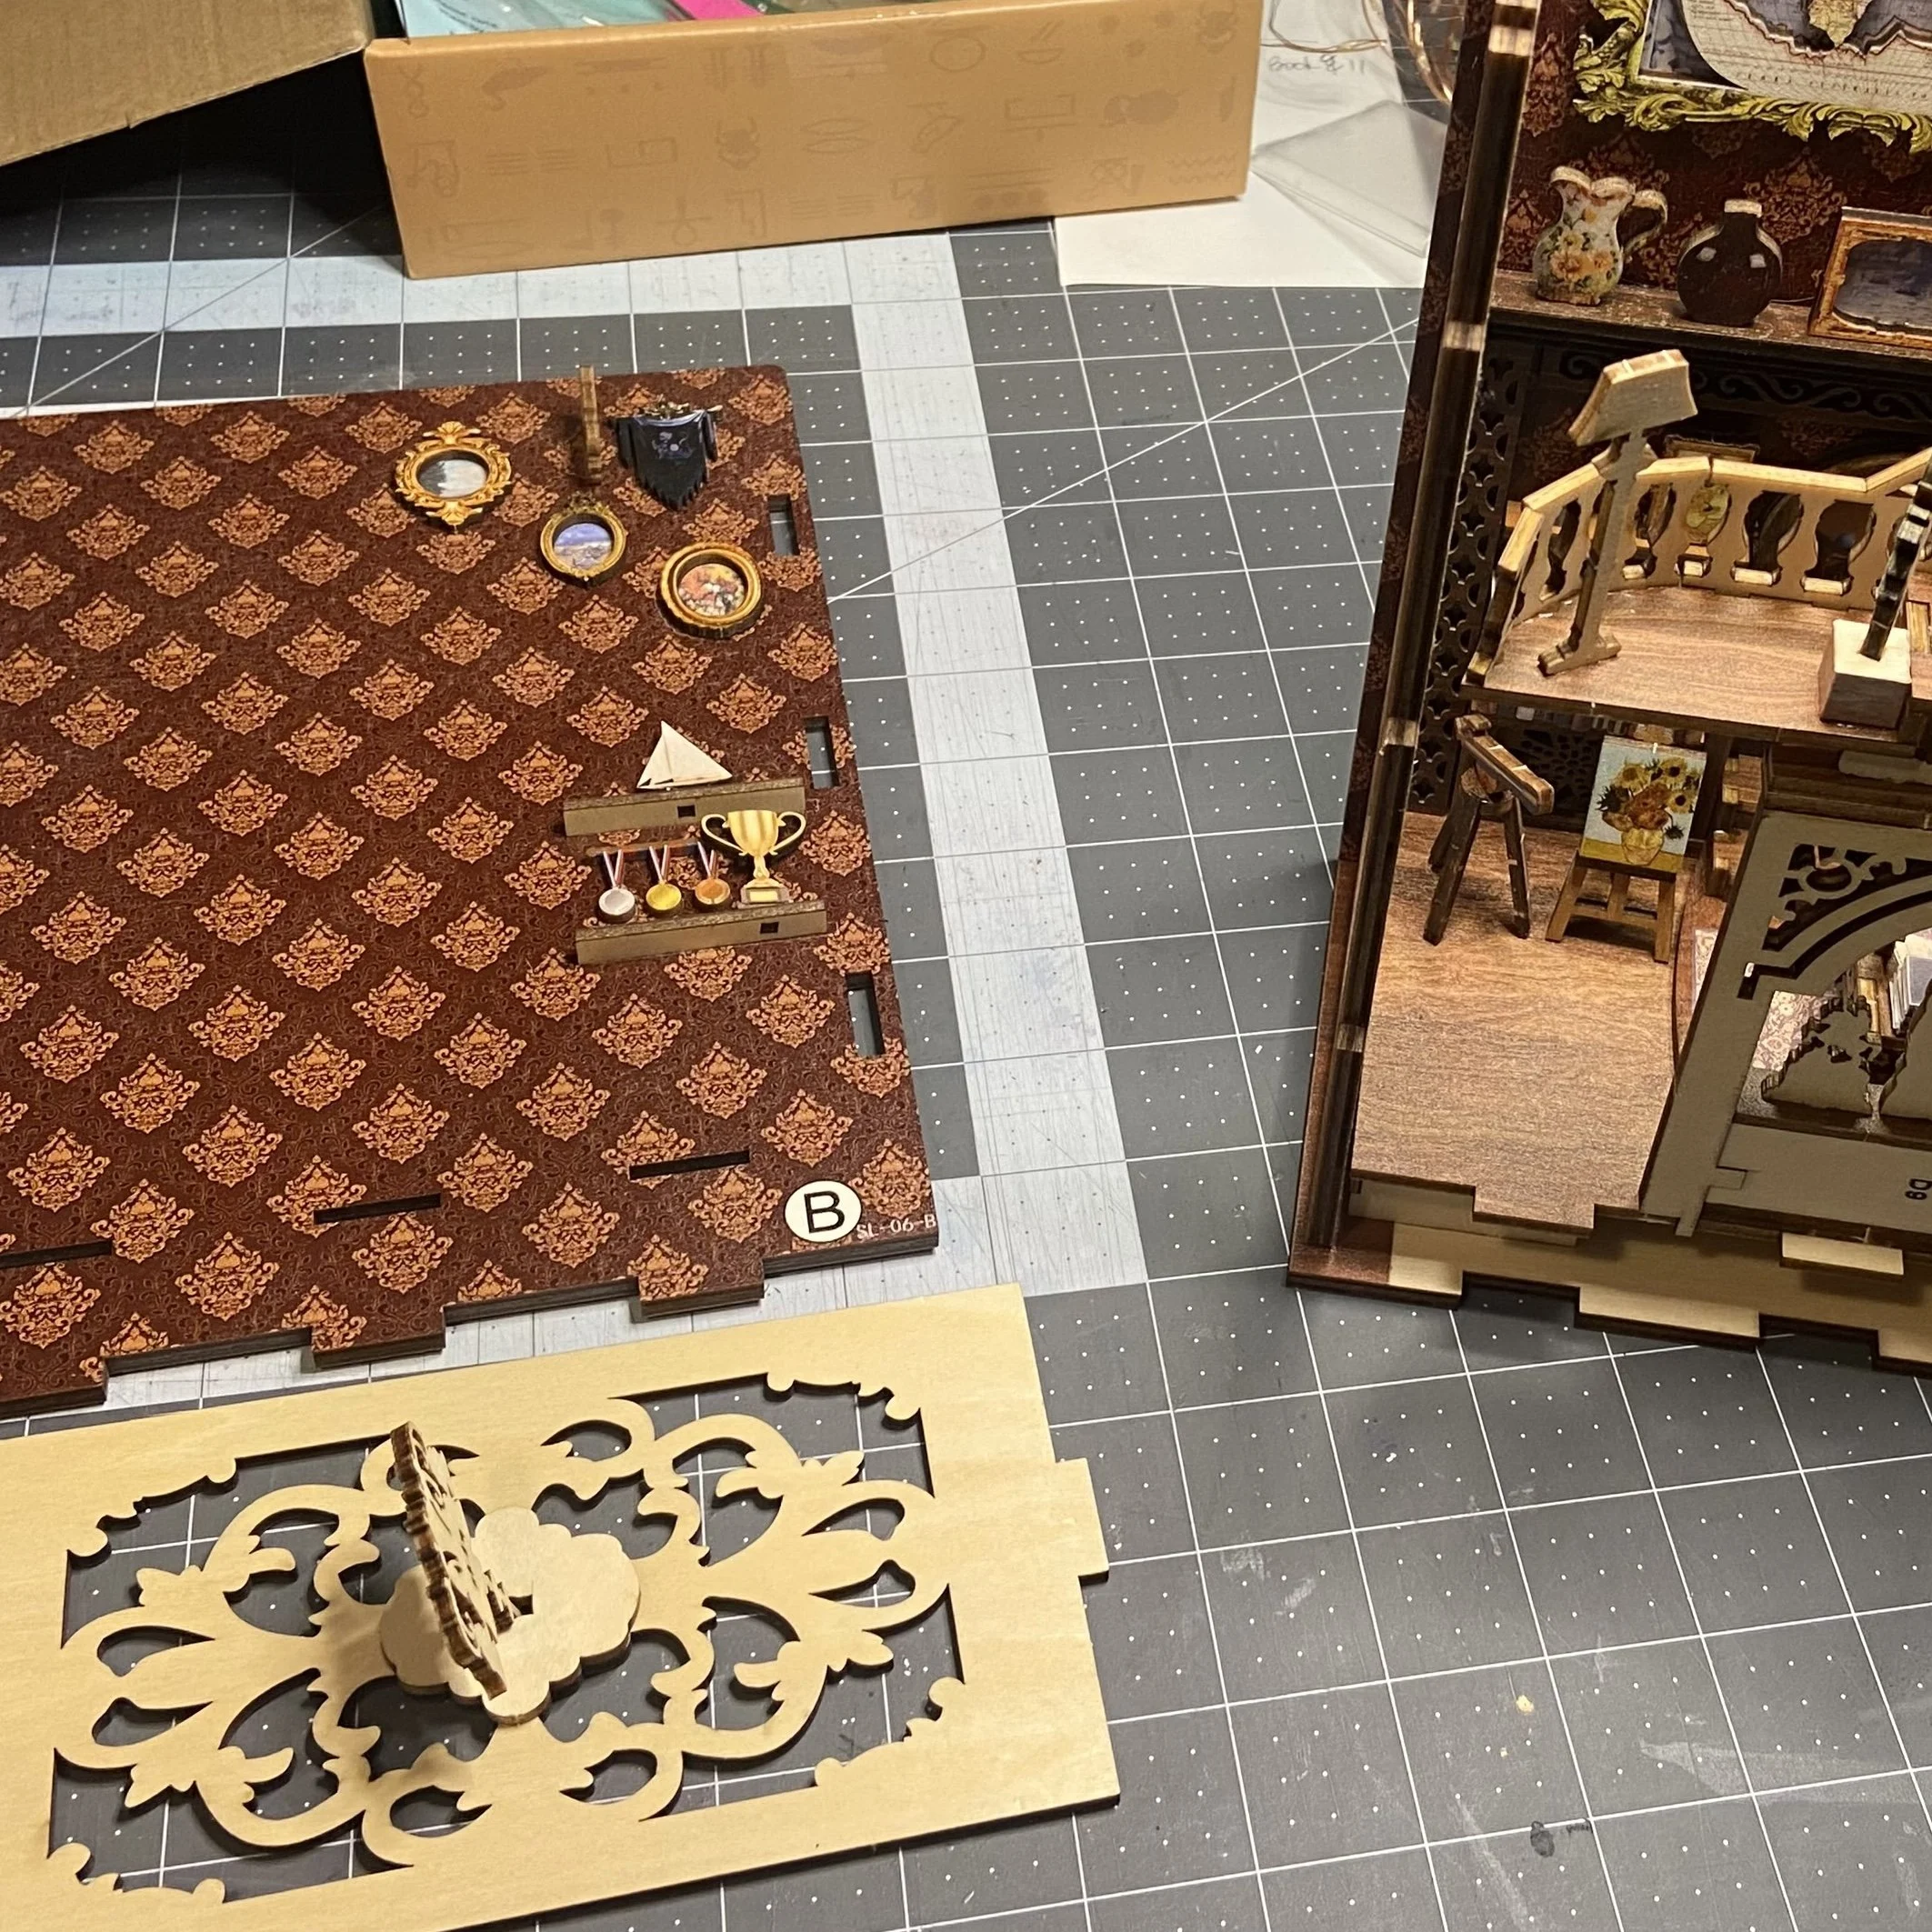
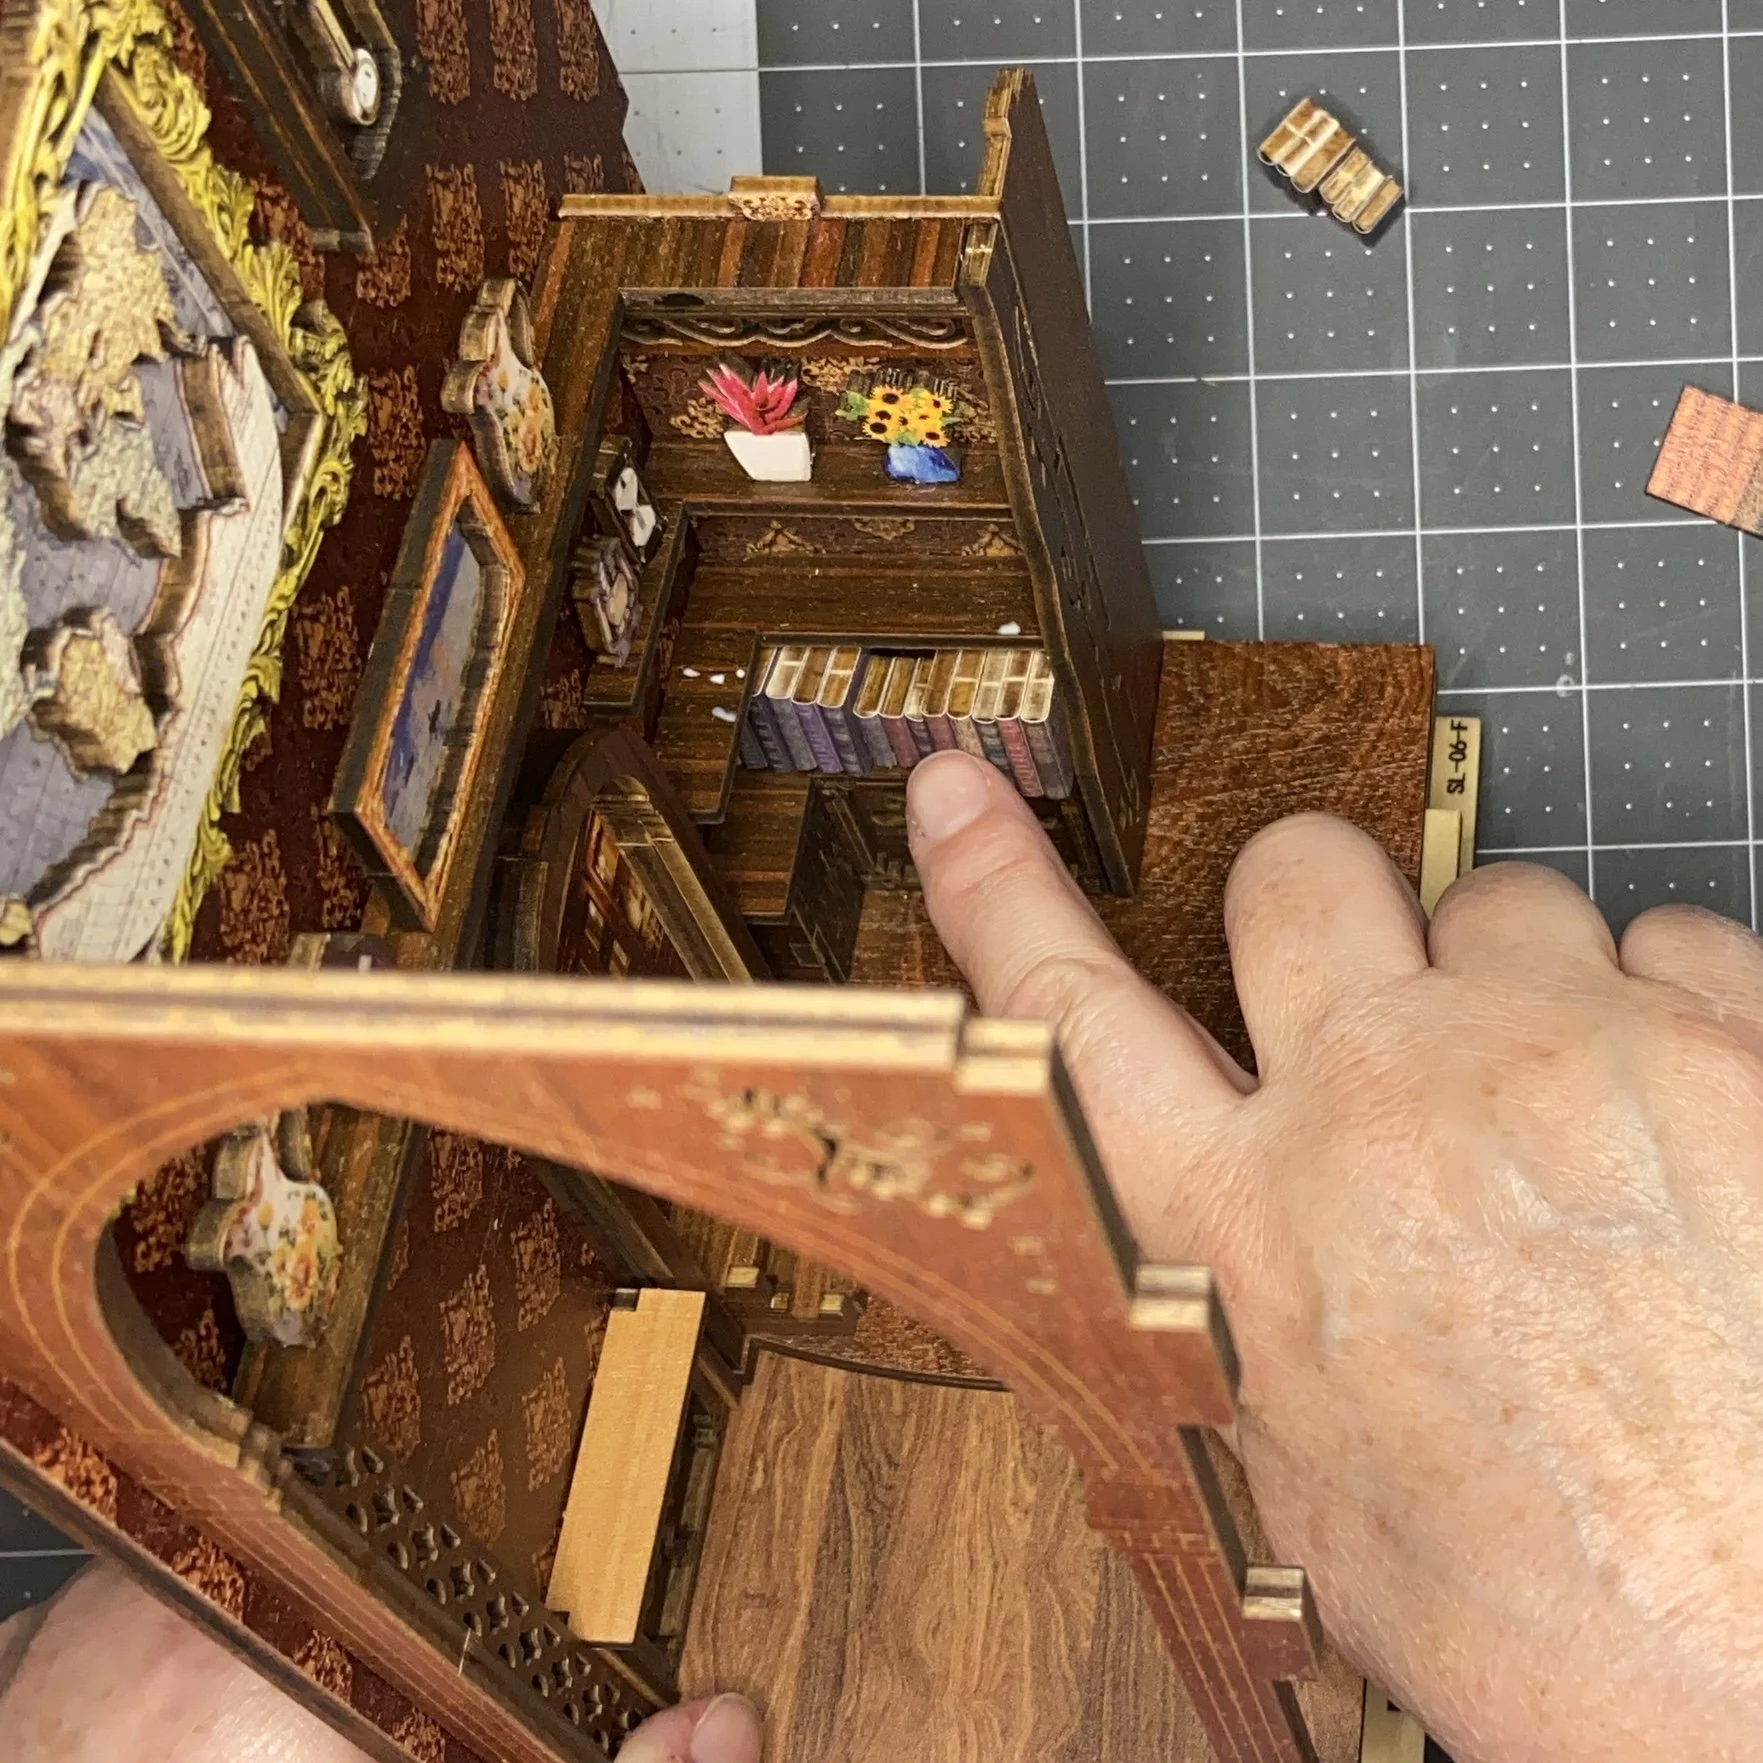
The first step instructed me to take the MDF pieces L11 (6 of them) from their sheet, which required using the utility knife to carefully sever the tiny bits of MDF still holding the shapes in their sheet. Then I used the little nail file to rub away any rough edges that were left. Once the MDF pieces were ready, I cut out the book covers as directed, which meant I cut the 6 book covers out of grouping 20. After that, it was easy to glue one cover onto each wooden book shape. I started on the second grouping of books and then paused to read ahead in the directions far enough to realize that I would be making a bunch of books and then glueing them into groups. So I set aside a piece of paper and labeled them as per the directions (book 1, book 2, and then later pile of books 1, pile of books 2). I’m very glad I thought to label them because once I had a bunch of groups, I wouldn’t have easily been able to figure out which grouping was which if they weren’t labeled. When I’d made all the books and glued them into their groups, I had 2 books left over. I’m sure I’ll think of something to do with them…

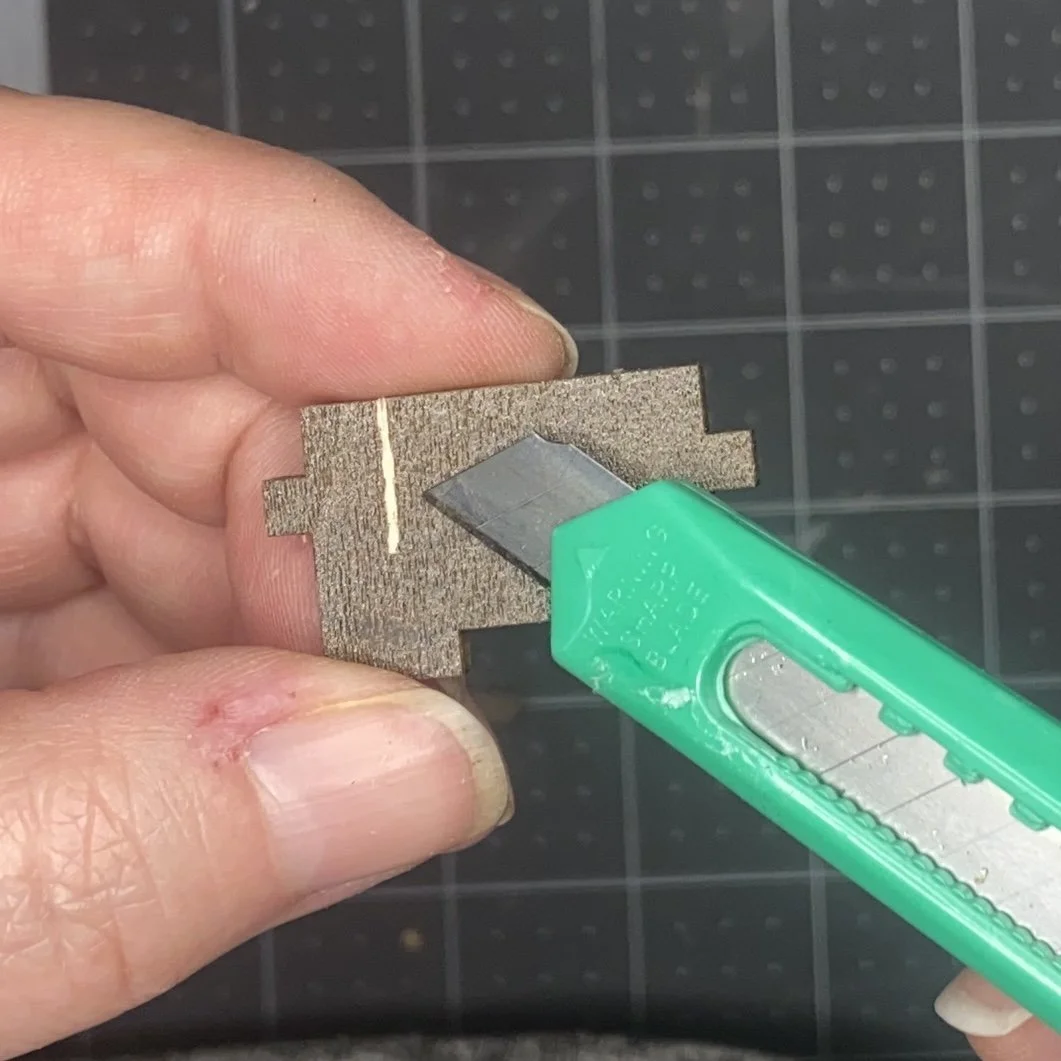
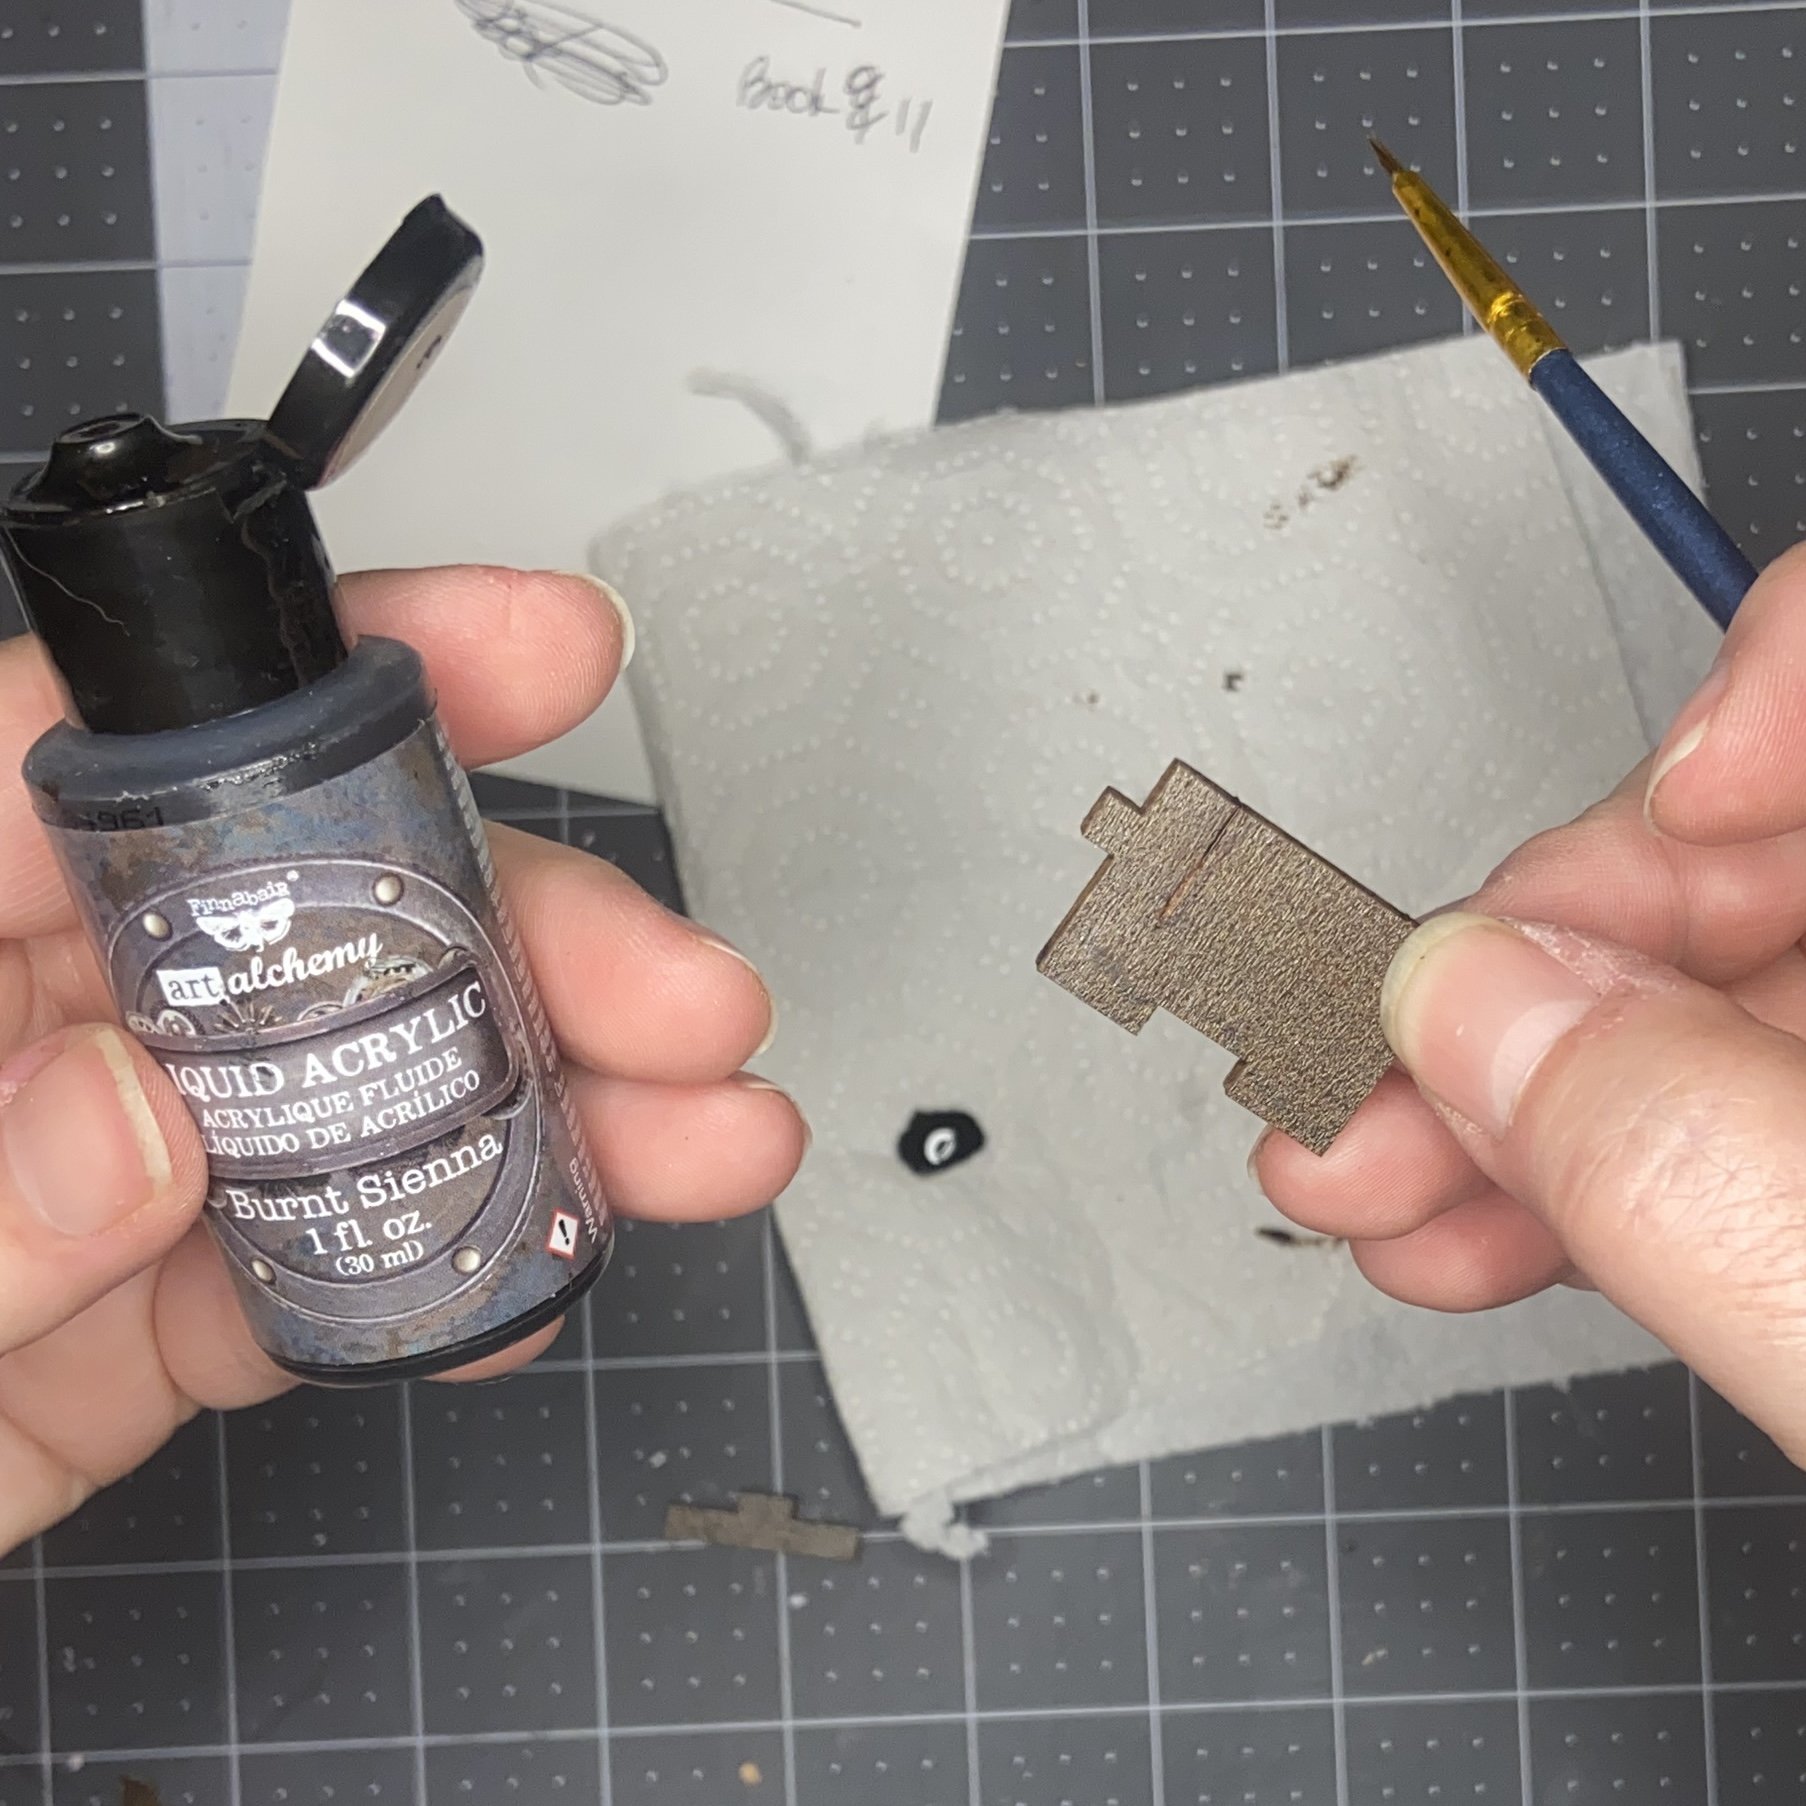
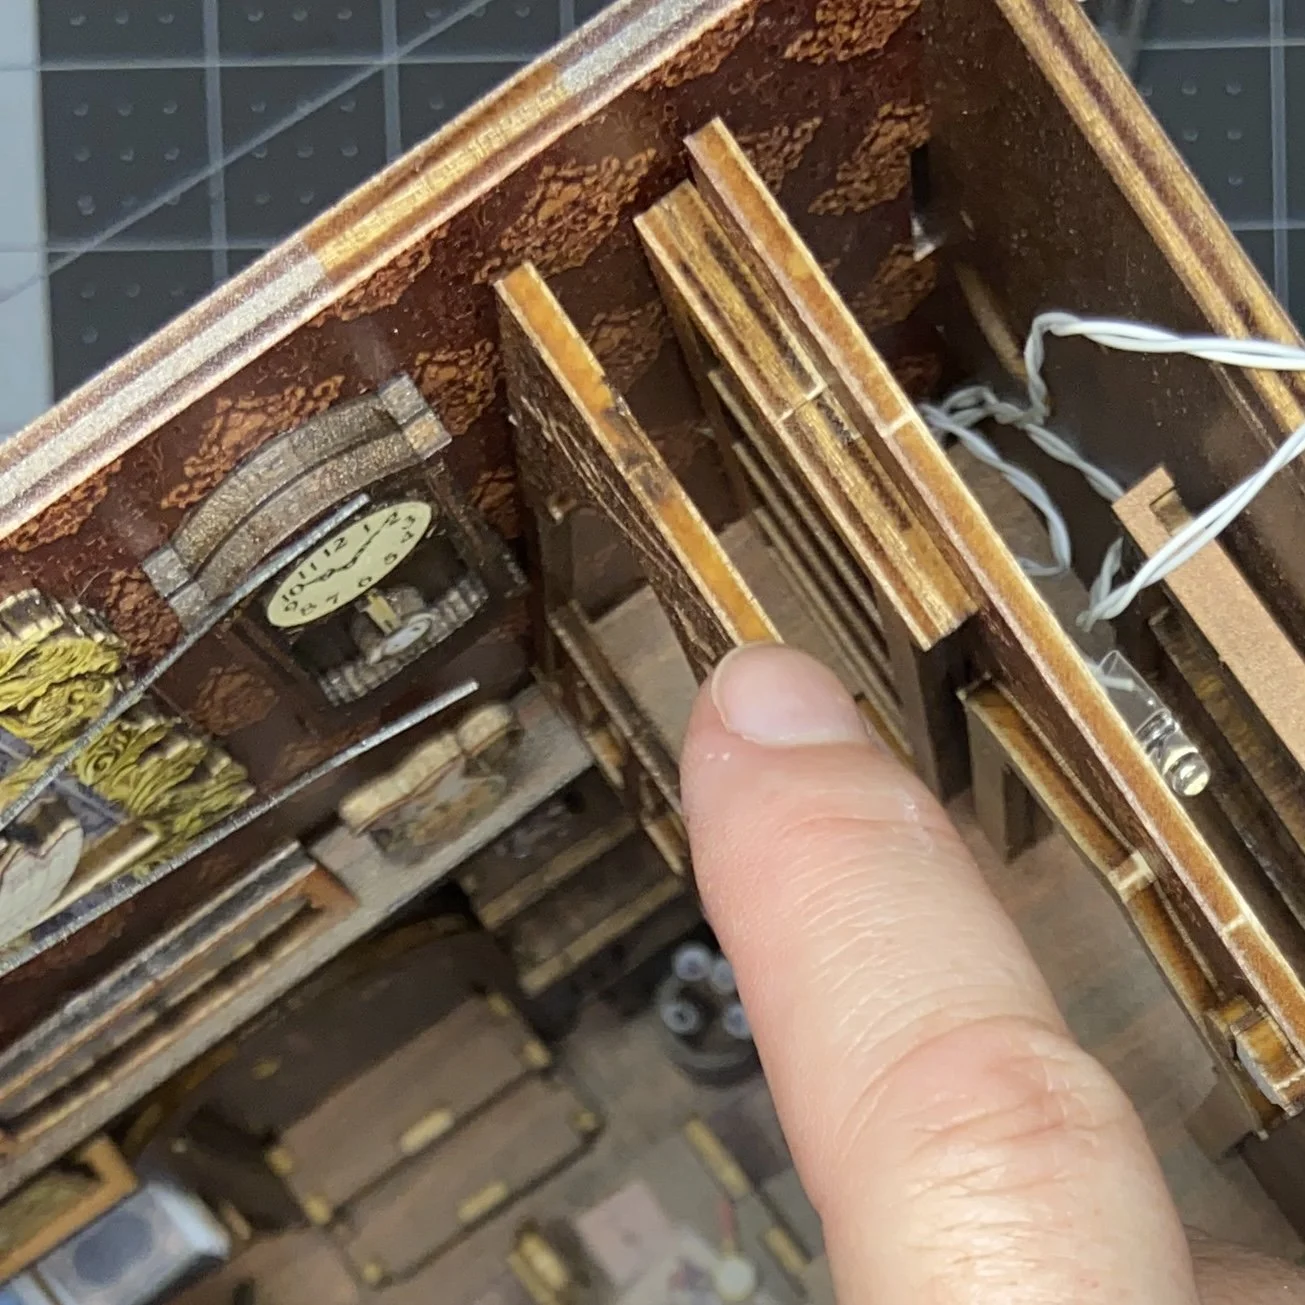
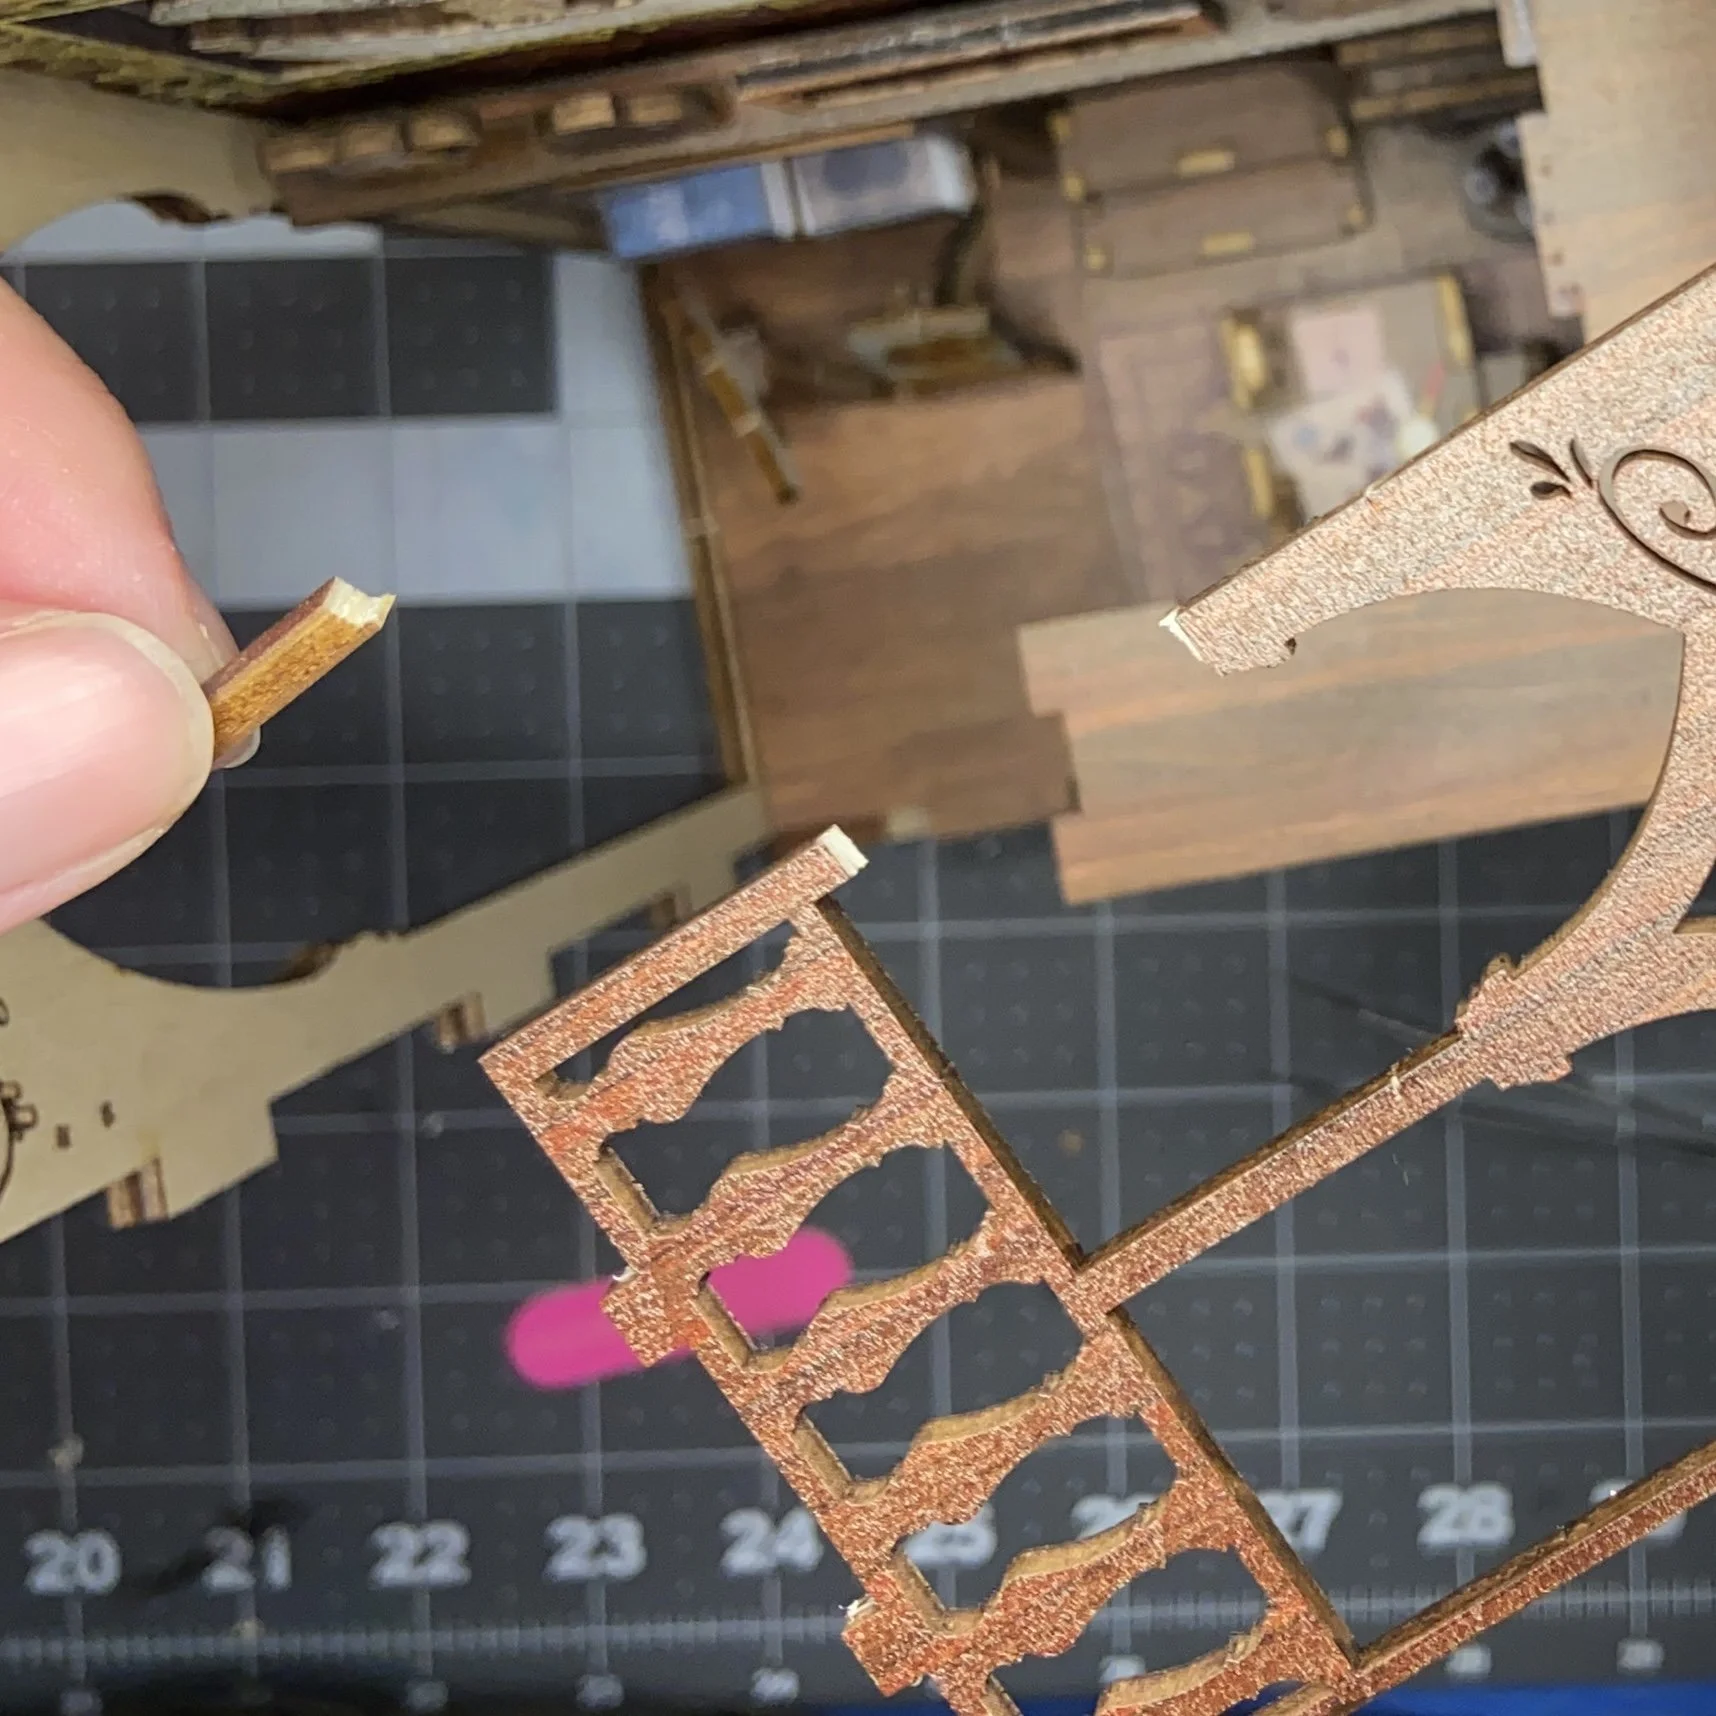
Then on to all the other premade pieces, mostly furniture. In prying some of the MDF pieces out of their sheets, I sometimes pulled away a little bit of the finish on the side that would show. Not to worry…I used my Liquid Acrylic paint in Burnt Sienna and a tiny paintbrush to paint over anything that I thought might be visible but which wasn’t perfectly finished. Things were going well enough when tragedy struck. Sorry, that’s not quite right. What I meant was…tragedy struck! I broke a chair leg, pulling it out of its MDF sheet. There was a brief freak out and then I remembered that I had glue and that the chair wasn’t going to be load bearing, and therefore only needed a cosmetic repair. I glued it back together, painted over the visible join, and moved on with my life, vowing to stop overreacting to every little setback. (Yeah, I don’t think I’m going to stop overreacting. But it’s good to have life goals.)

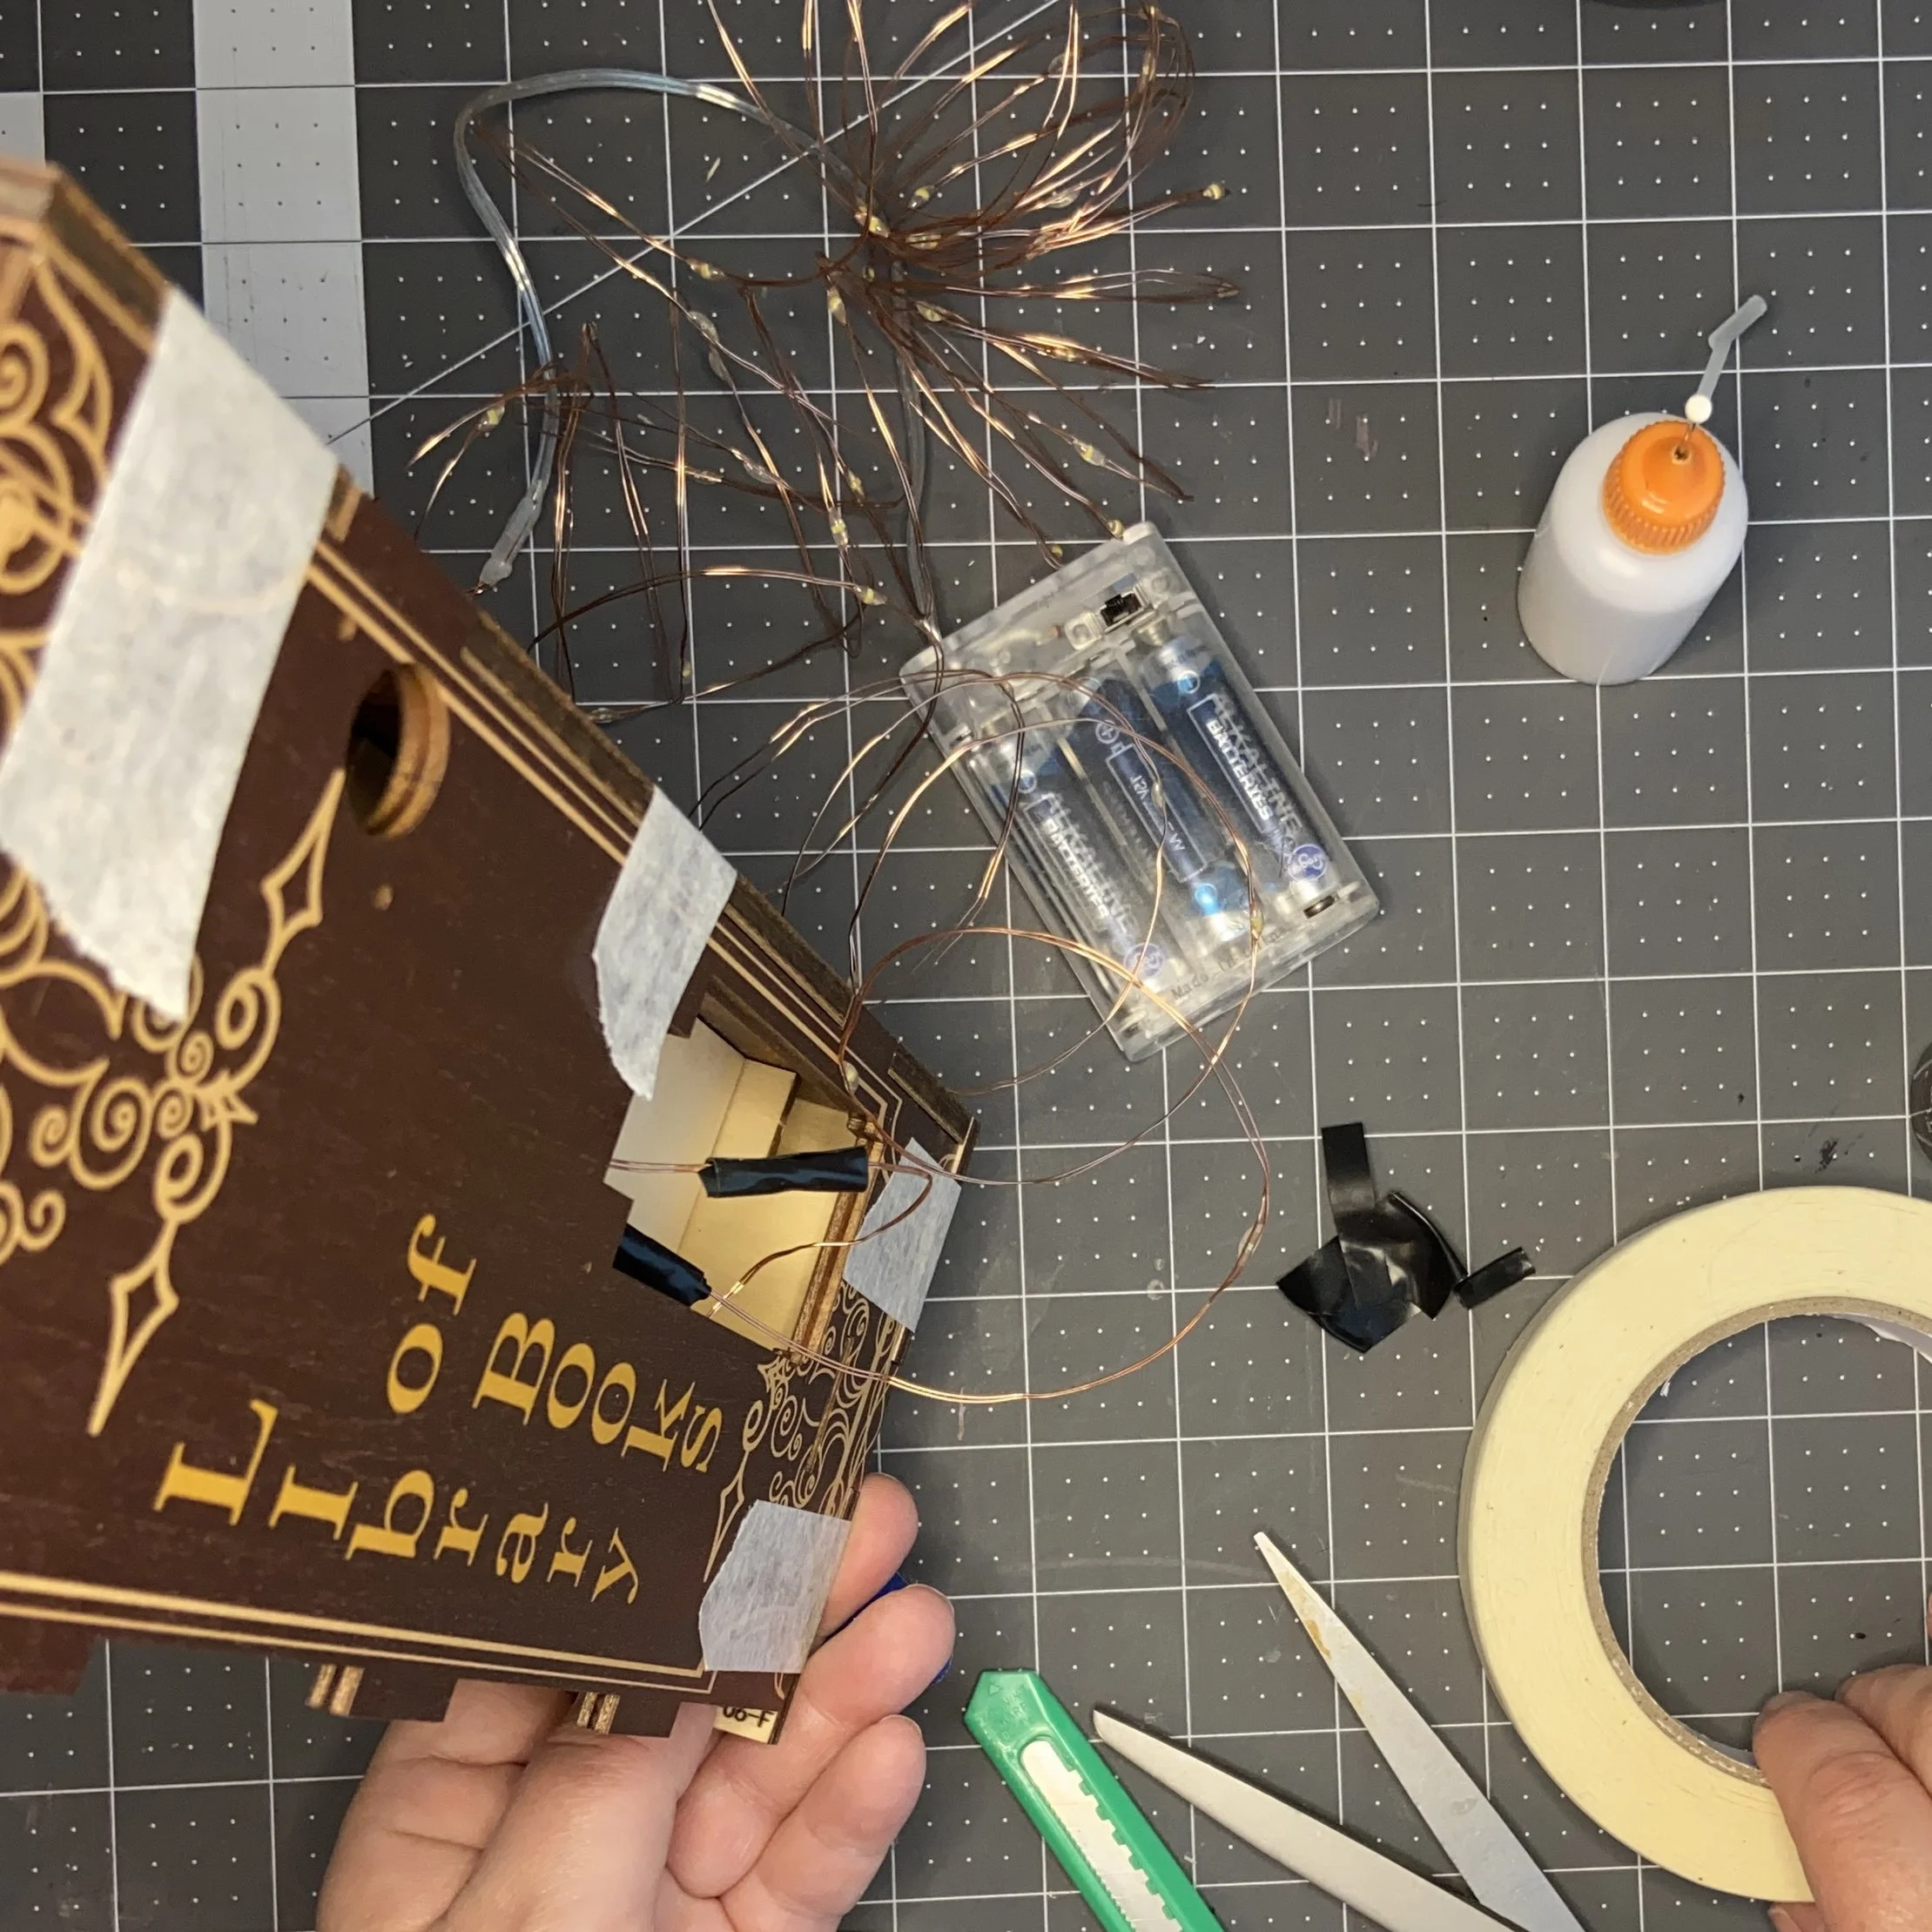
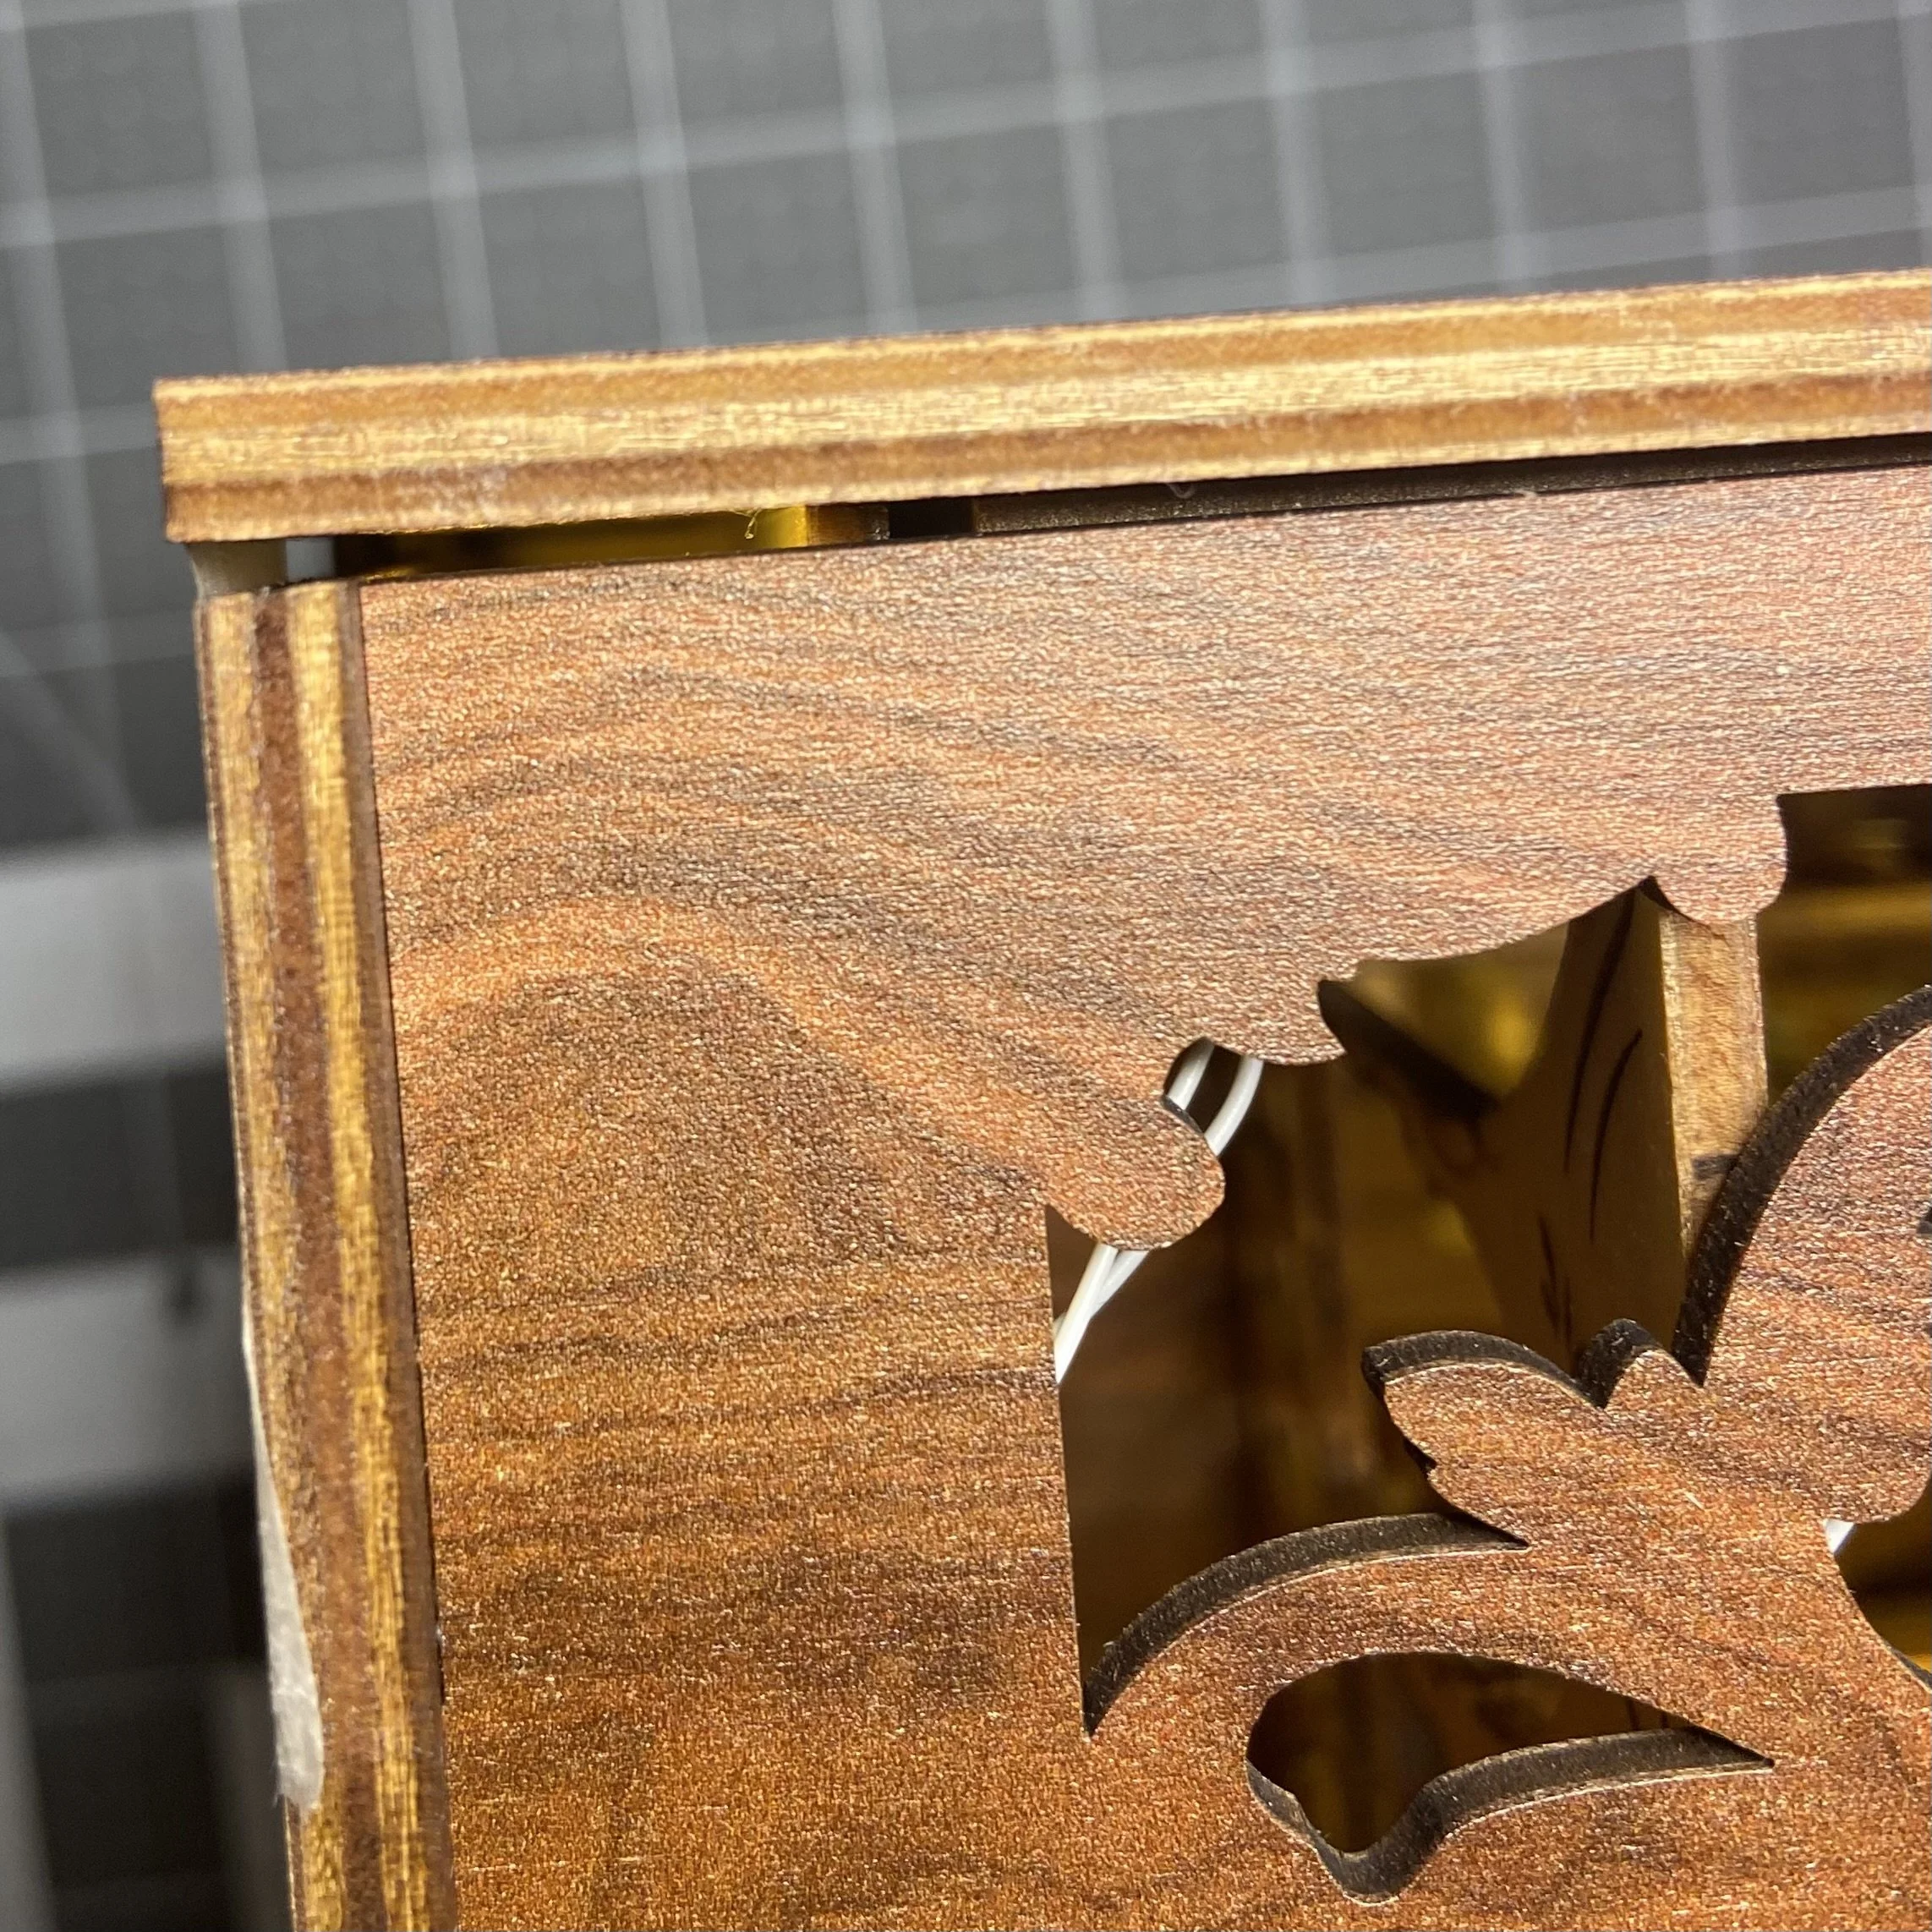
I believe I mentioned earlier that the written instructions were big on pictures and very light on words. This meant that I had no idea how the lighting and sensor were supposed to work. I studied the pictures multiple times and then basically decided (foolishly) that I would take my own path. I grabbed one of my sets of fairy lights and started using electrical tape to place the individual lights where the instructions said they should go. And since fairy lights are like Christmas lights in that they are a long wire with lights placed every few inches, I used the electrical tape to wrap/cover up the lights that I didn’t want showing. This did not go well at all. I’m shortening the exposition quite a bit (you’re welcome). I wasted about 3 days trying to make this work and in the end, I just went back and put in the sensor and lighting array that came with the kit. I had to pull apart a couple structural pieces that I’d already glued together in order to get that sensor in there, but it got done in the end.

A tiny music box came with the kit as well. As I had absolutely no interest in my book nook playing music, I did not install that.
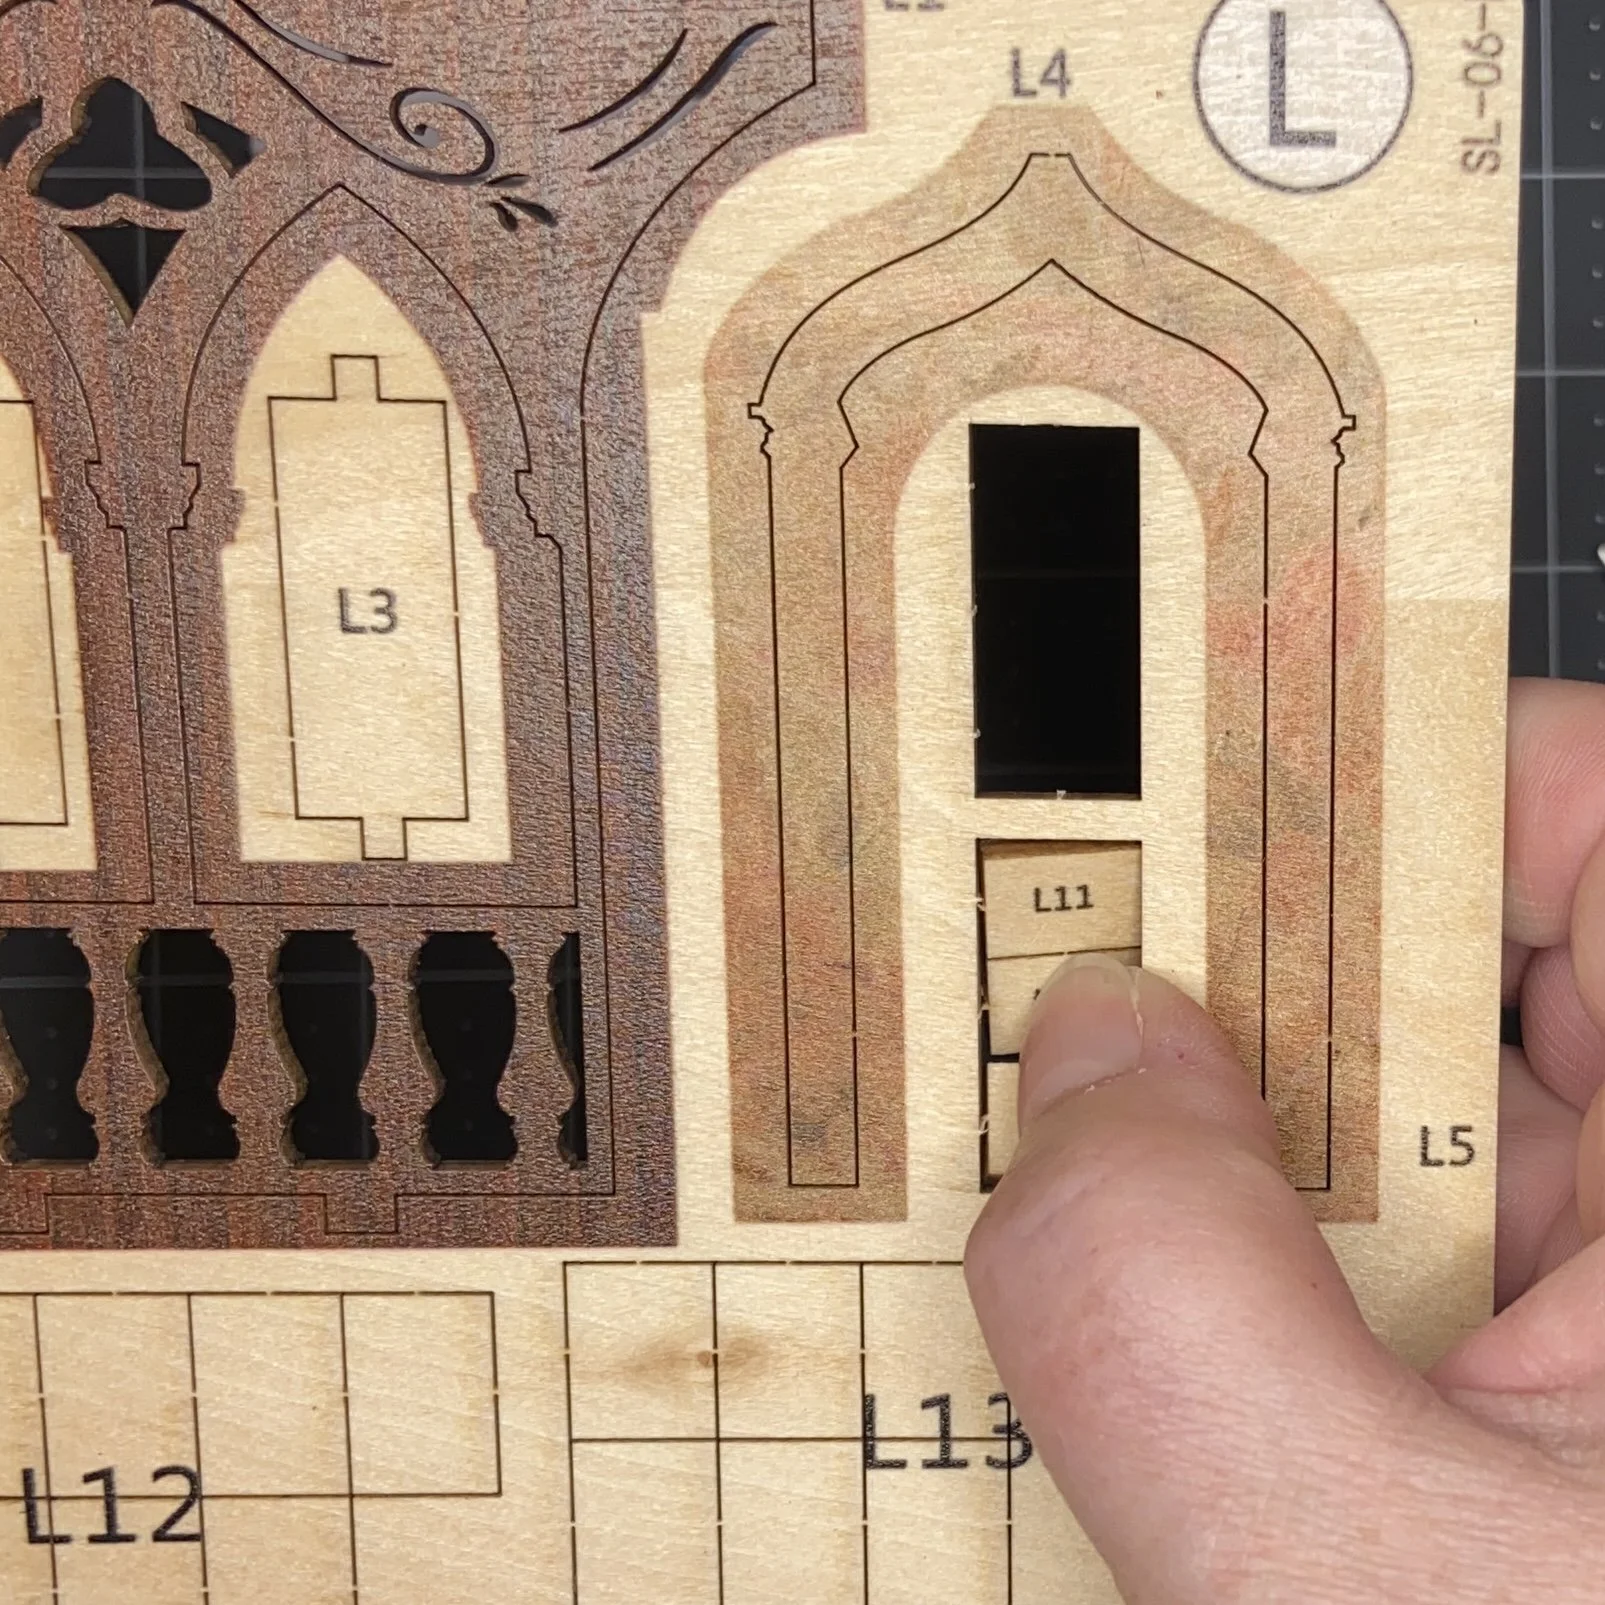
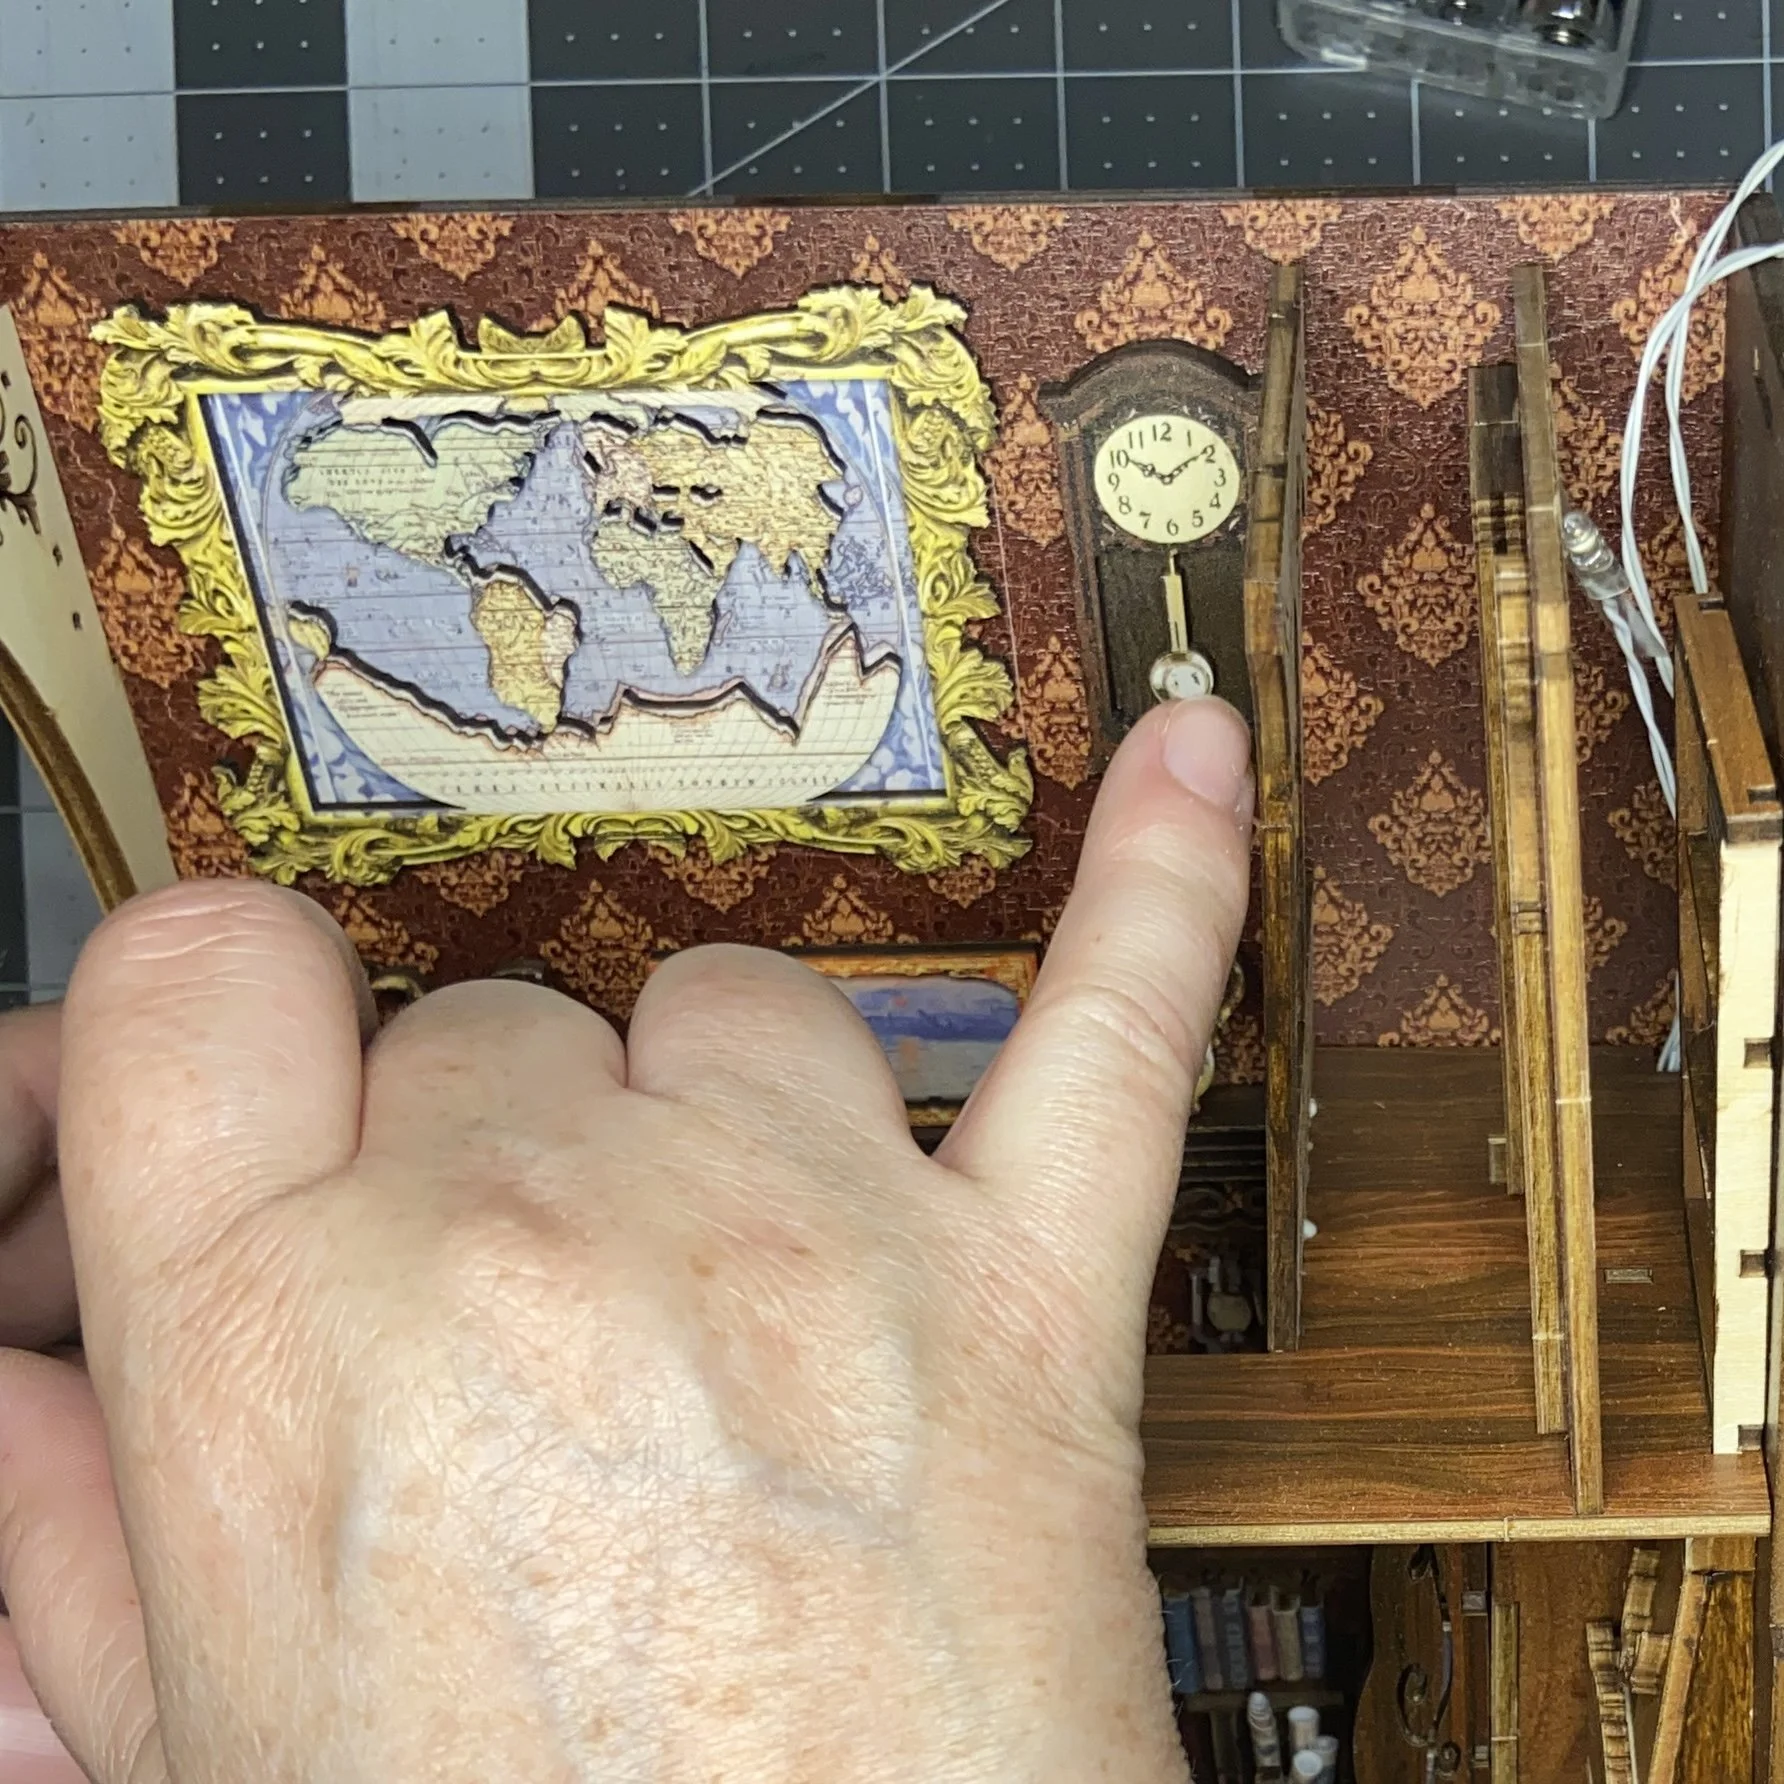
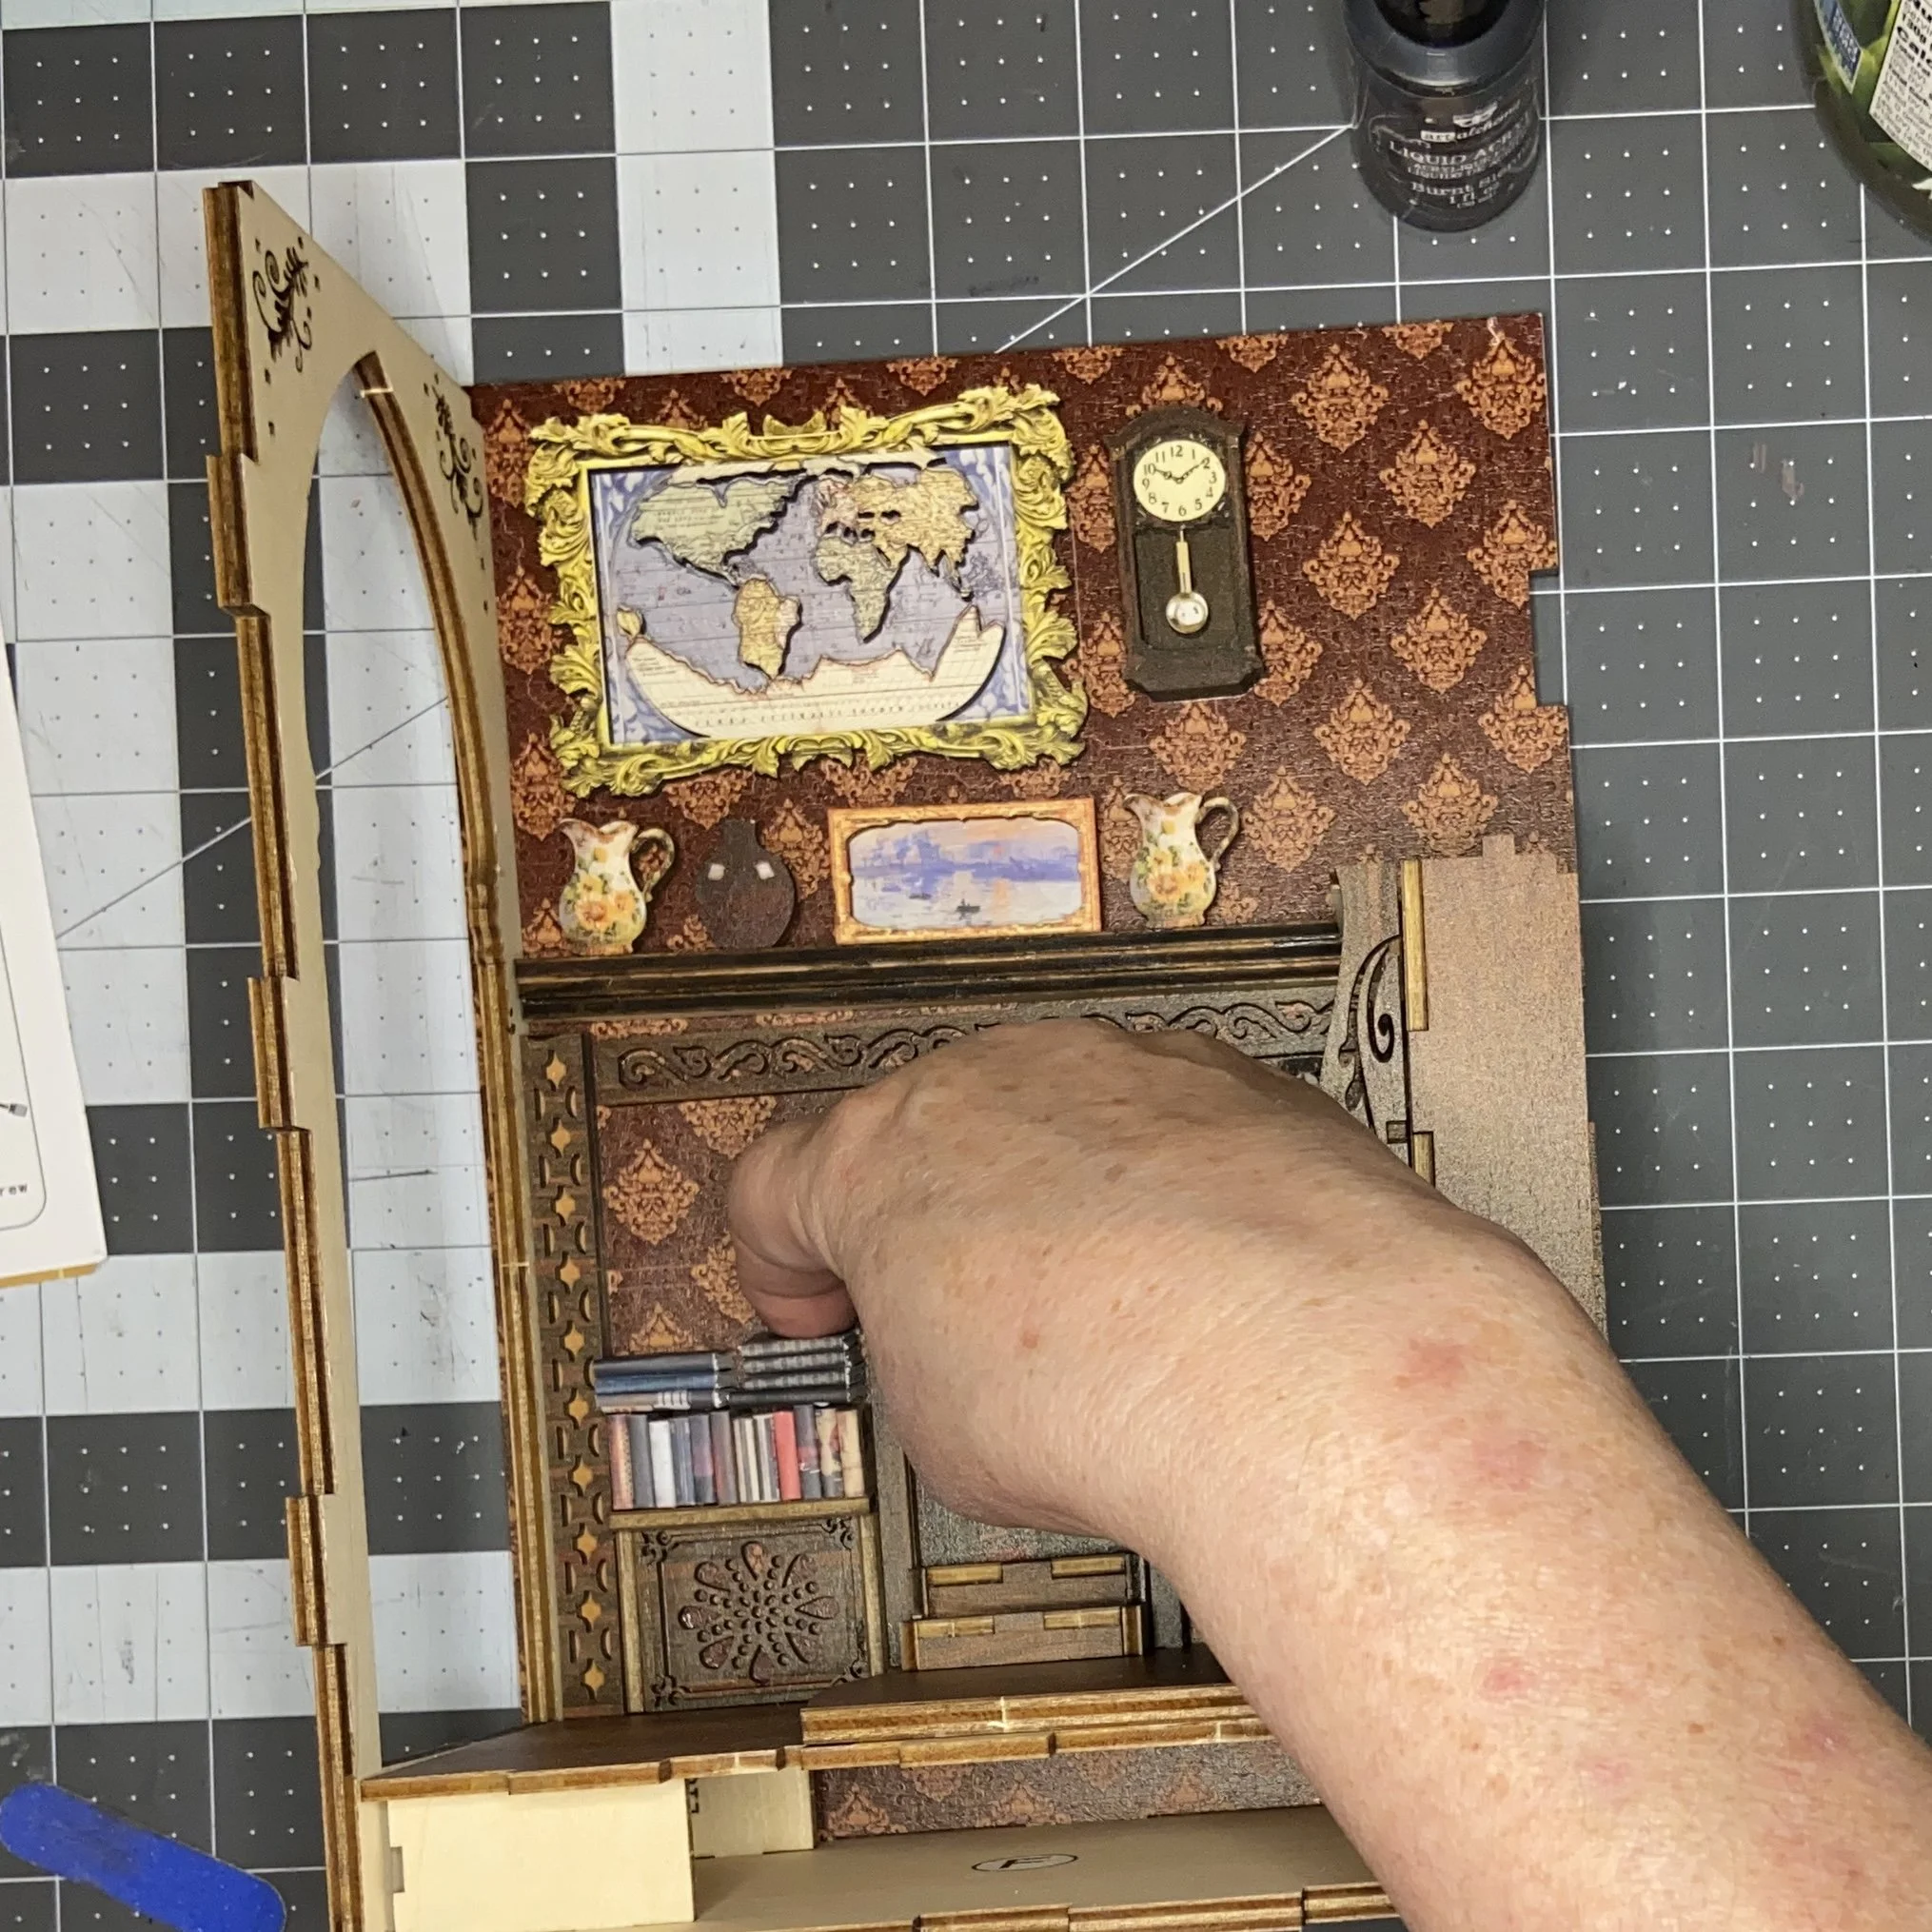
As the sides of the book nook were being installed, the face that would show as the interior wall was finished to look like wallpaper and the directions showed that certain premade pieces were now to be glued to the walls. I did not notice the very light outline of where the wall decorations were to be placed when I glued the first wall. Below, you can see how it should have gone:
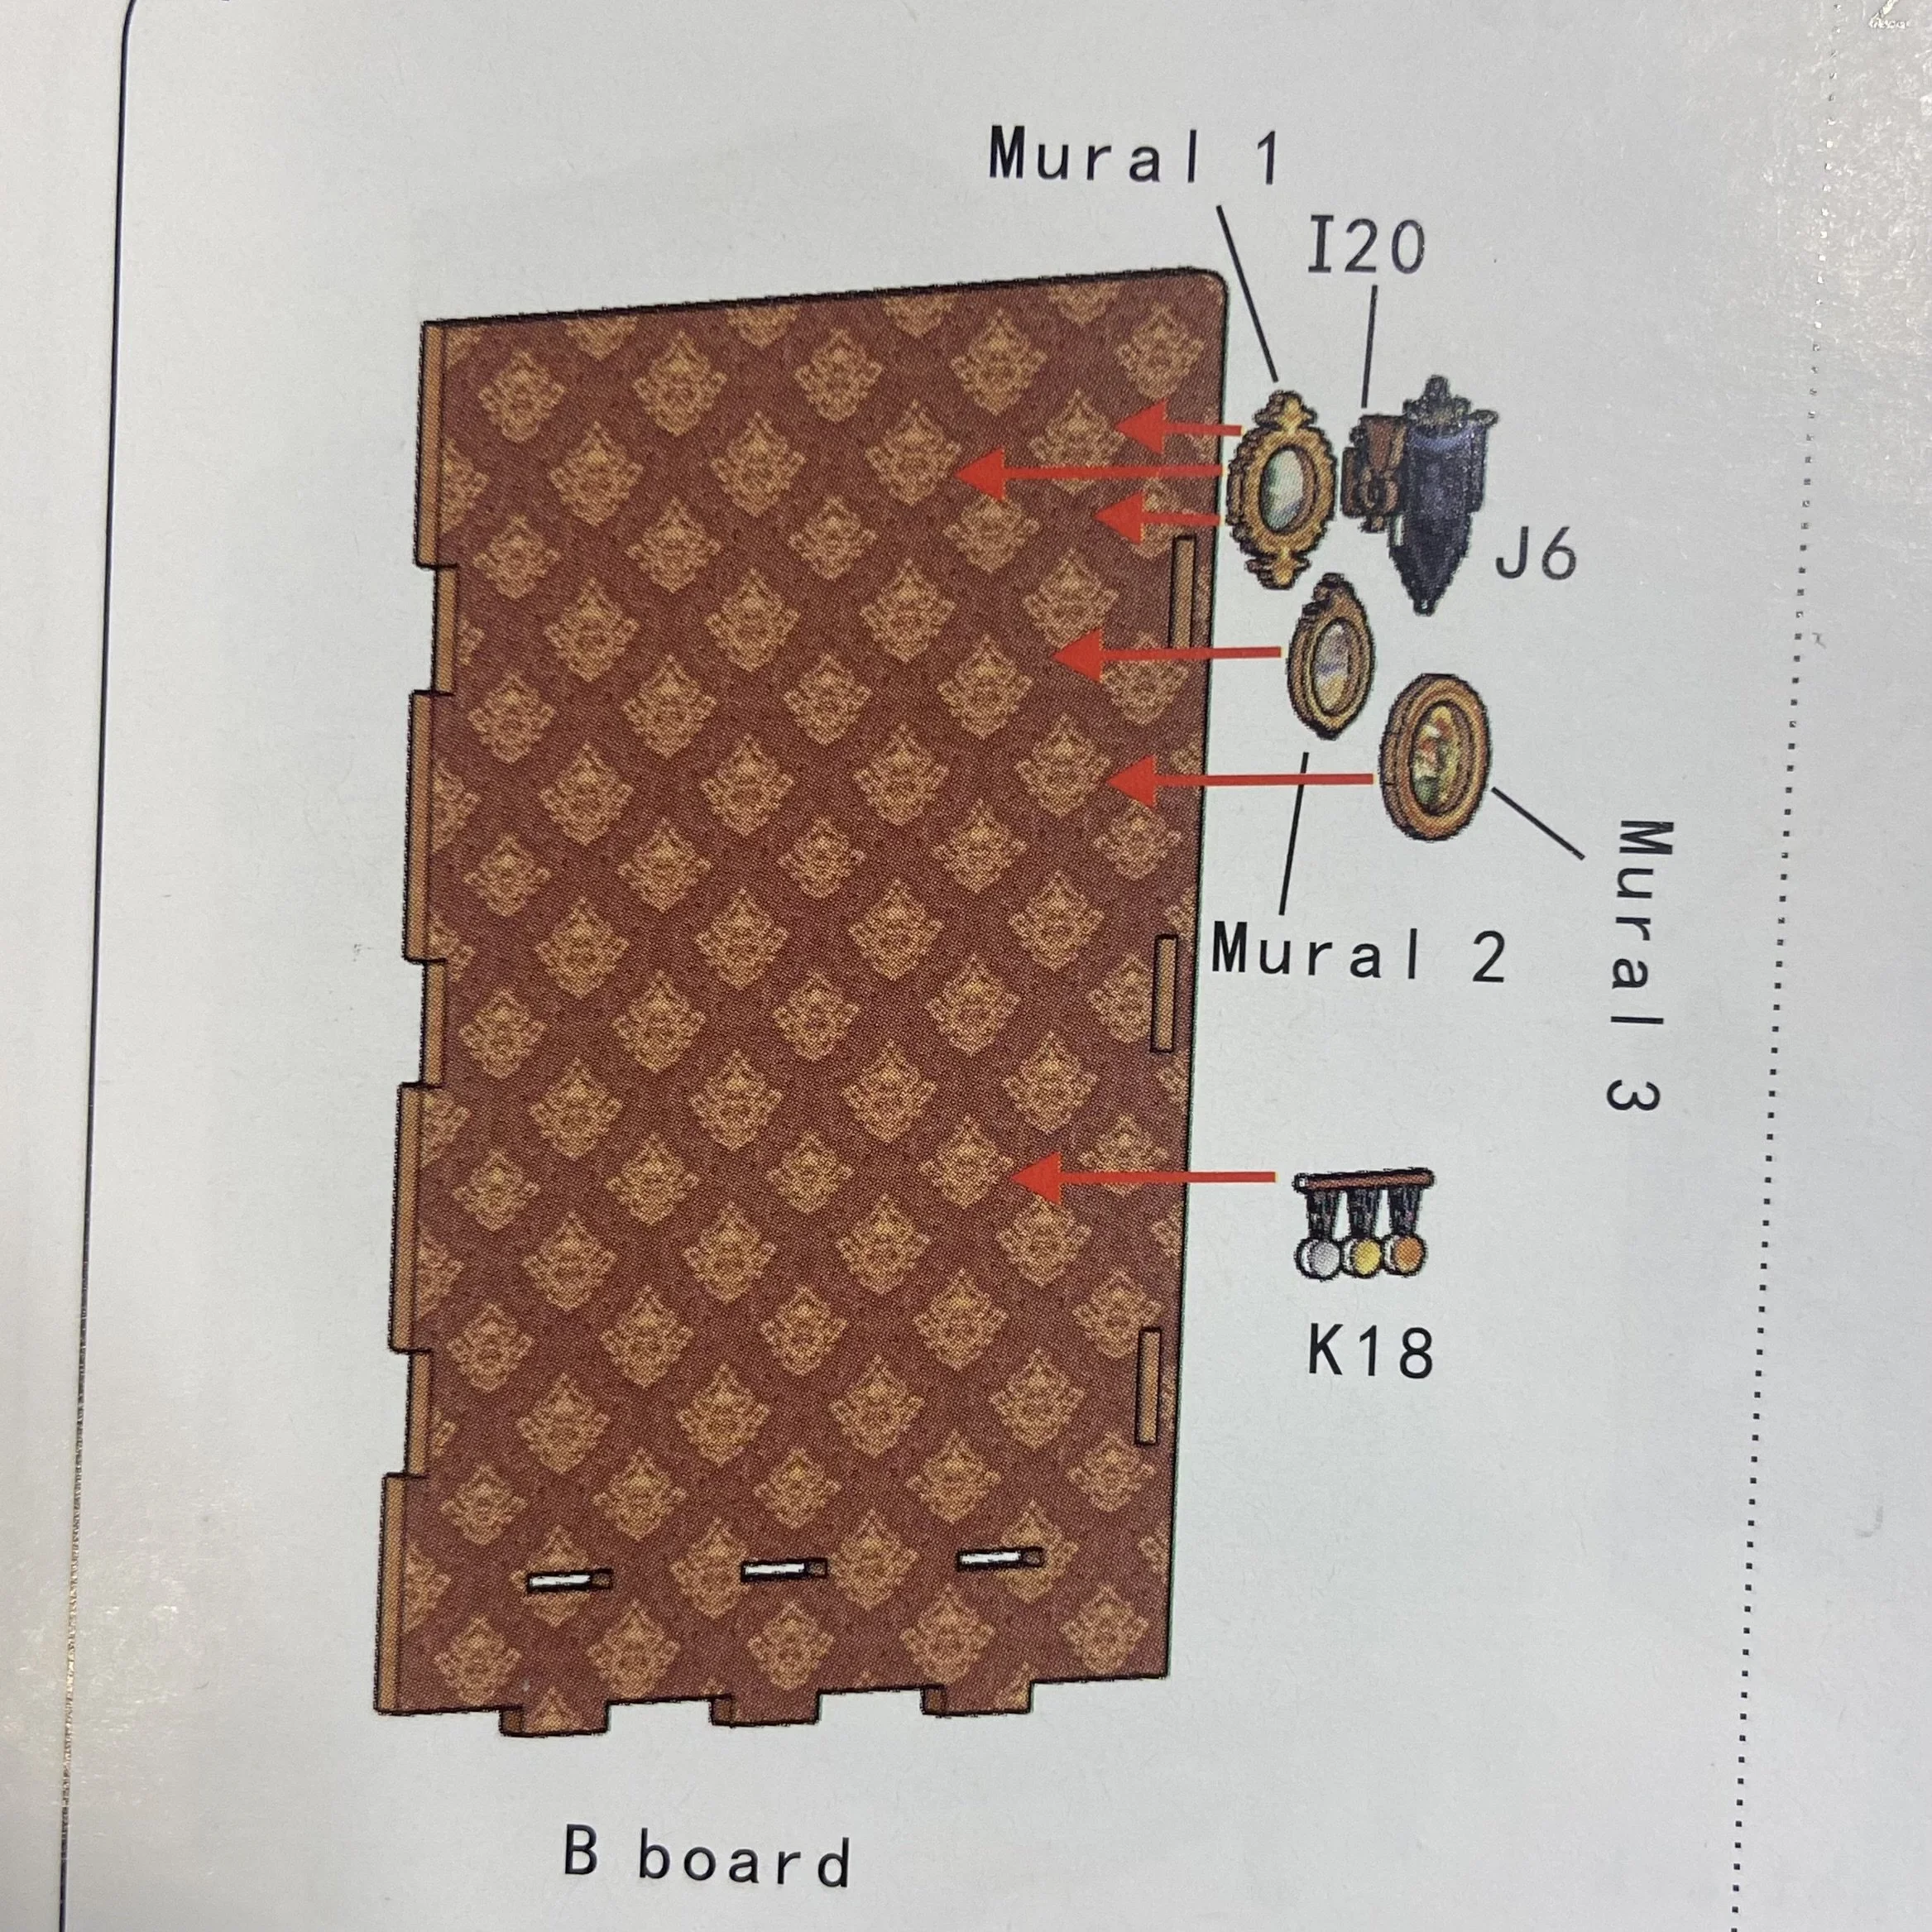
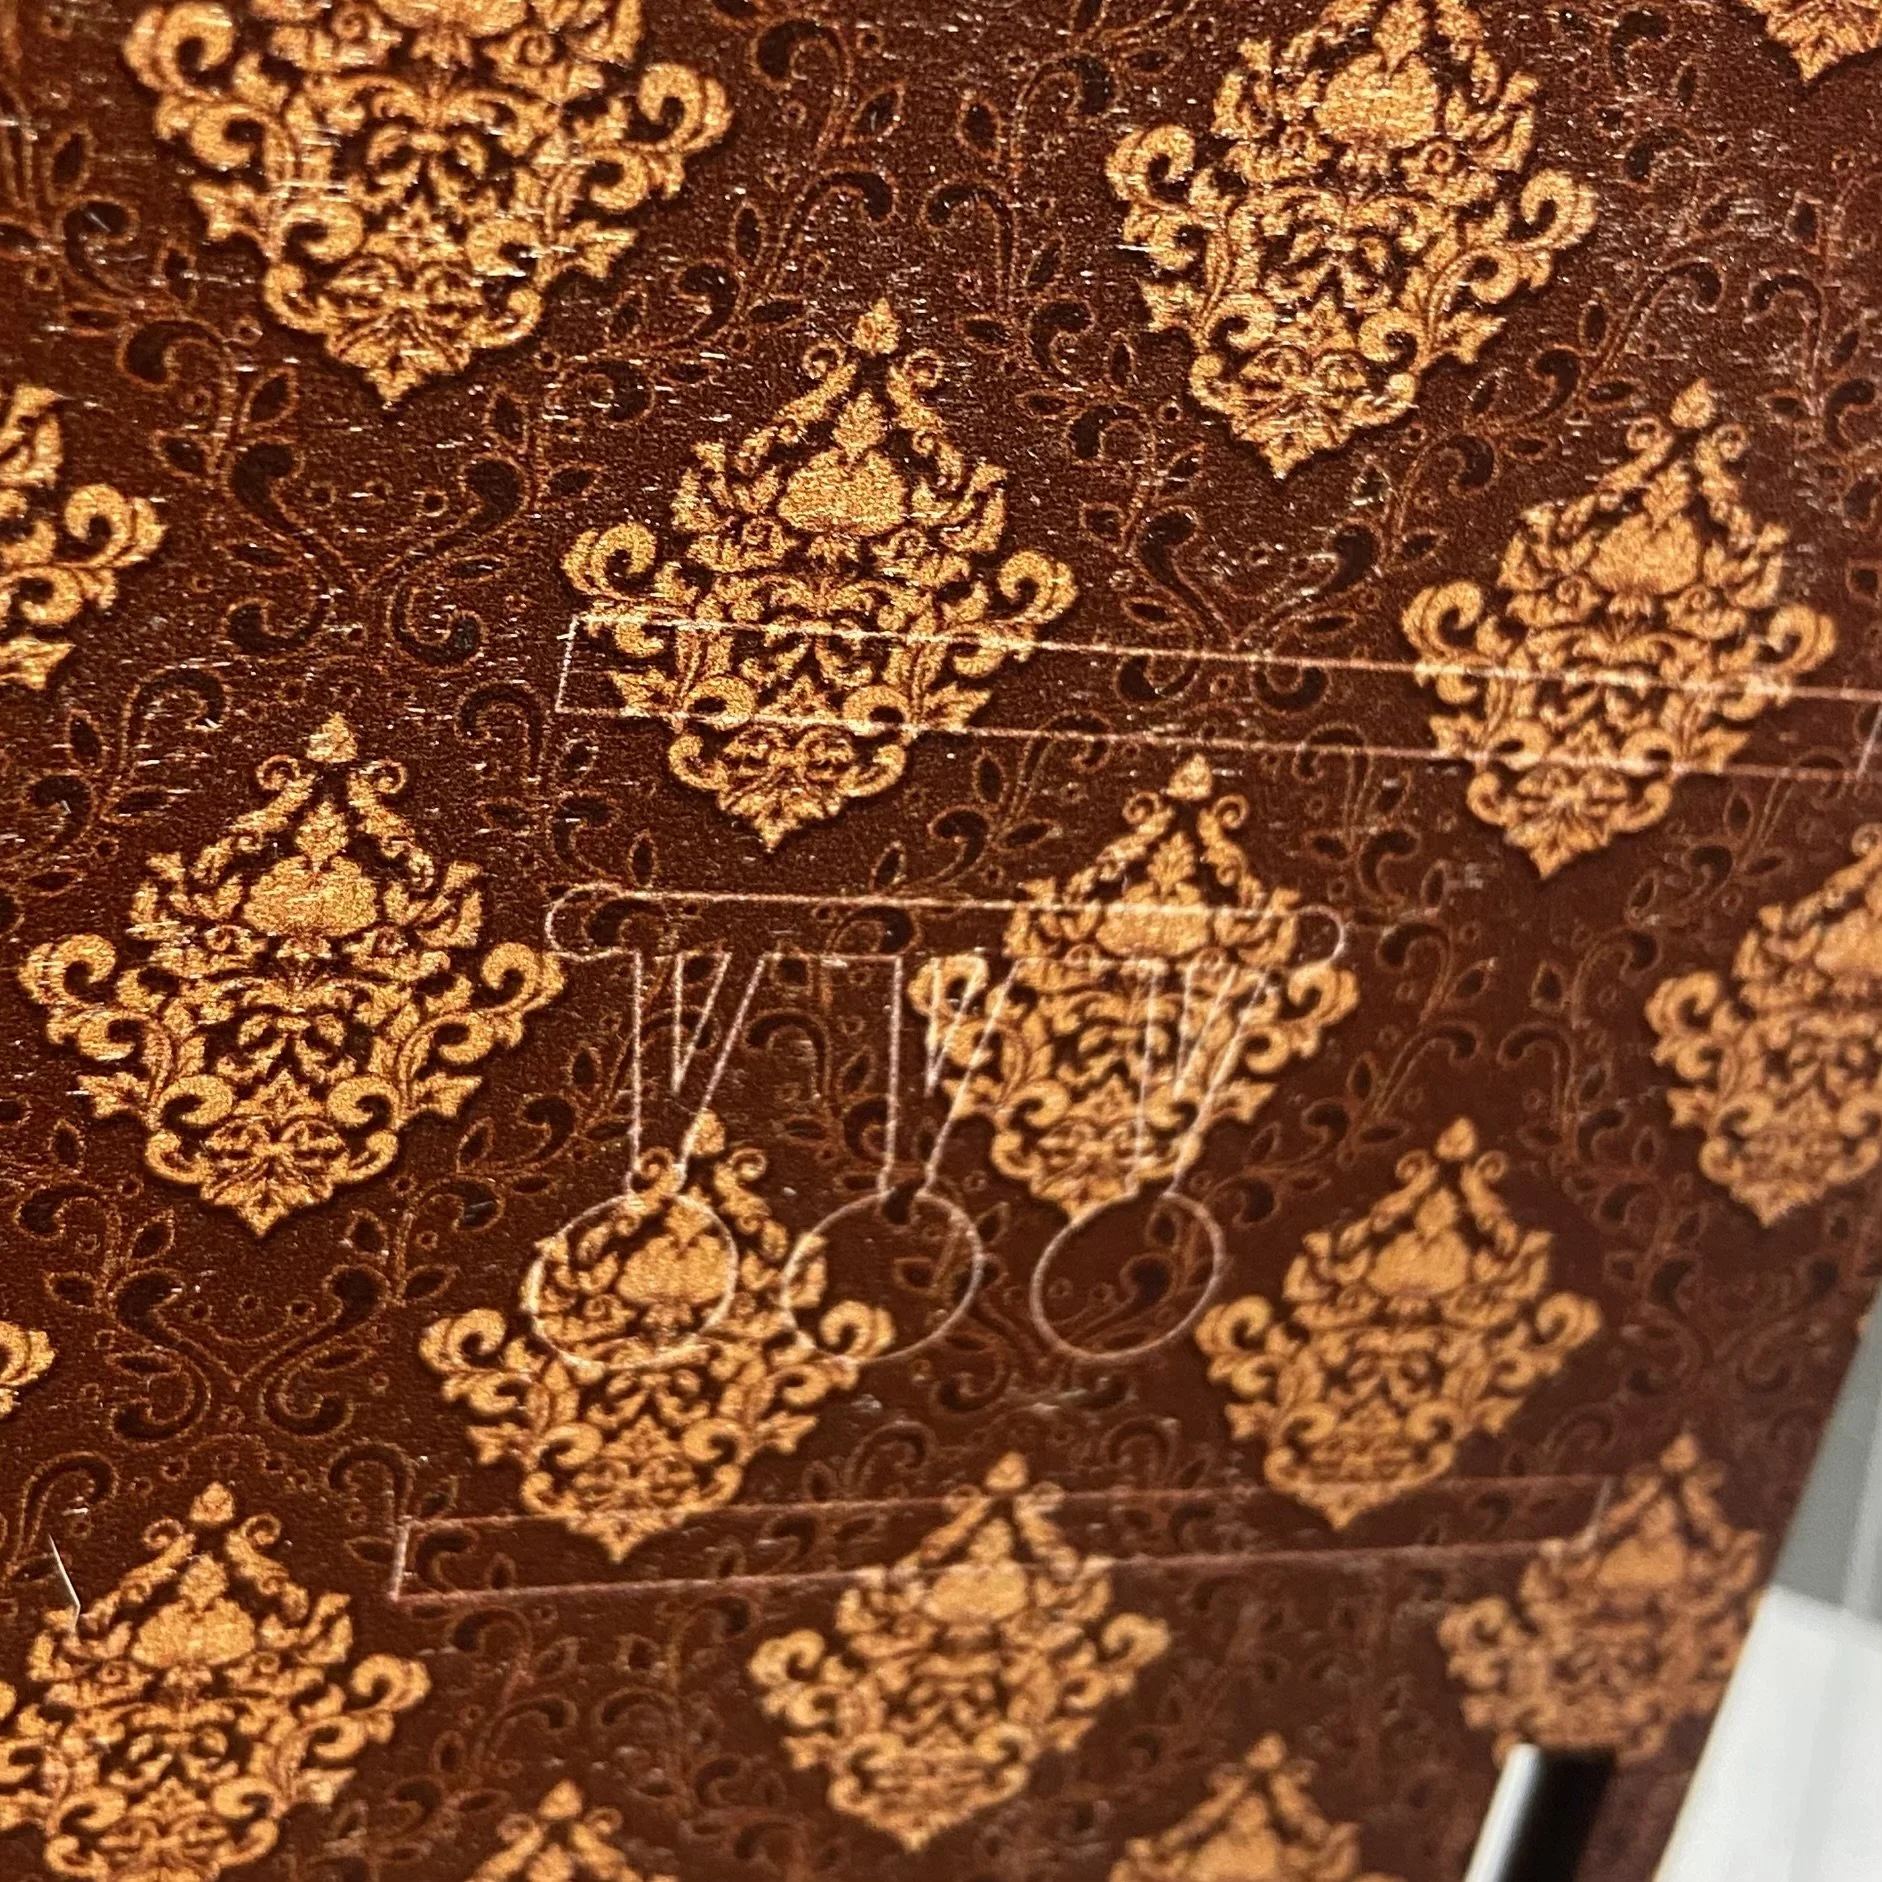
However, on the first wall I put in, I did not notice these very faint outlines, and so I placed a painting and a clock as best I could while referring to the directions. This seemed correct right up until I had to install a balcony railing, and the railing bumped up against the clock, which was clearly placed incorrectly. I tried with all my might to pry that clock off the wall so I could move it, but it absolutely would not budge. (Excellent glue.) So, I had to resort to cutting out a section of the balcony to get the piece to fit in its proper place. And even then, it wouldn’t sit completely upright. But it was pretty darn close, you couldn’t really see the problem from the front, and it’s not like there was anything else I could do about it anyway. Live and learn.
Once the walls were in, I got to start placing all those book groupings and pieces of furniture I’d premade earlier. This was quite fun!

Despite my various errors, I think I got reasonably close to what the instructions told me to do.

I did not quite manage the precision required to fit everything together perfectly. The walls and the back and the top aren’t quite perfectly aligned, due in no small part to the decisions I made while trying to install the fairy lights and also while trying to accommodate pieces that wouldn’t quite fit because I’d installed something else slightly out of place. I will take full credit for those problems. I think the kit itself was perfect (except for those 2 extra books; those are a mystery).
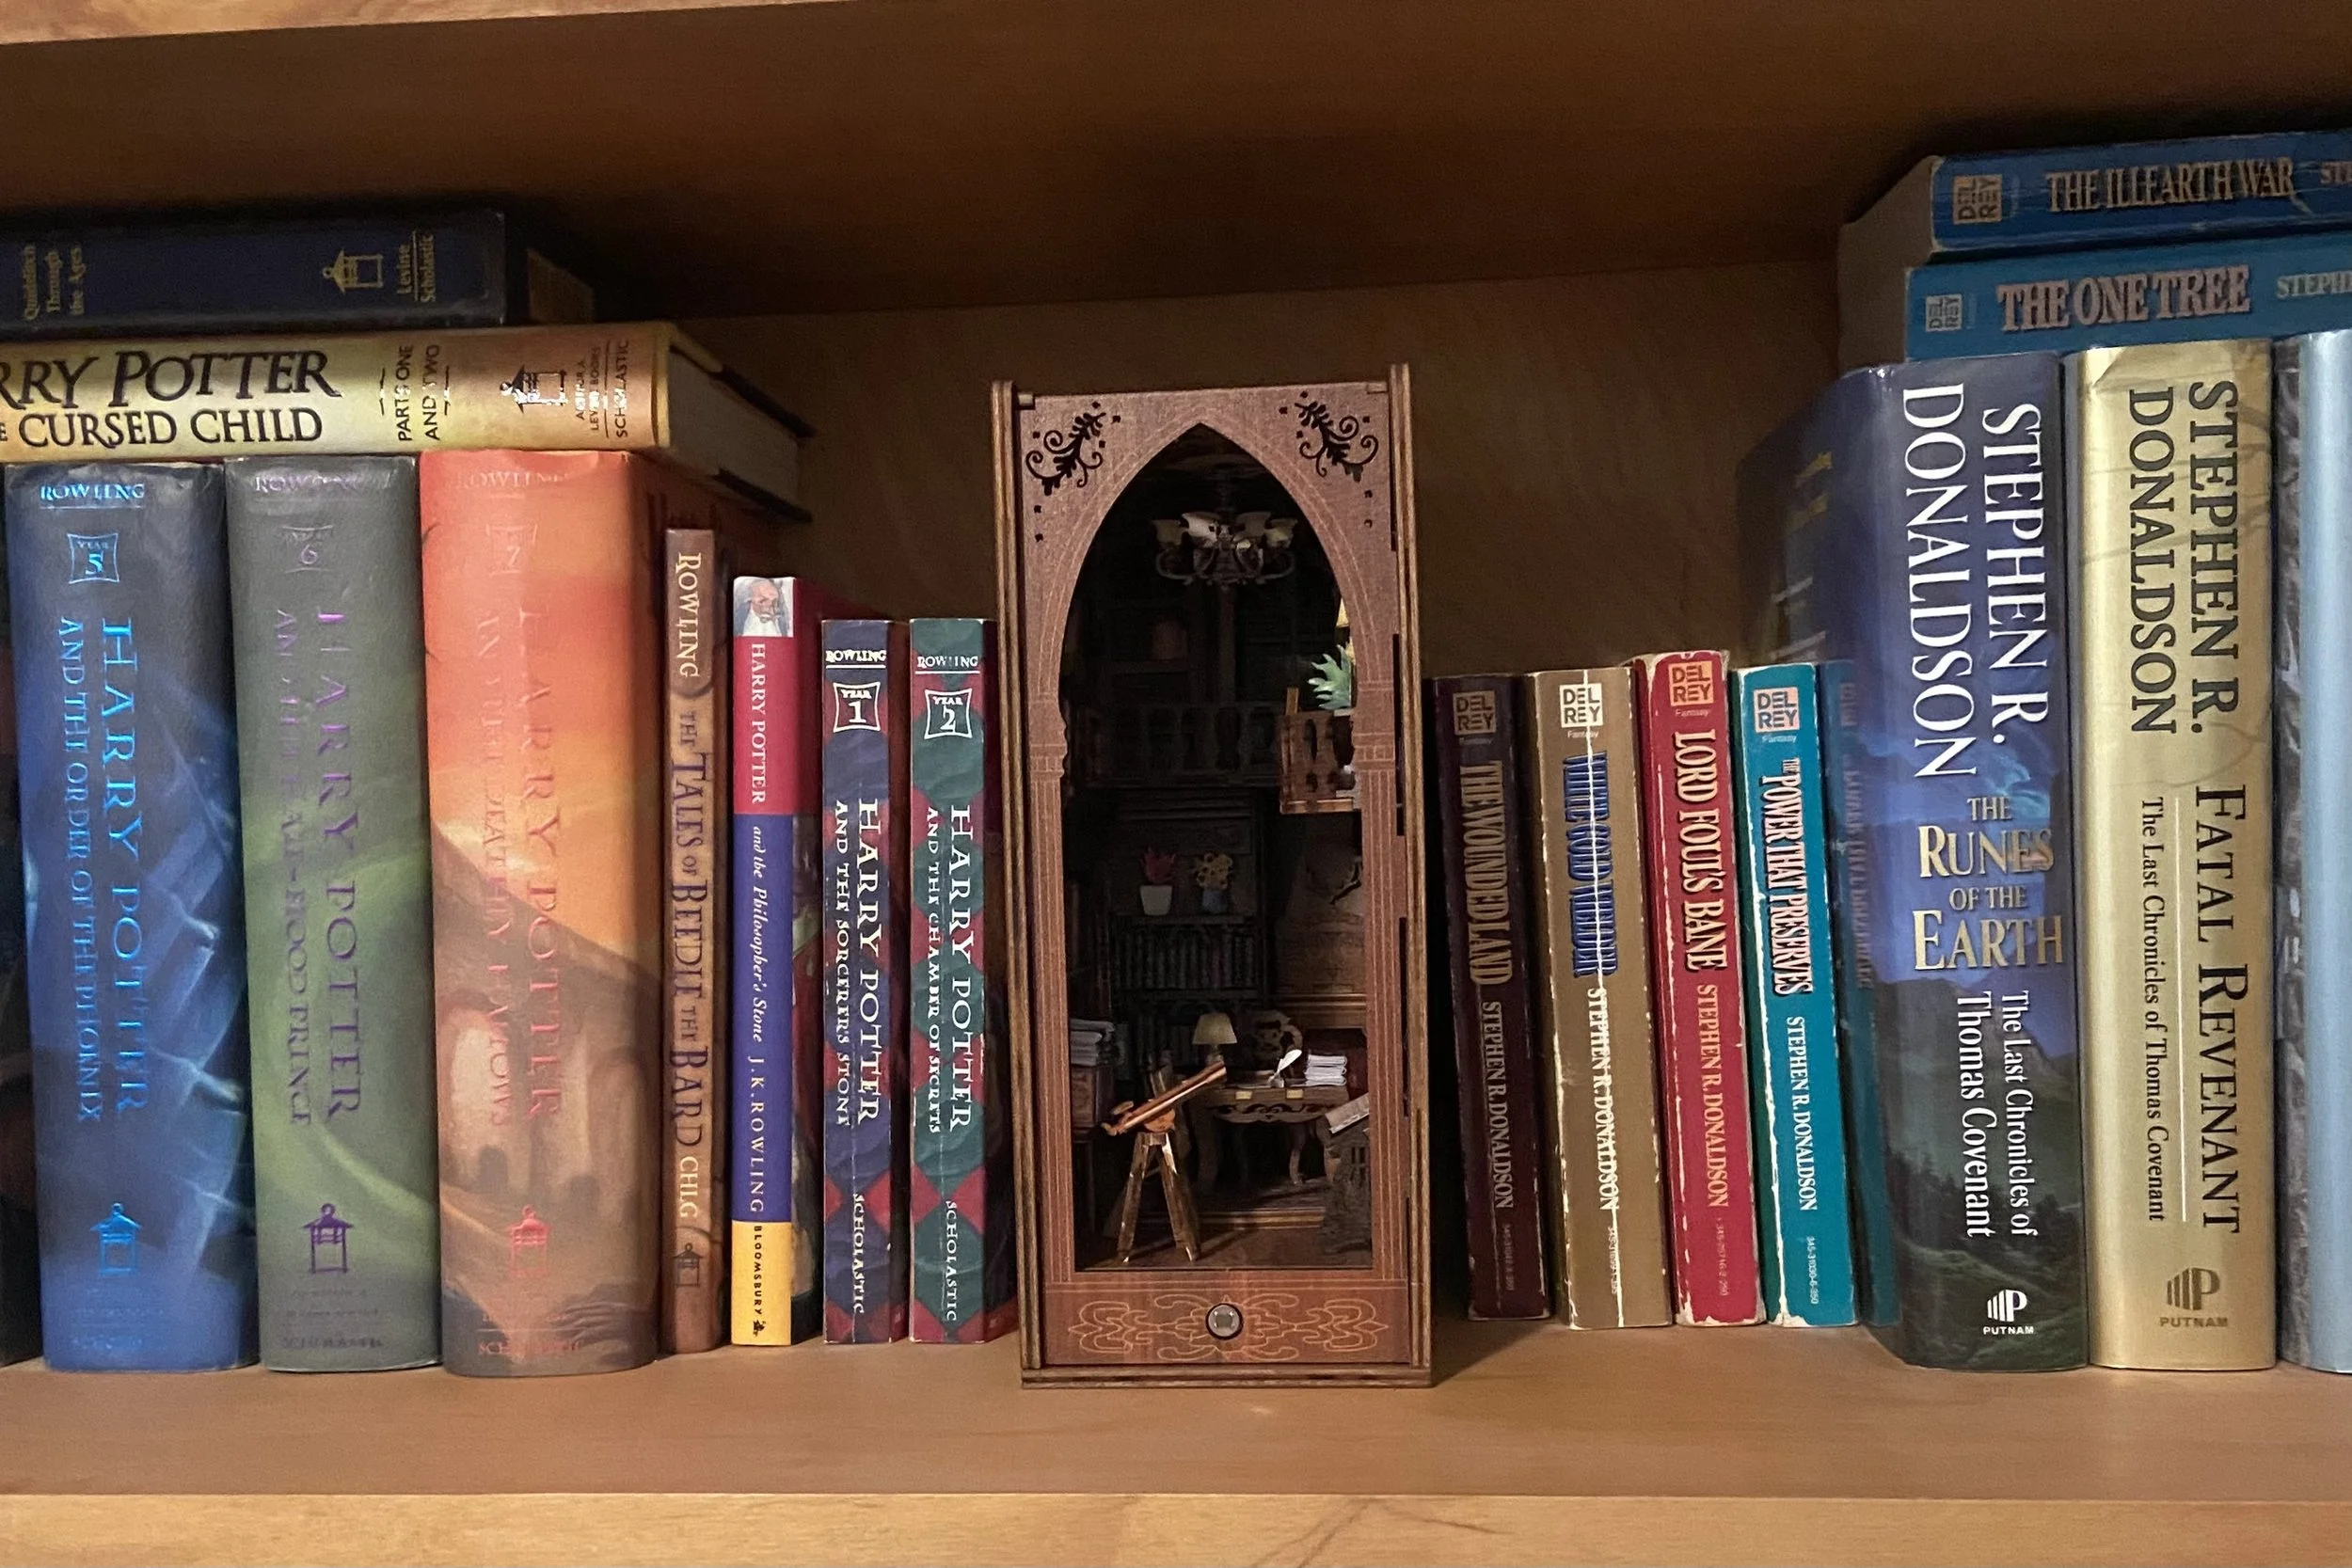
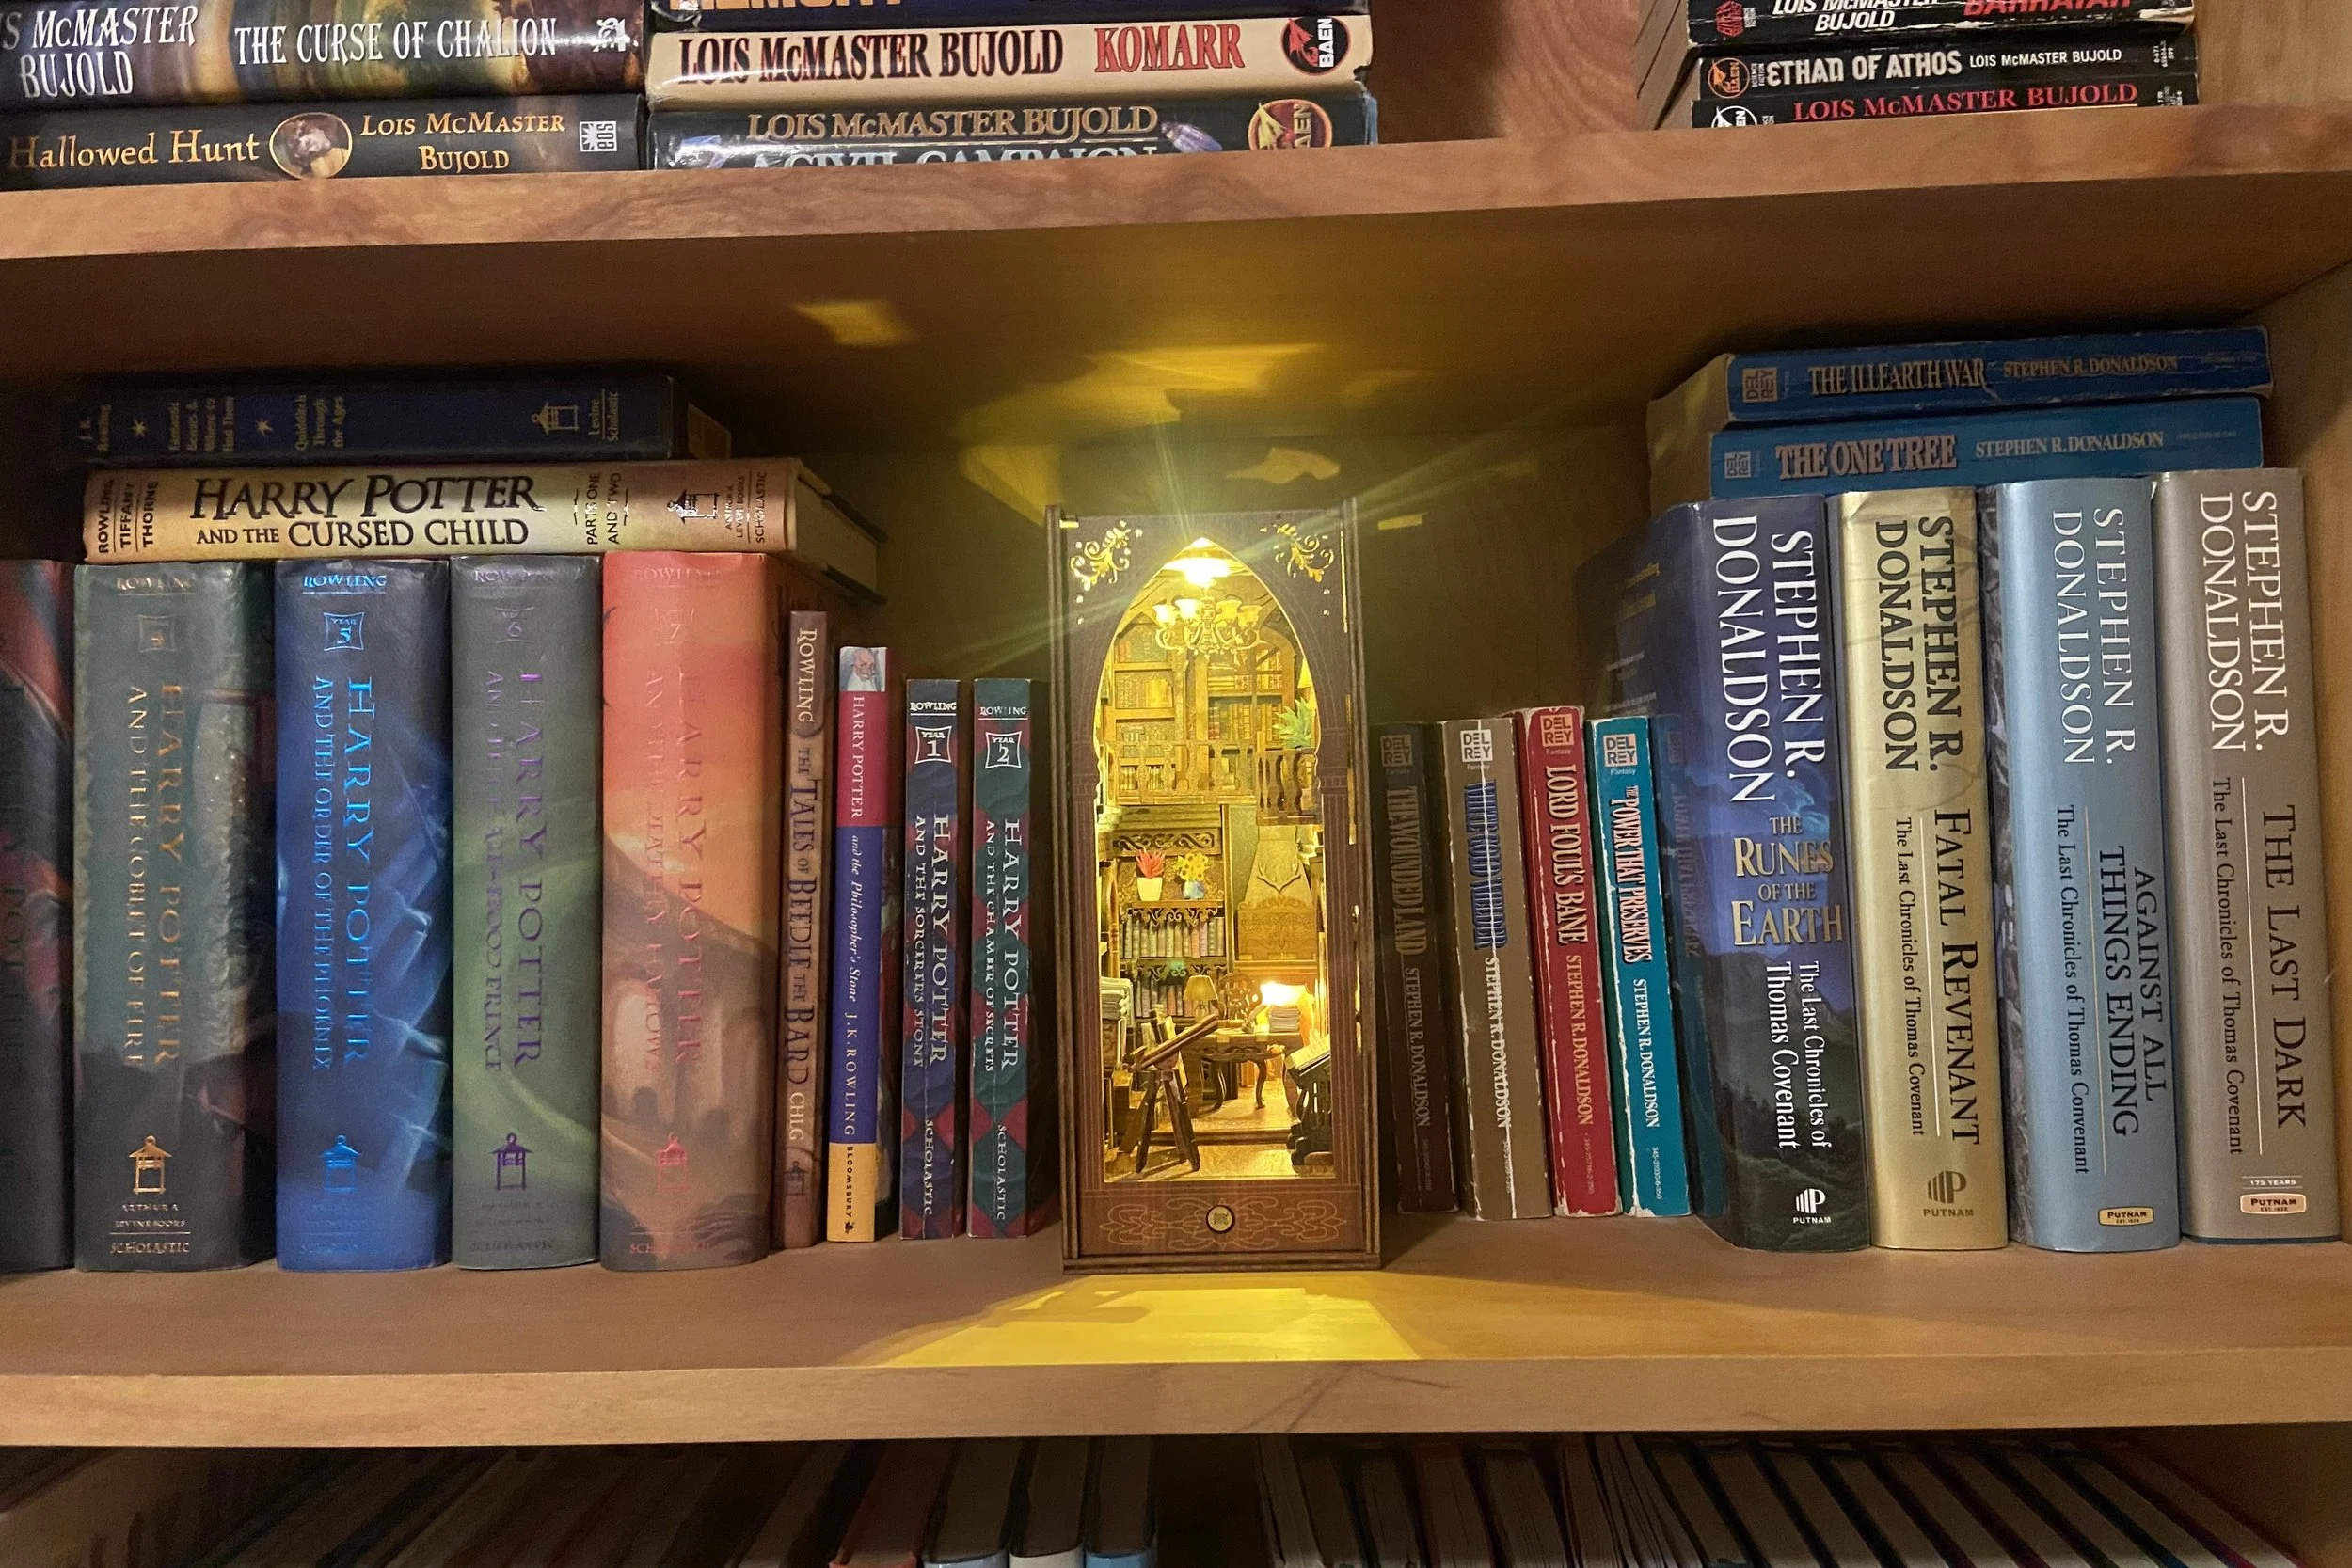
Nevertheless, it’s assembled now and installed in a place of honor between J.K. Rowling and Stephen R. Donaldson. The lighting array takes two AA batteries and is left on at all times. The sensor in the front detects motion, so the whole installation lights up for about 60 seconds any time anyone comes near it. Below are some closeups of the finished and illuminated interior:
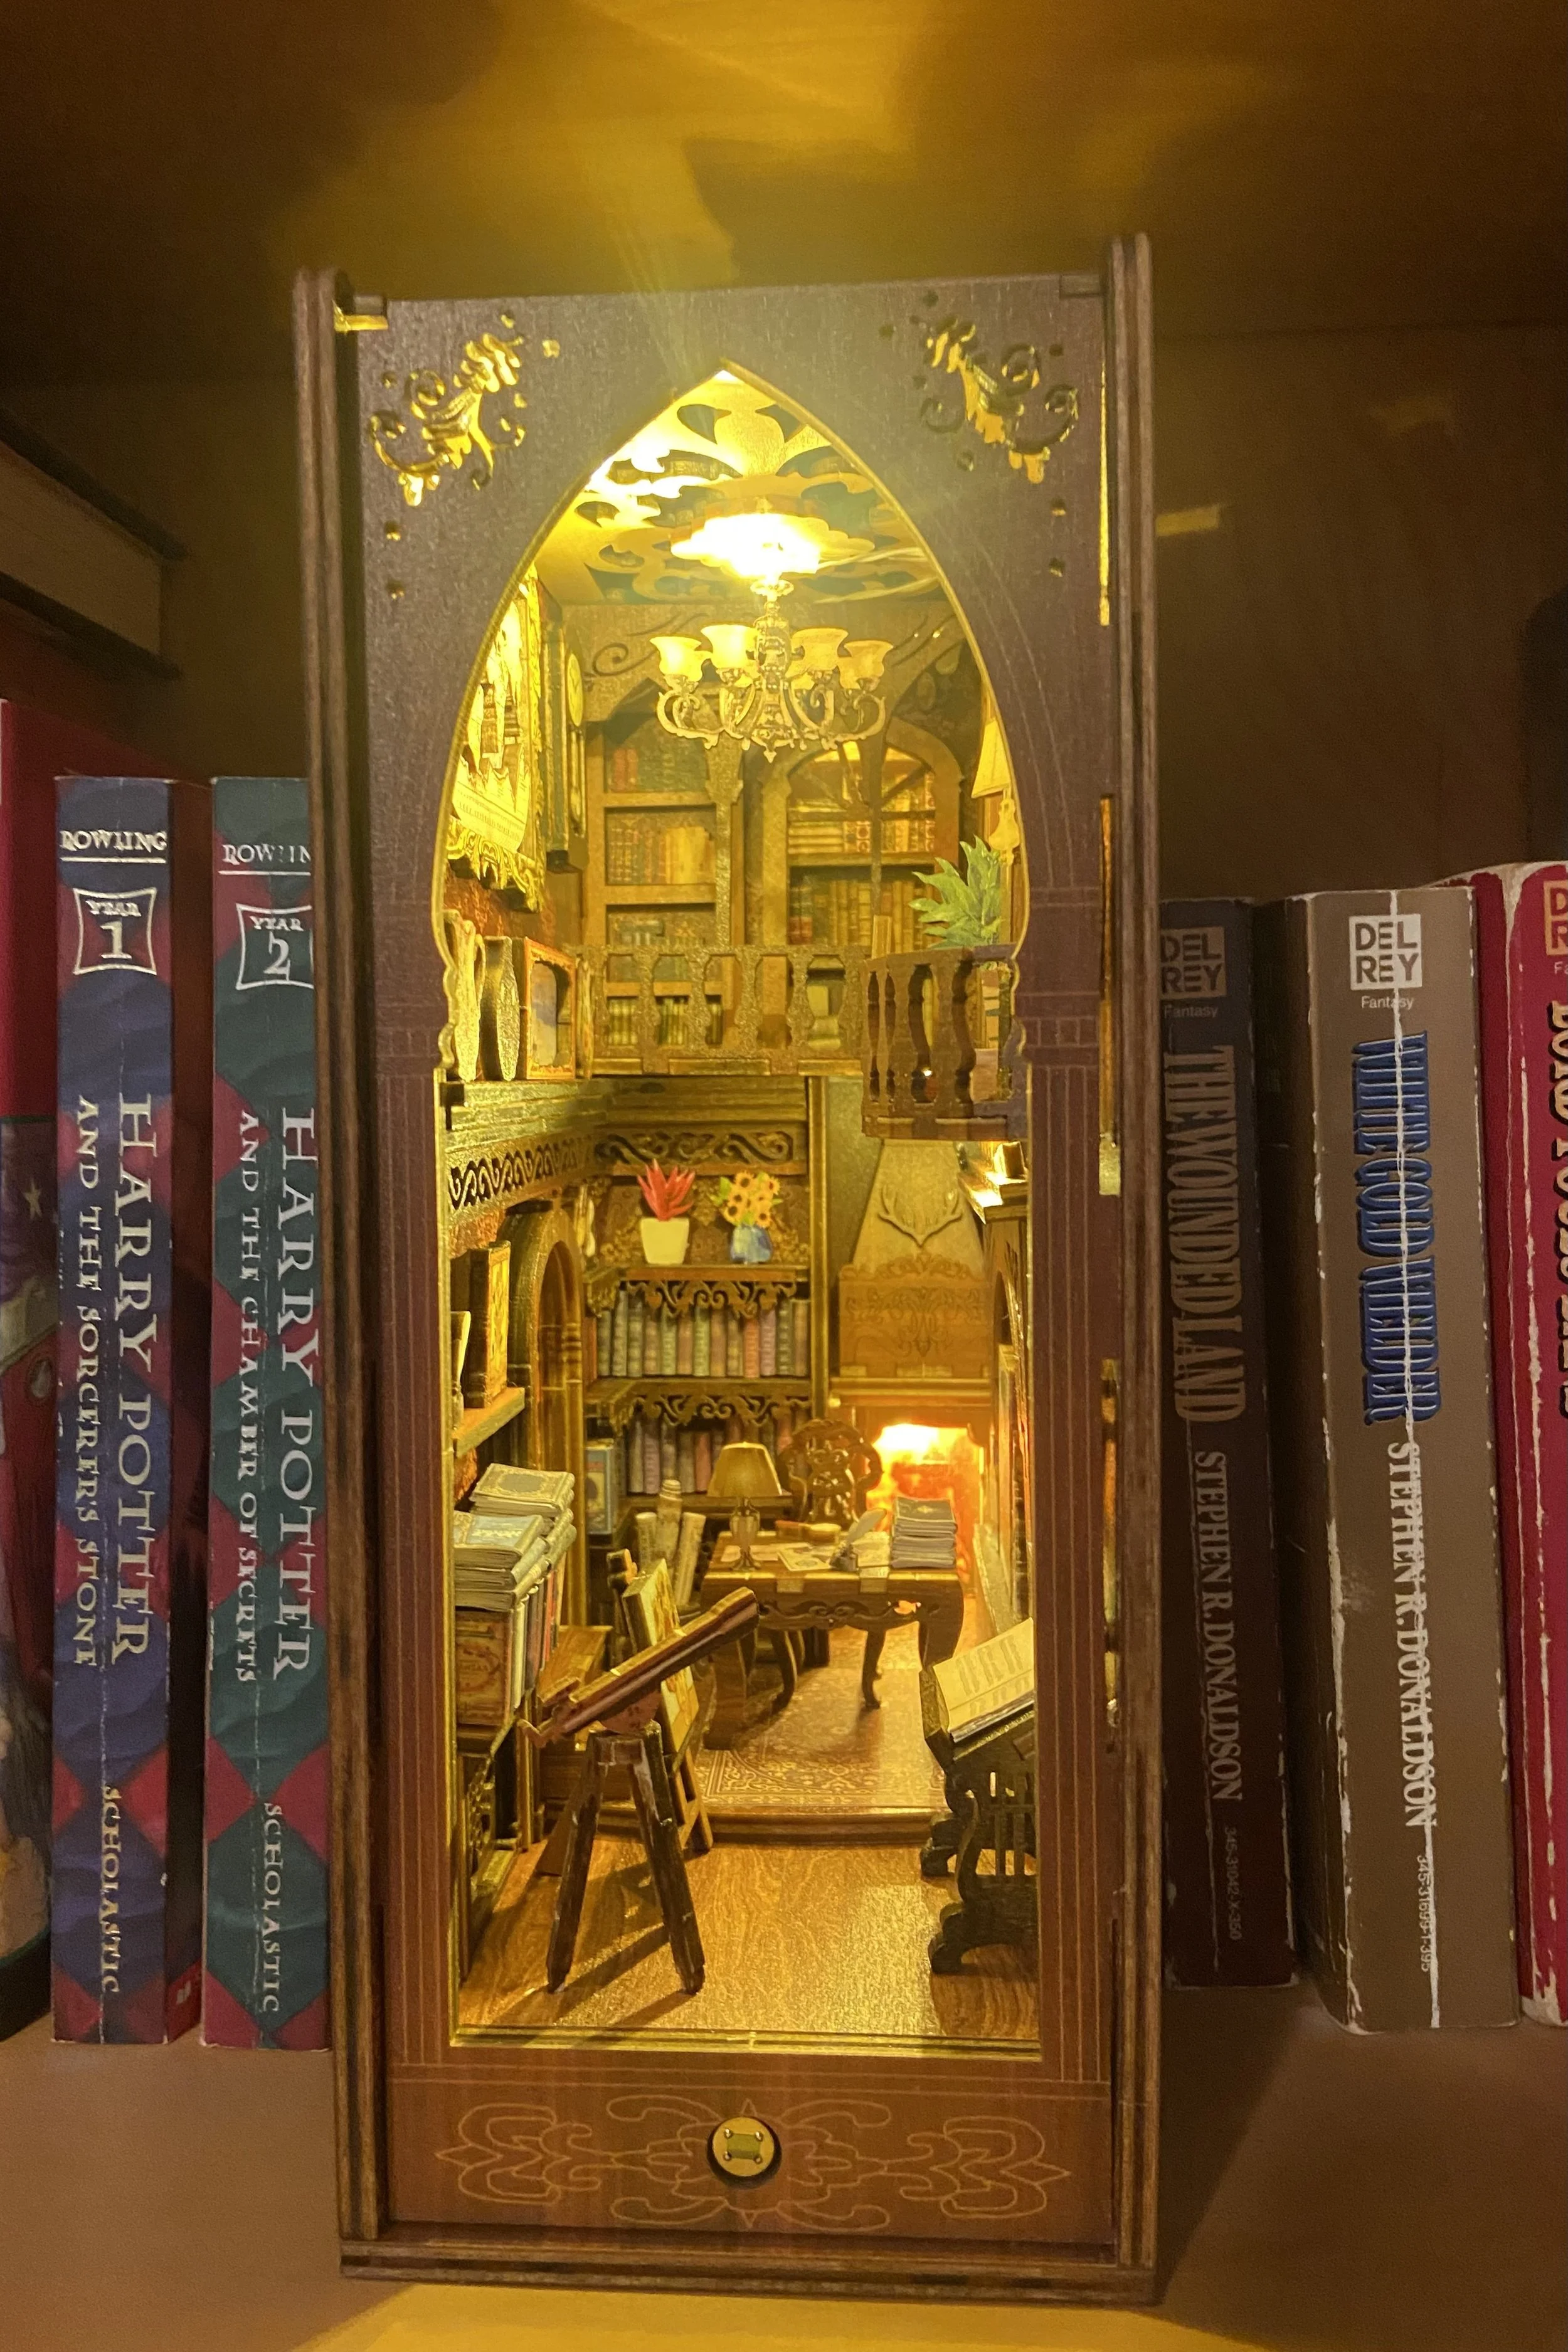
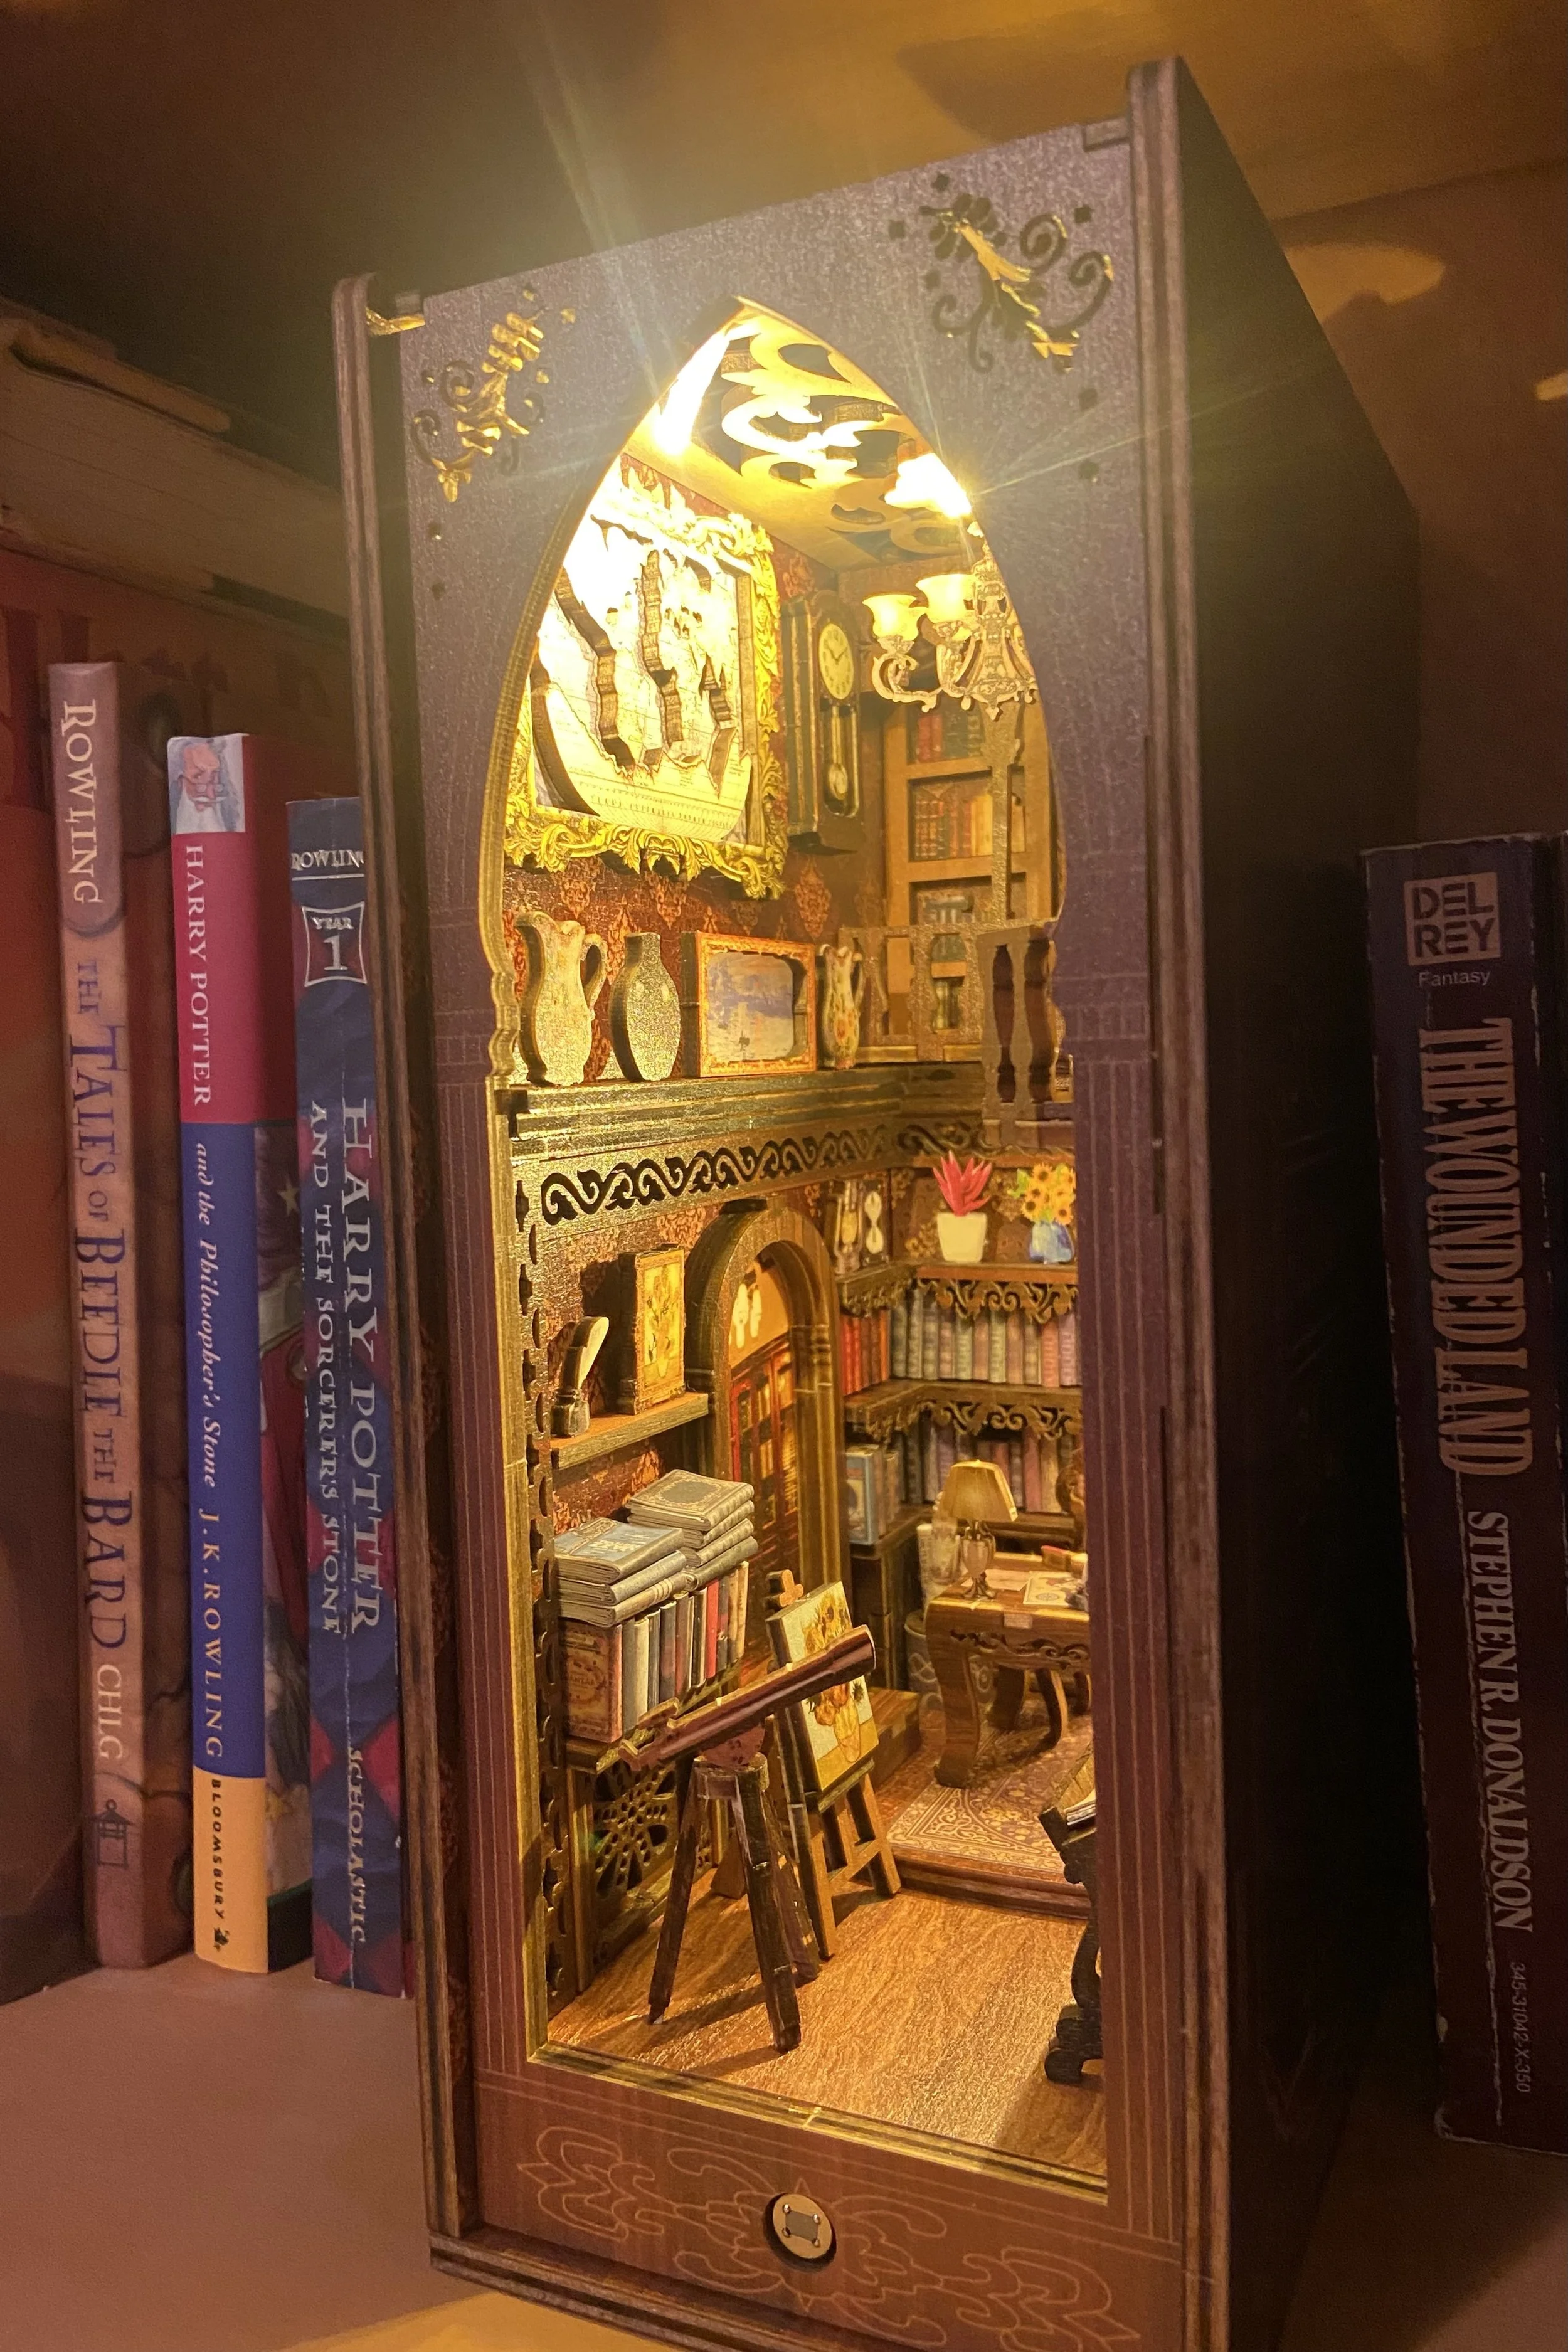
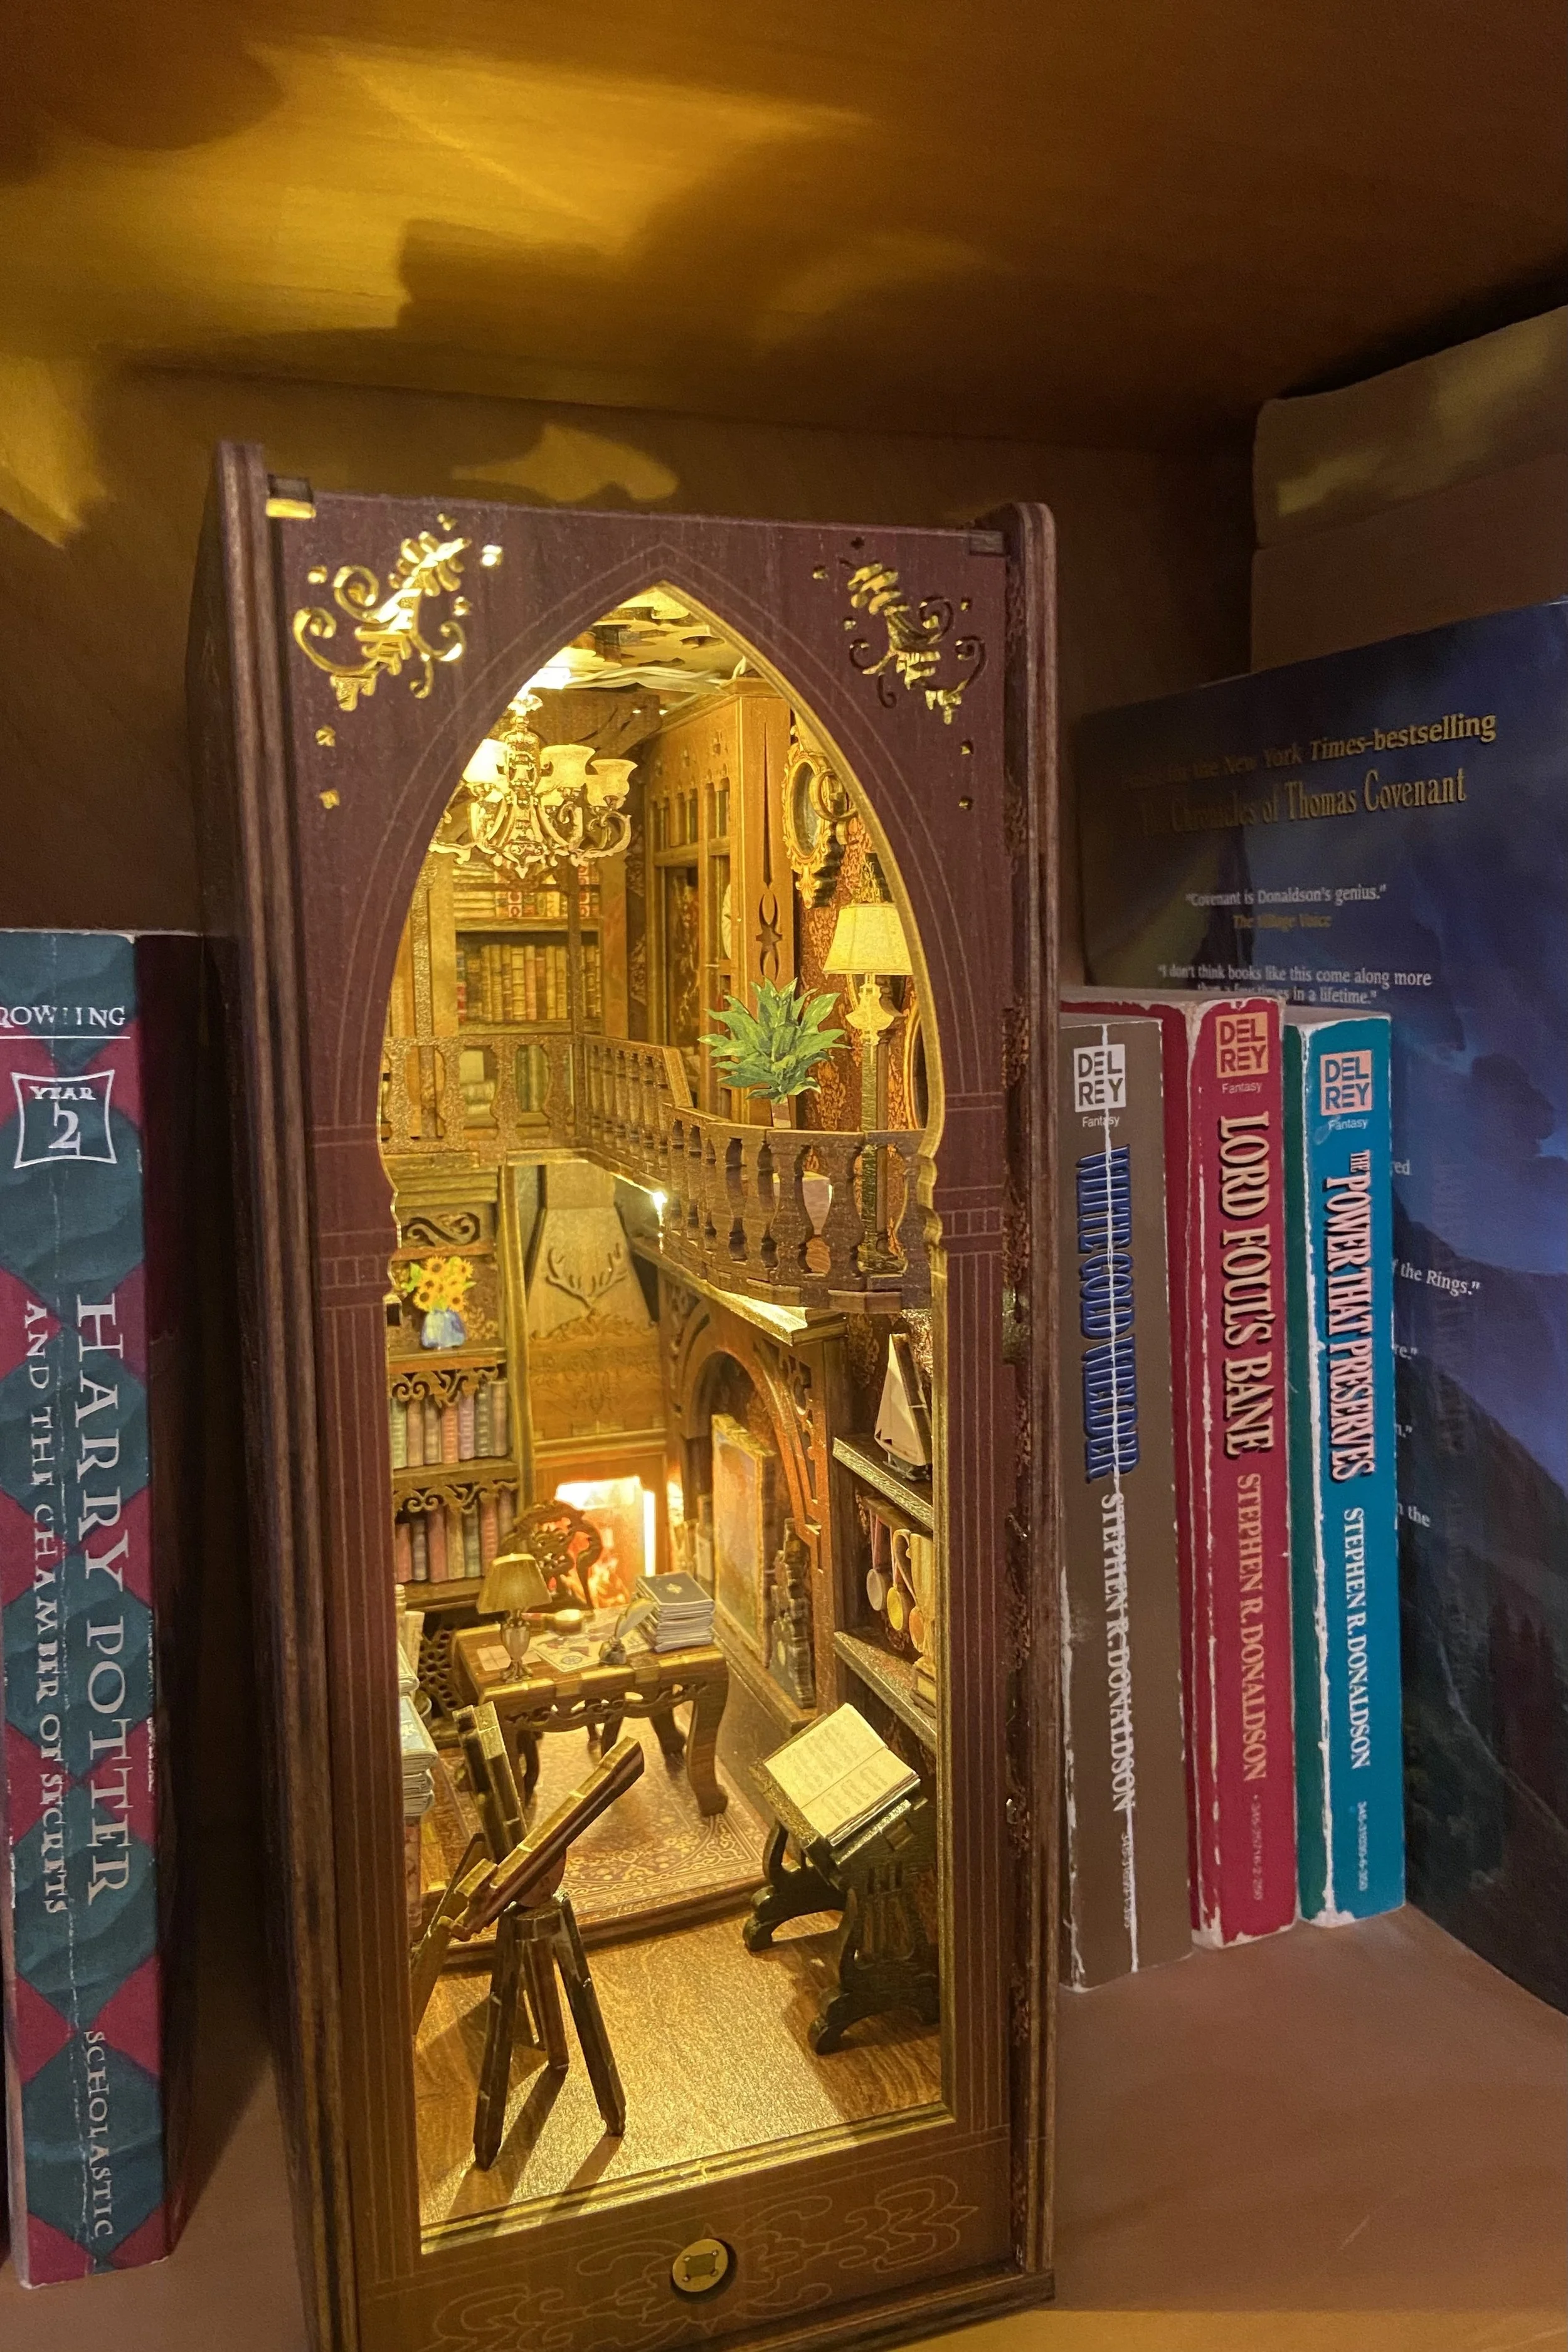
And a couple pictures of how it looks on the shelf, nestled between beloved old friends: