Adventures In Cushion Contrivance
As an Amazon associate, I may earn a small commission if you navigate to Amazon from my site and buy something. This will not result in an extra cost to you.
I don’t like buying certain things. Clothing. I just hate shopping for (and spending money on) clothes. My mother and I were laughing about this the other day during a phone conversation and we agreed that if it weren’t for her and my dear friend Jane, I wouldn’t have any decent clothes at all. Between the two of them, they have managed to force me to purchase enough pieces of clothing that I don’t go naked. I’m very grateful. Truly, I am, even though I’m a serious pain in the tush when the forced shopping is in progress…Jane, I’m very sorry about biting you.
Also on the list of things I don’t like to buy is furniture. I did one big furniture-buying spree many years ago, which yielded me all my beautiful bookcases, my gorgeous knotty-pine hutch, a computer desk, and something I’m calling a credenza, for lack of a better word. I got all these pieces from Natural Furniture in Portland. Oh, and I also bought a Sleep Number bed. Can’t say enough good things about that…but as for the rest of the furniture in my house, I either bought it very cheaply off family members, or it was given as a gift (okay, it was donated), or else I traded for it. Among the pieces I traded for are my Naugahyde recliner (made usable only by copious coverings of various blankets) and my Naugahyde couch. I was really keen on that couch, because it’s also a hide-a-bed. I figured if I ever had overnight guests, it would be good to have an extra bed available. Of course, this hostessing plan did not survive past the one night I myself slept on that mattress. I was darn near crippled when I got up in the morning…it’s NOT comfortable or good for the spine.

These days, I use the recliner if I feel like napping during the day, but the couch mostly belongs to the dogs. I do have it covered with various afghans and blankets but when the dogs jump up, the blankets slide about on the Naugahyde and soon are displaced. This means I can either straighten blankets constantly or just let the dogs jump on the uncovered couch. I was just letting them jump up when I finally noticed that they were putting increasing numbers of very small holes in the cushions. Holes the exact size and shape of their little doggie toenails. That’s when I figured I needed to take some action.

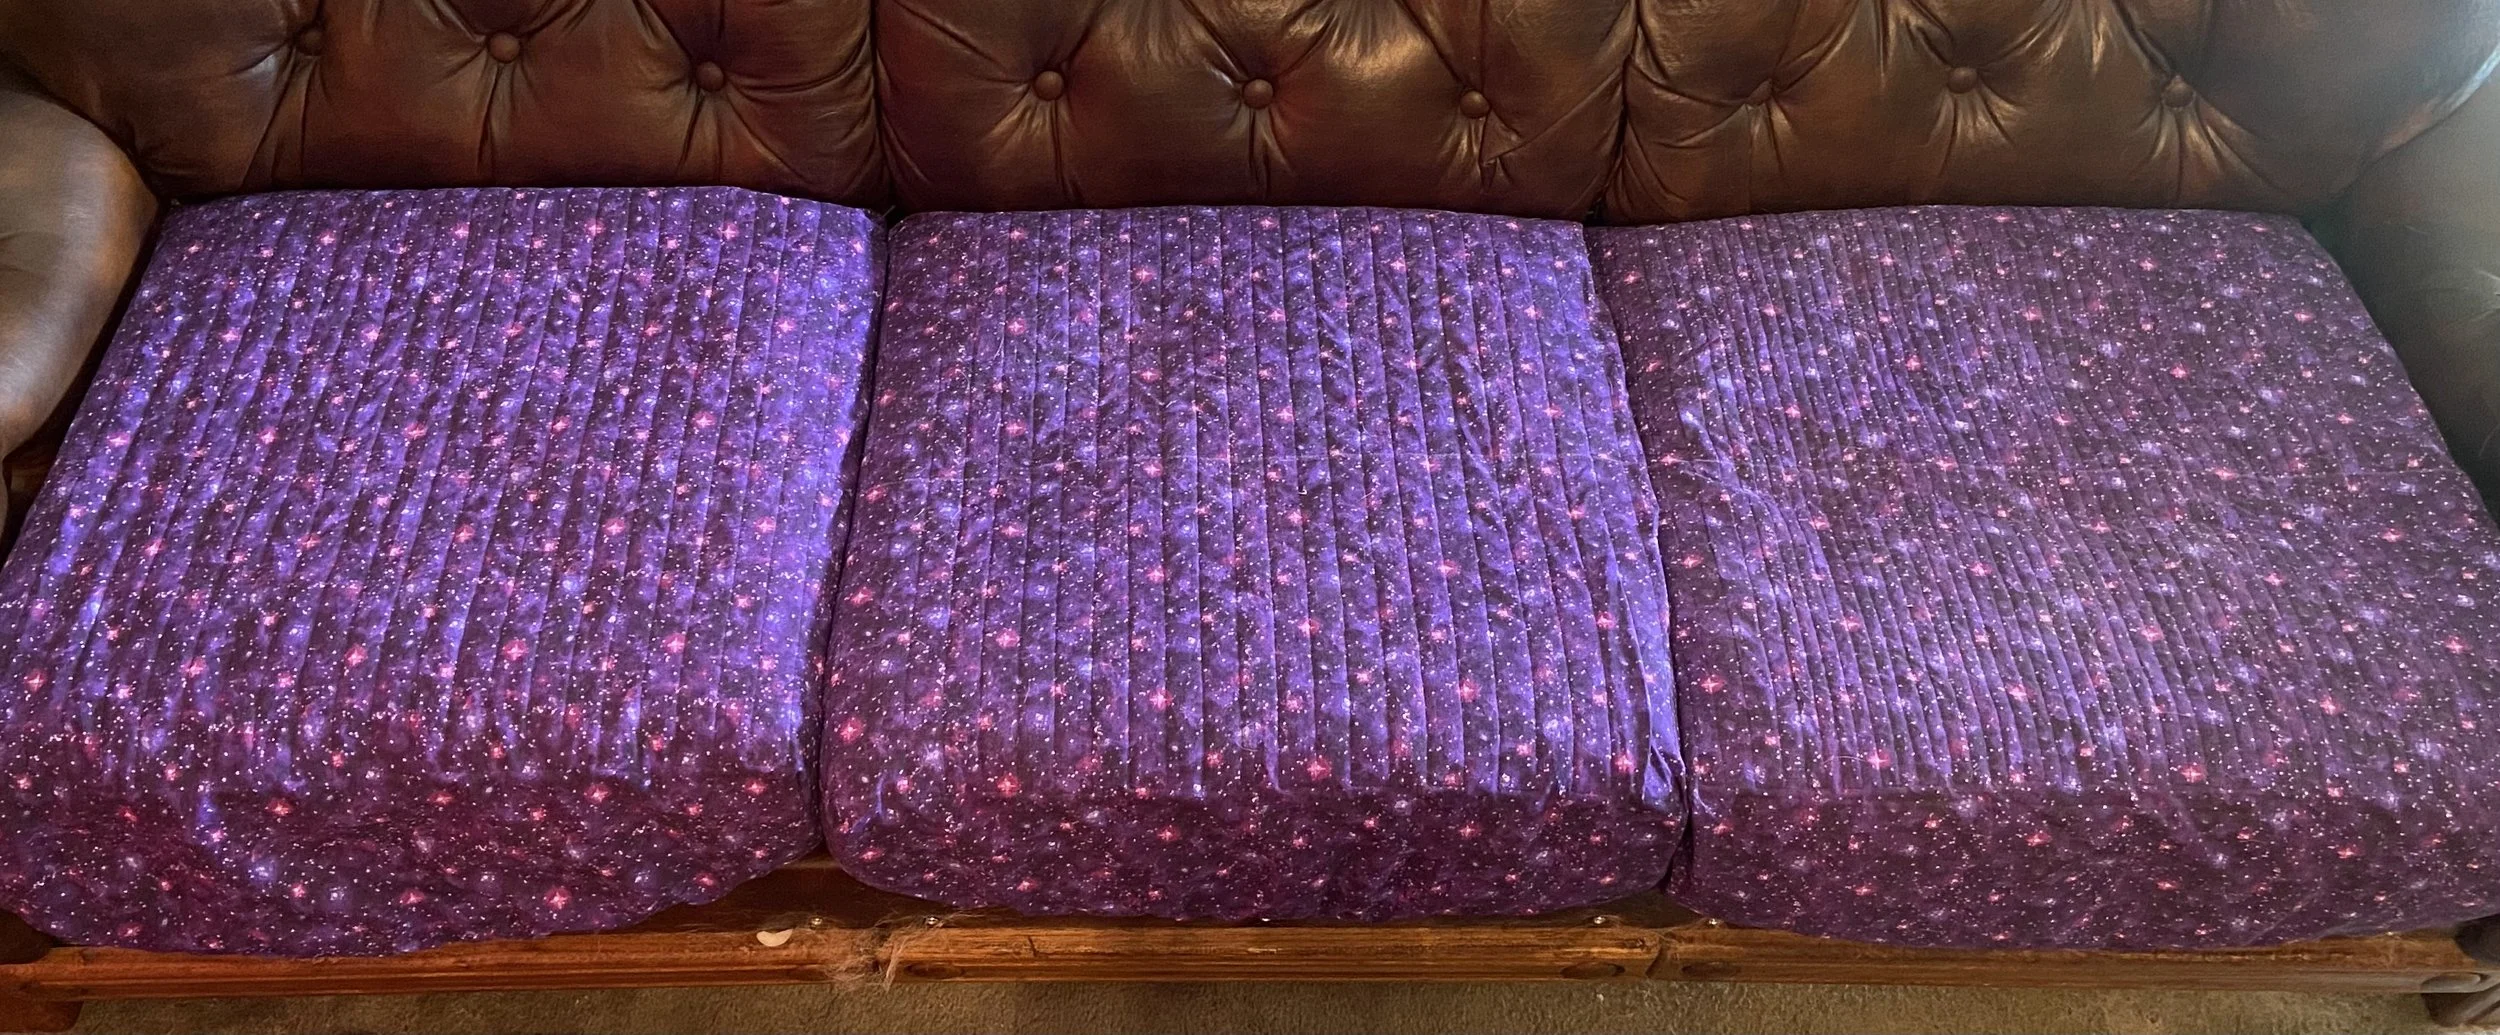
I finally decided to make individual quilted cushion covers. These are utilitarian covers, designed and sewn for function, not for good looks. Which was a relief, given how they turned out looking. But I get ahead of myself. First, I unsnapped one of the cushions and hauled it into my back room to have a good look at it and measure it. My measurement showed me that the cushion is actually square (I hadn’t been sure of that) and the top surface measures 22” x 22”. This was the only part that I planned to quilt. Two layers of fabric with cotton batting in between should be enough to keep the dogs’ claws from penetrating. I decided that my measurement for the big (top) piece of cloth should be 40”. This should be enough to wrap around the sides of the cushion, wrap a little bit underneath, leave enough length to sew a casing for some elastic, and leave a little leeway for shrinkage when I washed the fabric before sewing it.
The fabric I planned to use was a sort of “galaxy print” cotton that was heavier than quilting cotton but lighter than canvas. I’d had this in the stash for ages…I think I’d planned to make curtains from it. I bought it from JoAnn’s a number of years ago, and it was 108” wide. Now, when I made my last quilt, I had to buy backing fabric and ended up buying fabric about 108” wide. The lady who was cutting the fabric for me didn’t actually use scissors. Instead, she made a small snip in the fabric, and then tore the fabric across the grain. She told me that when working with fabric that wide, it’s best to tear rather than cut in order to get a straight line, because it’s almost impossible to get a straight cut right across the grain of fabric. I did not heed her advice on the quilt. And unfortunately, I did not heed her advice on this project either.
I ended up with my 40” top piece, a 26” under piece, and I also cut a piece of batting that was 22” square. And then I washed all the fabric except the batting. It did shrink some and when I ironed it out, I was dismayed to realize that my 40” square was not square at all, but rather looked like a sort of drunken rhomboid. I should have stopped here and torn my fabric properly before trying to sew it, but I can be stubborn. “I can make this work!” The rallying cry of the deluded seamstress still clinging firmly to denial.

I pinned the cotton batting in the center of my smaller square of fabric and wrapped the edges around. Then I stitched that down, using my walking foot. On the first cushion, I didn’t bother with mitered corners because no one was every going to see this part of the cushion cover. But on the other two cushions, I did miter those corners. It’s just tidier, it’s just as easy as making a square corner, and the fabric lies even and flat when you’re done.
Next, I centered (I use that word advisedly) my fabric/batting piece onto the back side of the large piece of fabric that would be the cover’s outer surface. I pinned it down with my quilting pins and started quilting. I was just doing parallel rows of stitches and trying to keep it straight by eye. I do have a quilting guide that came with my machine for just these sorts of jobs, but it only fits in the attachment to my regular presser feet, and won’t attach to the walking foot. Honestly, it looked like a drunk had quilted it. I reminded myself that these were utility cushions and the dogs would not care how they looked, and I pressed on.


Next, I needed to sew the side seams. For that, I used my quilting ruler and rotary cutter to cut a square out of each of the corners of the large piece of fabric, leaving 1/4” extra fabric for seam allowance. Since my fabric was not square, I just did my best to have the overhang on all four sides even, trimming where necessary.

Then I swapped out the walking foot for my overcast foot. Okay, brief side note: this little presser foot is genius. It’s designed to allow you to use a regular sewing machine to overcast (or zigzag) the raw edge of your fabric, so that it doesn’t ravel. This is what a serger machine does, but they are expensive and I don’t have one. But I do have this genius little foot. As you can see in the picture, it has a guide (that black metal piece at the front end) so that you know where to hold the edge of your fabric as you feed it through. And in the stitching area, there is a little bar that the thread passes over every time the needle jumps to the right to catch the edge of your fabric. This little bar puts just enough slack in the top thread to keep the edge from curling as your thread wraps around it. SO clever!

I selected a stitch that would sew a seam while overcasting the edge. You wouldn’t do this in garment-making, or in any seam that was going to take a lot of pressure, because this seam is quite close to the edge of the fabric. But my cushion covers were intended to actually fit the cushions, not stretch to go around them. So I wasn’t worried about this. I sewed all four corner seams this way. This left only the bottom edge of the cover unfinished. So I used the overcast foot some more and finished the bottom edges as well.
Finally, the elastic case. I didn’t bother to measure…I just turned up the bottom edge to the inside by roughly an inch and sewed it down, leaving a couple inches open for me to insert my elastic. Then I measured out what I thought was an appropriate length of elastic (I have so much colorful elastic left over from my mask-making projects!), pinned one end down, and put a safety pin on the other end so that I could thread it through the casing. Once it was threaded through, I stitched the two ends together (with a messy zigzag…this is NEVER coming loose), and then stitched closed the opening I’d left in the case. Et voila! Finished.


It fits okay. There are a number of things I could have done (and some I could still do) to make it fit better. But it does fit. And it is puppy-dog approved.
For the other cushions, I applied the lessons learned and tore a new top piece of fabric, which came out square after washing and drying. When it came time to do my quilting, I ran 1” wide masking tape across the area where I wanted to quilt. I used a couple smaller pieces of tape as spacers to make sure all my rows of tape were 1” apart. And then I sewed along the outside edges of the tape. Perfectly straight seams exactly 1” apart. Yes, I could have done this by marking with a pen also. I wouldn’t even have had to use erasable pen since I was marking and sewing on the underside which would never be visible. But the tape was fun and it worked a treat.


The cushion covers do stay put on the cushions but they are a little bit loose. Two things I could have done to make them fit a little more snugly are: 1) make the overhang a little deeper (as in, cut the top piece of fabric 44” or 46” square); and 2) use a shorter piece of elastic to make it draw in a little more tightly. I can still do either or both of those things. It would be very easy to pull out a little length of the elastic, cut some off, and sew the ends together again. The other solution would be a bit more work, but I could certainly sew on a length of fabric to extend the overhang, stitch a new casing, and thread my (shorter) elastic through. As things stand now, the covers are working just fine and I’ll only do further improvements if it turns out to be necessary.
Right now, they are doggie-approved. Seriously, the dogs love them. And I love not having a huge tangle of blankets strewn about the couch all the time. And no new holes in the Naugahyde. Win-win!