Adventures In Gallery Glass
As an Amazon associate, I may earn a small commission if you navigate to Amazon from my site and buy something. This will not result in an extra cost to you.
Emboldened by the rallying cry “Do it for the blog!”, I have managed to wade through another craft project that has waited in a corner of my studio* for several years: faux-stained glass. I first saw this on YouTube (naturally) and it was intriguing. The idea is that you use some sort of dimensional paint to provide the “leading” between the colored panes of glass and then you use some sort of transparent or translucent paint to color in your pattern.
*Side note: my mother wanted to know, “How did you convert your craft room into a studio?”
“Through the power of words.”
“What?”
“I re-named it.”
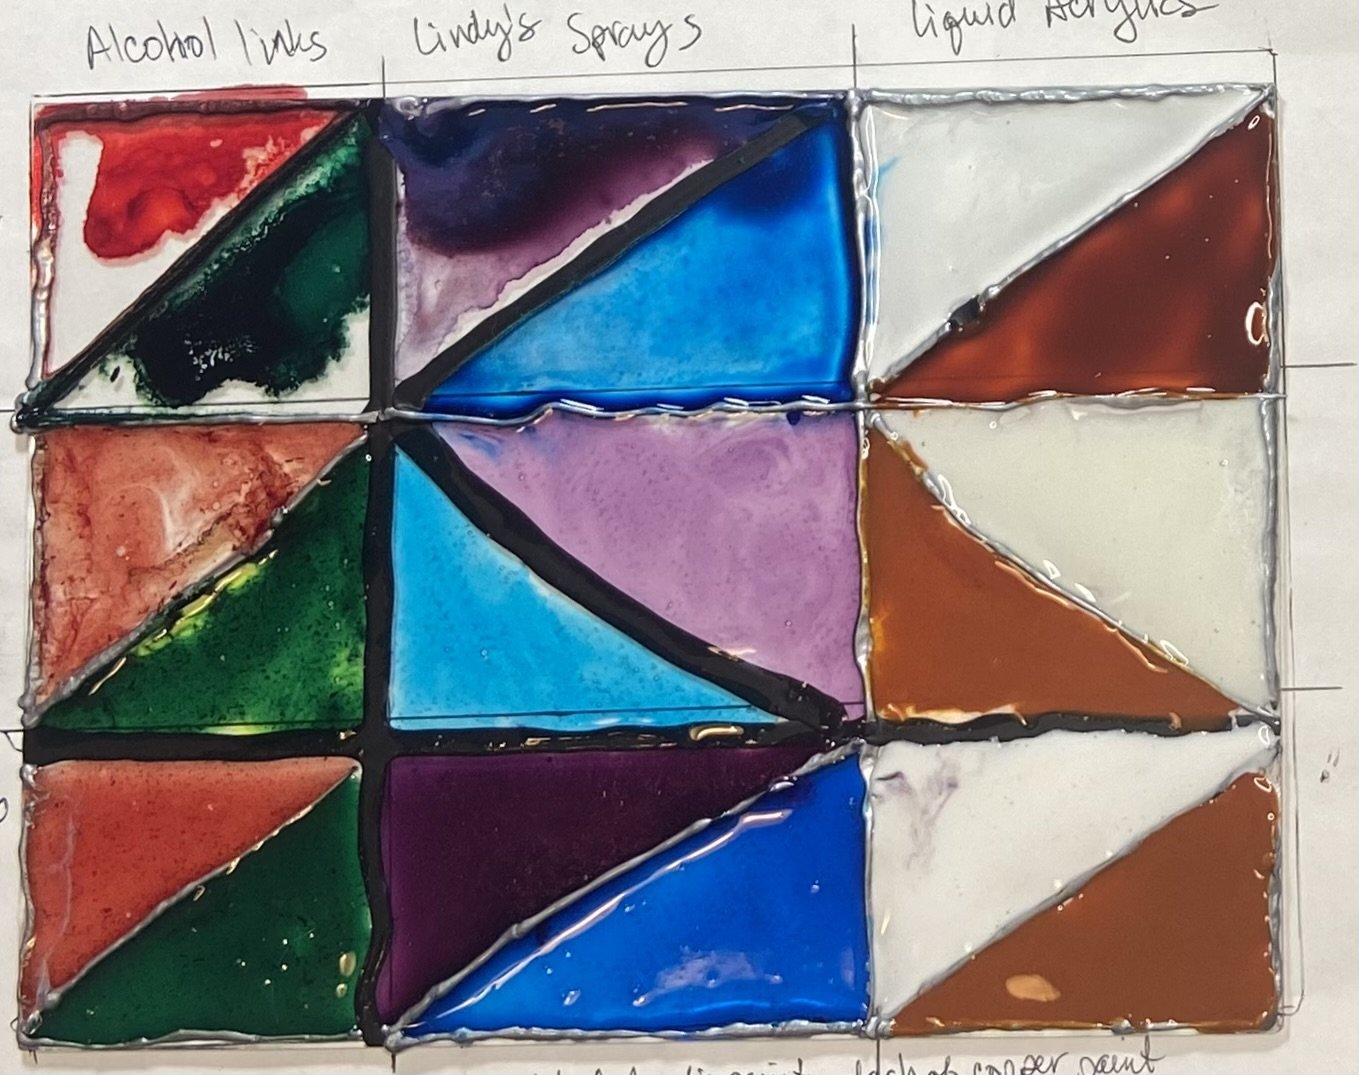
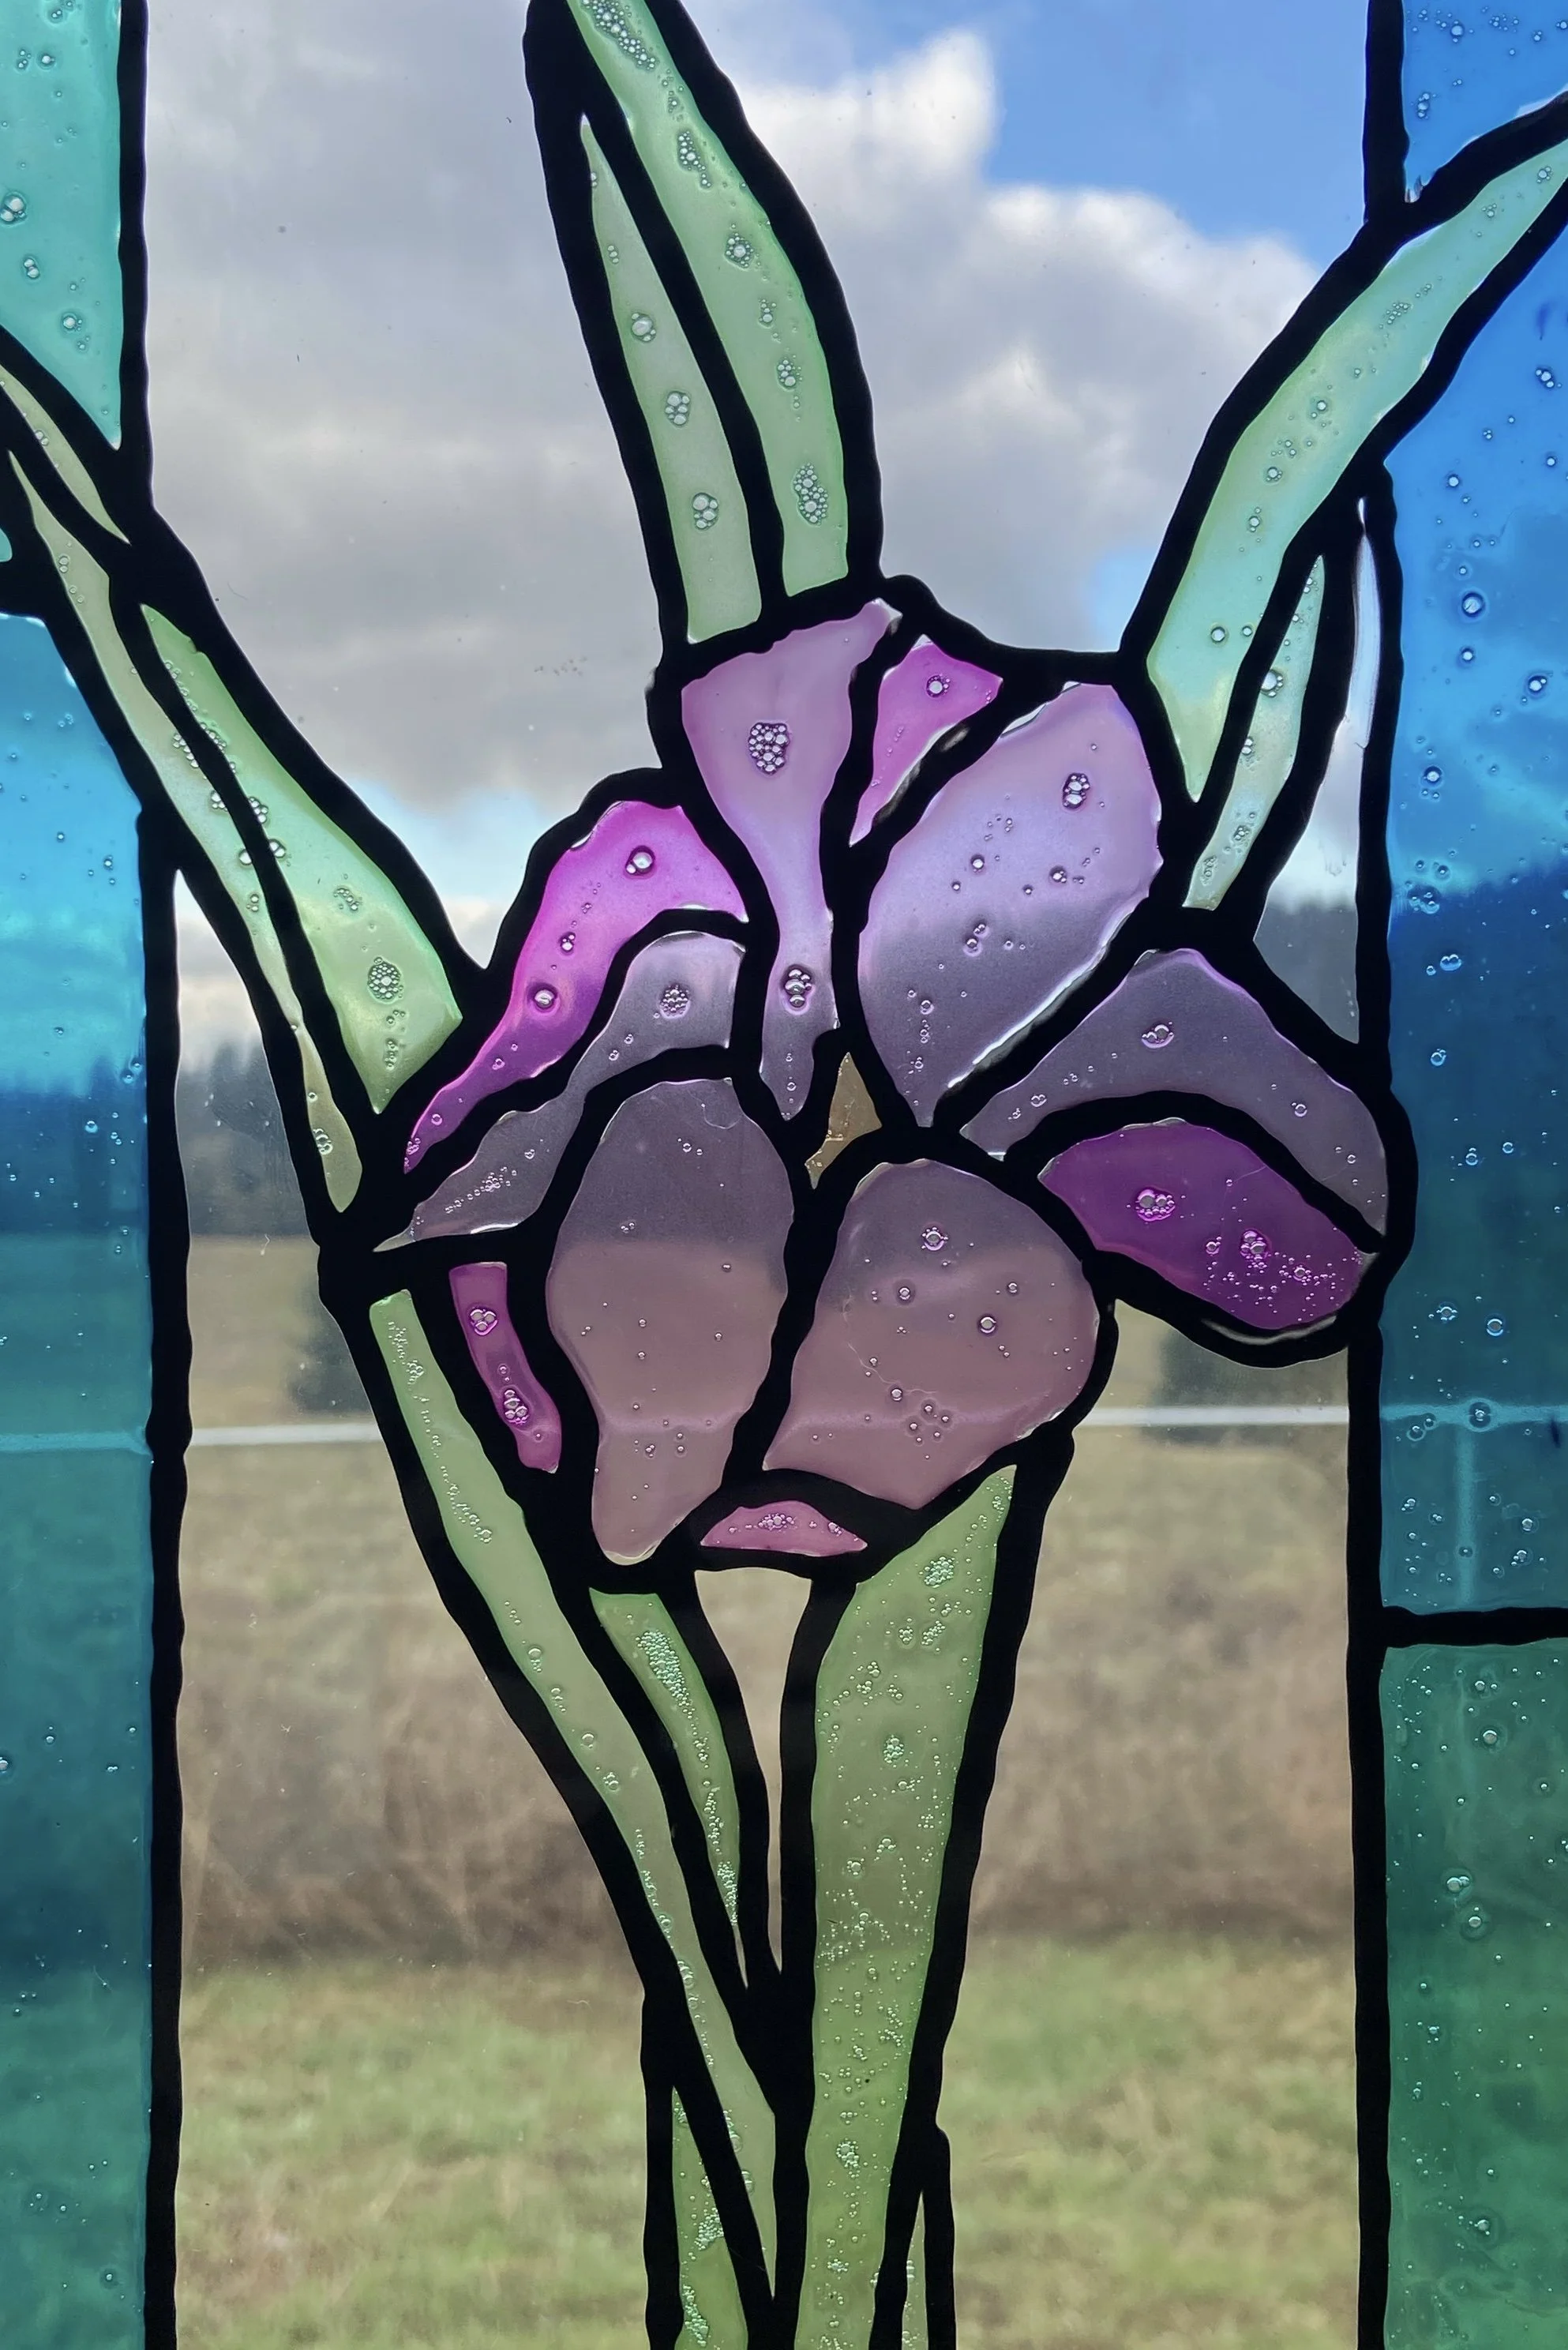
Back to the project: I opted for what appeared to be the easiest route (of course), using clear Elmer’s glue for the colored bits and puffy fabric paint for the “leading.” The idea was to use some paint to tint the clear glue and then apply that for the colored glass. Of course, getting the right paint to mix with the clear glue is the trick. Many paints will end up opaque. I opted to try a sort of “sampler” on a scrap piece of glass. I tried three different kinds of color: alcohol inks (widely recommended for this sort of thing), my beautiful Lindy’s Gang spray paints (I bought this kit and this kit a few years ago), and my Finnabair Liquid Acrylic paints (which are supposed to be more translucent than regular acrylic paint). I also tried three different methods of paint application: applying the undiluted paint directly onto the glass; mixing paint and clear glue on the glass; and pre-mixing the paint and glue before applying to the glass. I ended up deciding on the Lindy’s sprays, of which I had quite a few colors; it seemed the best balance between rich colors and translucence. Also, I got the best results from pre-mixing the paint and glue.
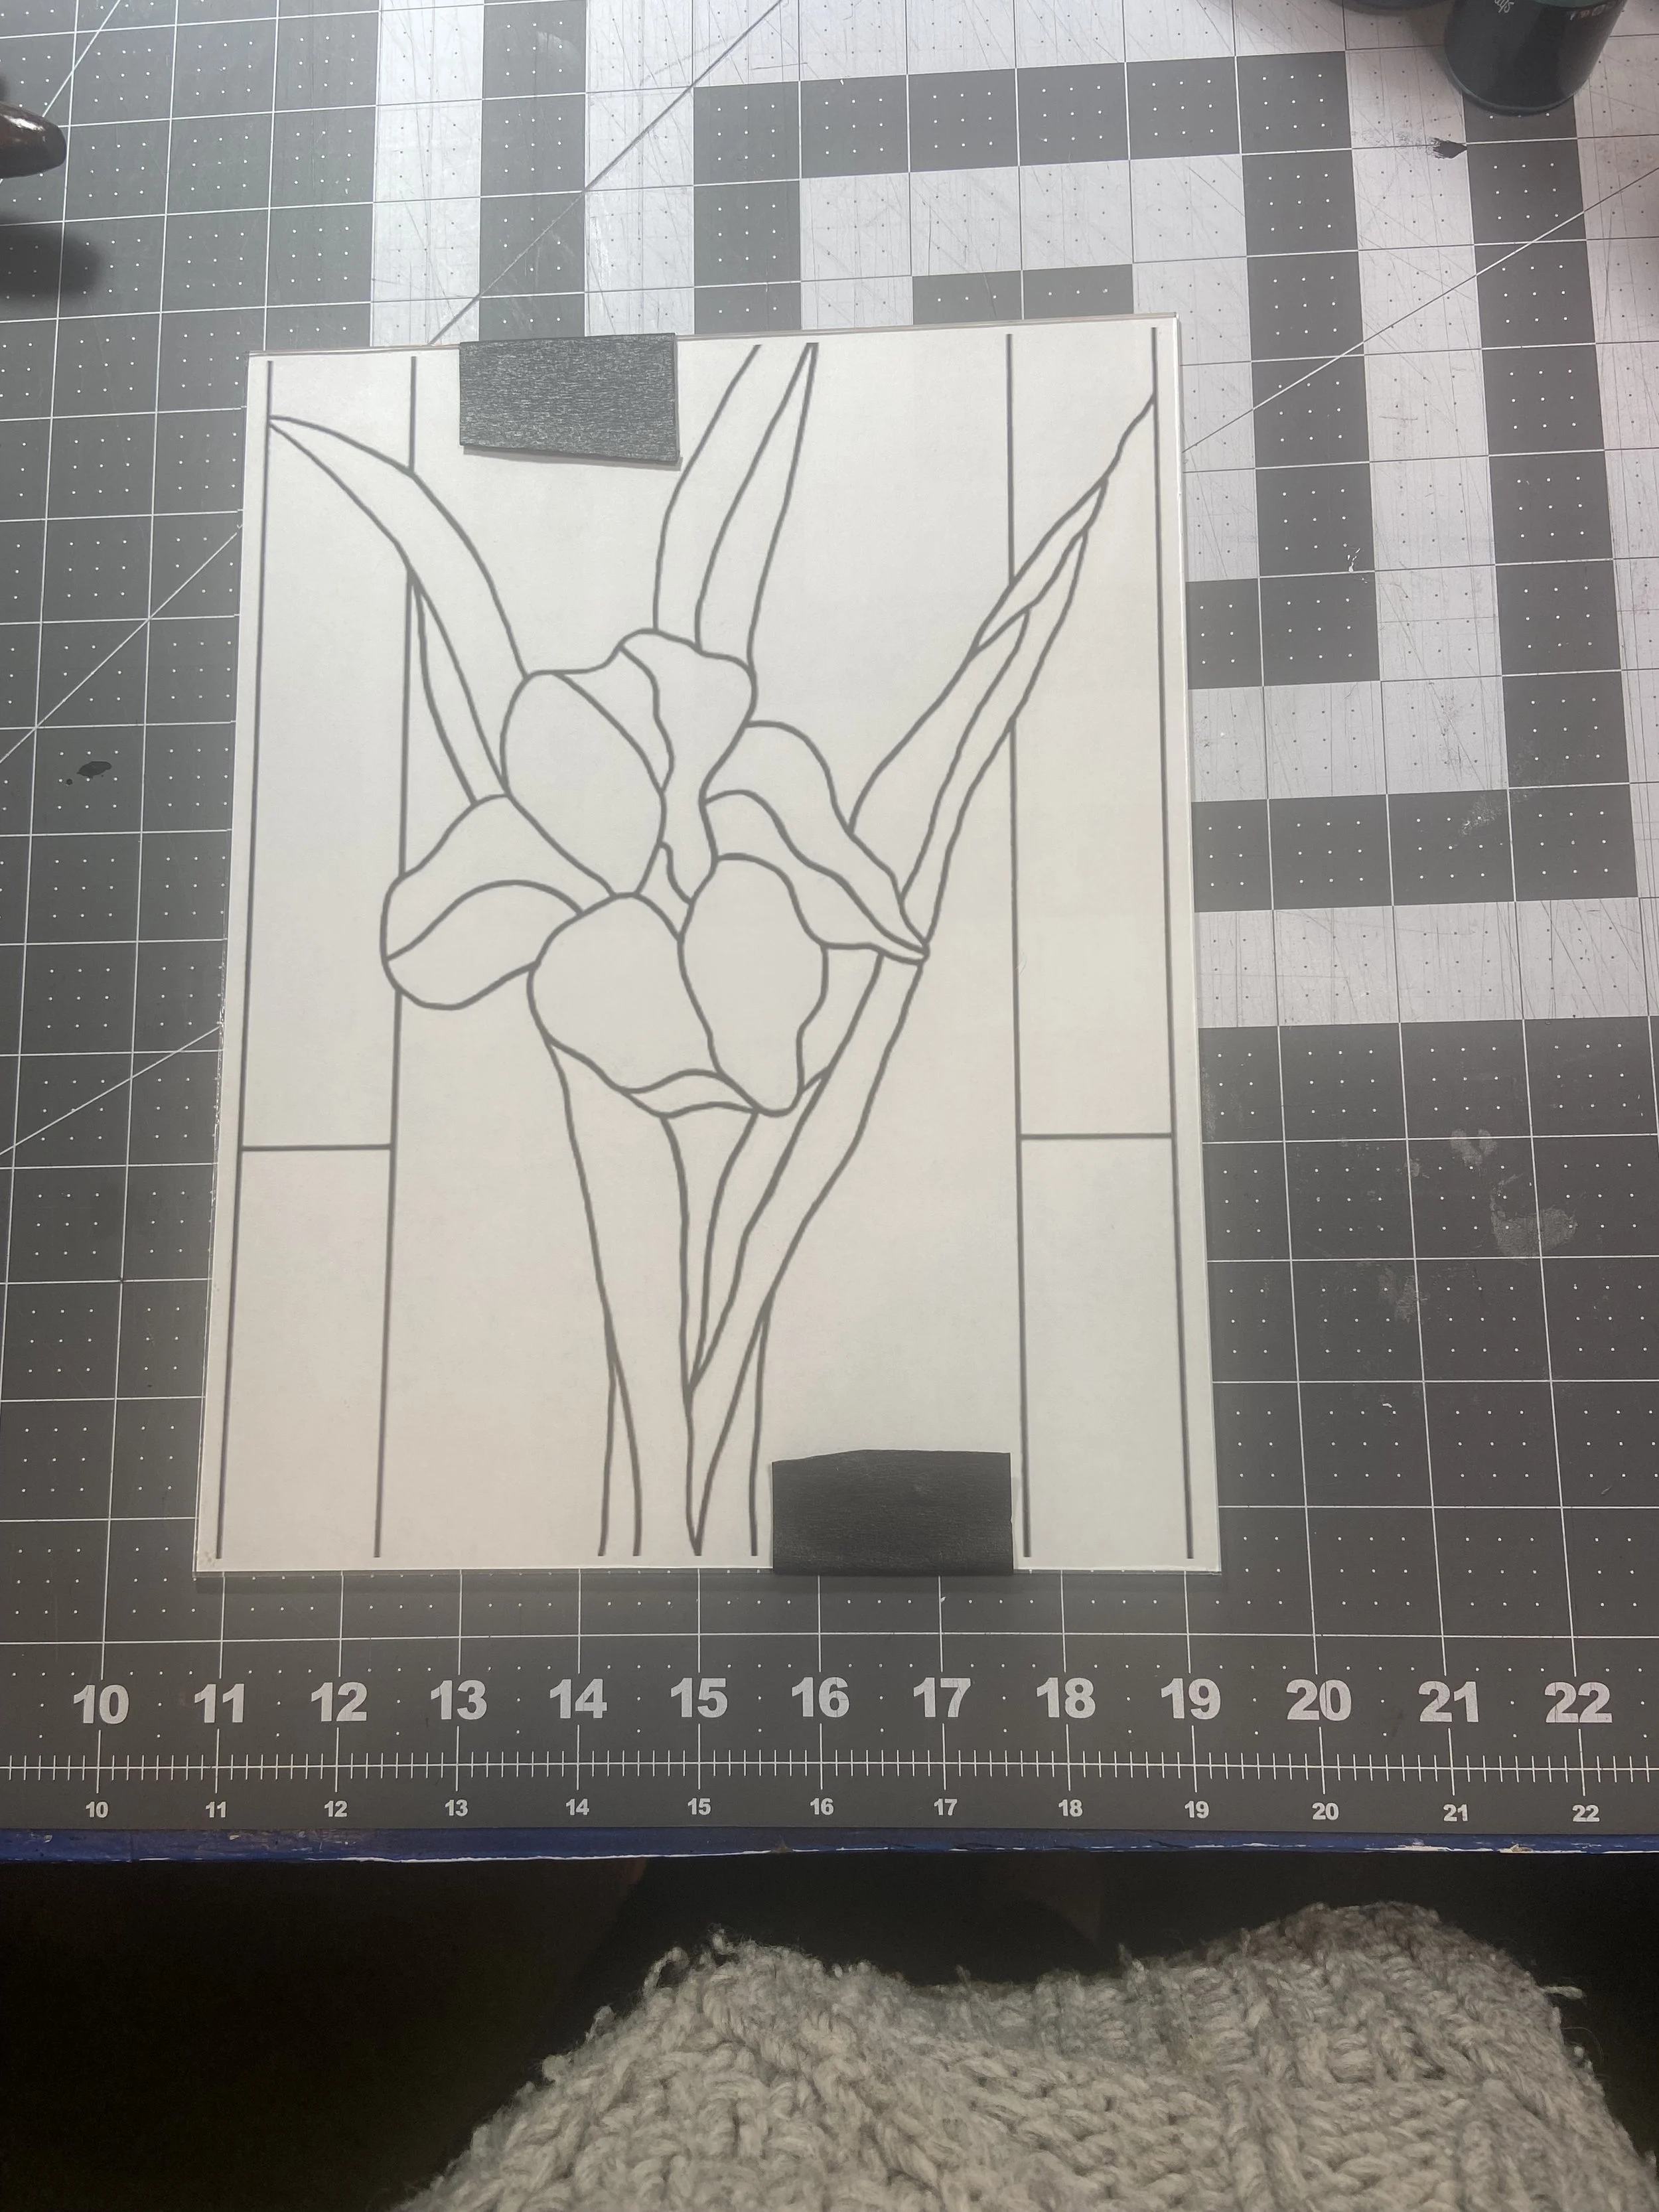
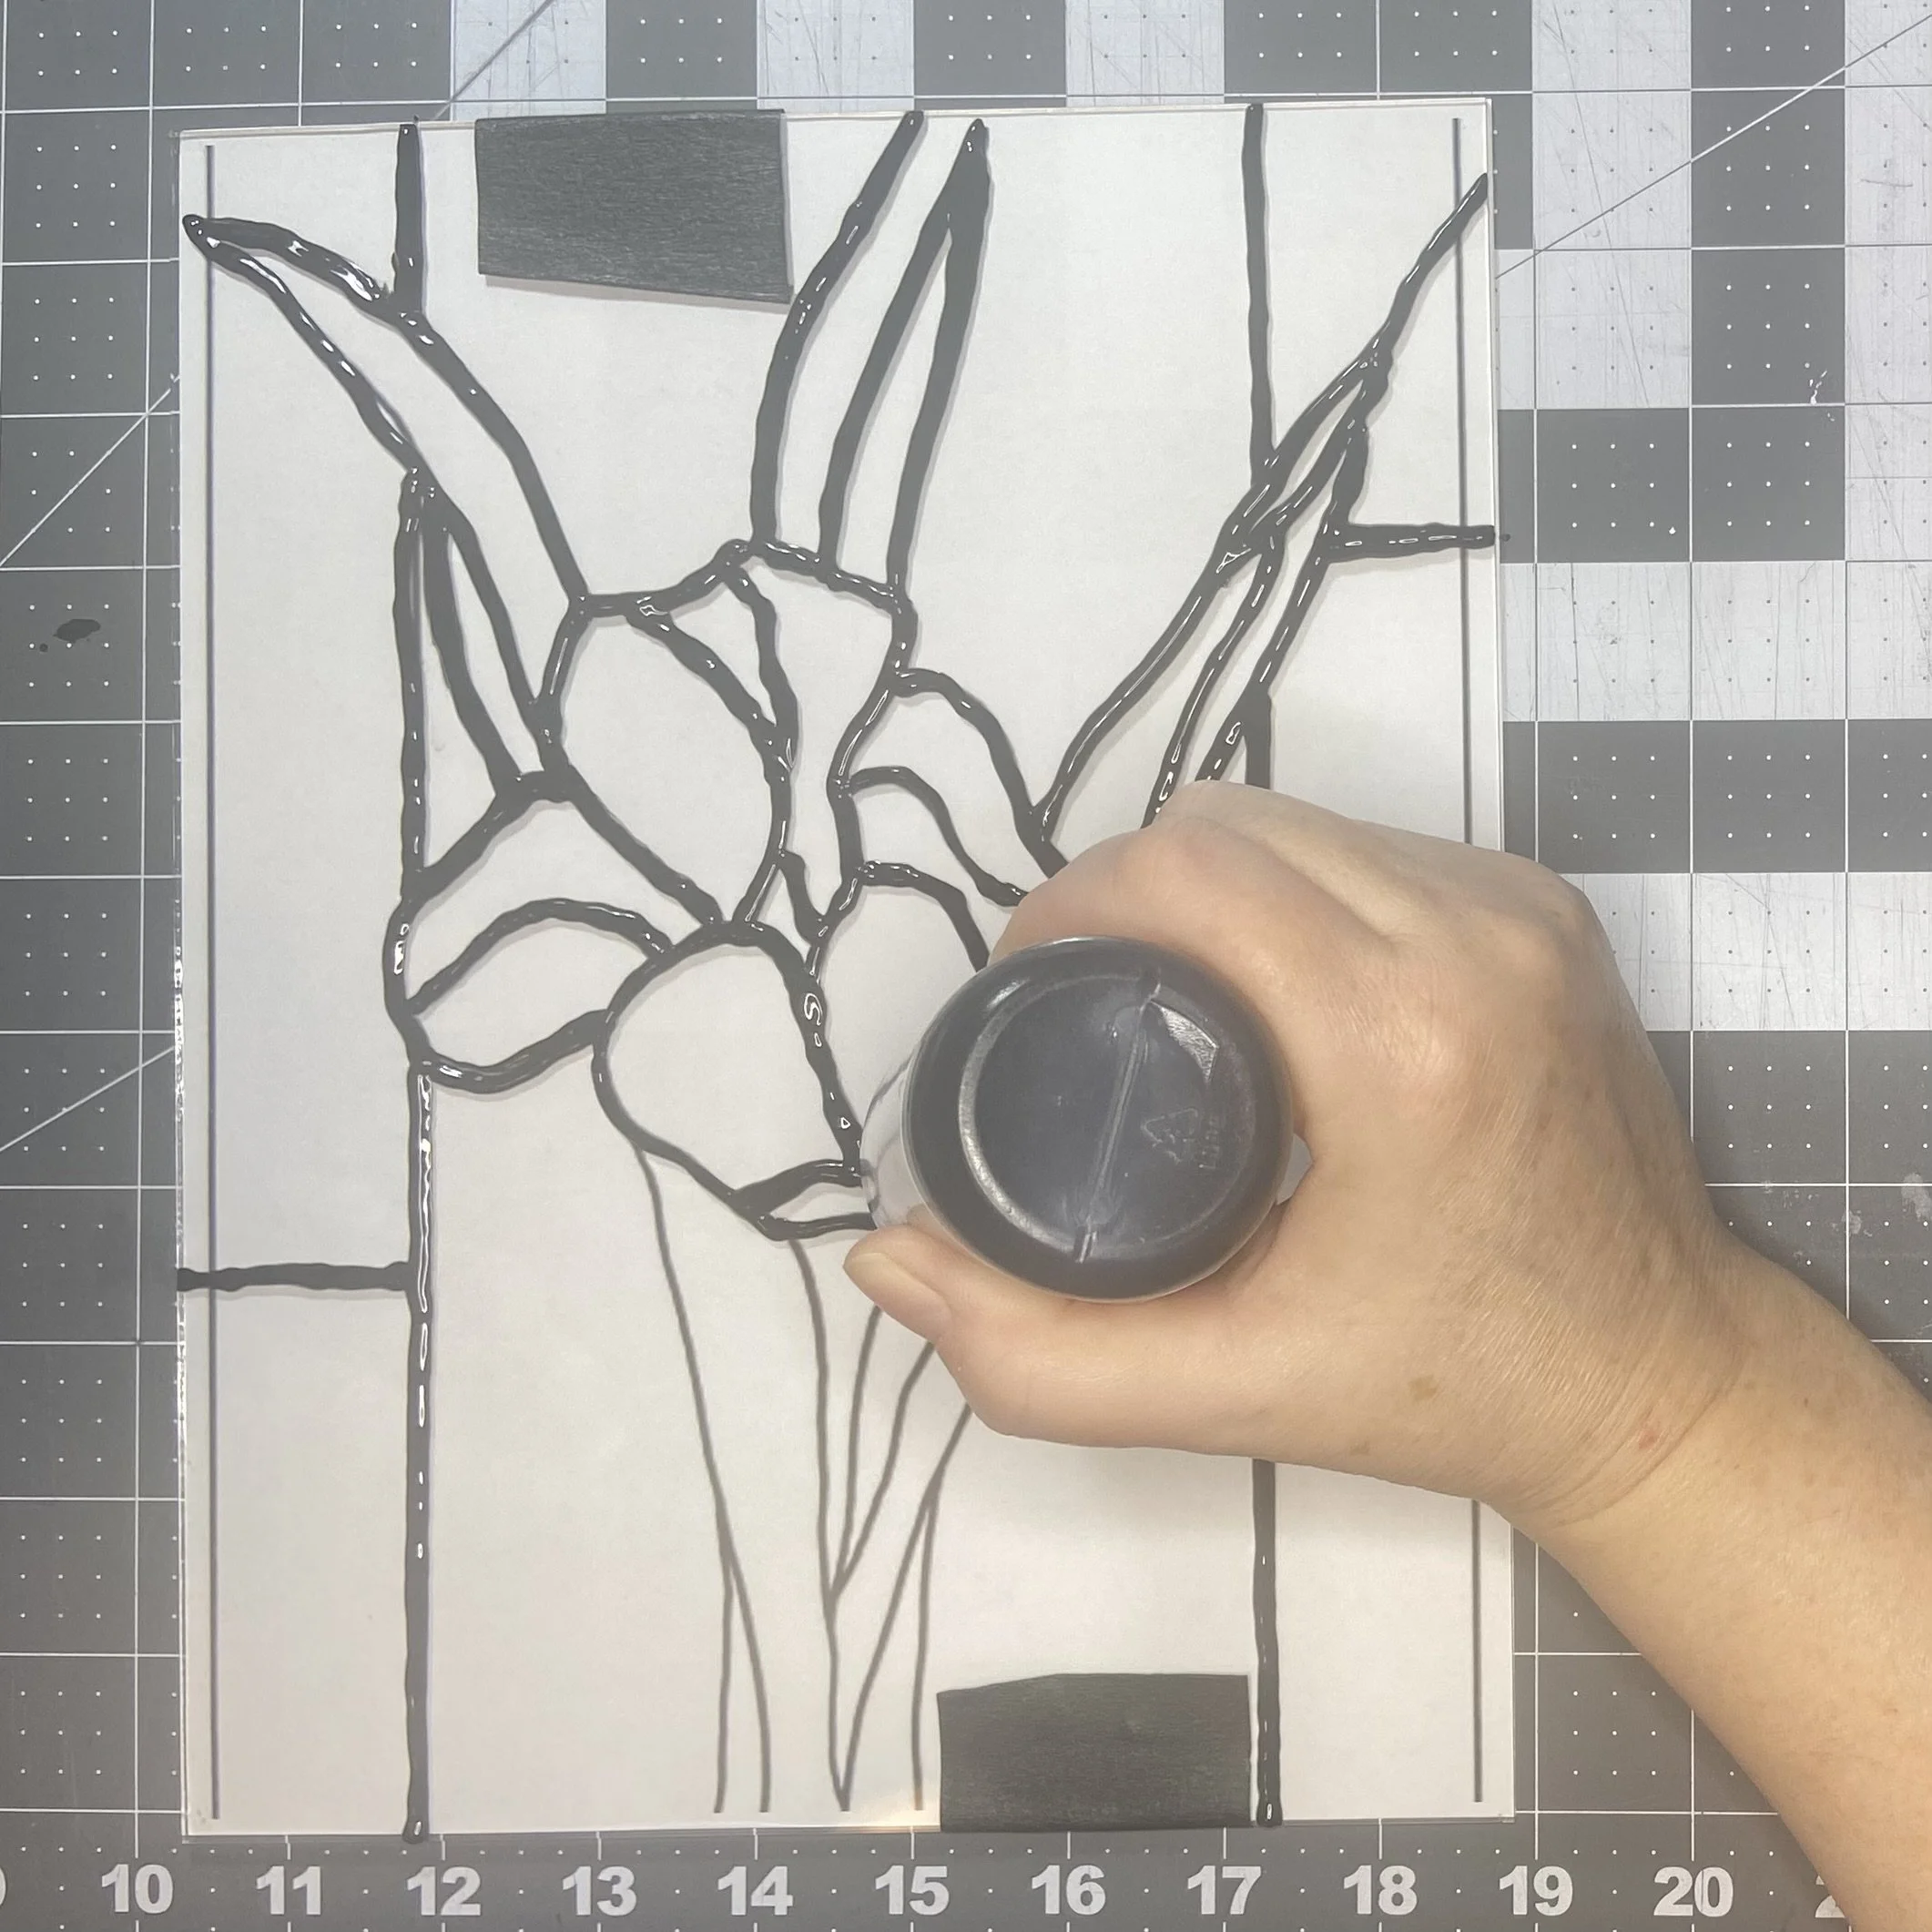
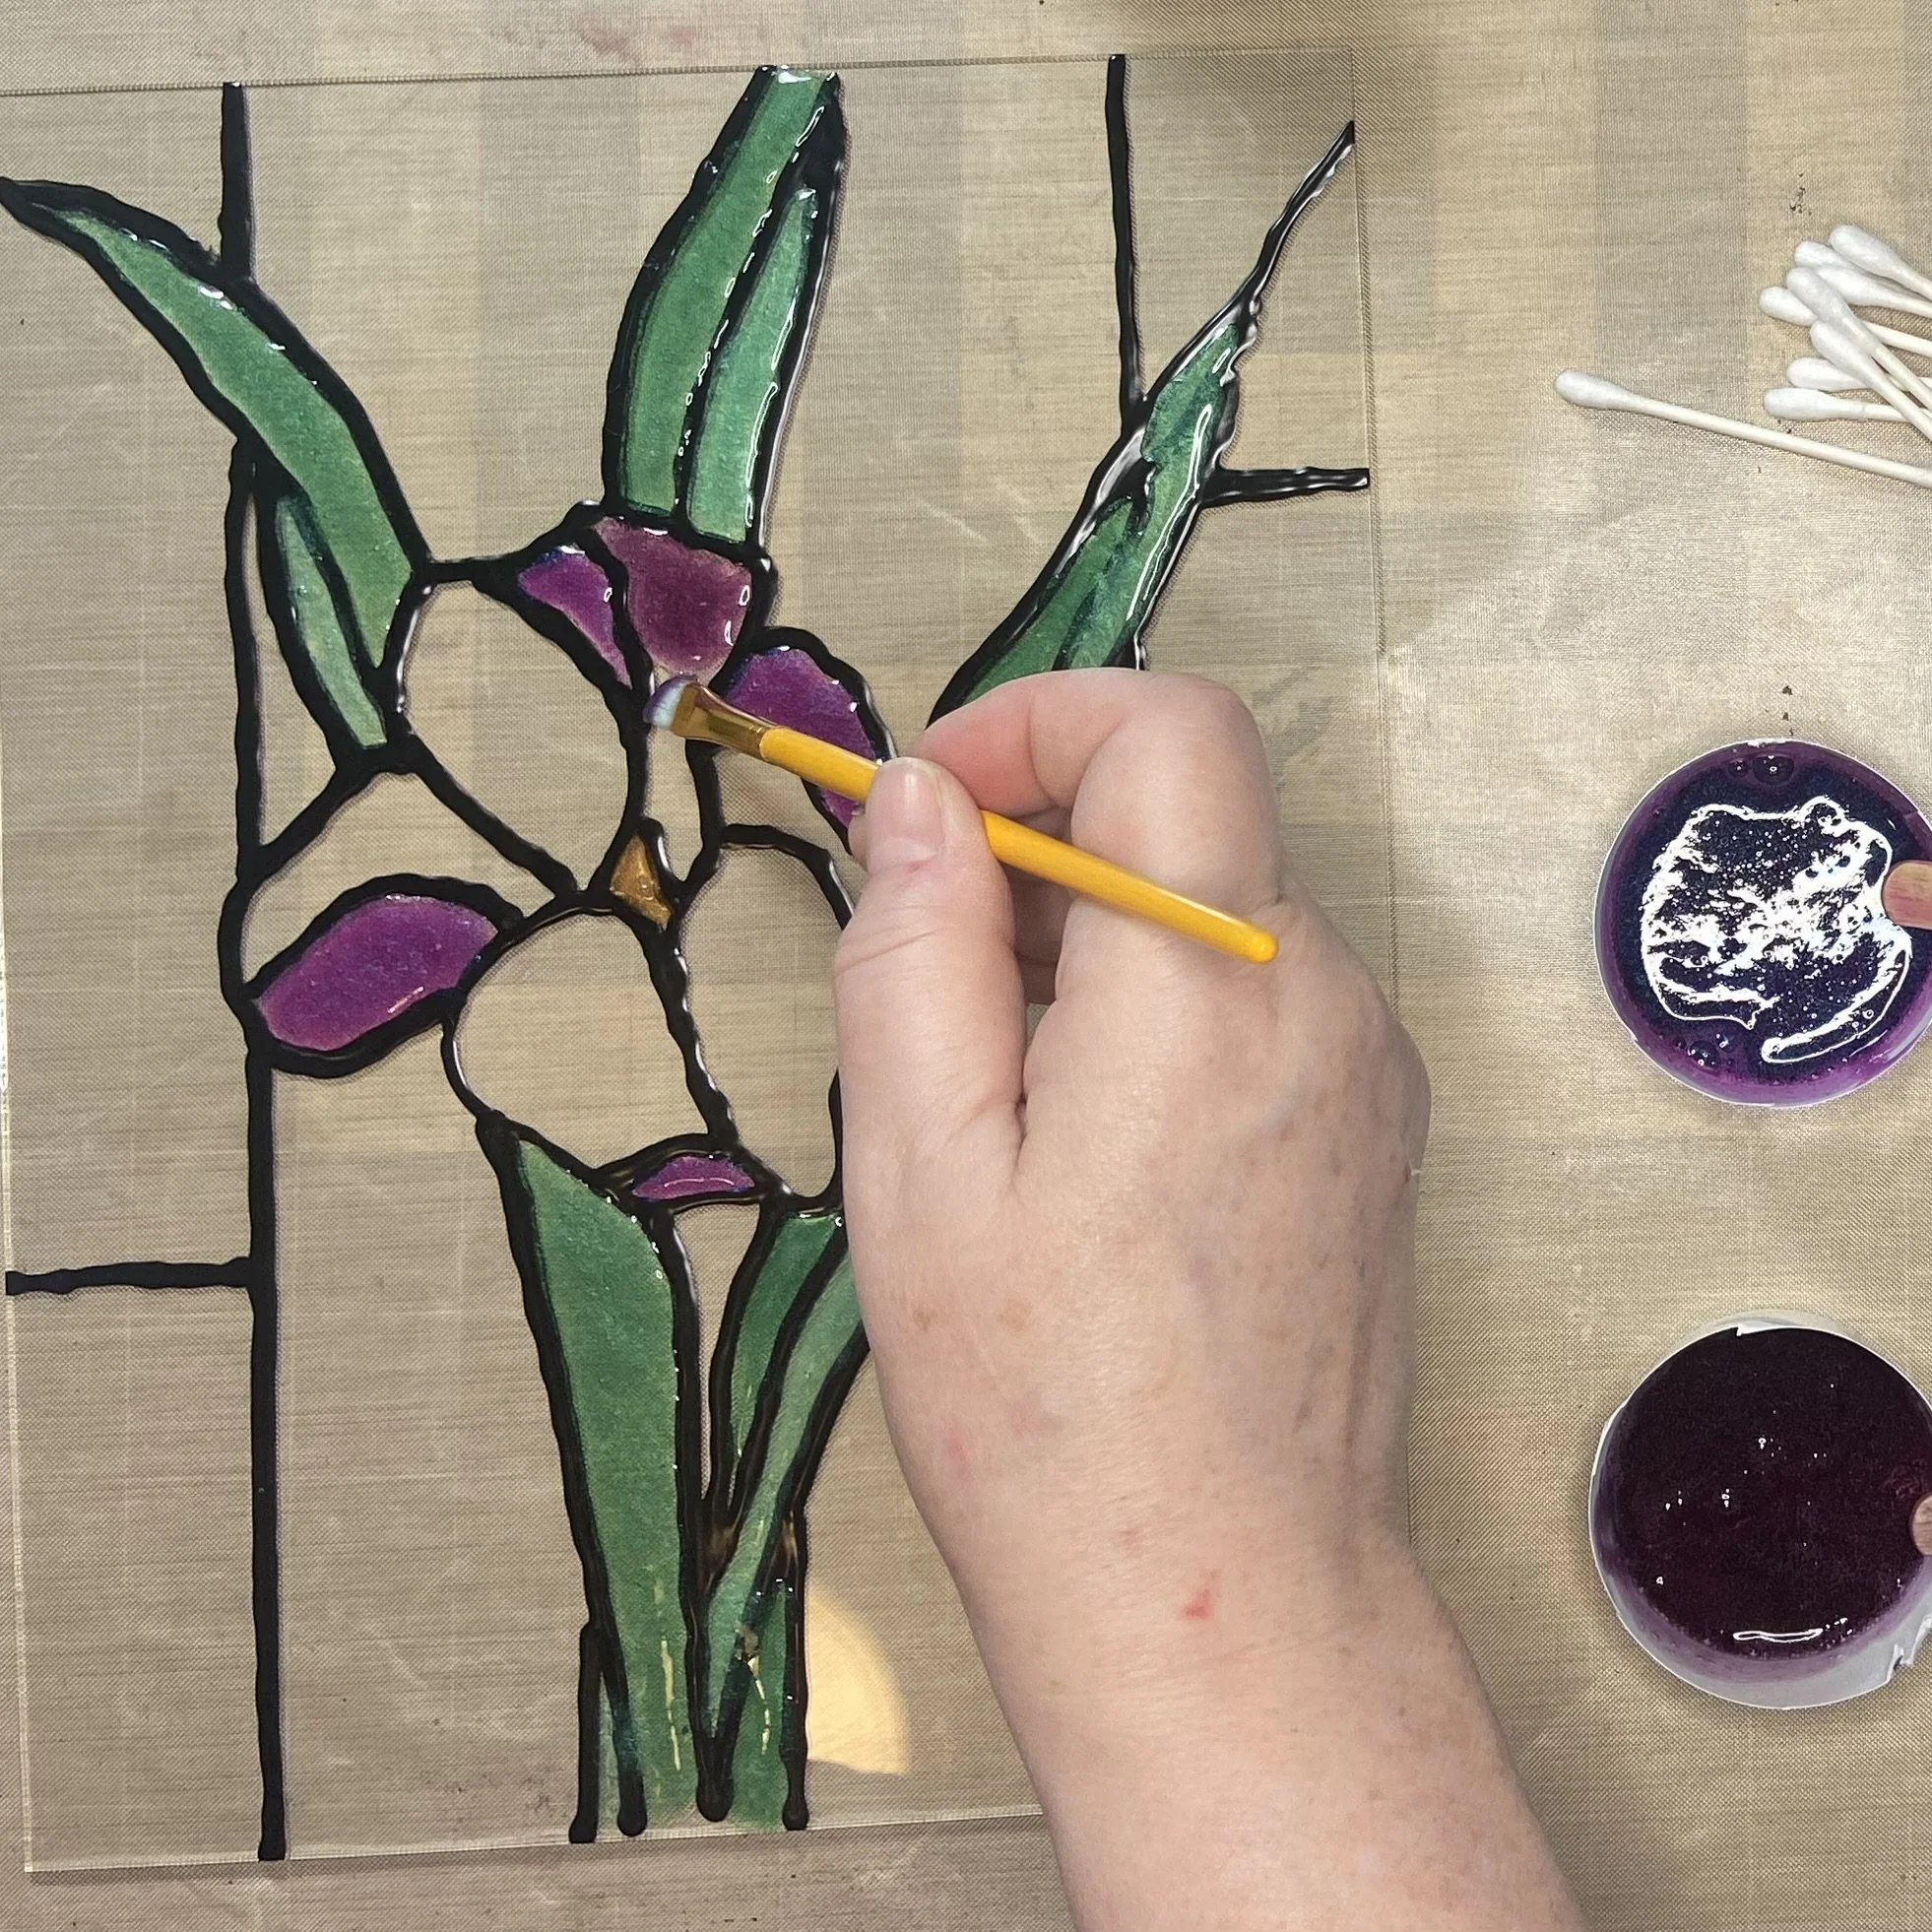
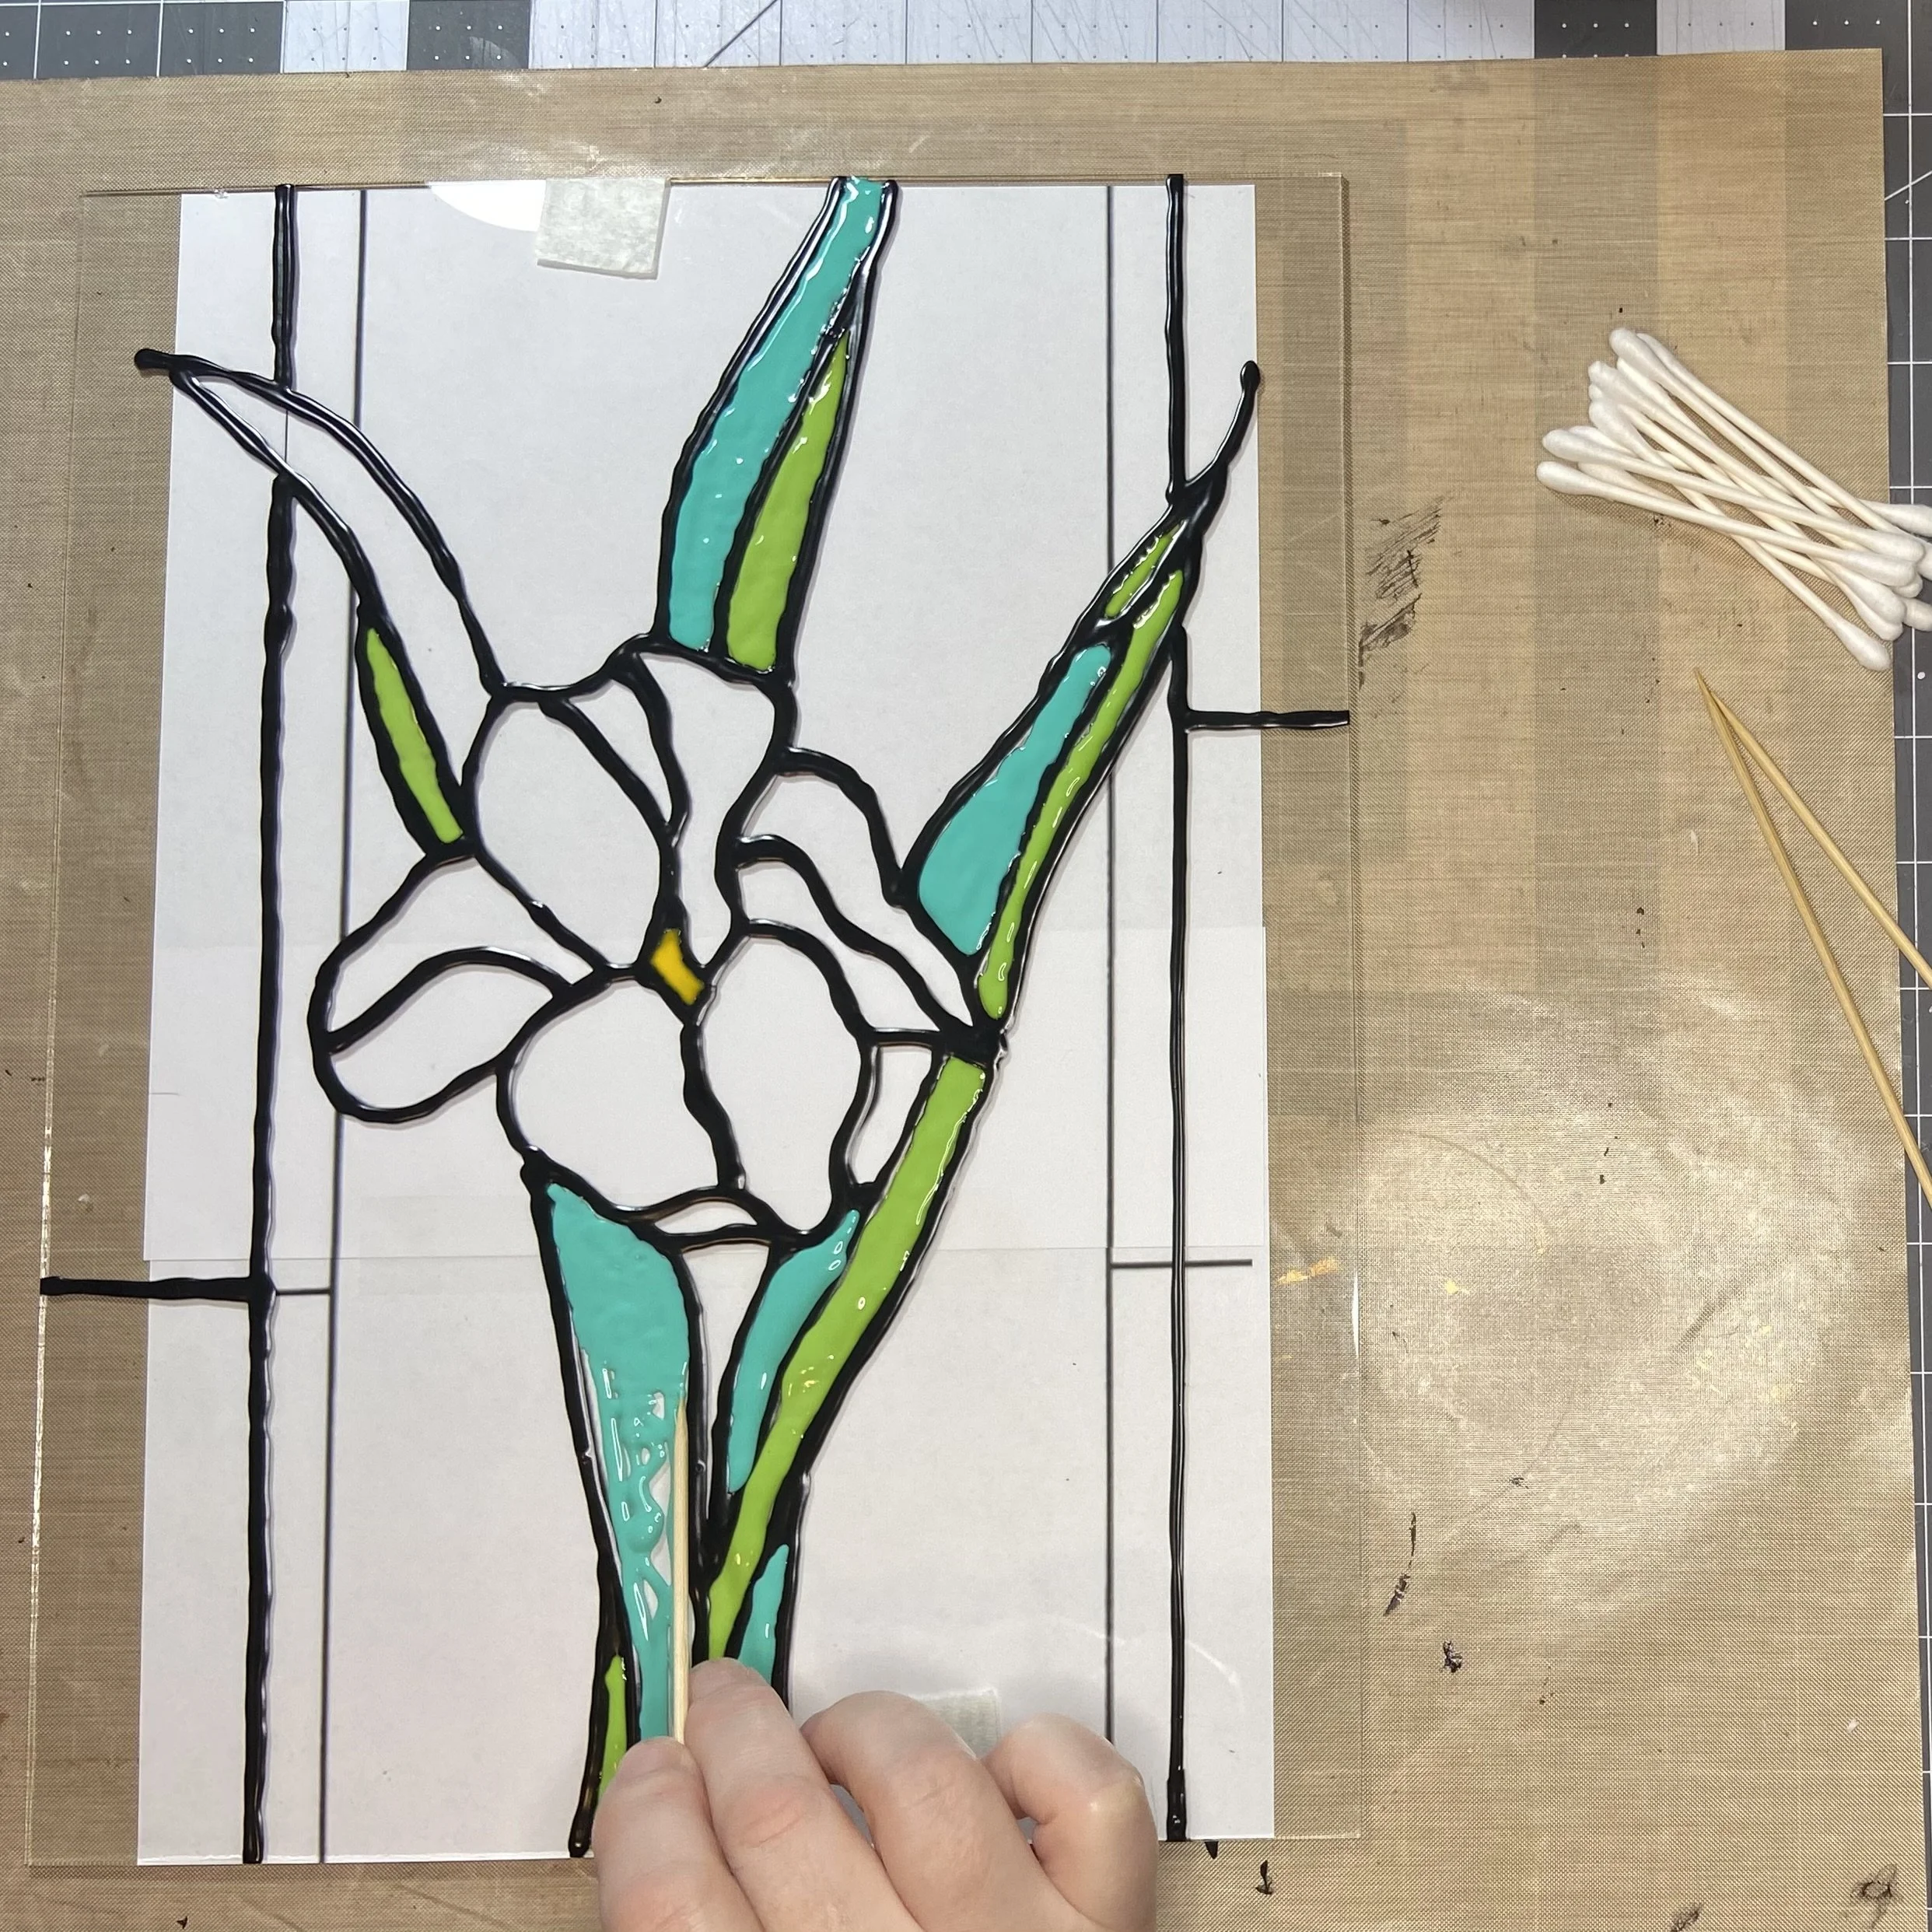
Having decided on this method, I found a simple pattern on Google, printed two copies in the right size, and then taped one copy to the underside of the glass I would be working with (glass from an old picture frame; I set the frame aside for later). Using the fabric paint, I traced the lines of the pattern onto the glass and then set it aside for a day to dry. While waiting for it to dry, I took the time to use colored pencils to color in the second pattern I’d printed out so I would know what colors to put where on the glass. The next day, I mixed up clear glue and the Lindy’s sprays I was using and applied it to the glass using a paint brush. I love how the colors turned out…they are quite beautiful, but they are full of bubbles. The bubbles were invisible to my eye until the glue/paint dried so I had no opportunity to pop them. Possibly I’d have had fewer bubbles if I’d left my glue/paint mixture to sit for several hours after stirring it all together. I think many of the bubbles would have surfaced and vanished. But as I didn’t do that, I guess I won’t know until (unless) I try again.

Having finished this picture, I felt that although it was quite pretty and would look lovely in a window with light shining through, it nonetheless looked absolutely nothing like stained glass. Back to YouTube, where I watched several videos about a product called Gallery Glass, which was supposed to look much more like real stained glass and had the virtue of being custom made for the purpose. I caved and bought a set off Amazon and when it arrived, I made the same iris pattern for another piece of glass and did the picture again in the Gallery Glass paint, which goes on opaque but dries translucent.
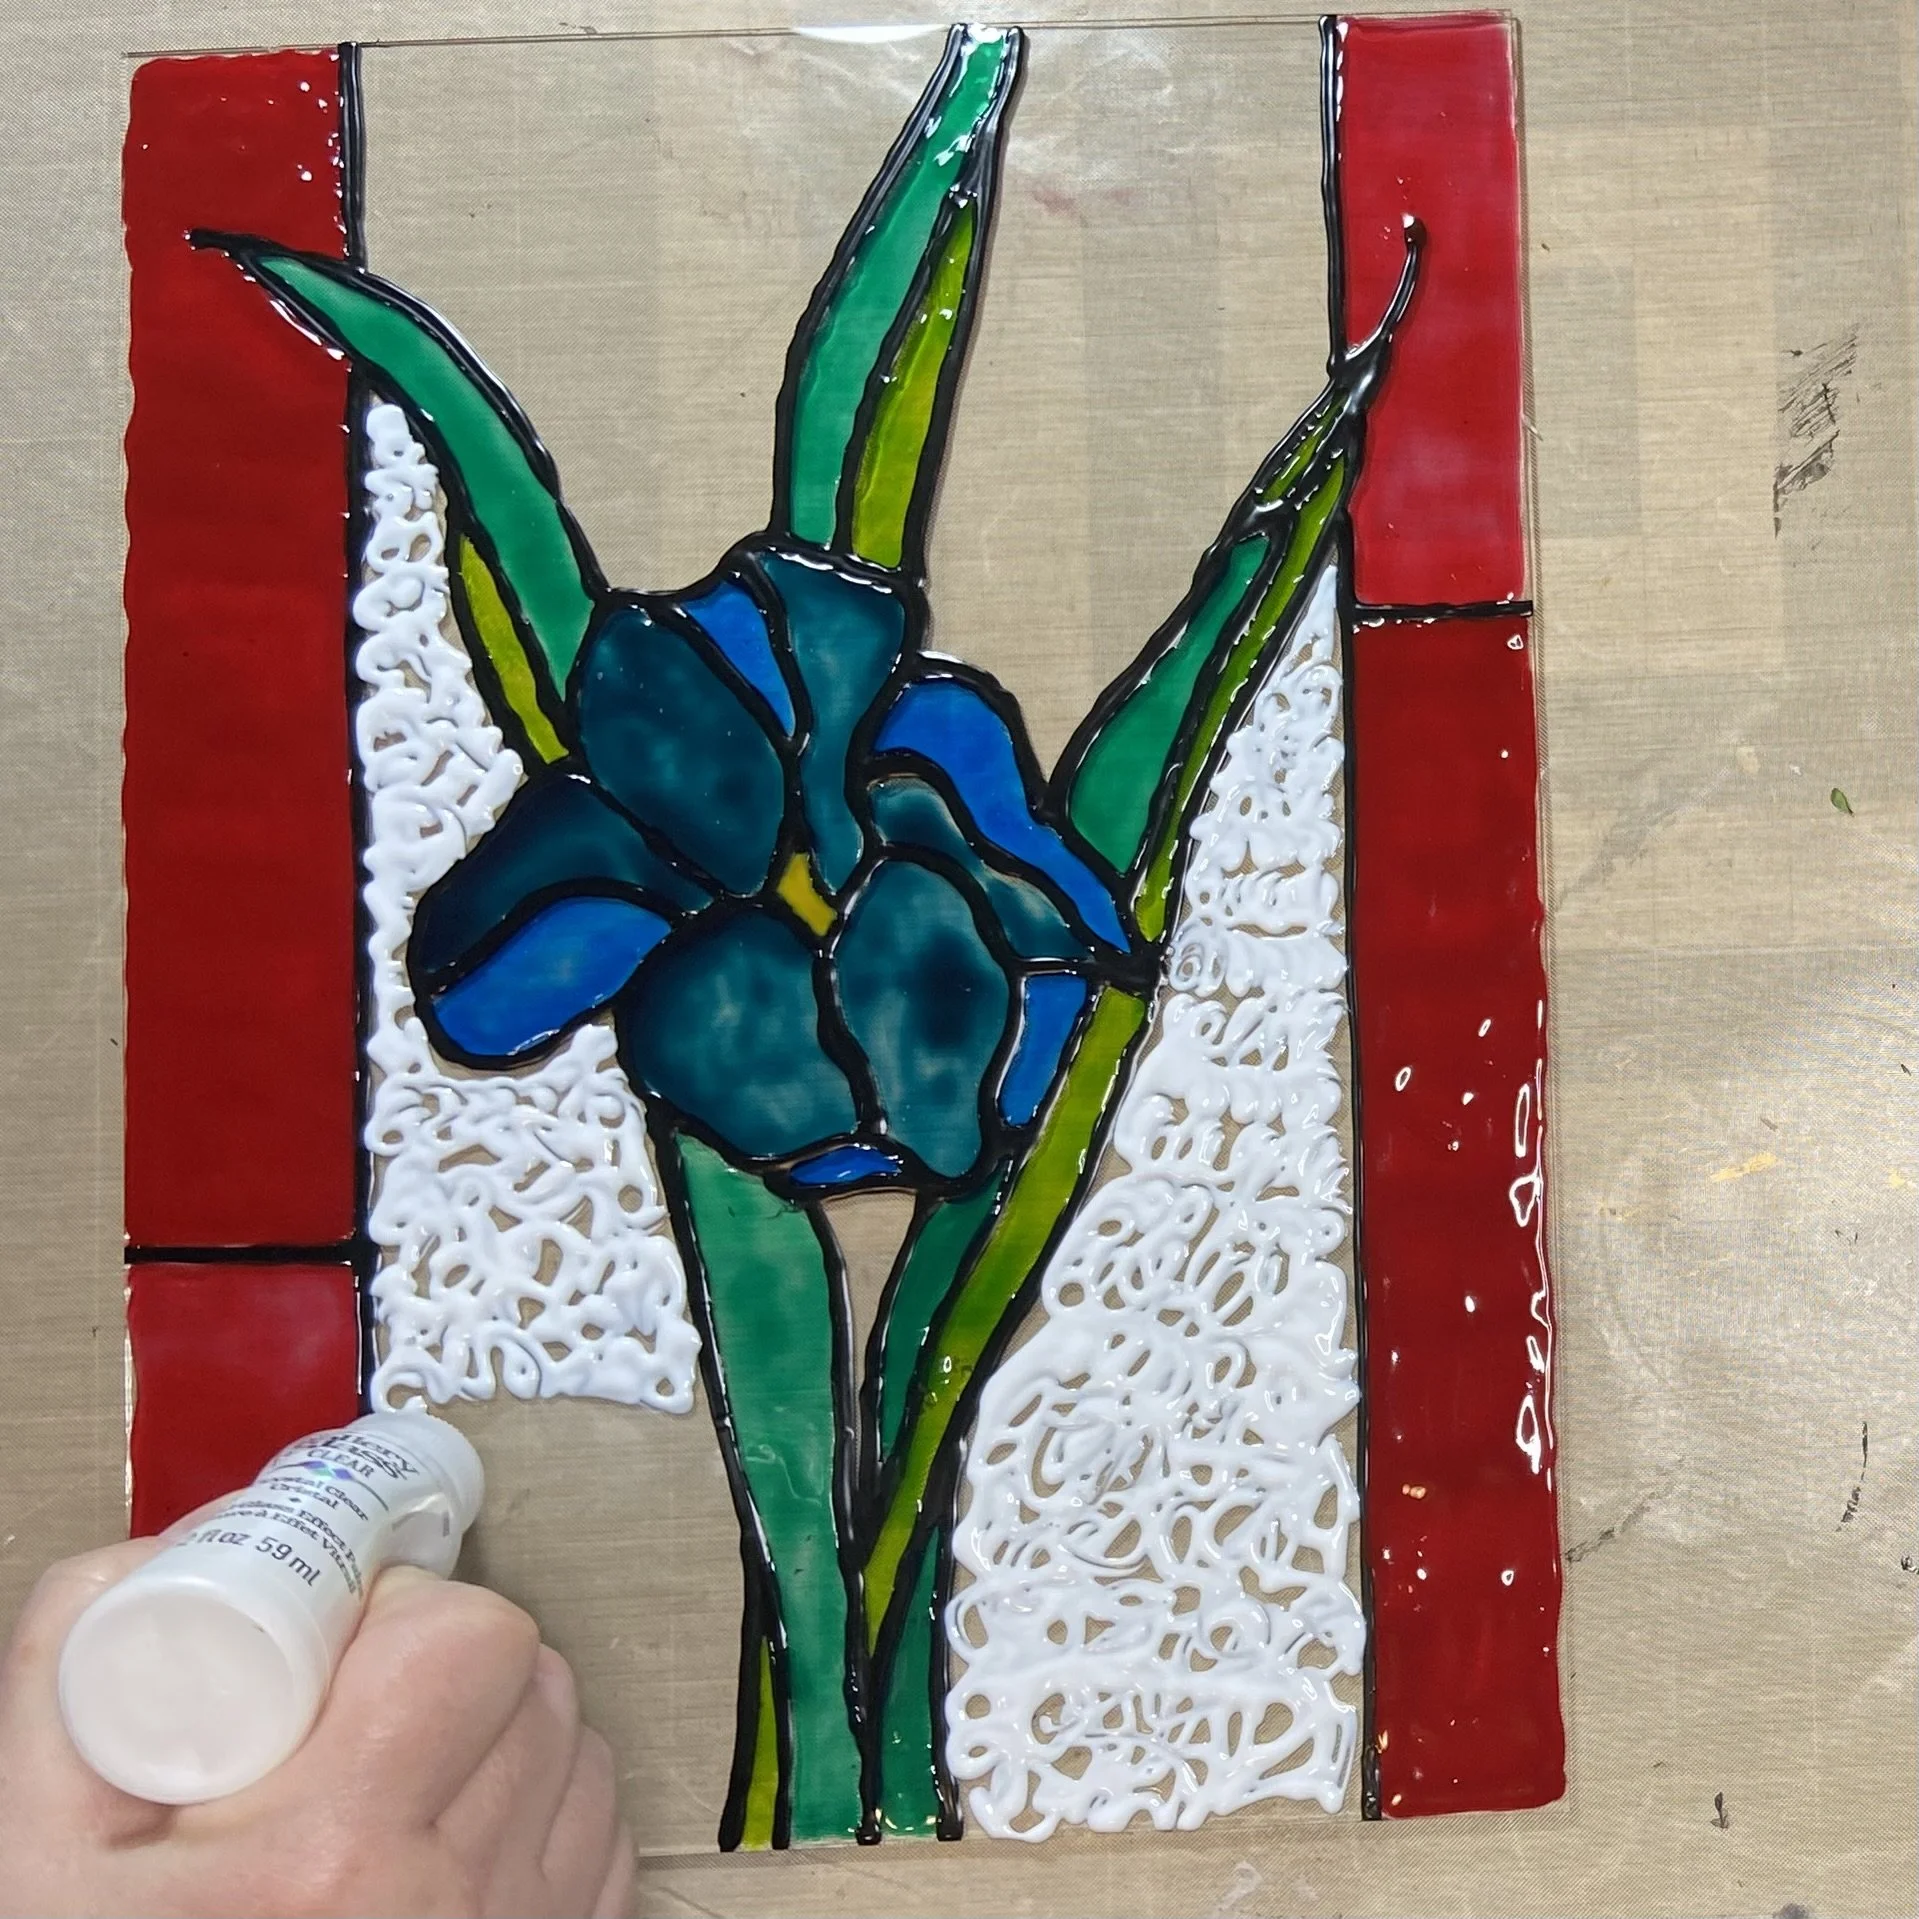
I bought some small silver hooks and used some chain I’ve had around forever (no idea where I got it) to hang the pictures in a window.
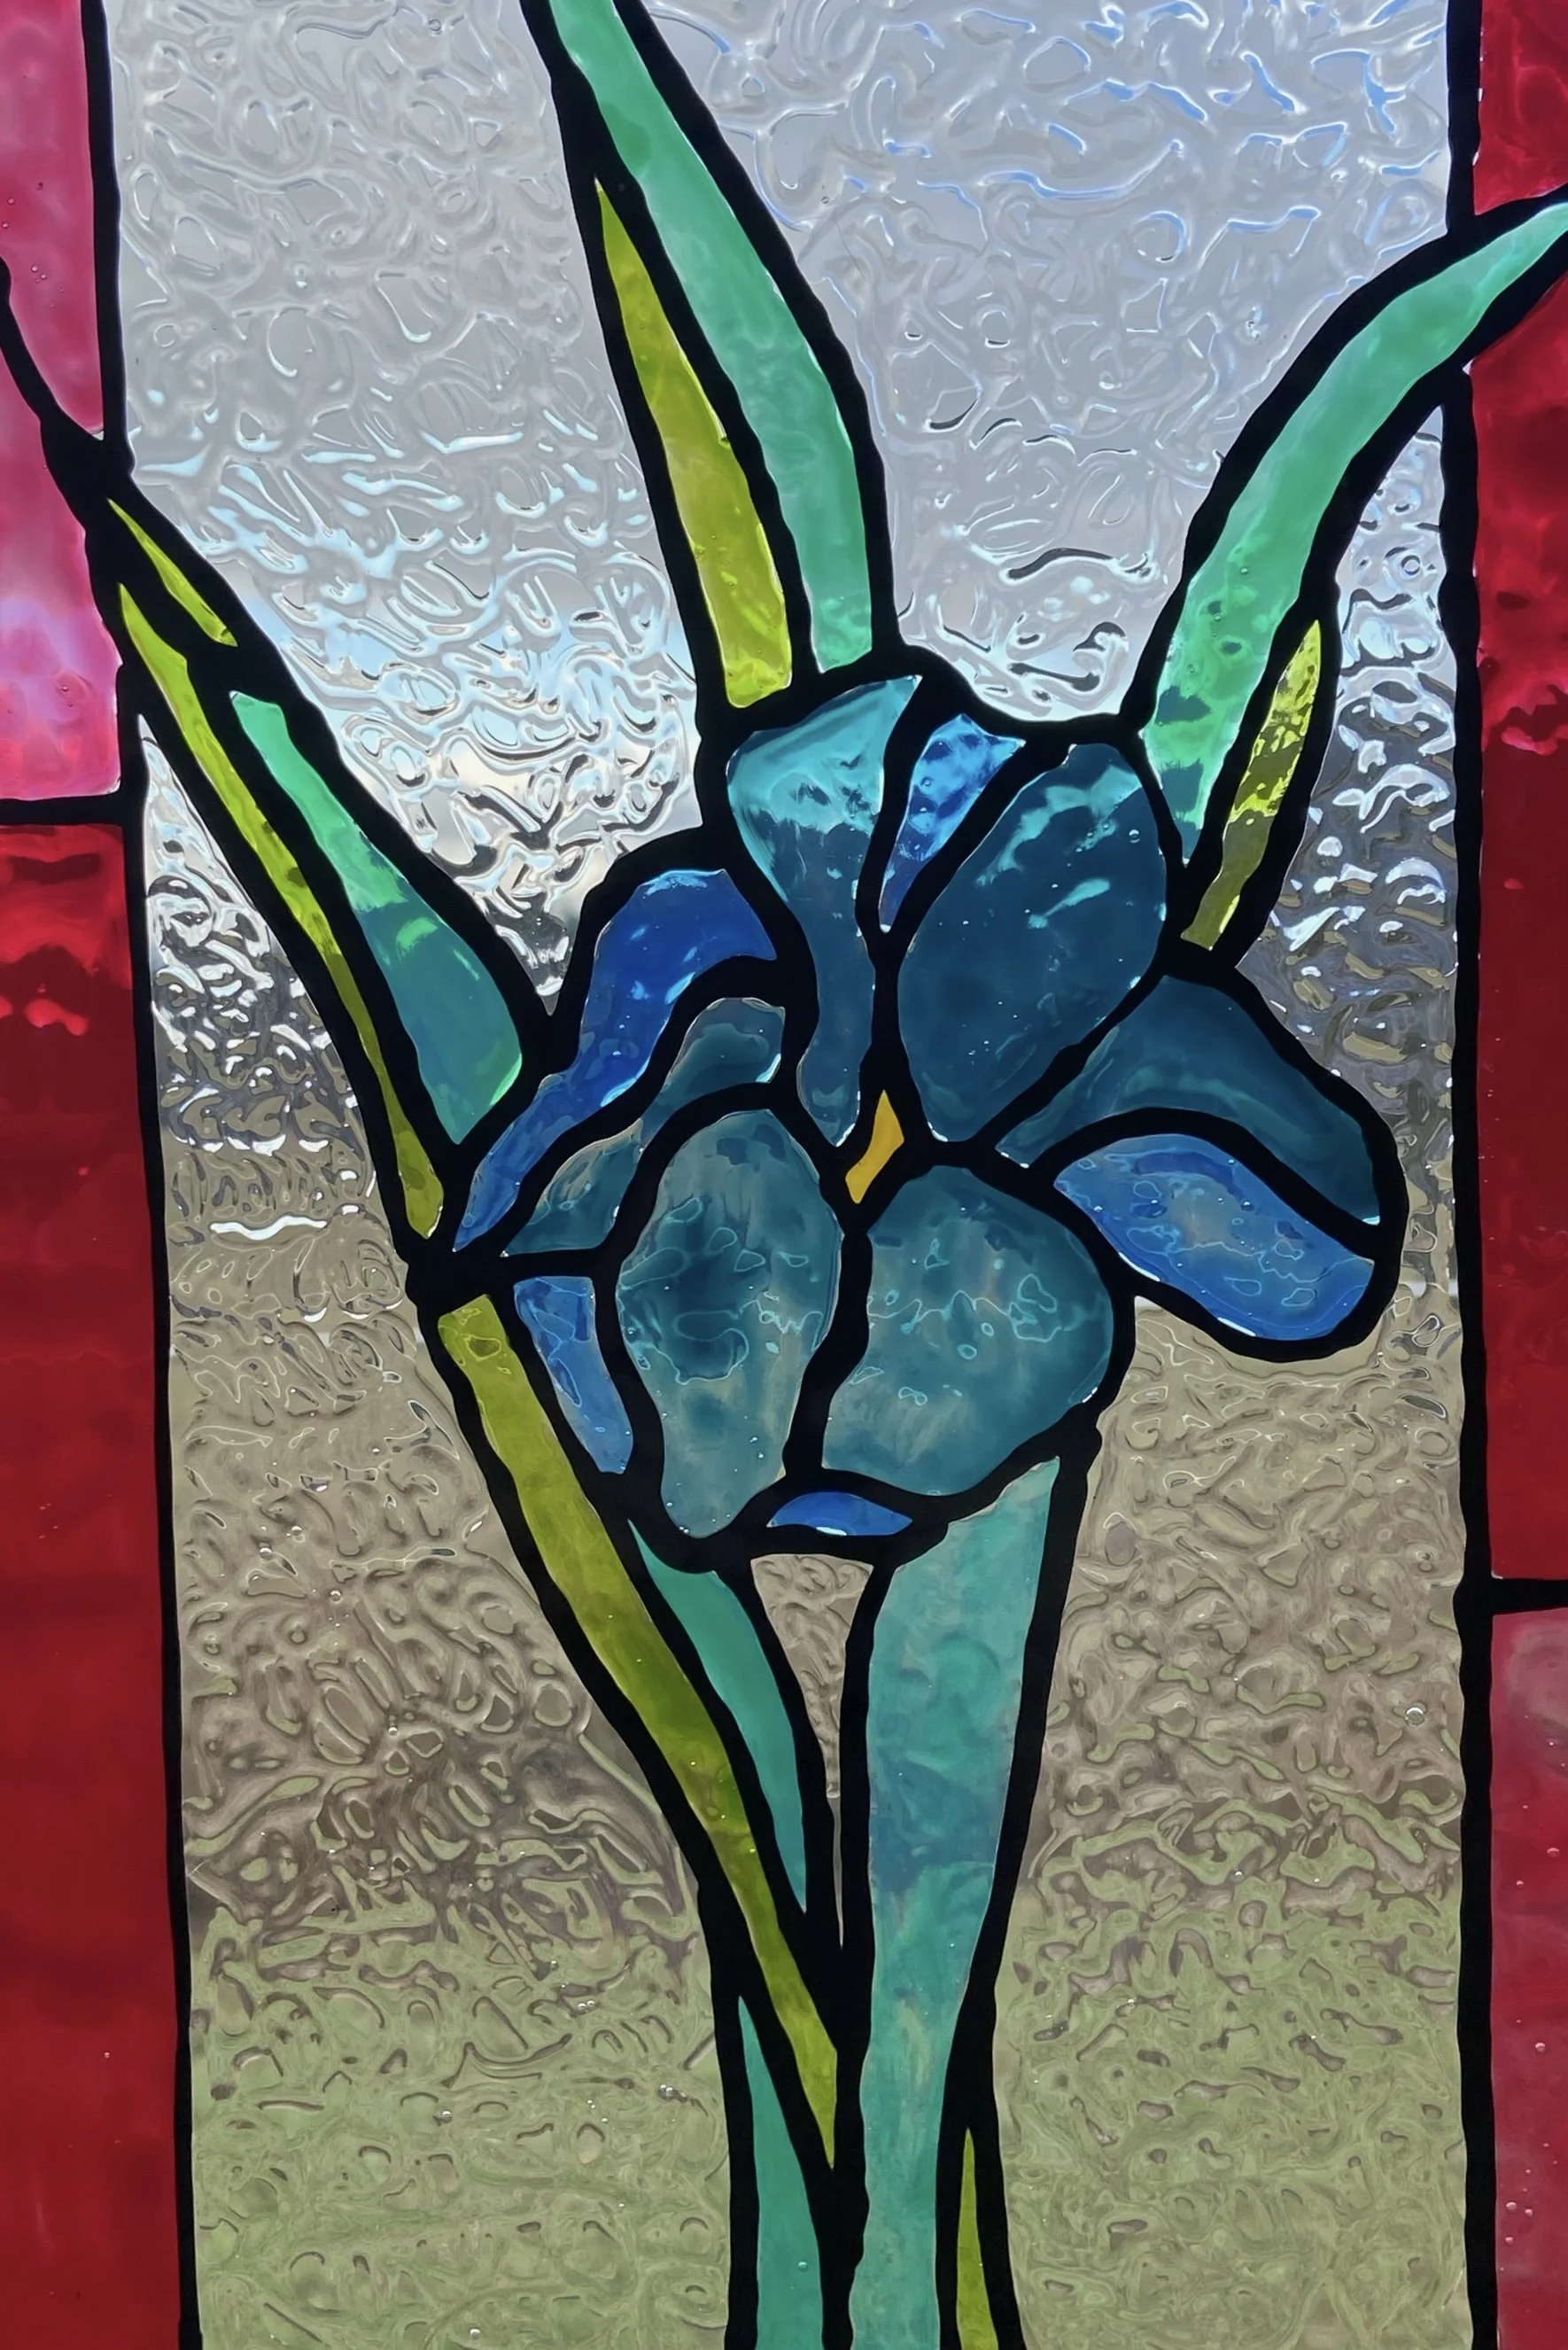
Okay, pros and cons. For my custom-made (sounds much fancier than homemade) stained glass paints, the Lindy’s spray comes in many very rich and lovely colors and they are slightly sparkly. I had all the Lindy’s colors and the clear glue already, so I didn’t have to buy anything. But it doesn’t really look like stained glass, it was full of bubbles, and there was no real way to make the clear sections look like part of a stained glass window. For the Gallery Glass, it very much does look like stained glass when it’s finished, including the clear areas. But the array of colors is relatively limited. And while the paints aren’t super expensive, they aren’t exactly cheap either.
Bottom line: both methods work, and both are fun. Do whatever appeals to you. I’m hard-pressed to say which I’d choose when I do this again. Chances are excellent I’ll do both methods again.
August addendum: after hanging in a sunny window for six months, the Gallery Glass paint has faded, particularly the red and pink colors. Those are both a rather dingy yellow now. Very disappointing. My mother informs me that the piece I made with clear glue and paint is still very bright and colorful, although I think her piece doesn’t get as much direct sunlight as mine does.