Adventures In Nookish Wormholes
As an Amazon associate, I may earn a small commission if you navigate to Amazon from my site and buy something. This will not result in an extra cost to you.
It’s a brand new year, so I’m starting my book nook count from scratch. This is the first (but almost certainly not the last). It’s this kit and a beauty it is. In the distant past (okay, it was last year), all my book nook builds had some things in common, mostly that they were heavy on miniature books and scholarly accouterments, as this is the aesthetic I particularly like. But this one is completely different.
It’s sci-fi all the way, and appears to harken back to many familiar TV and movie appearances without being so close as to actually infringe upon any copyrights. Well, mostly. The wormhole thing is quite close to the look from the various TV shows and movies from the Stargate Universe. But I’ll save that delight for the end.
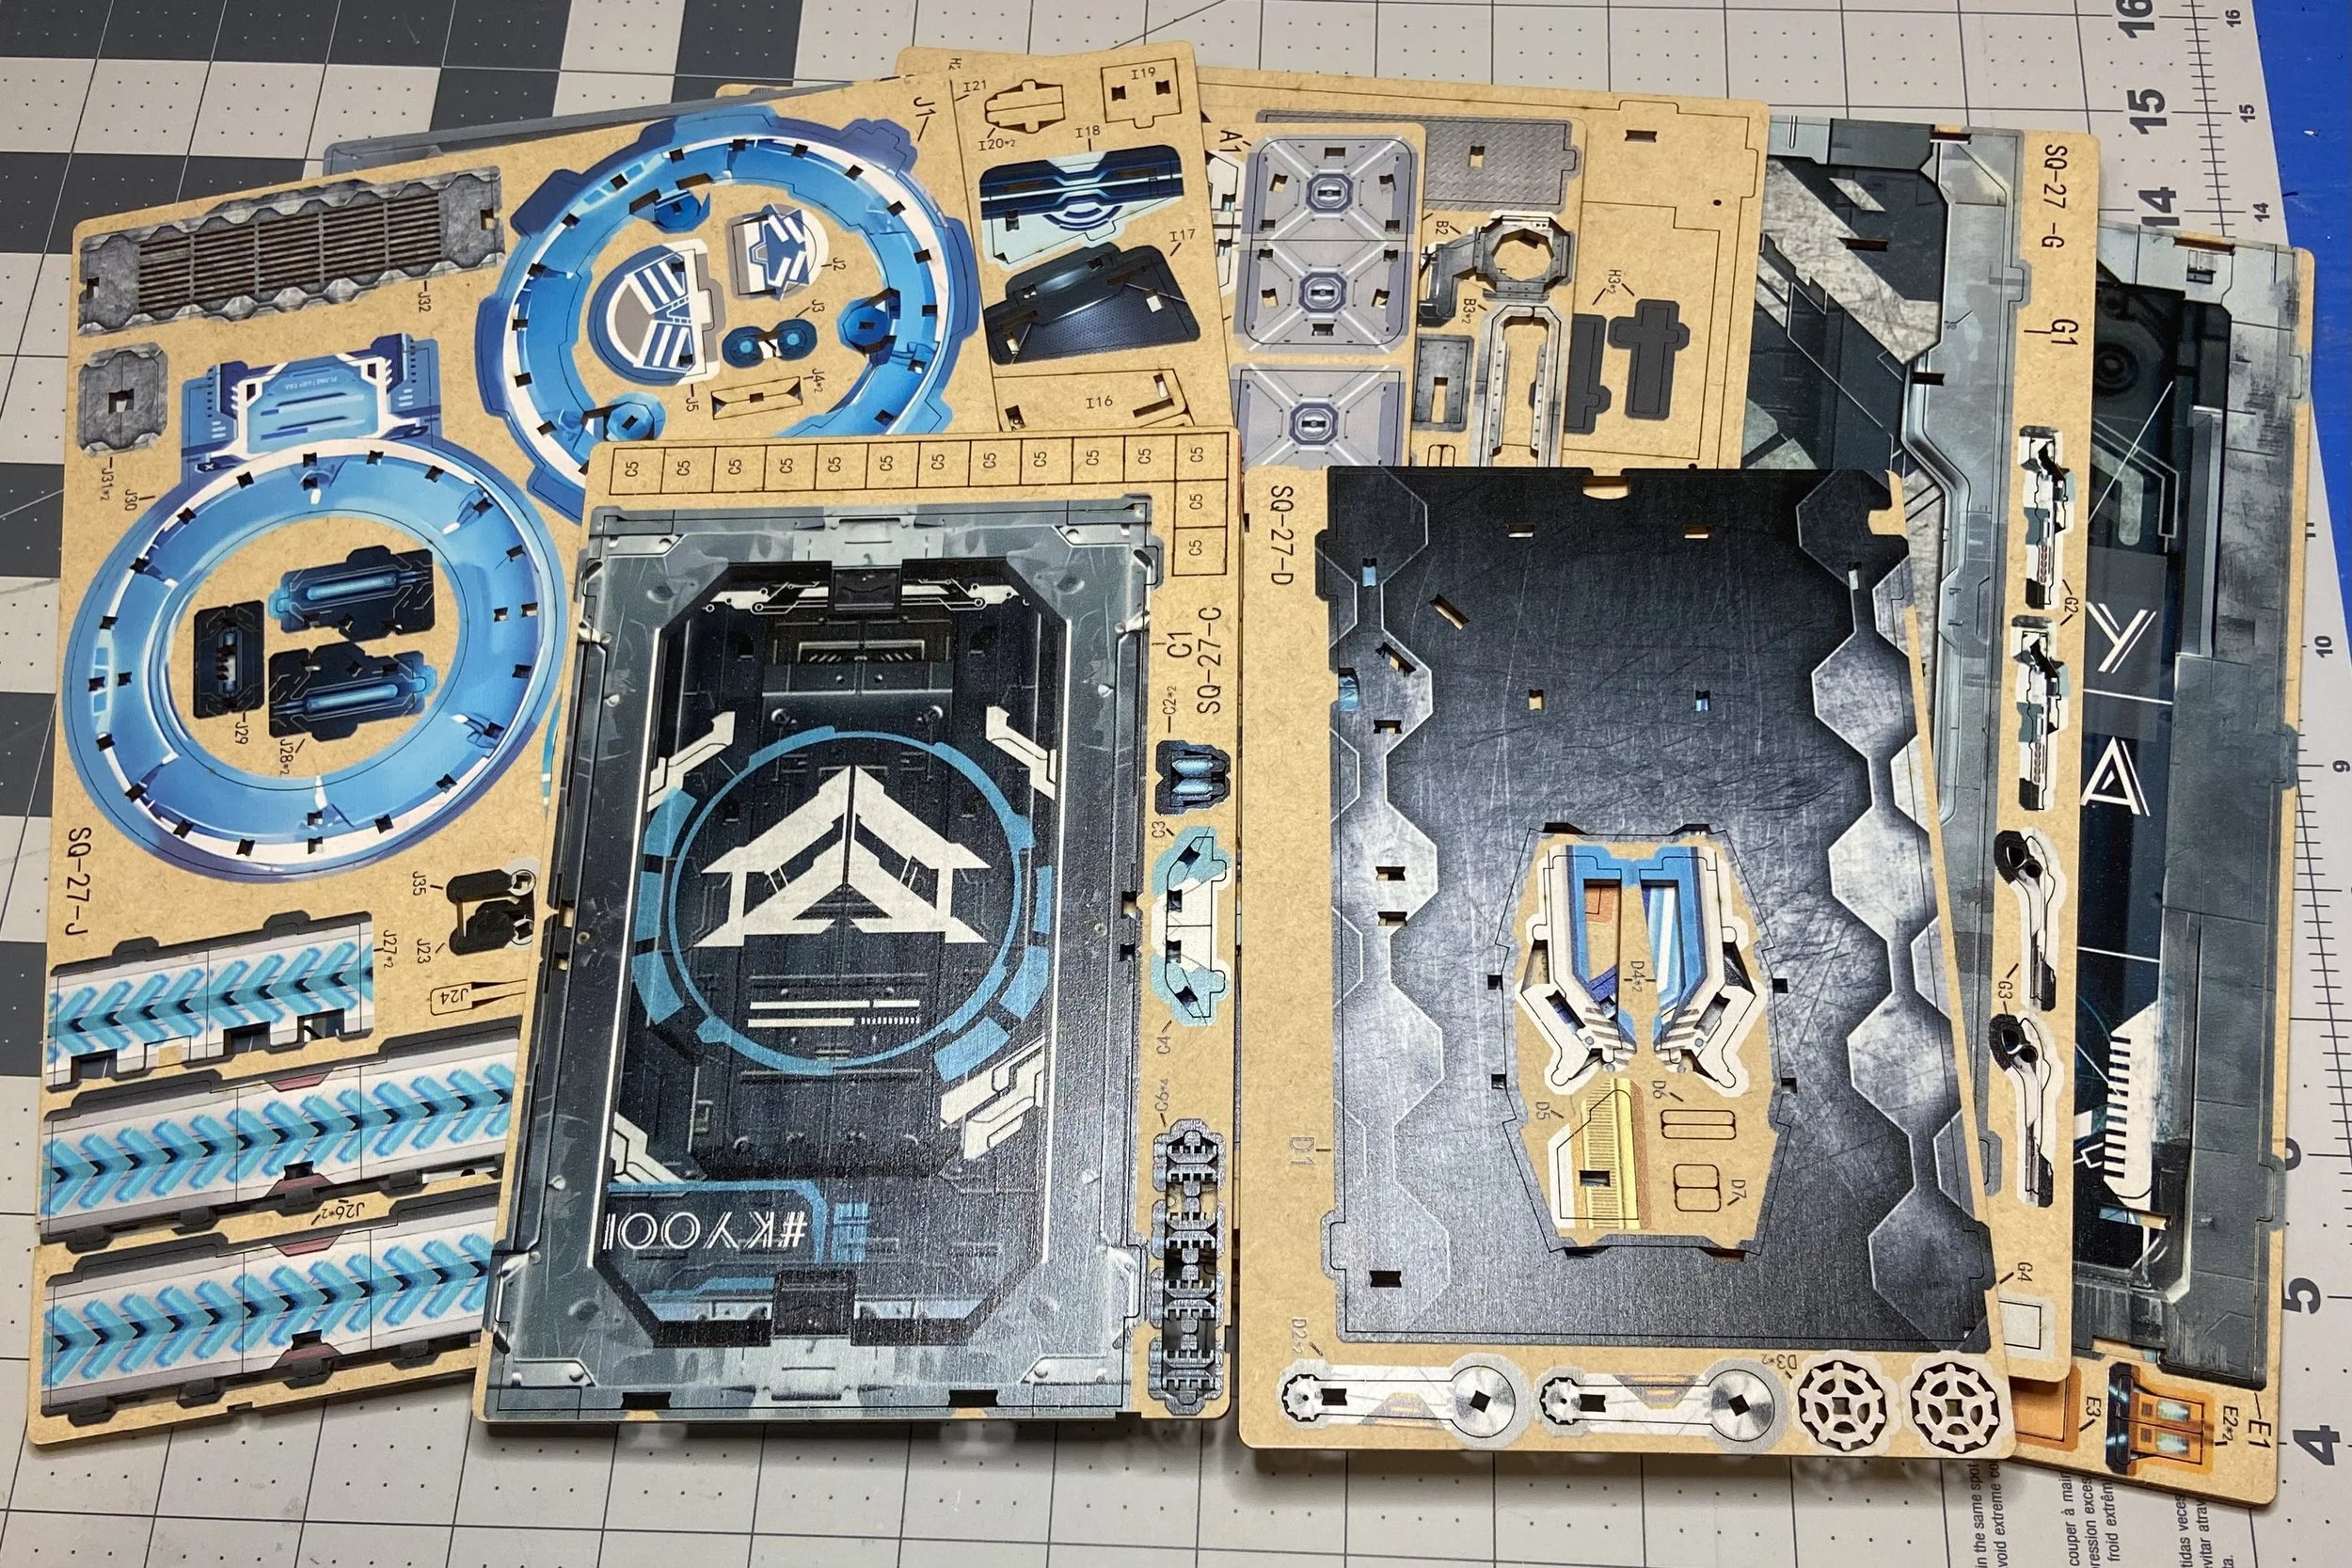
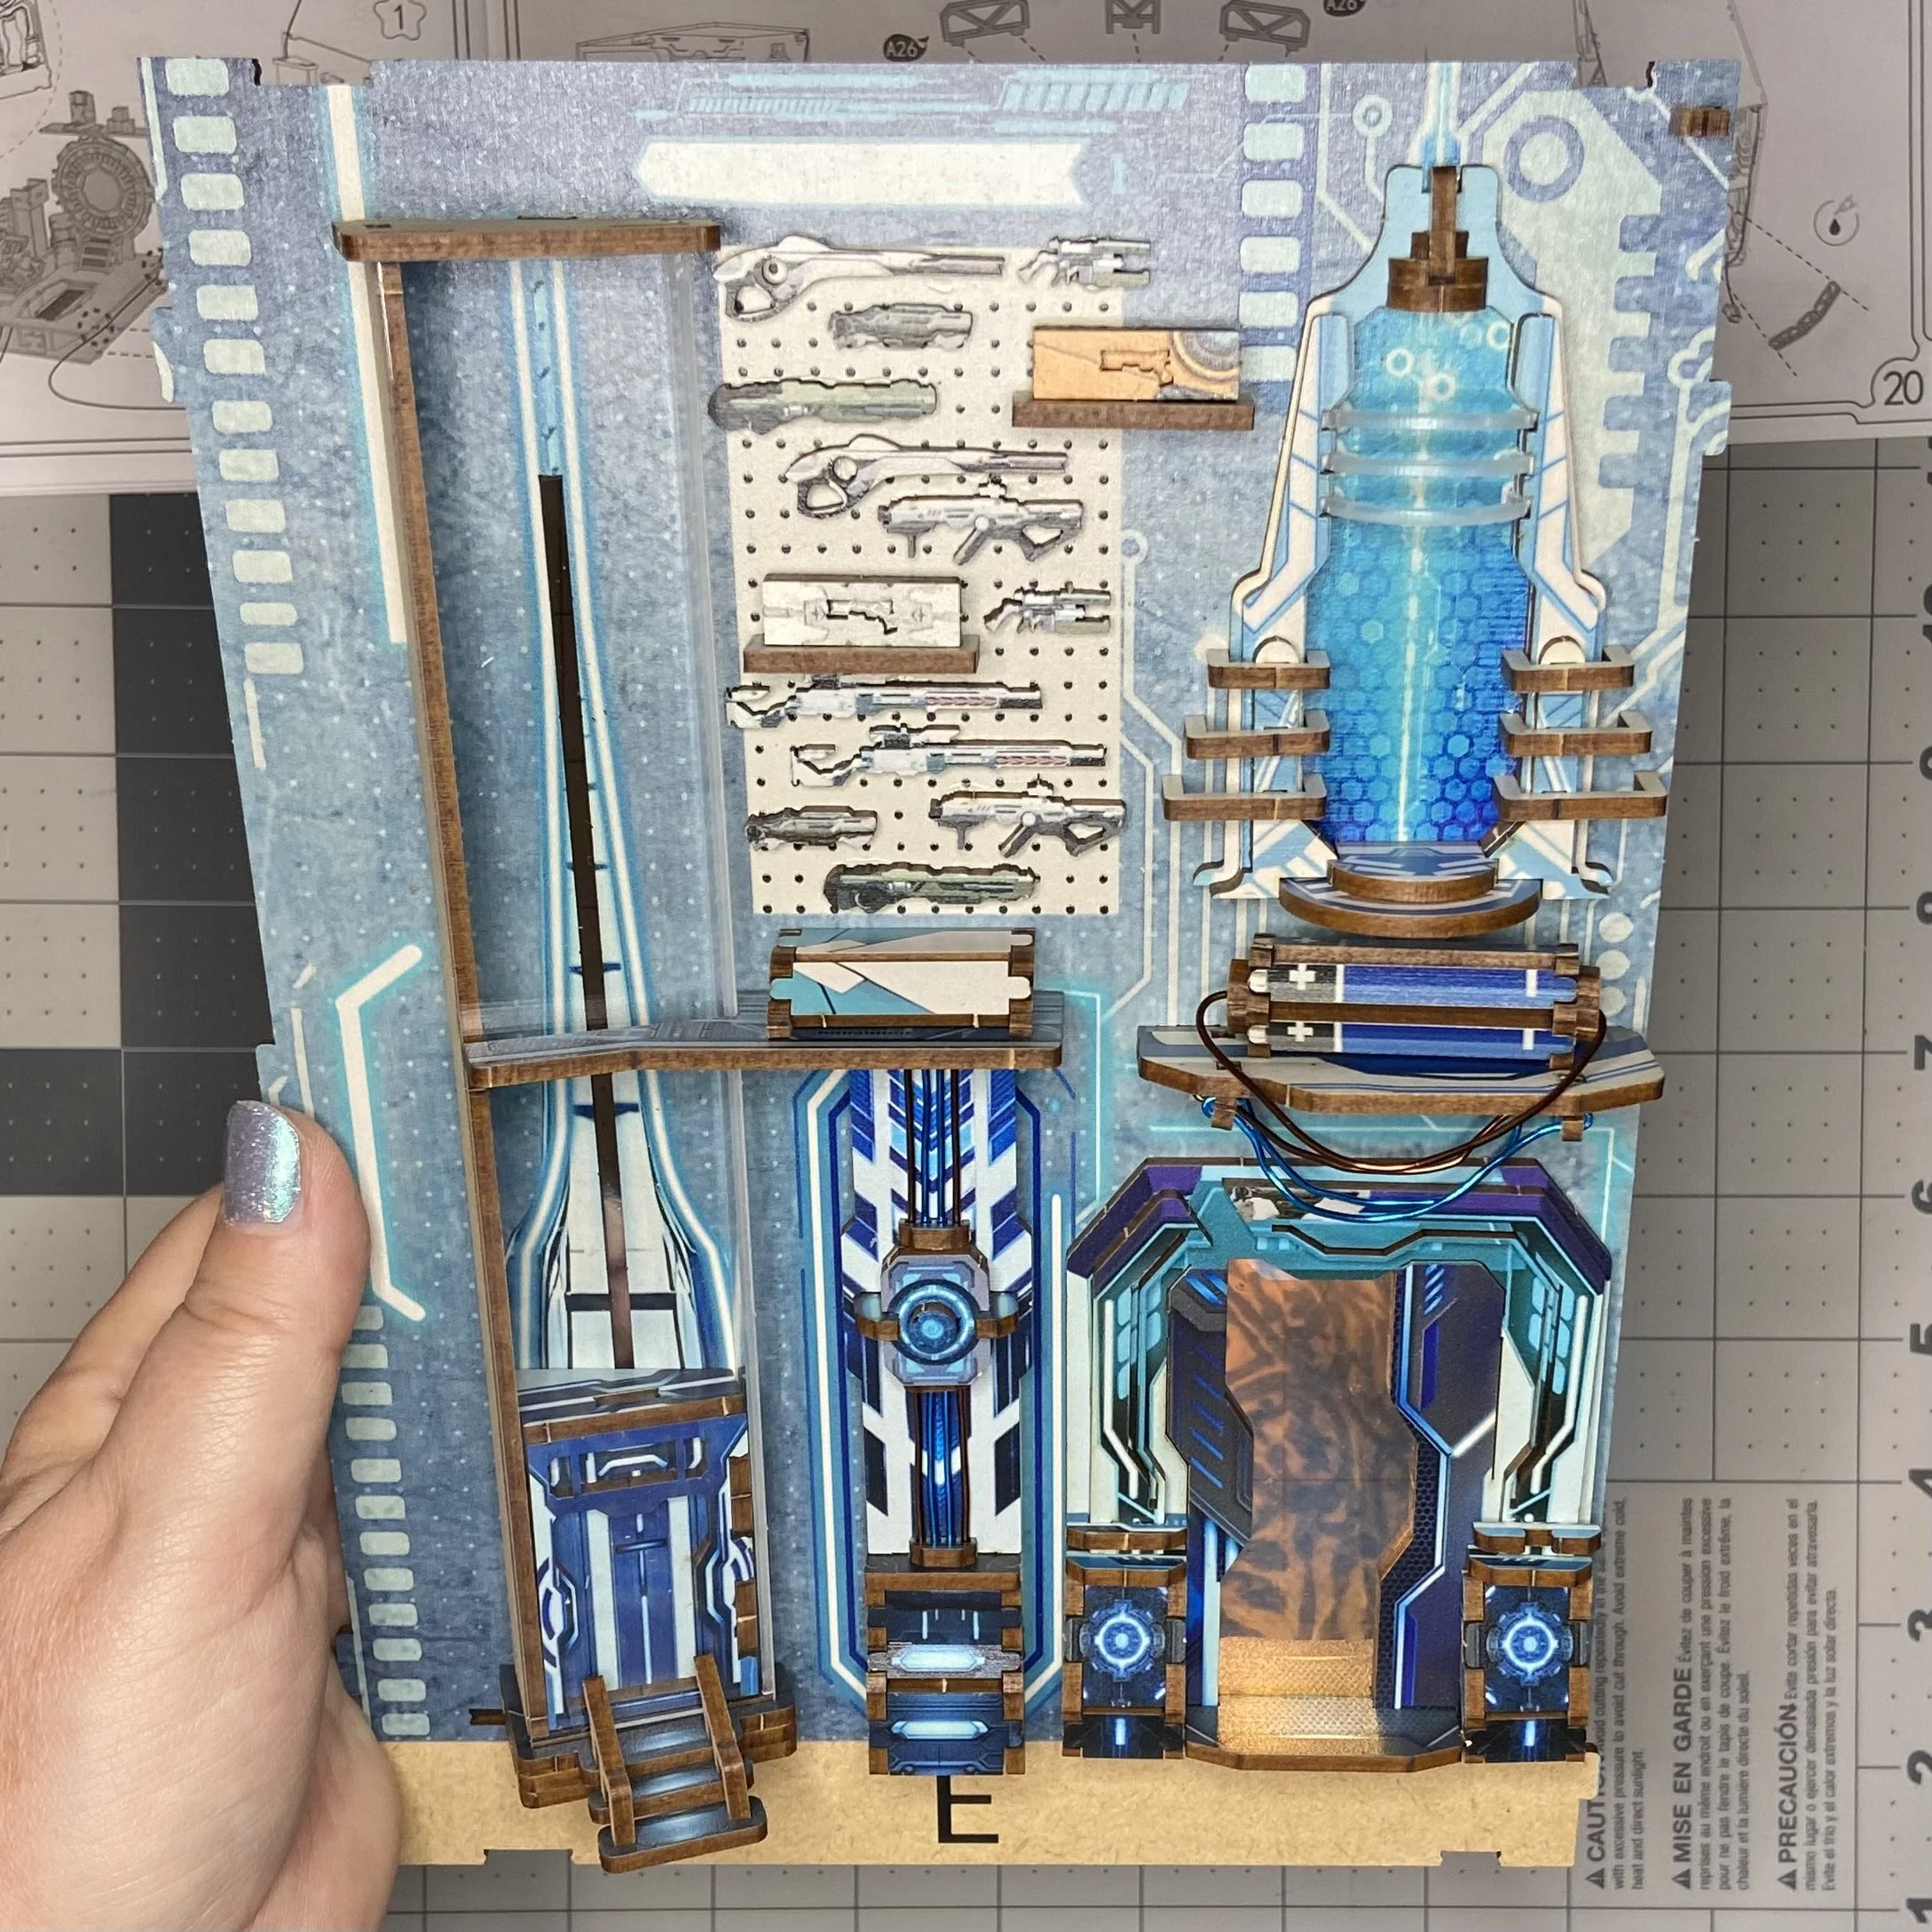
The first thing I noticed when I opened the box was that there were almost no paper components. Nothing to cut out and glue on. I don’t really mind doing that, but it does take quite awhile. There was one set of stickers, and that was it. In addition to the sheets of wood with the shapes printed and stamped onto them, there was also a plastic sheet of the shapes, plus a few other bits and bobs.
I struggled a little bit with the directions…it wasn’t always clear to me what the orientation of any given piece was supposed to be. Eventually, I mostly worked it out. I also had the help of some YouTubers who’d assembled this themselves and when I wasn’t sure of something, I could consult the wisdom of the YouTube crowd.
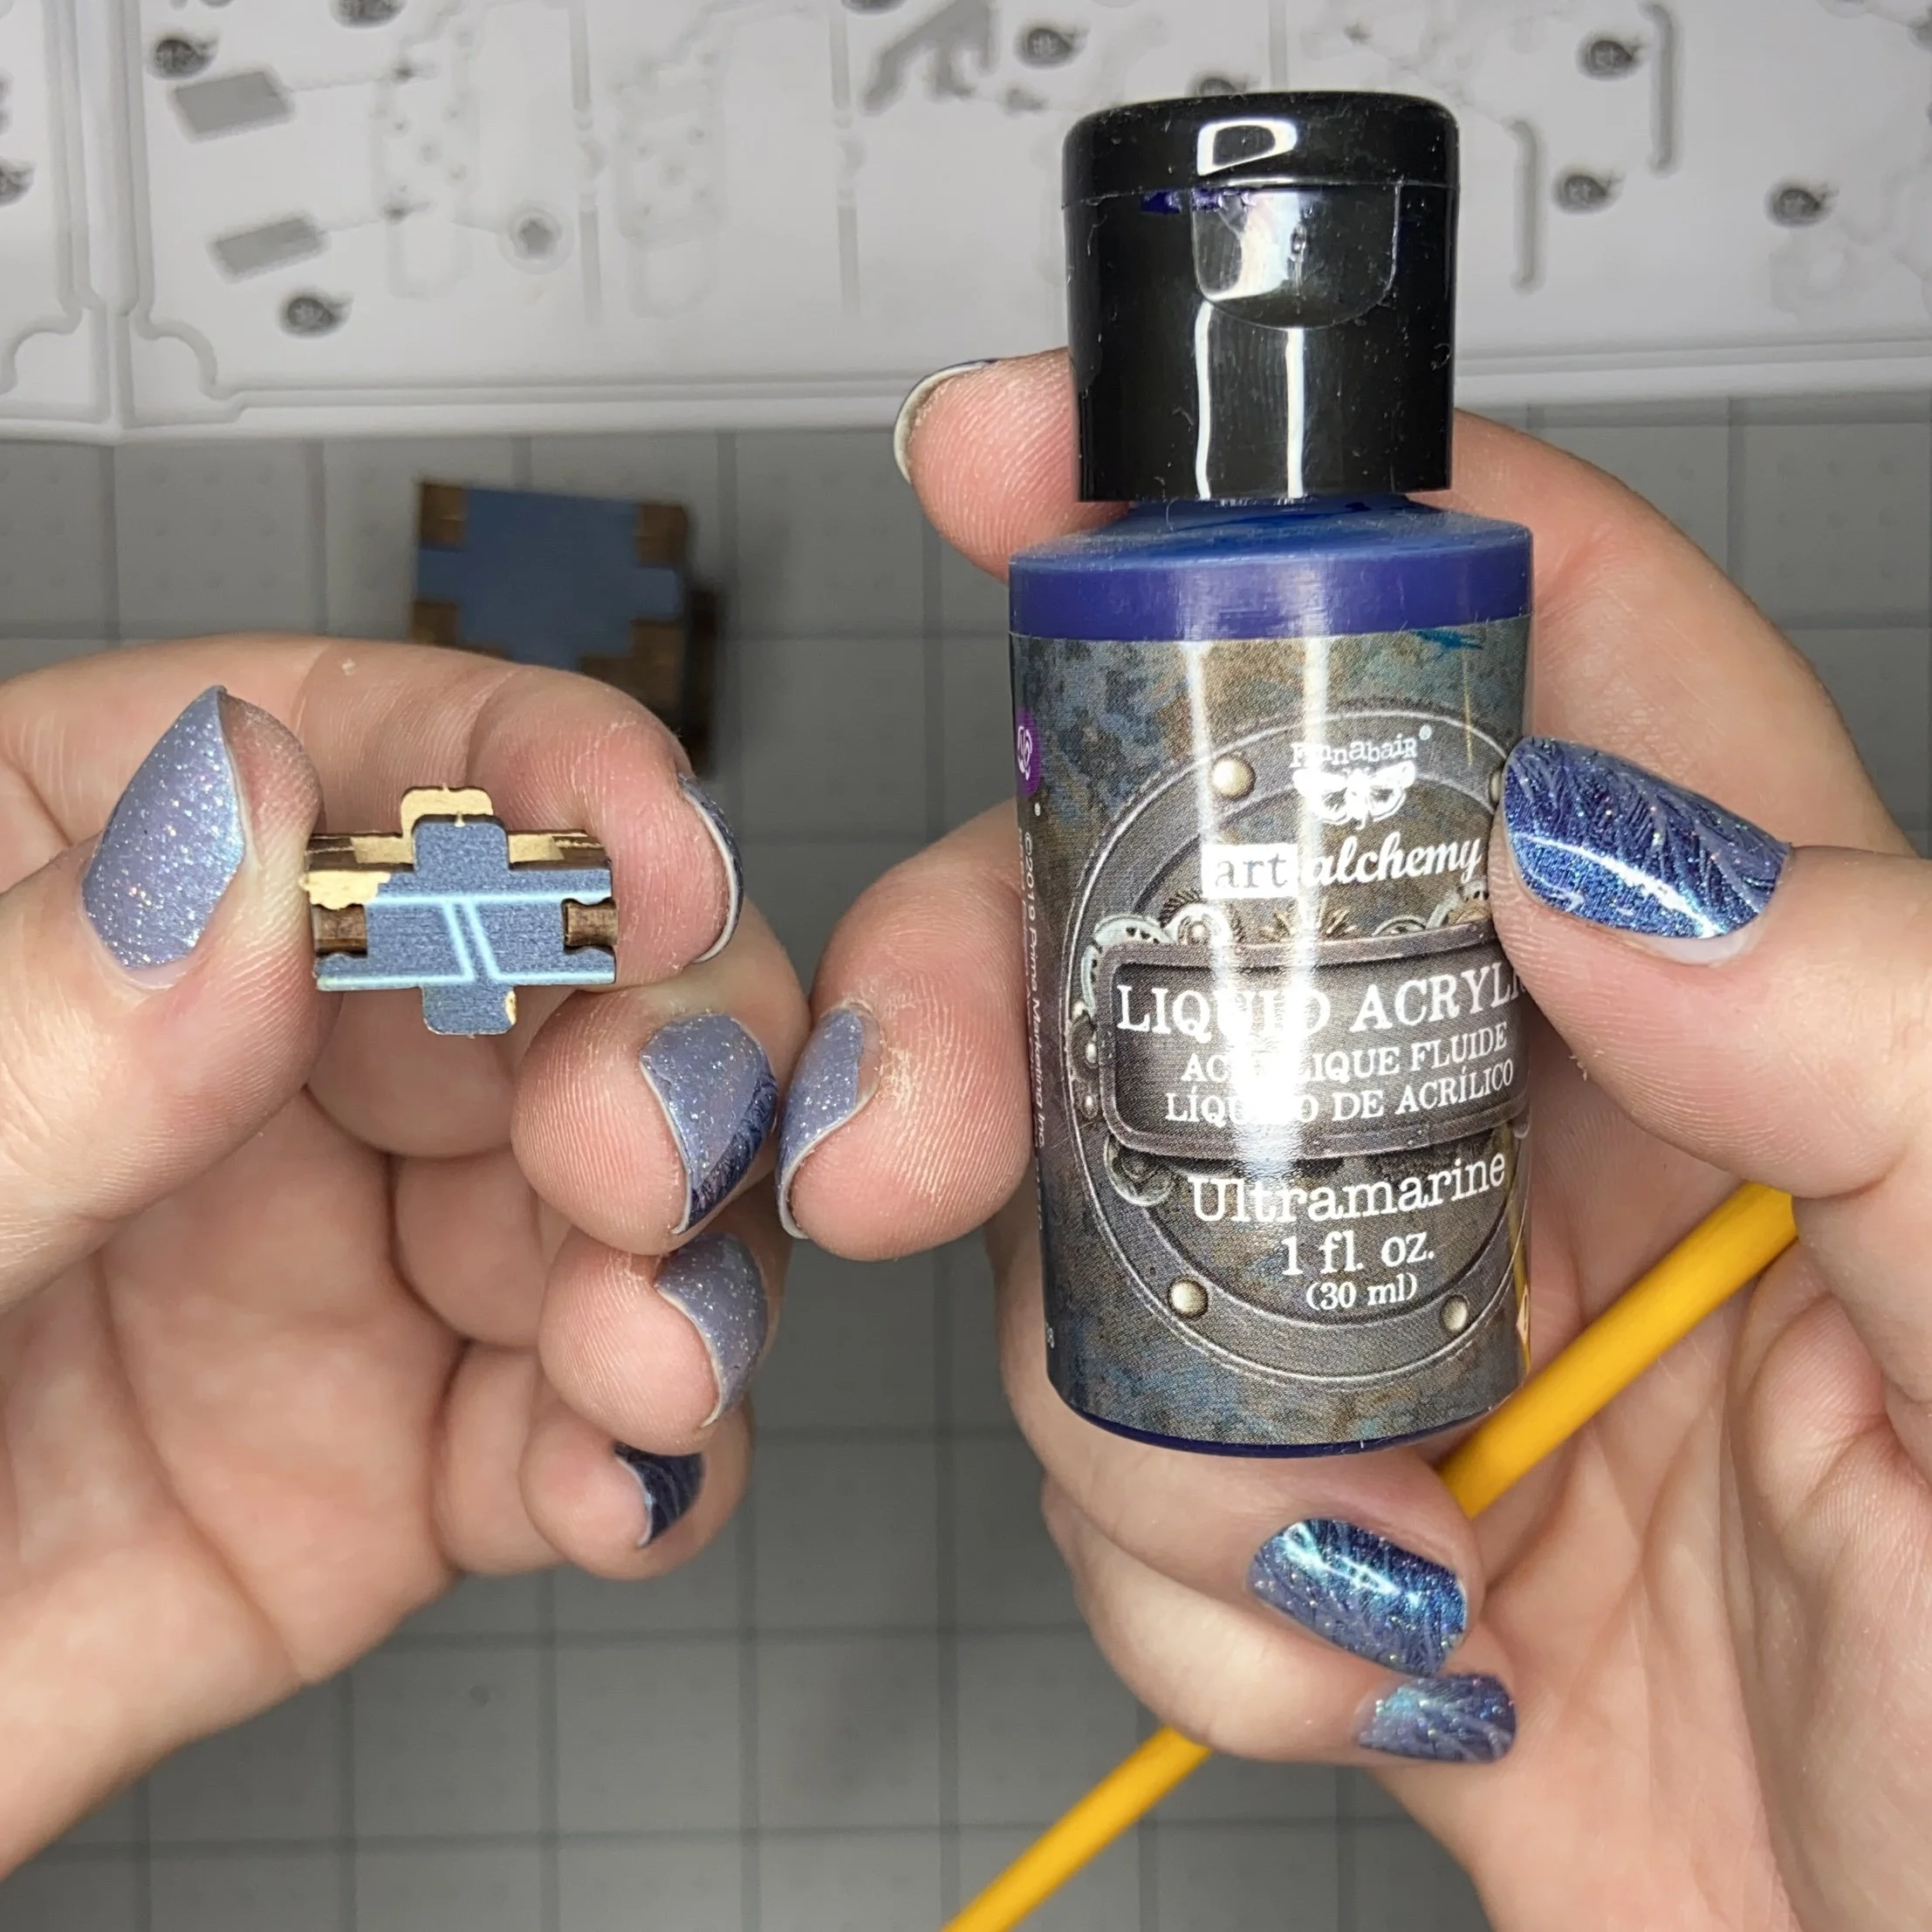
In at least one instance, I had to file down the connecting peg of a piece to fit into the slot of another piece, but for the most part, the parts in the kit fit together tightly but precisely. Which means it was almost certainly my fault when I couldn’t get an assembled piece to fit into its base slots. I’m sure that the four uprights weren’t snapped together tightly enough, which meant the bottom of the pieces were spread too far apart to fit into the base slots. I improvised…by which I mean, I cut off the pegs, and just glued the piece to its base. In cases where a little bit of the finish came off a piece, I just used a little paint to hide the bare wood.

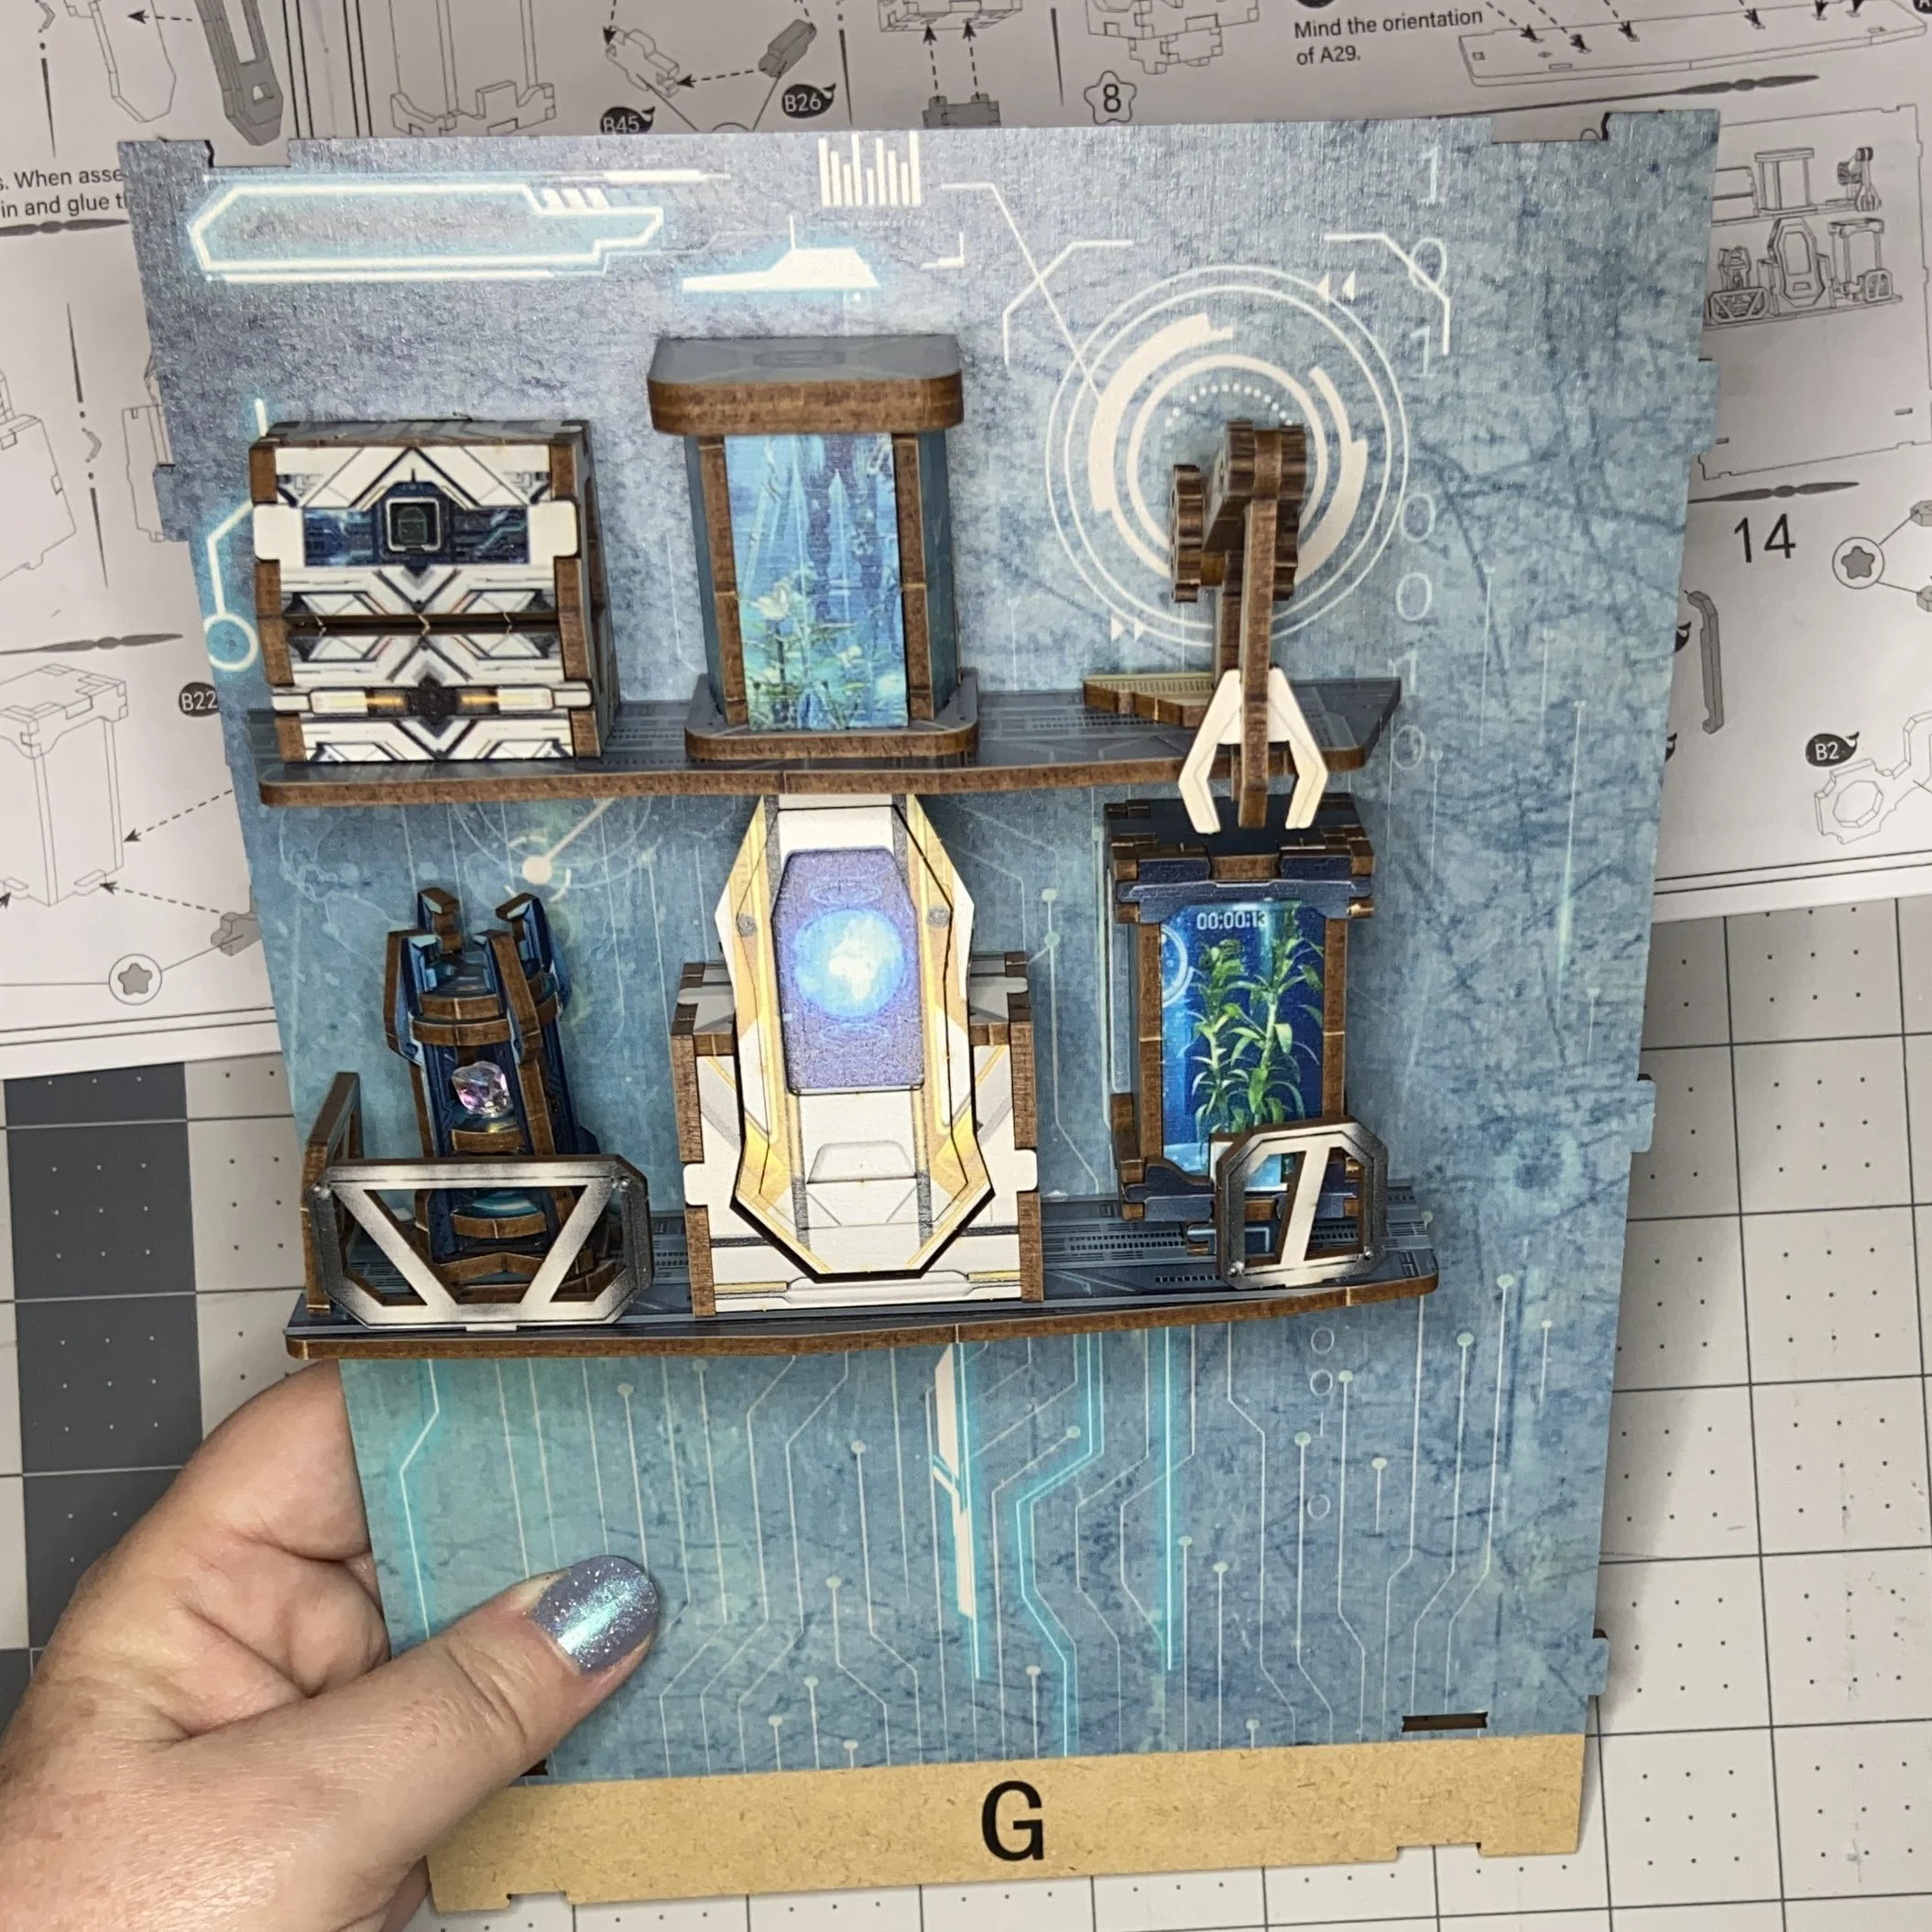
Unlike my other book nook projects, I never had a whole tray full of miniatures to admire…as soon as I finished one or two, they went onto a shelf and then were attached to one of the structural pieces, usually one of the sides.
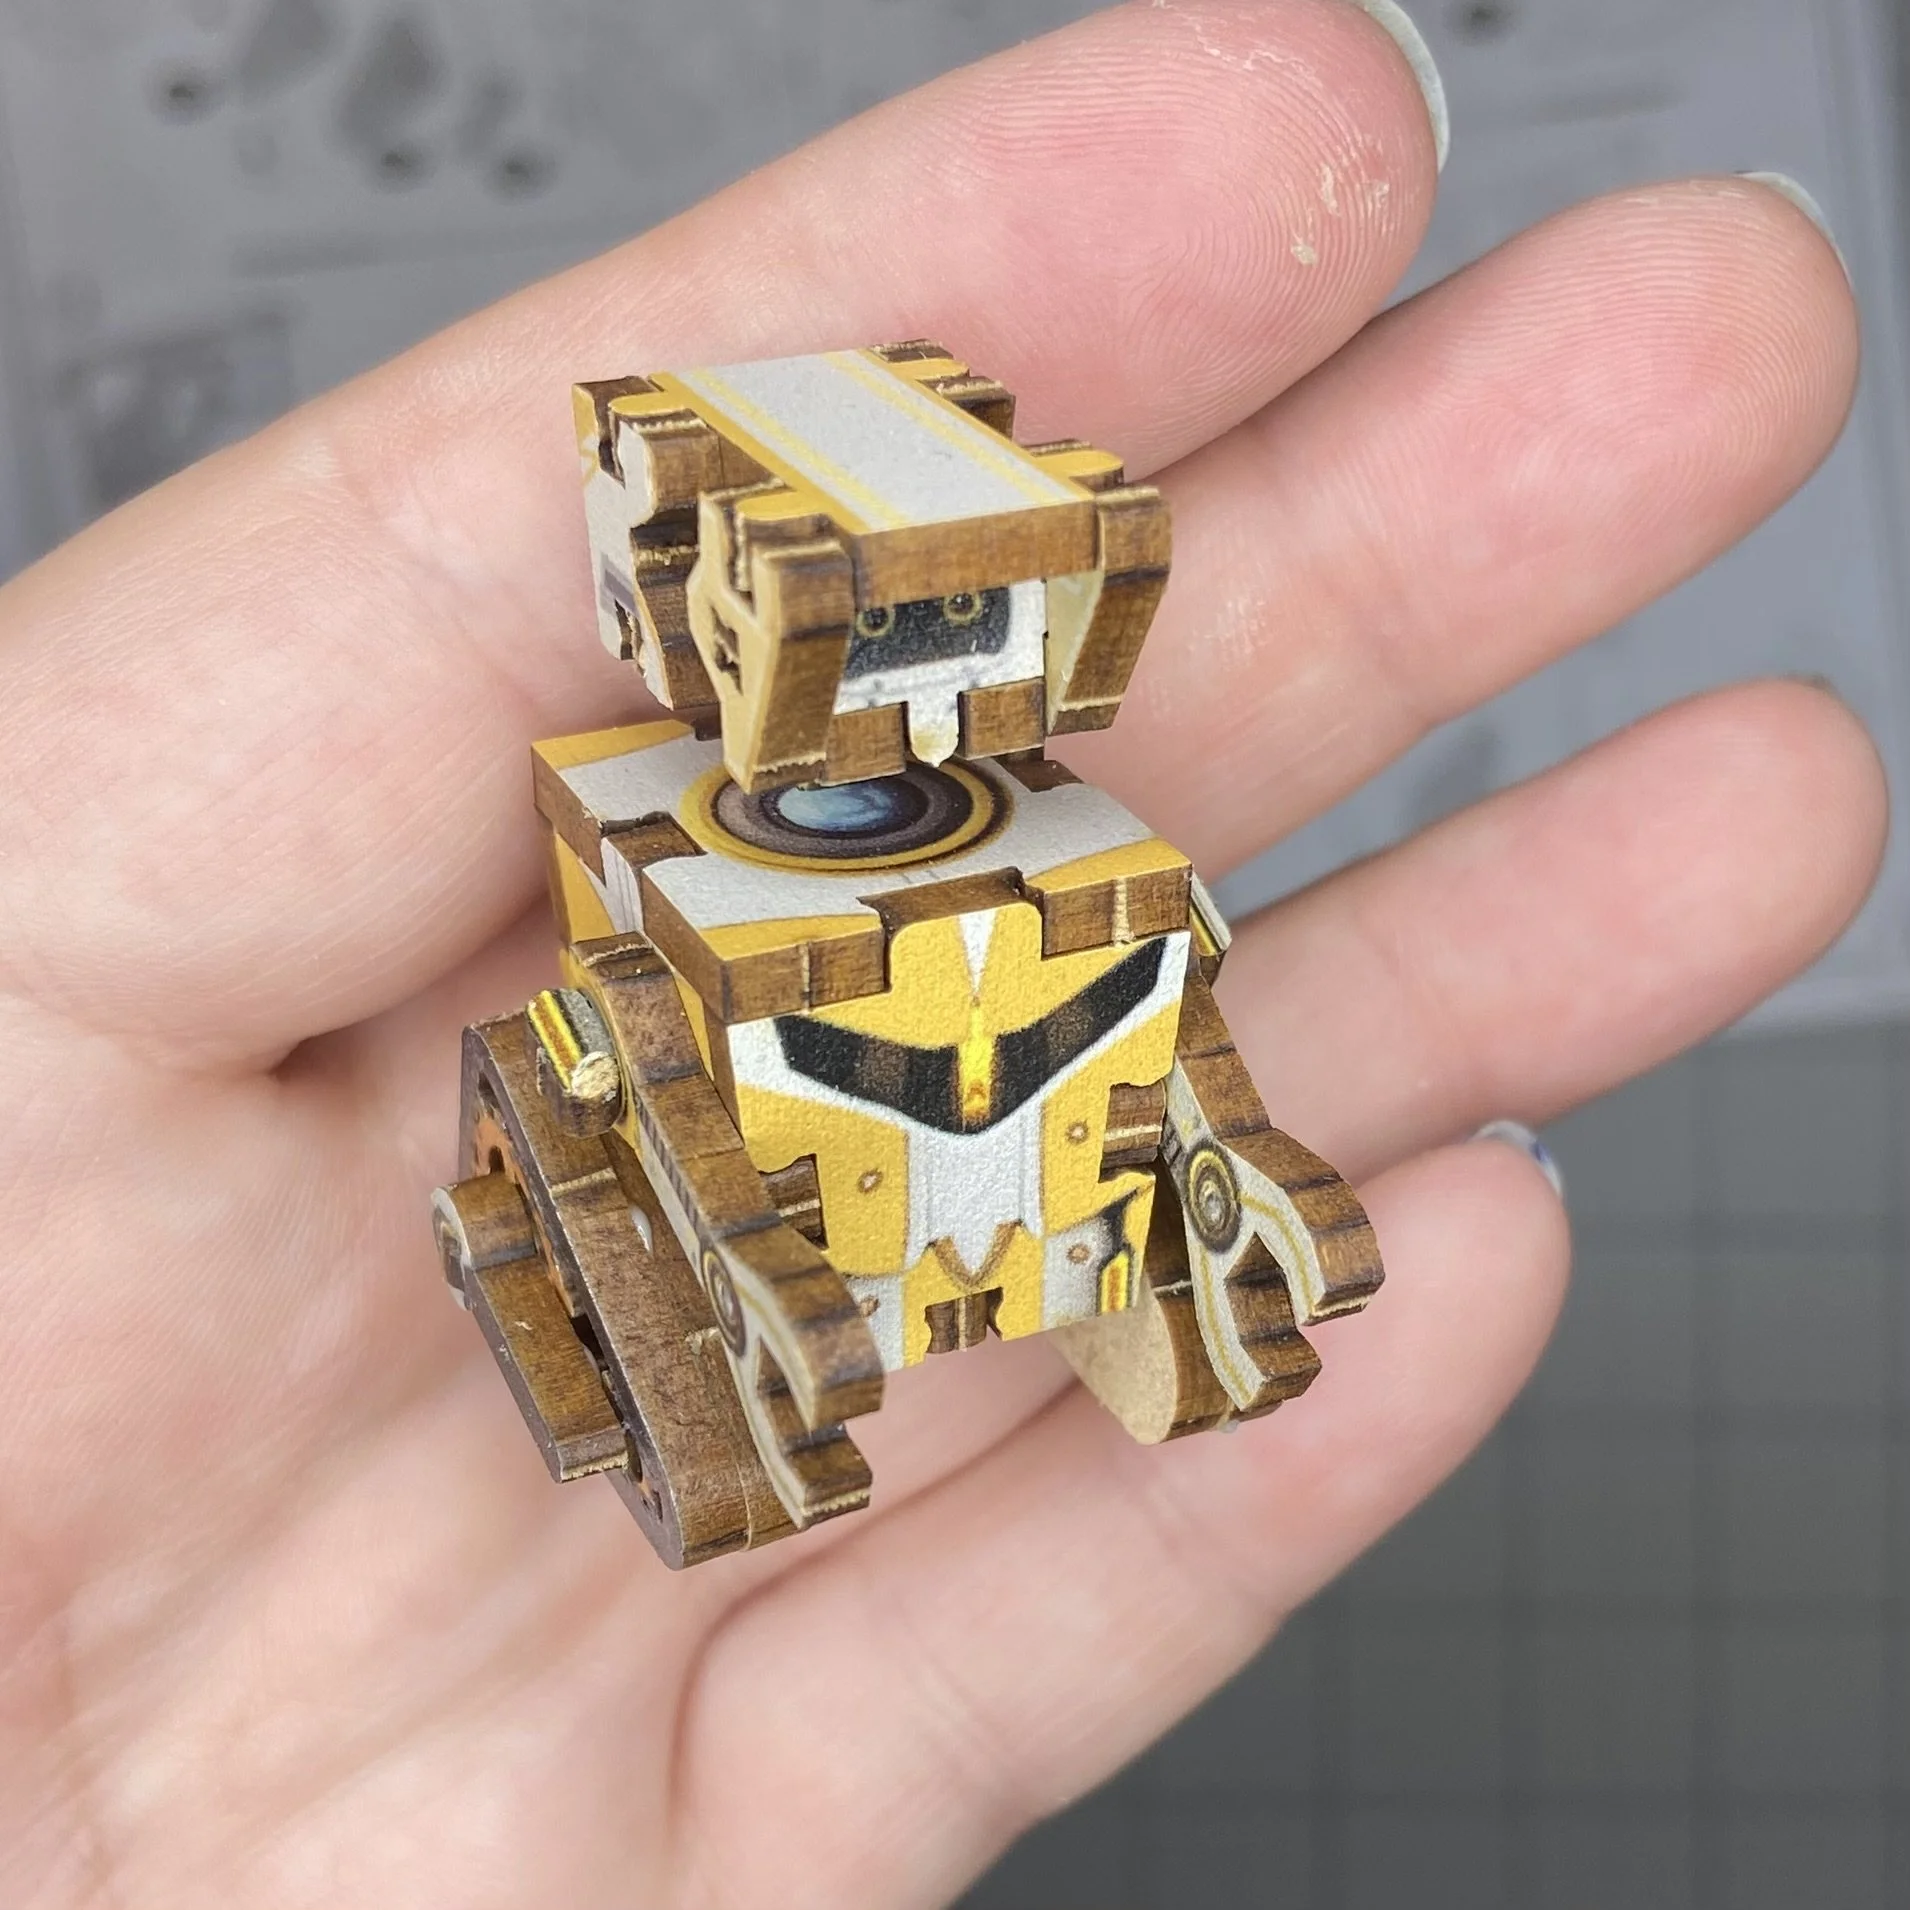
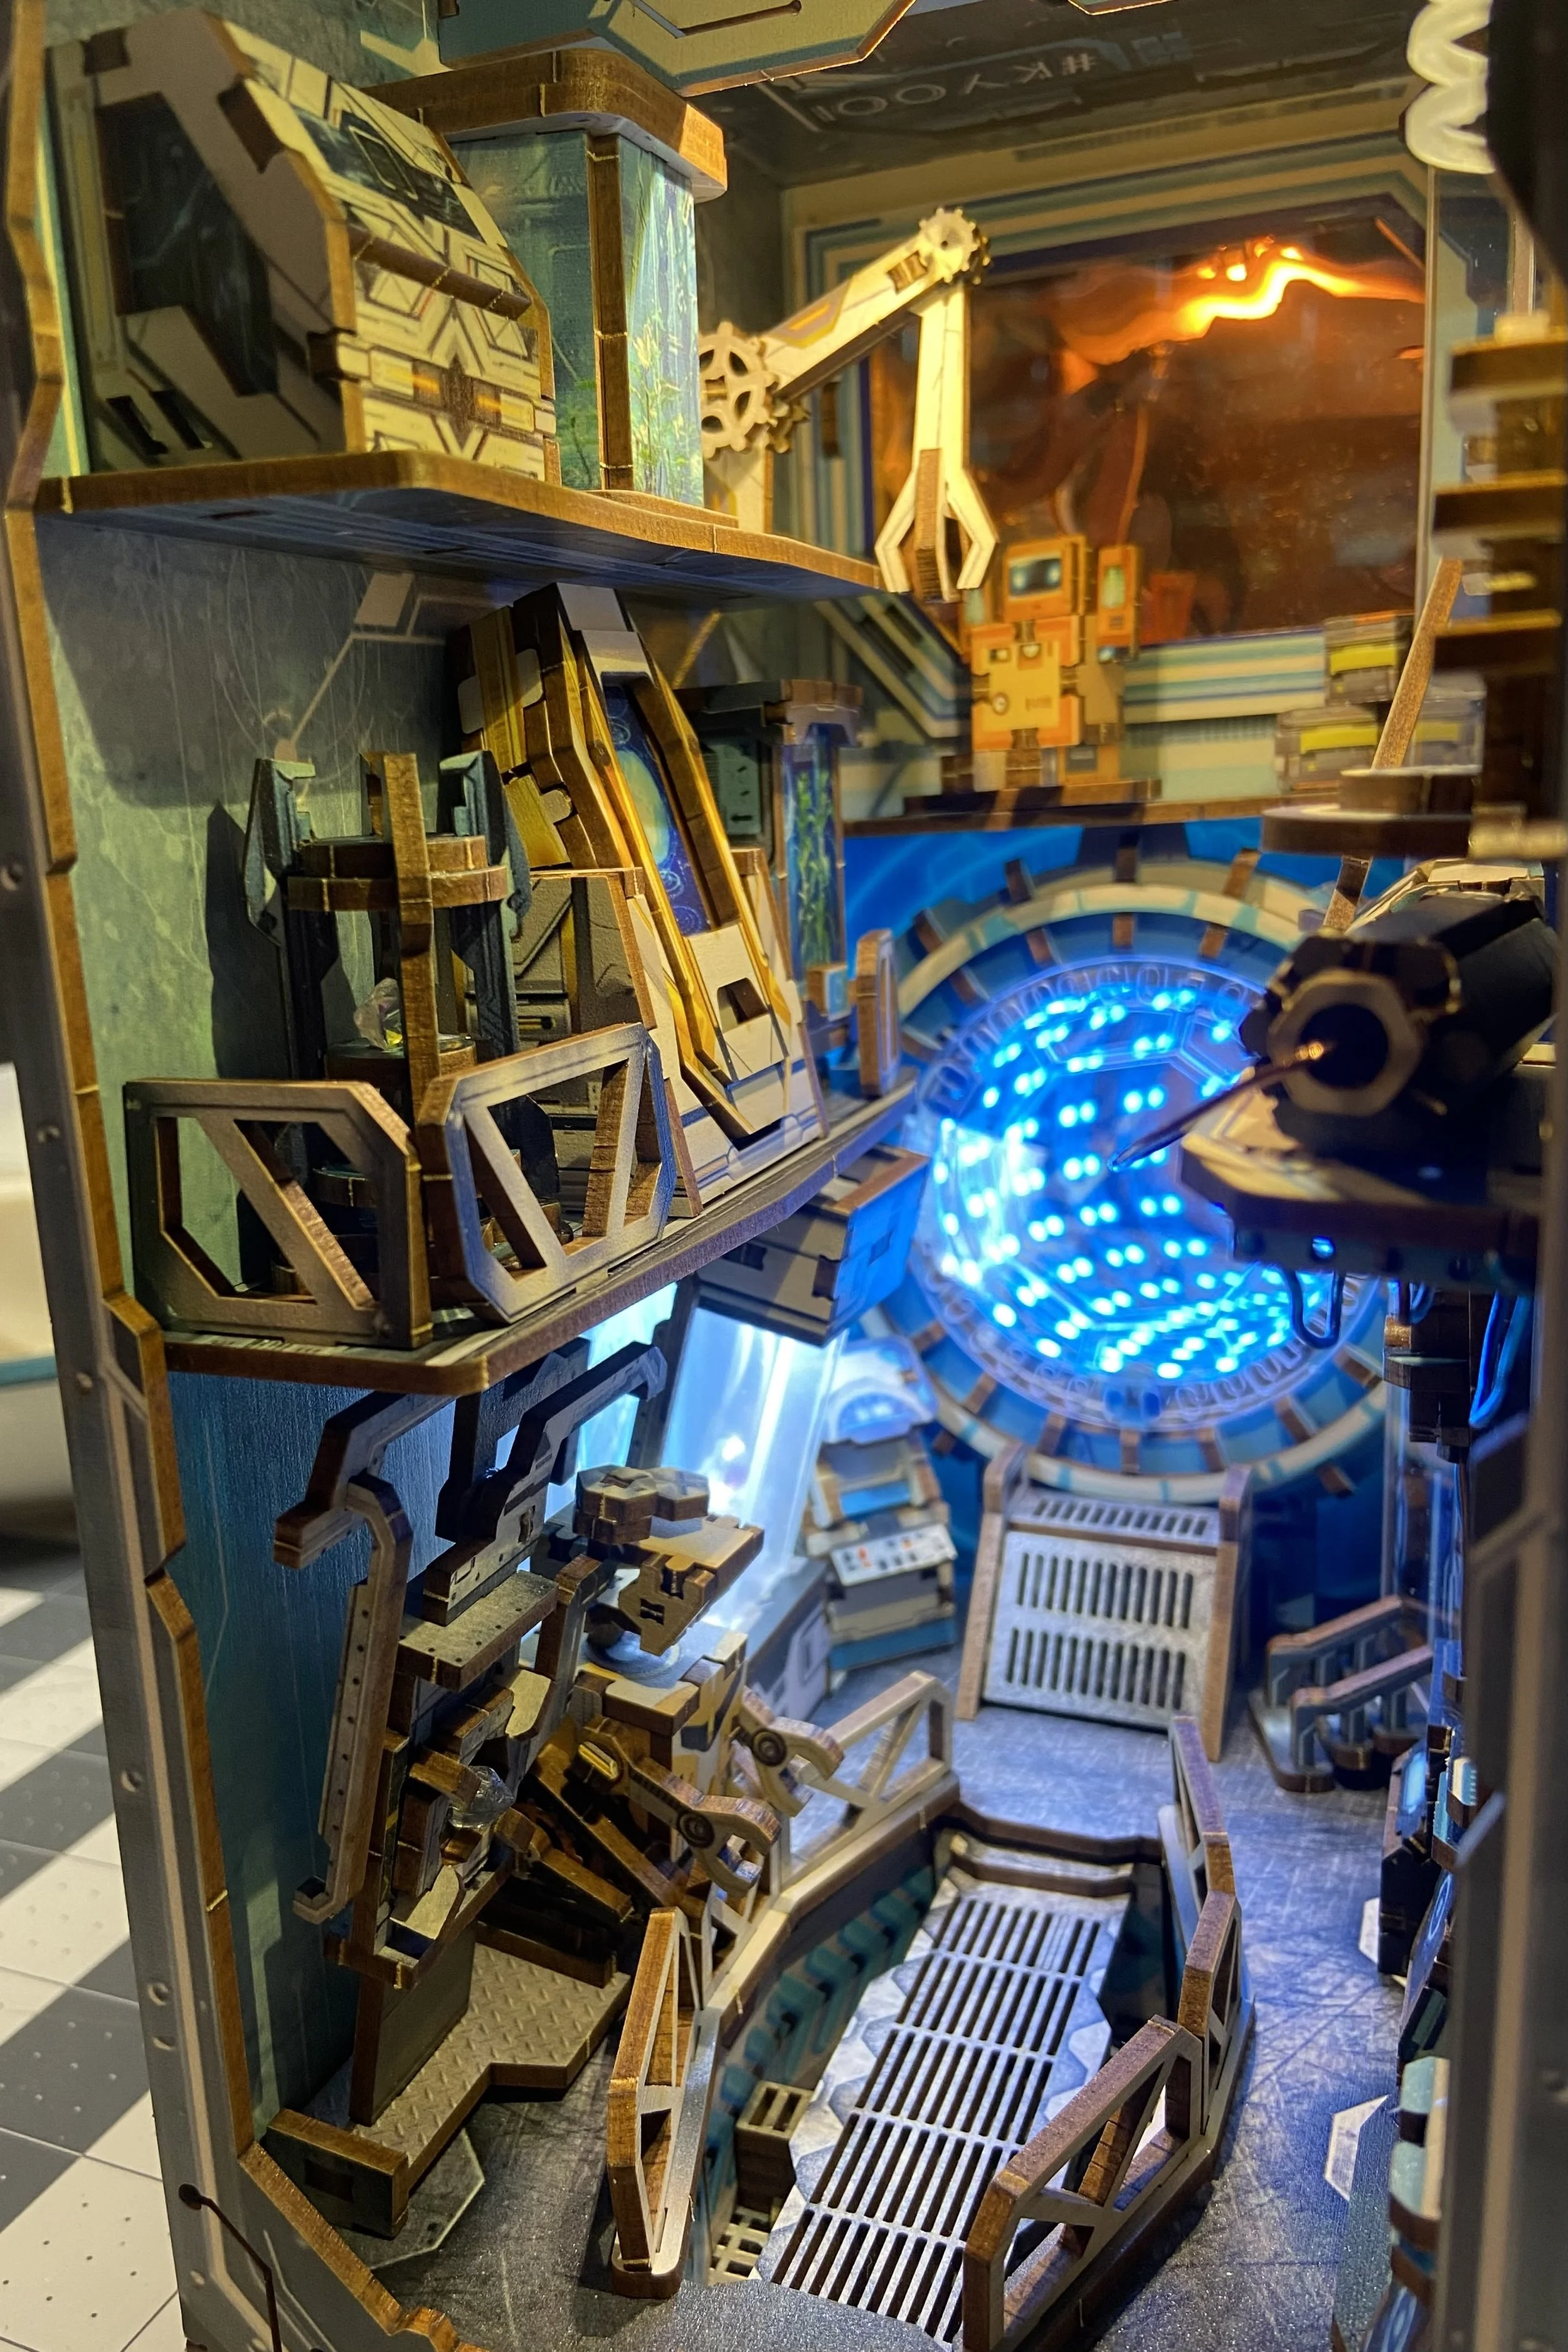
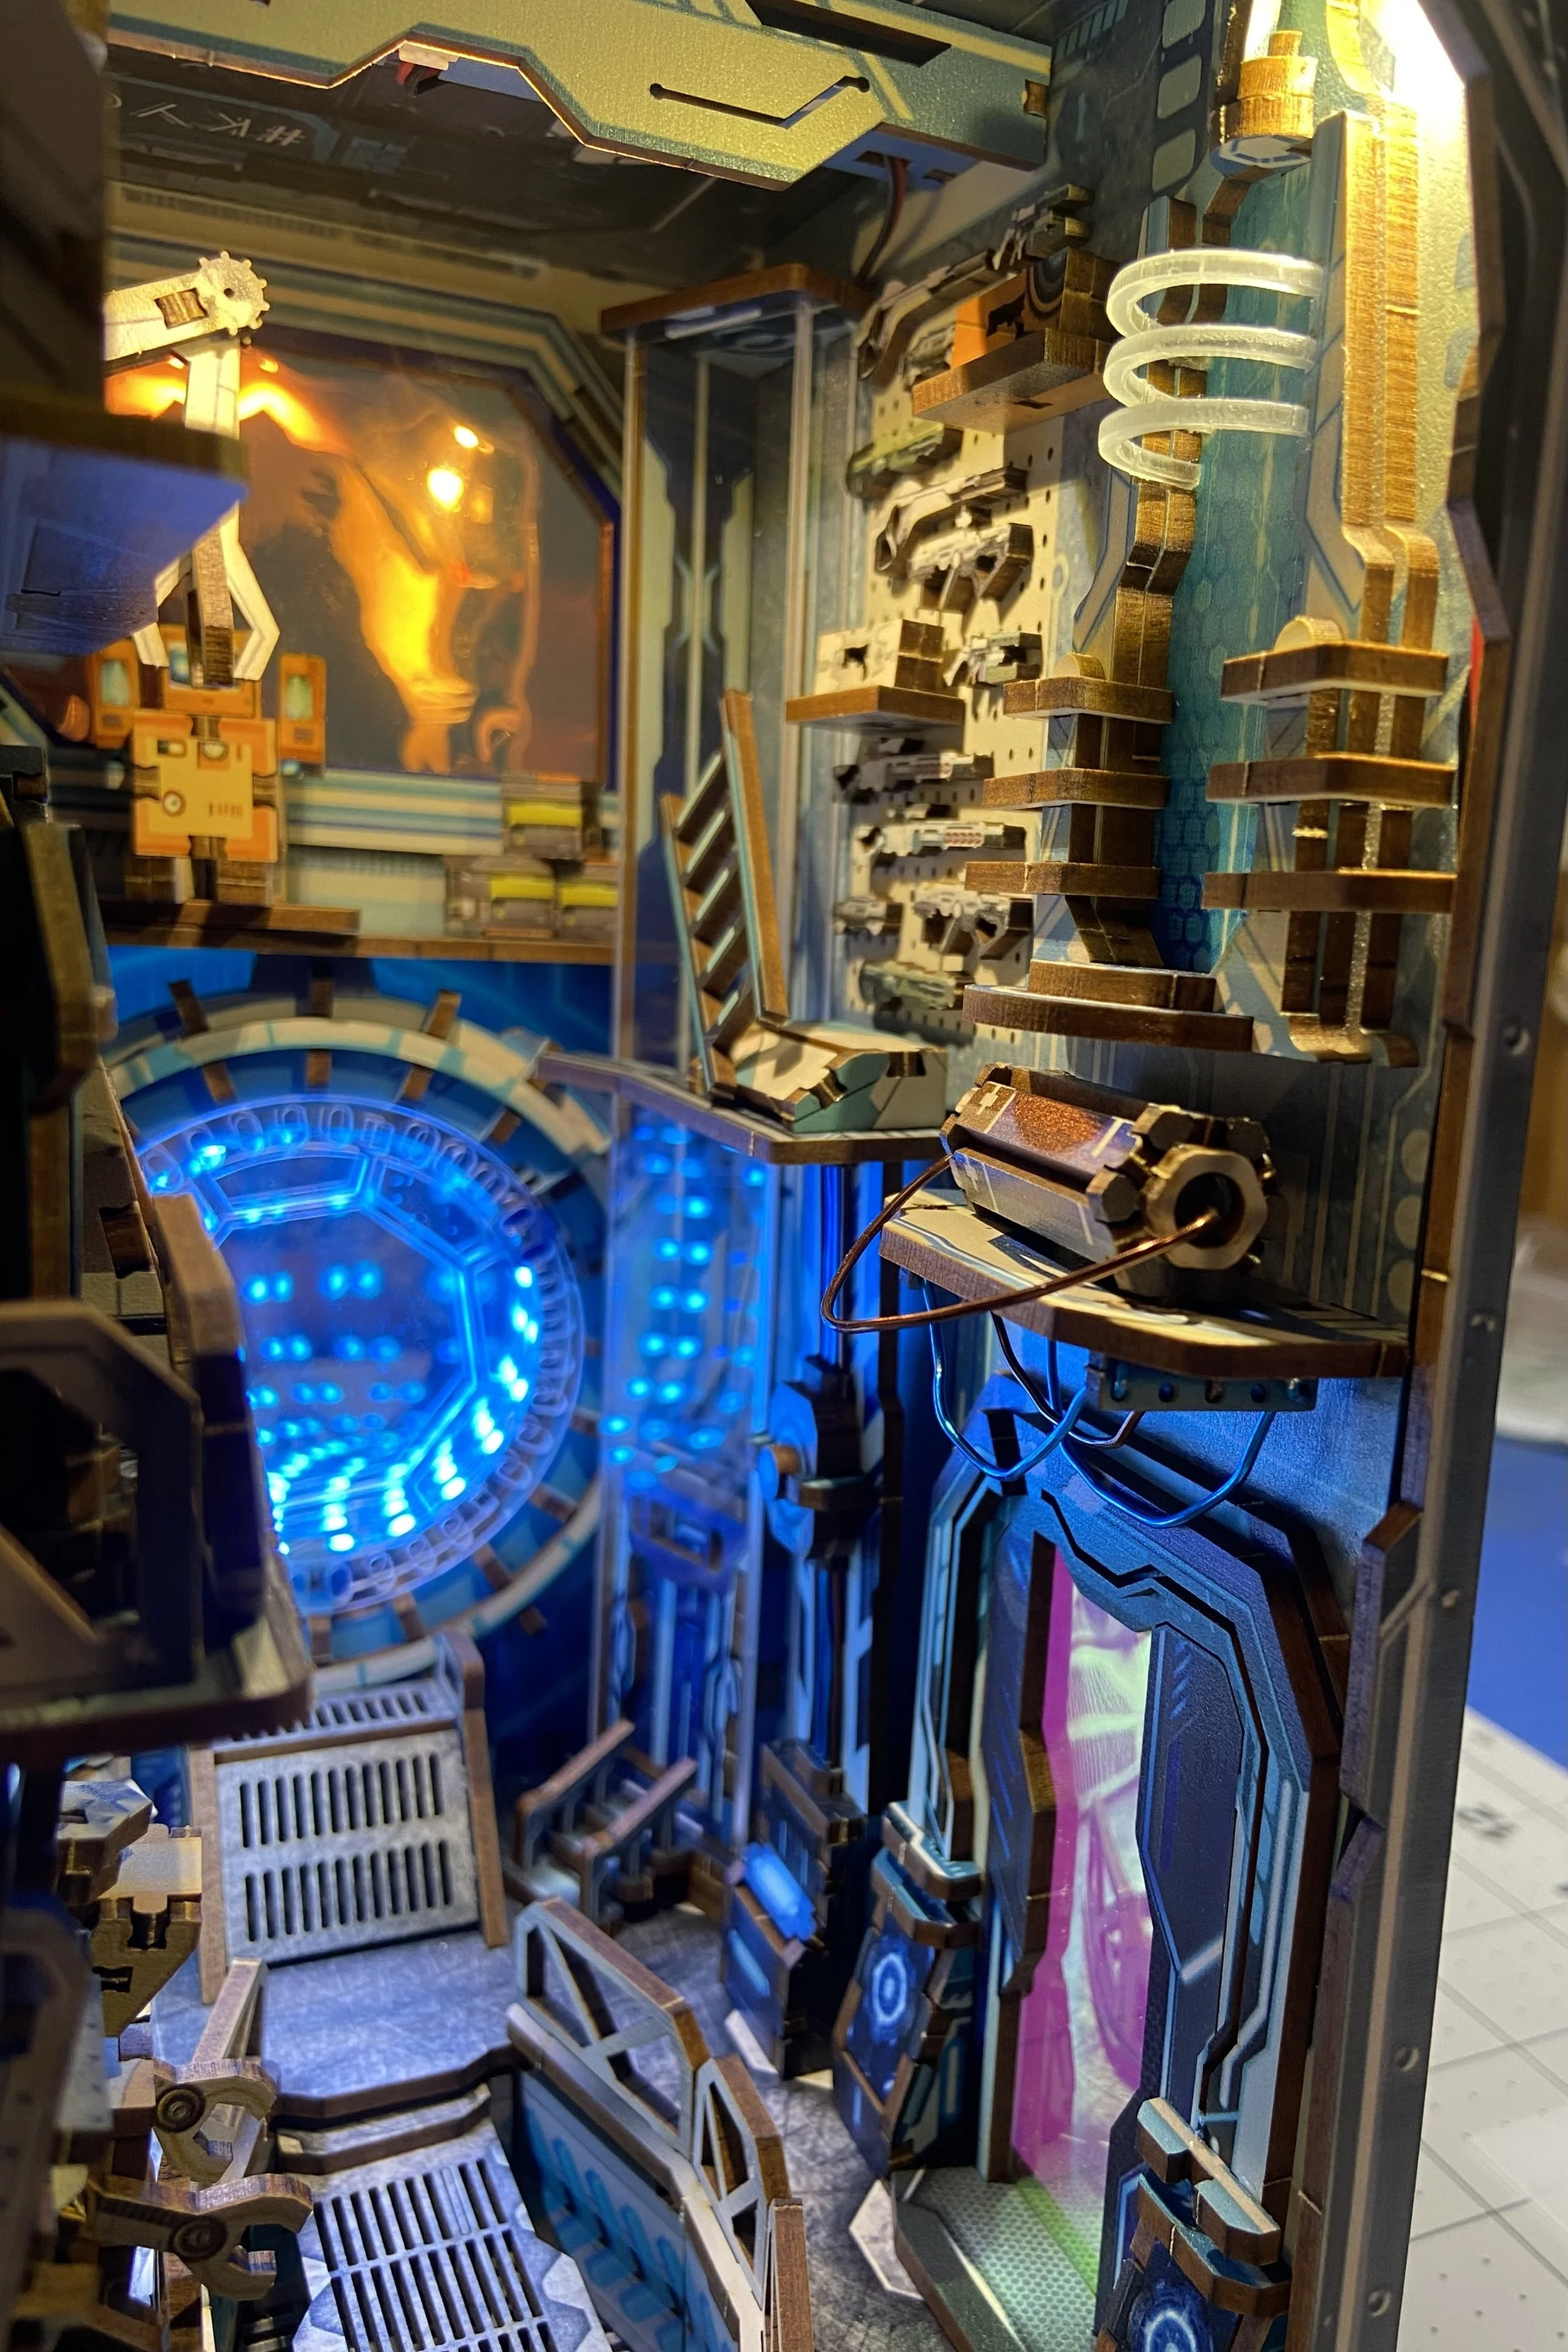
Some of the pieces were quite familiar but I couldn’t quite place them. This robot, for example…I know I’ve seen something very like it in a TV show or a movie, but I can’t think which one. Maybe Johnny 5 from the movie Short Circuit…? But the crystals seemed quite analogous to dilithium crystals from Star Trek.
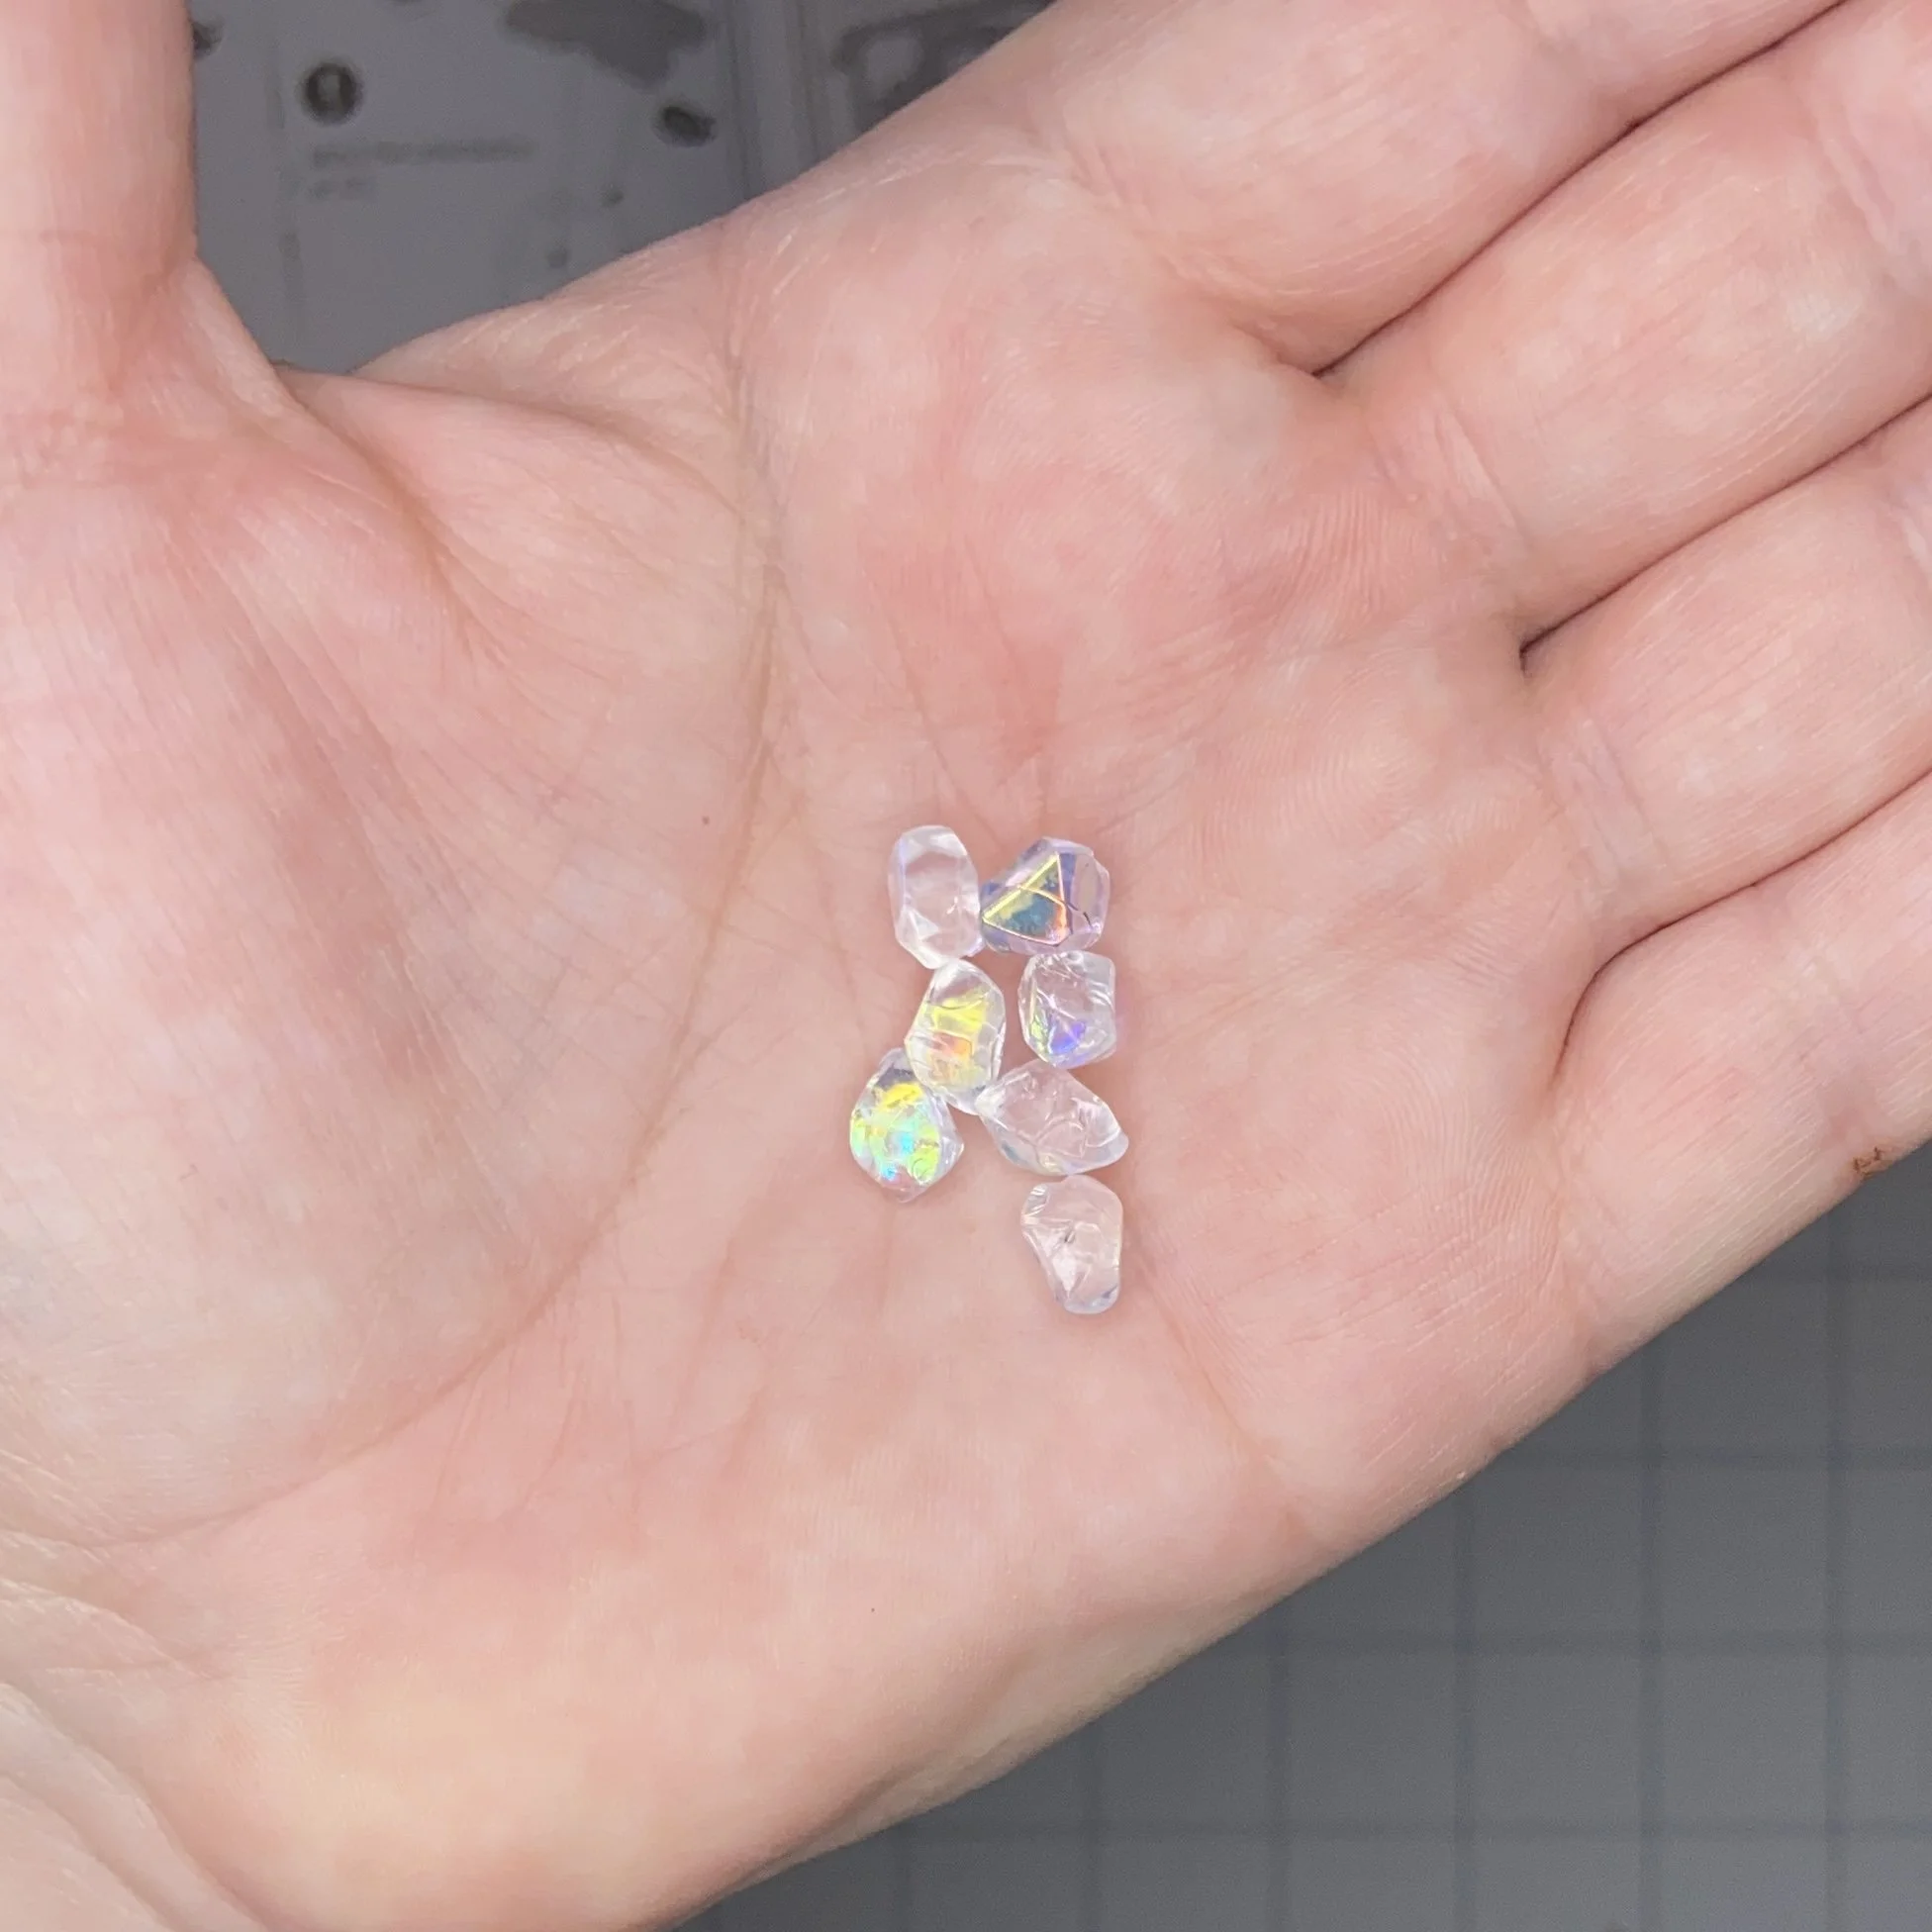
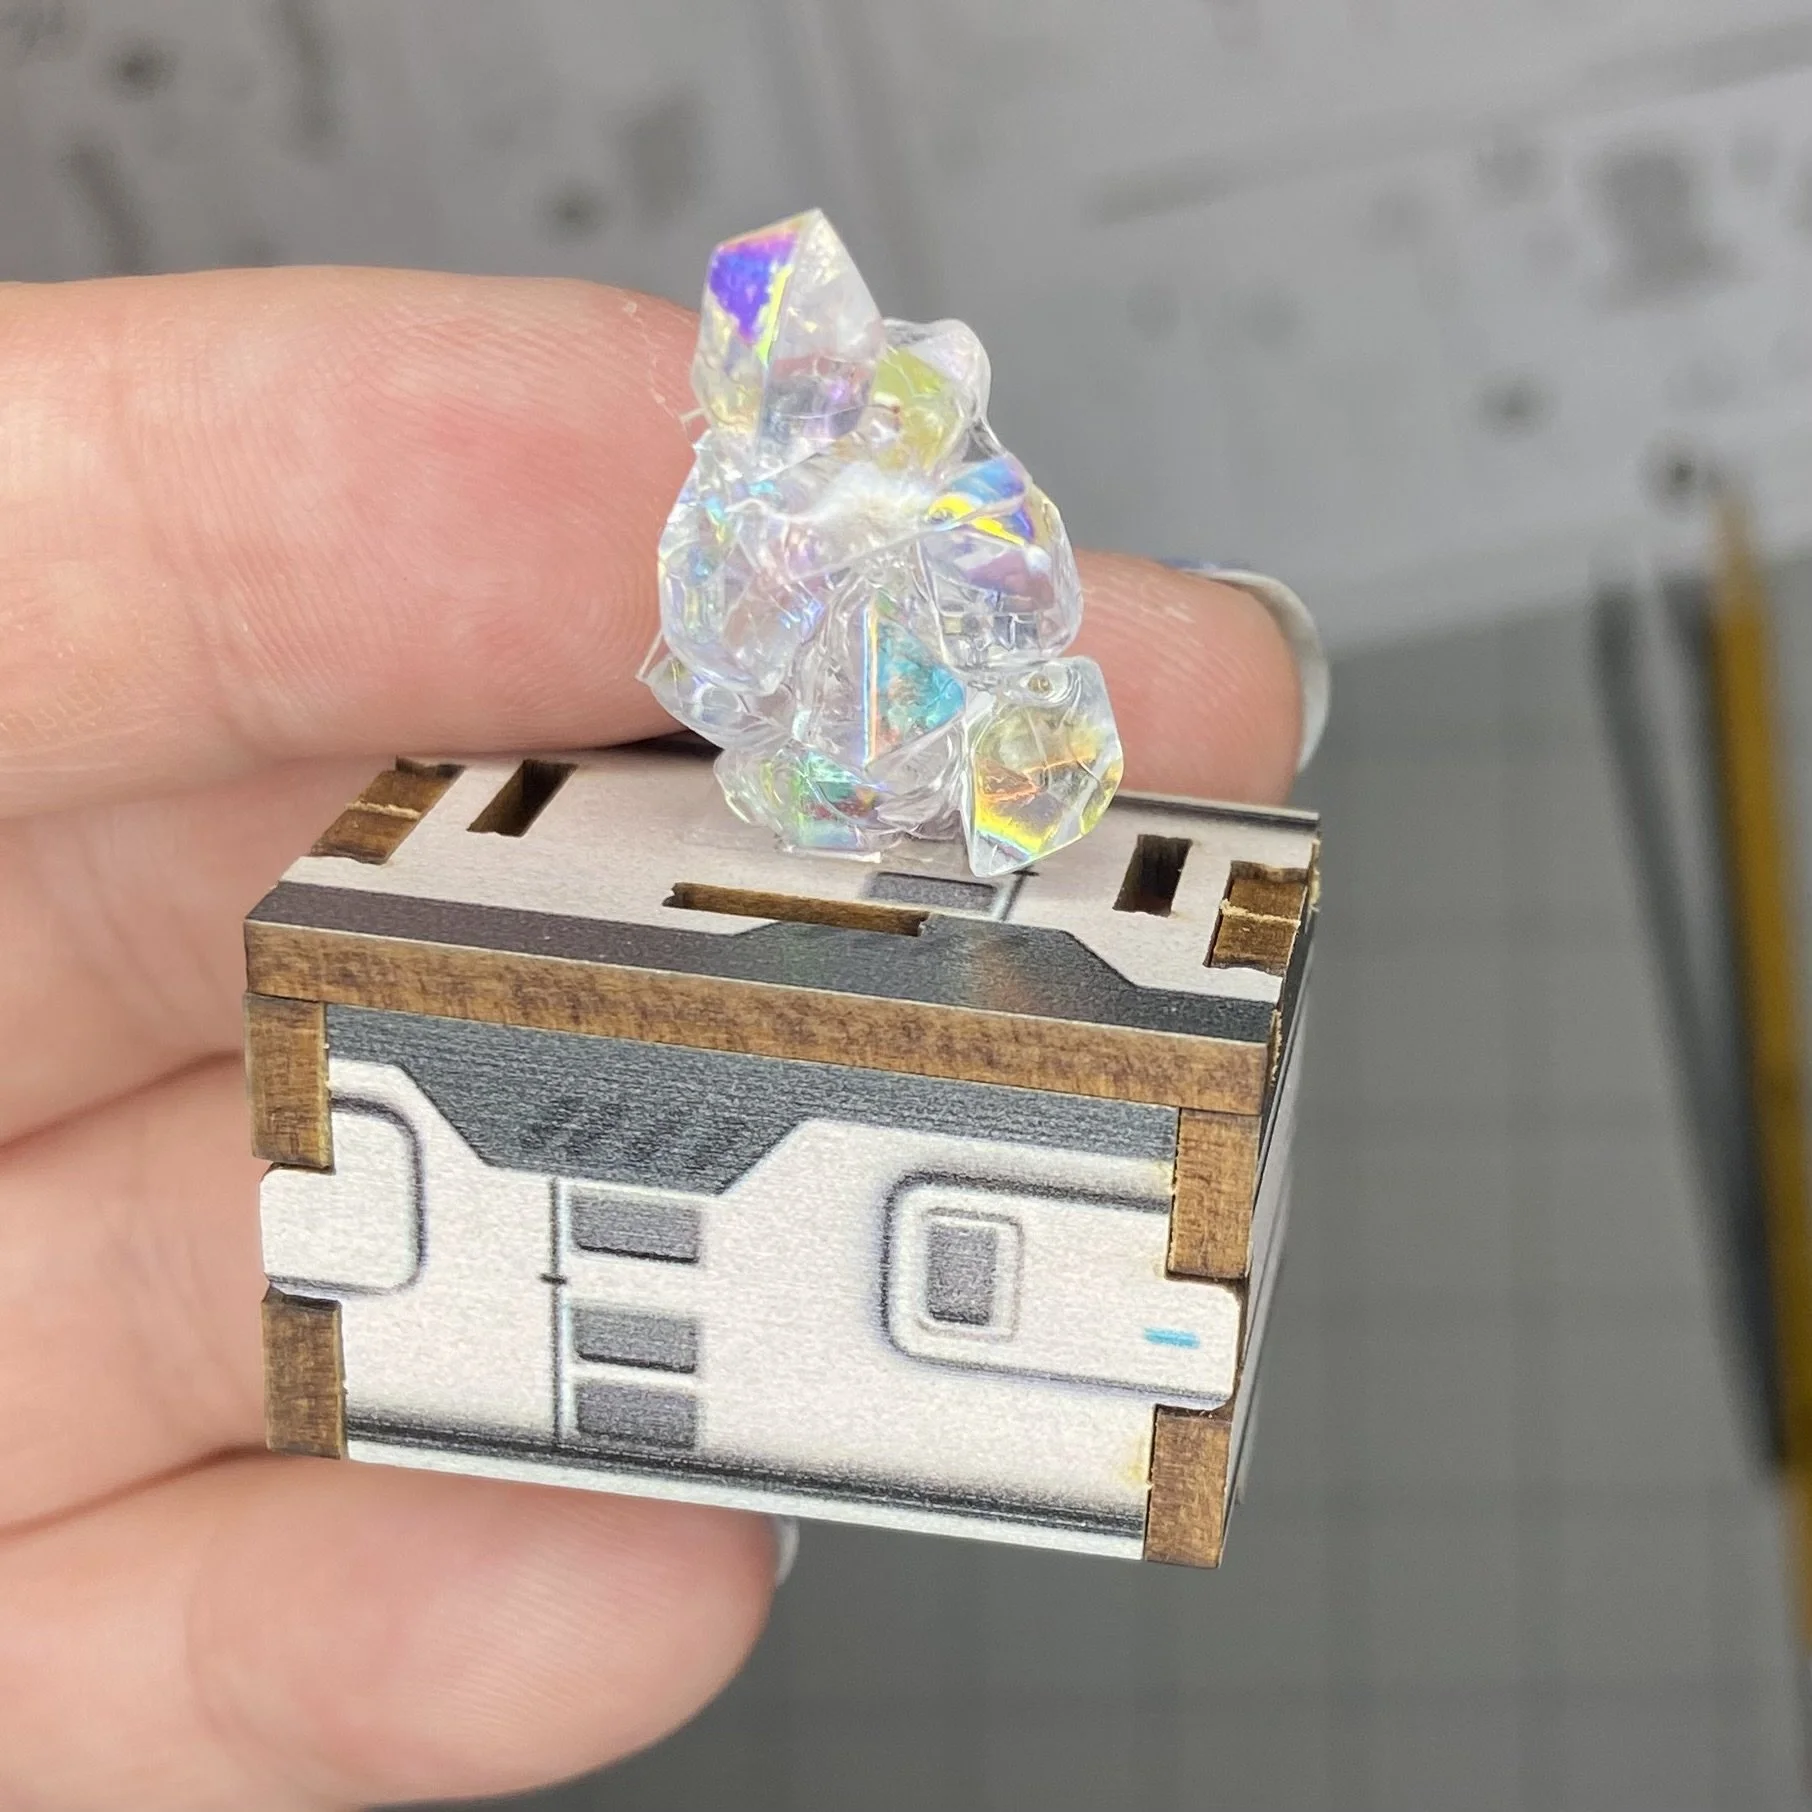

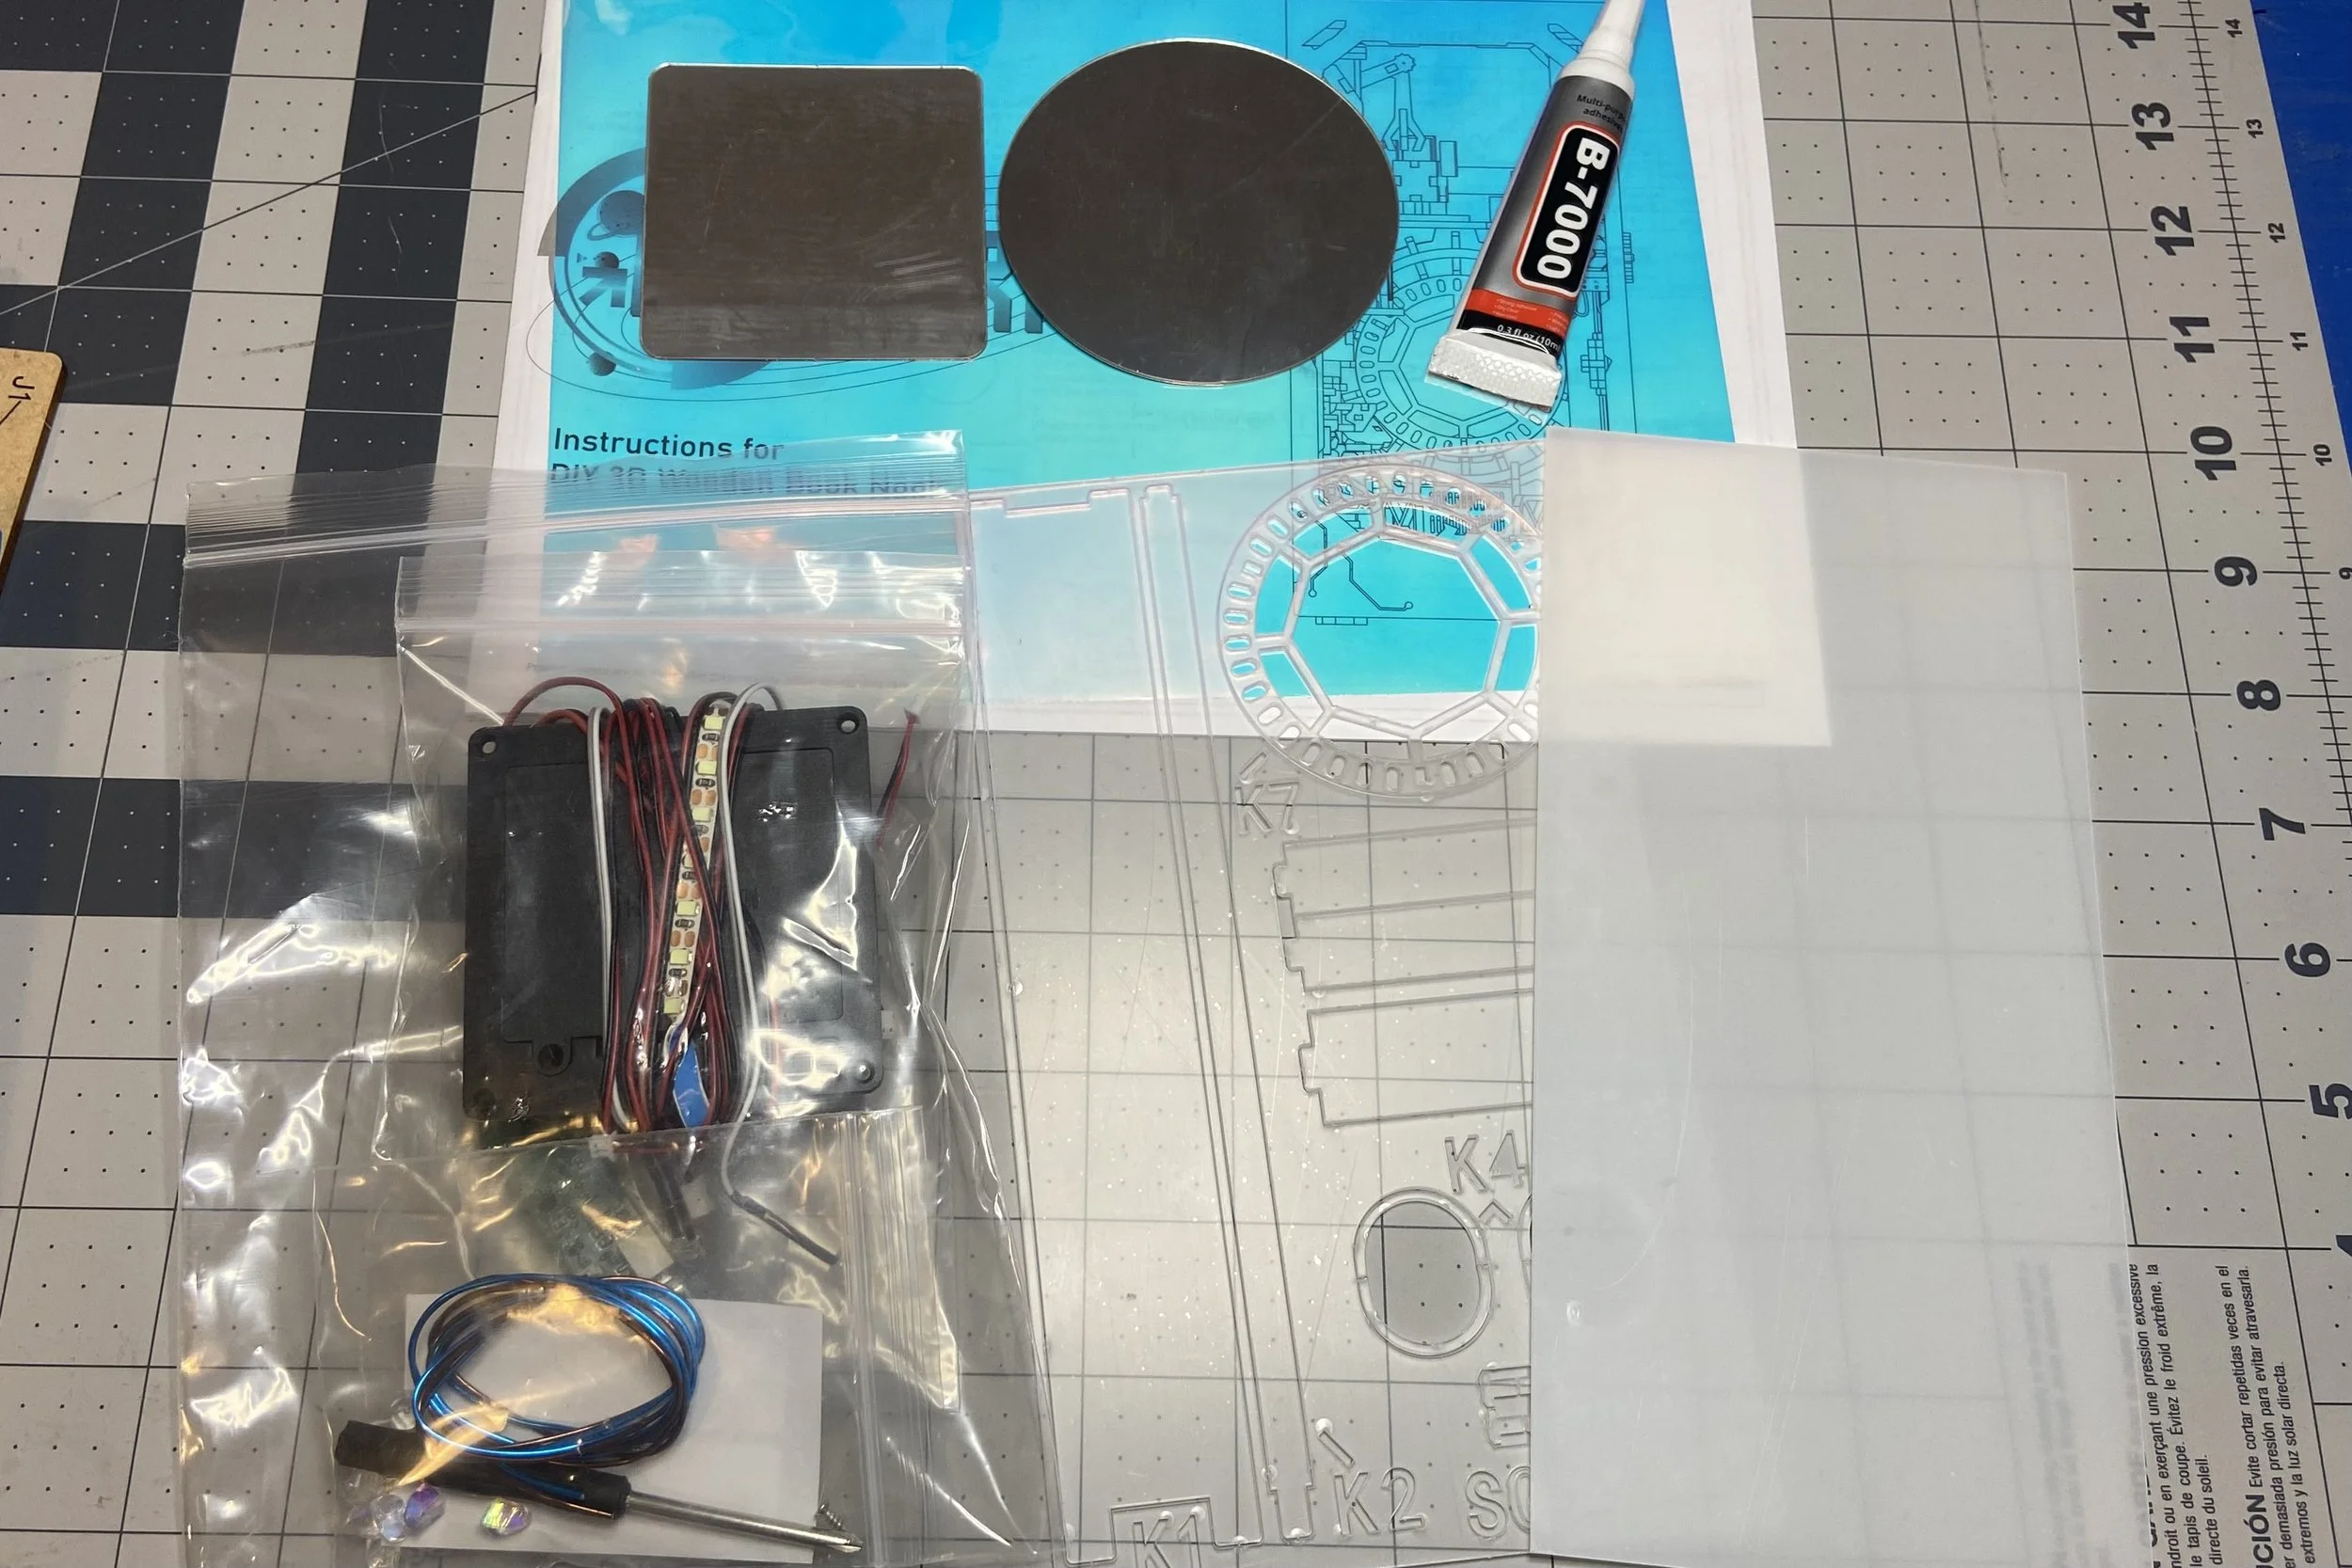
After I’d stacked the “dilithium crystals” into their space, I was supposed to encase them with three plastic pieces from sheet K in my supplies. A closer examination of the instructions would have told me that there’s a protective plastic coating on either side of all of sheet K that needs to be removed before the piece is placed, but I somehow missed this. I installed the pieces for the “dilithium chamber” without removing the protective plastic, so the case was translucent, rather than clear. By the time I realized my mistake, I’d already glued the pieces in place, so I couldn’t take them back out and take off the plastic. I did manage to peel it off the outside, but I couldn’t get at the inside, so those pieces aren’t completely clear. Oh well, it’s not like I could do anything about it, so I decided to live with it.
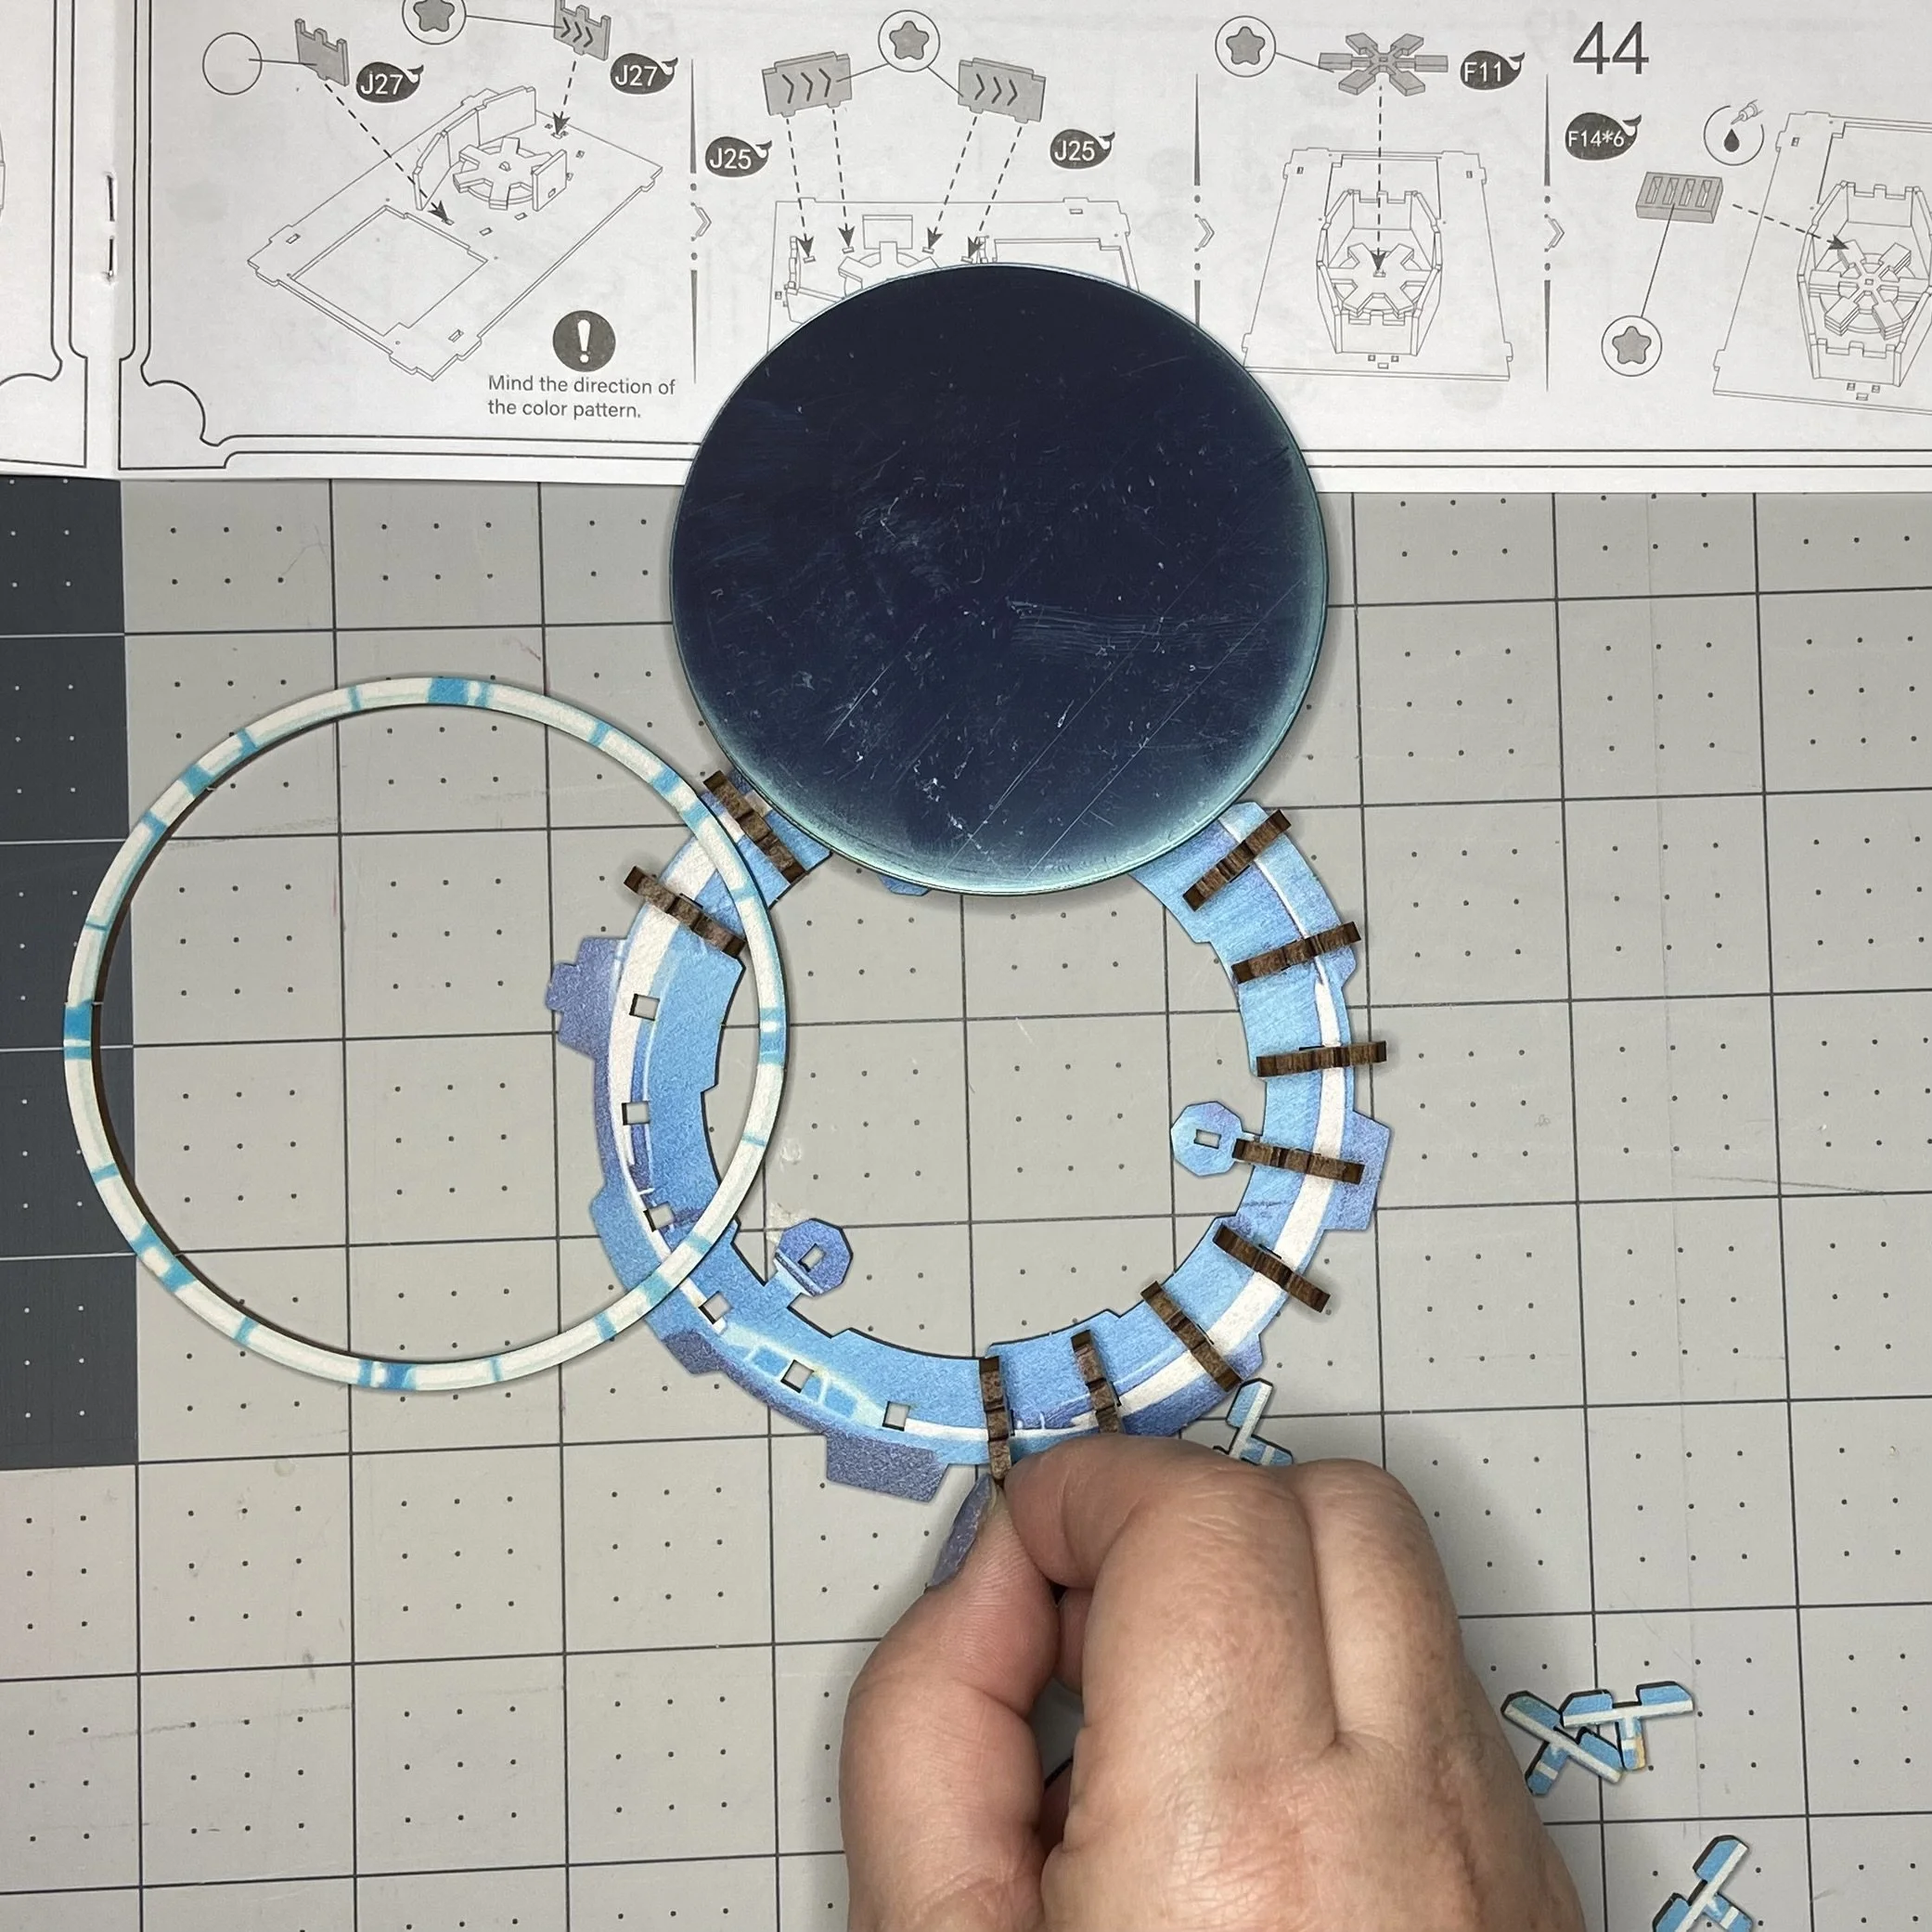
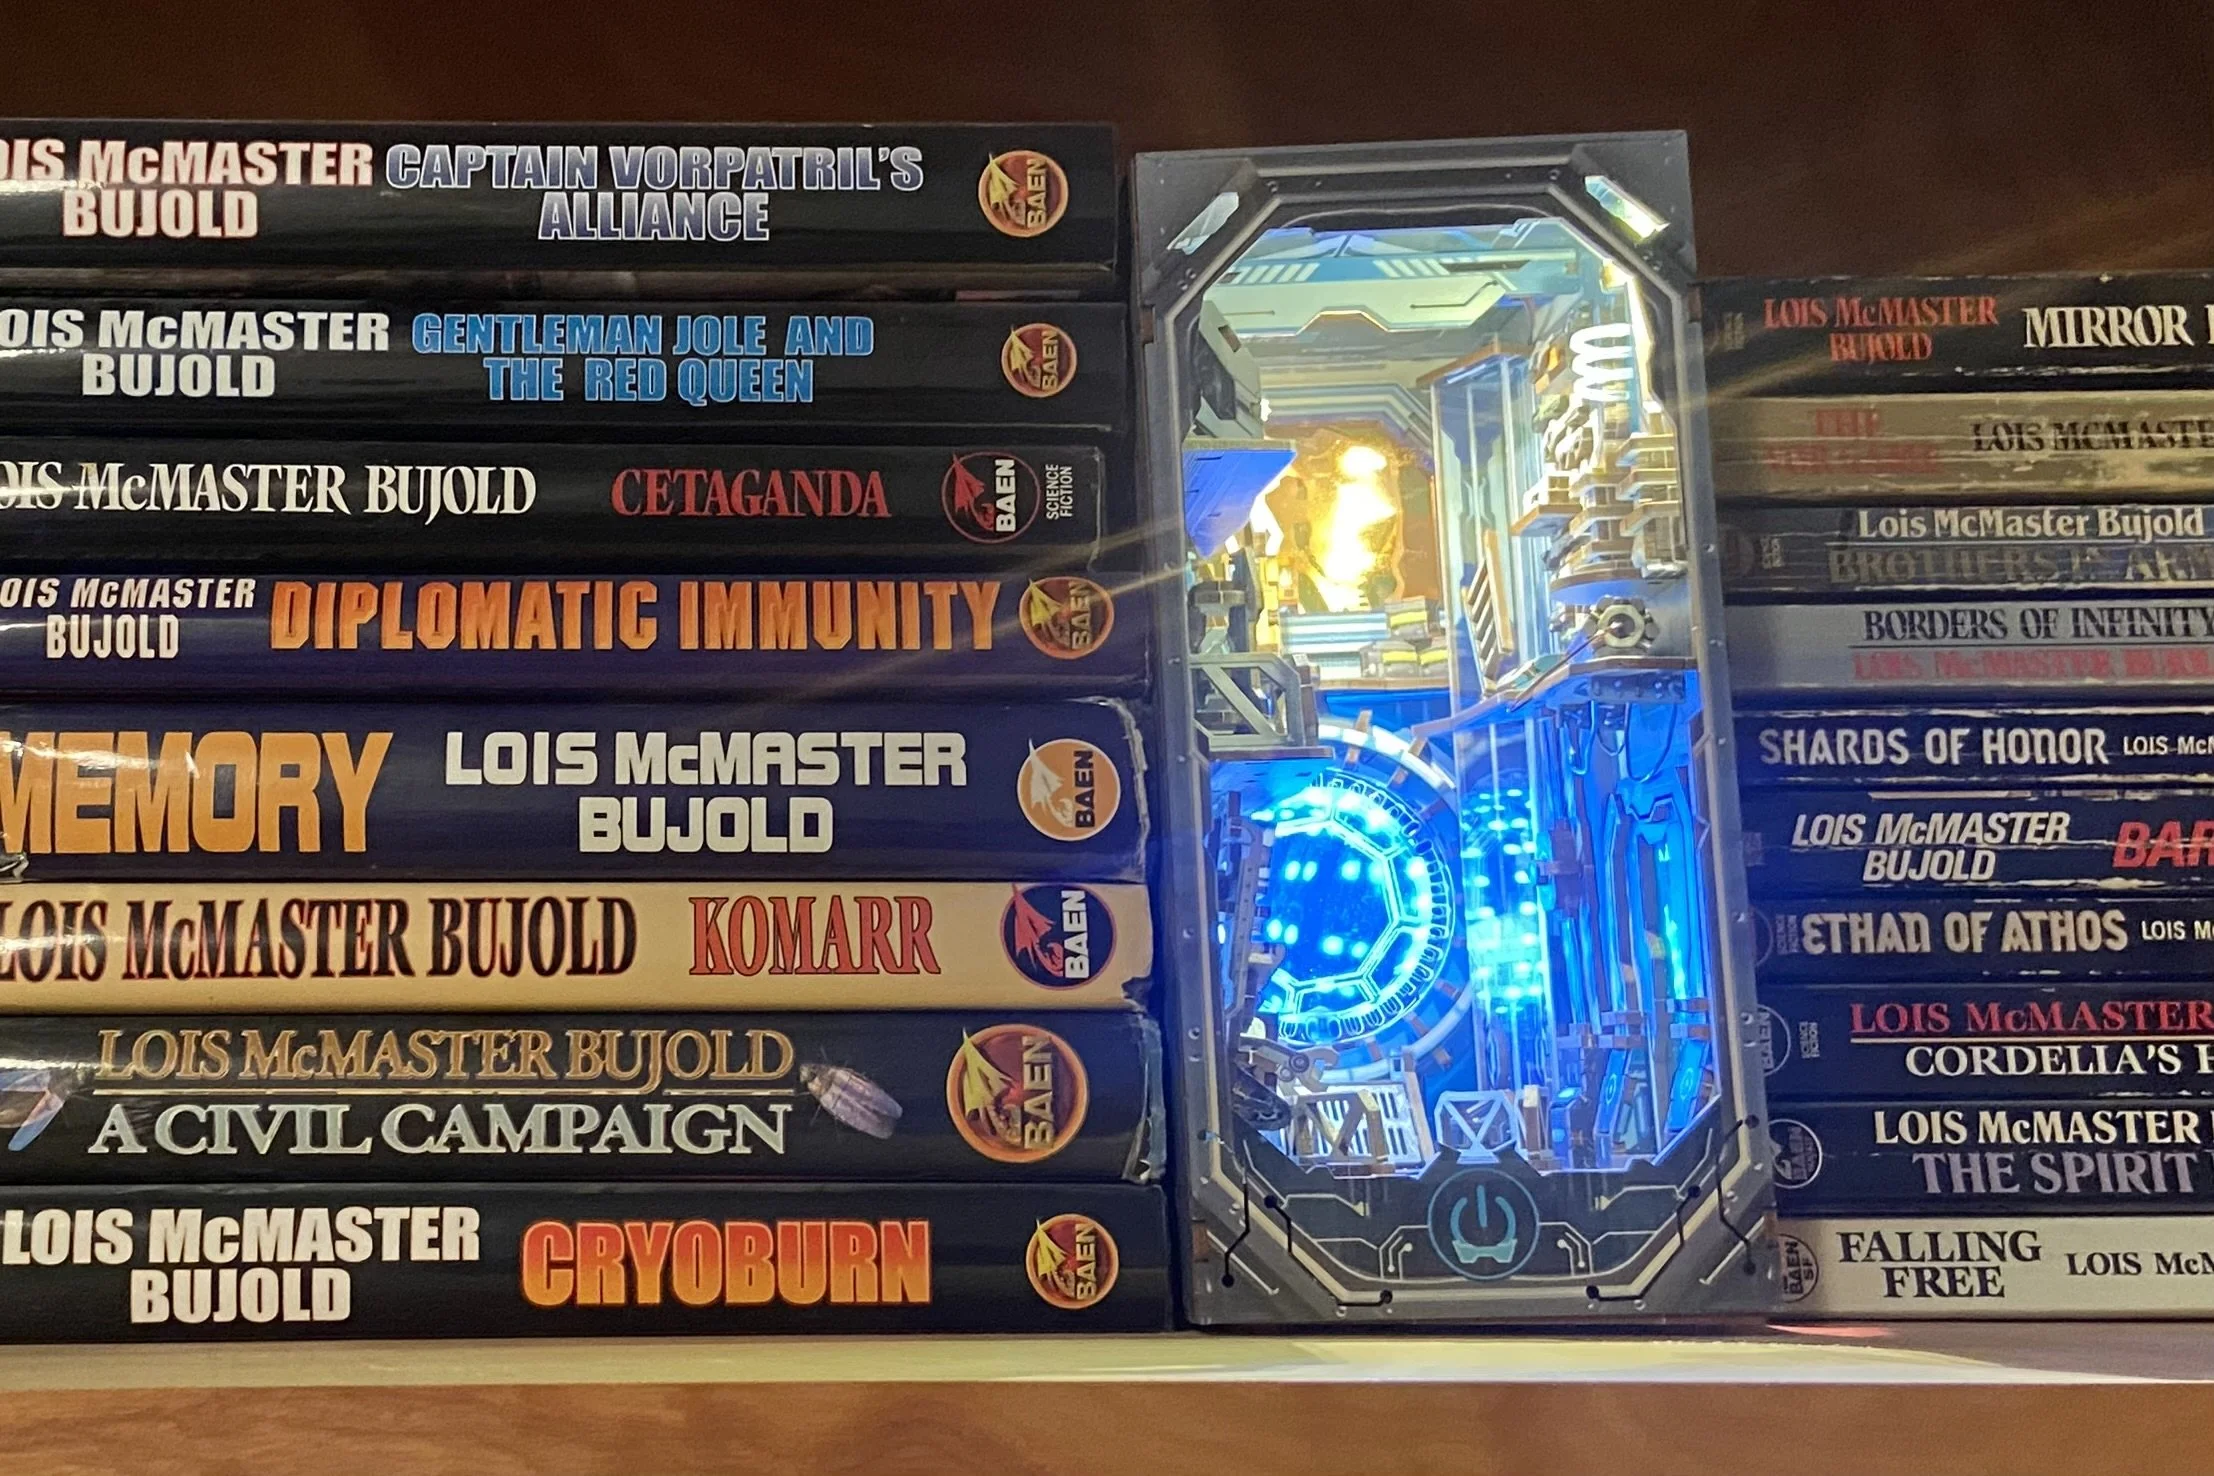
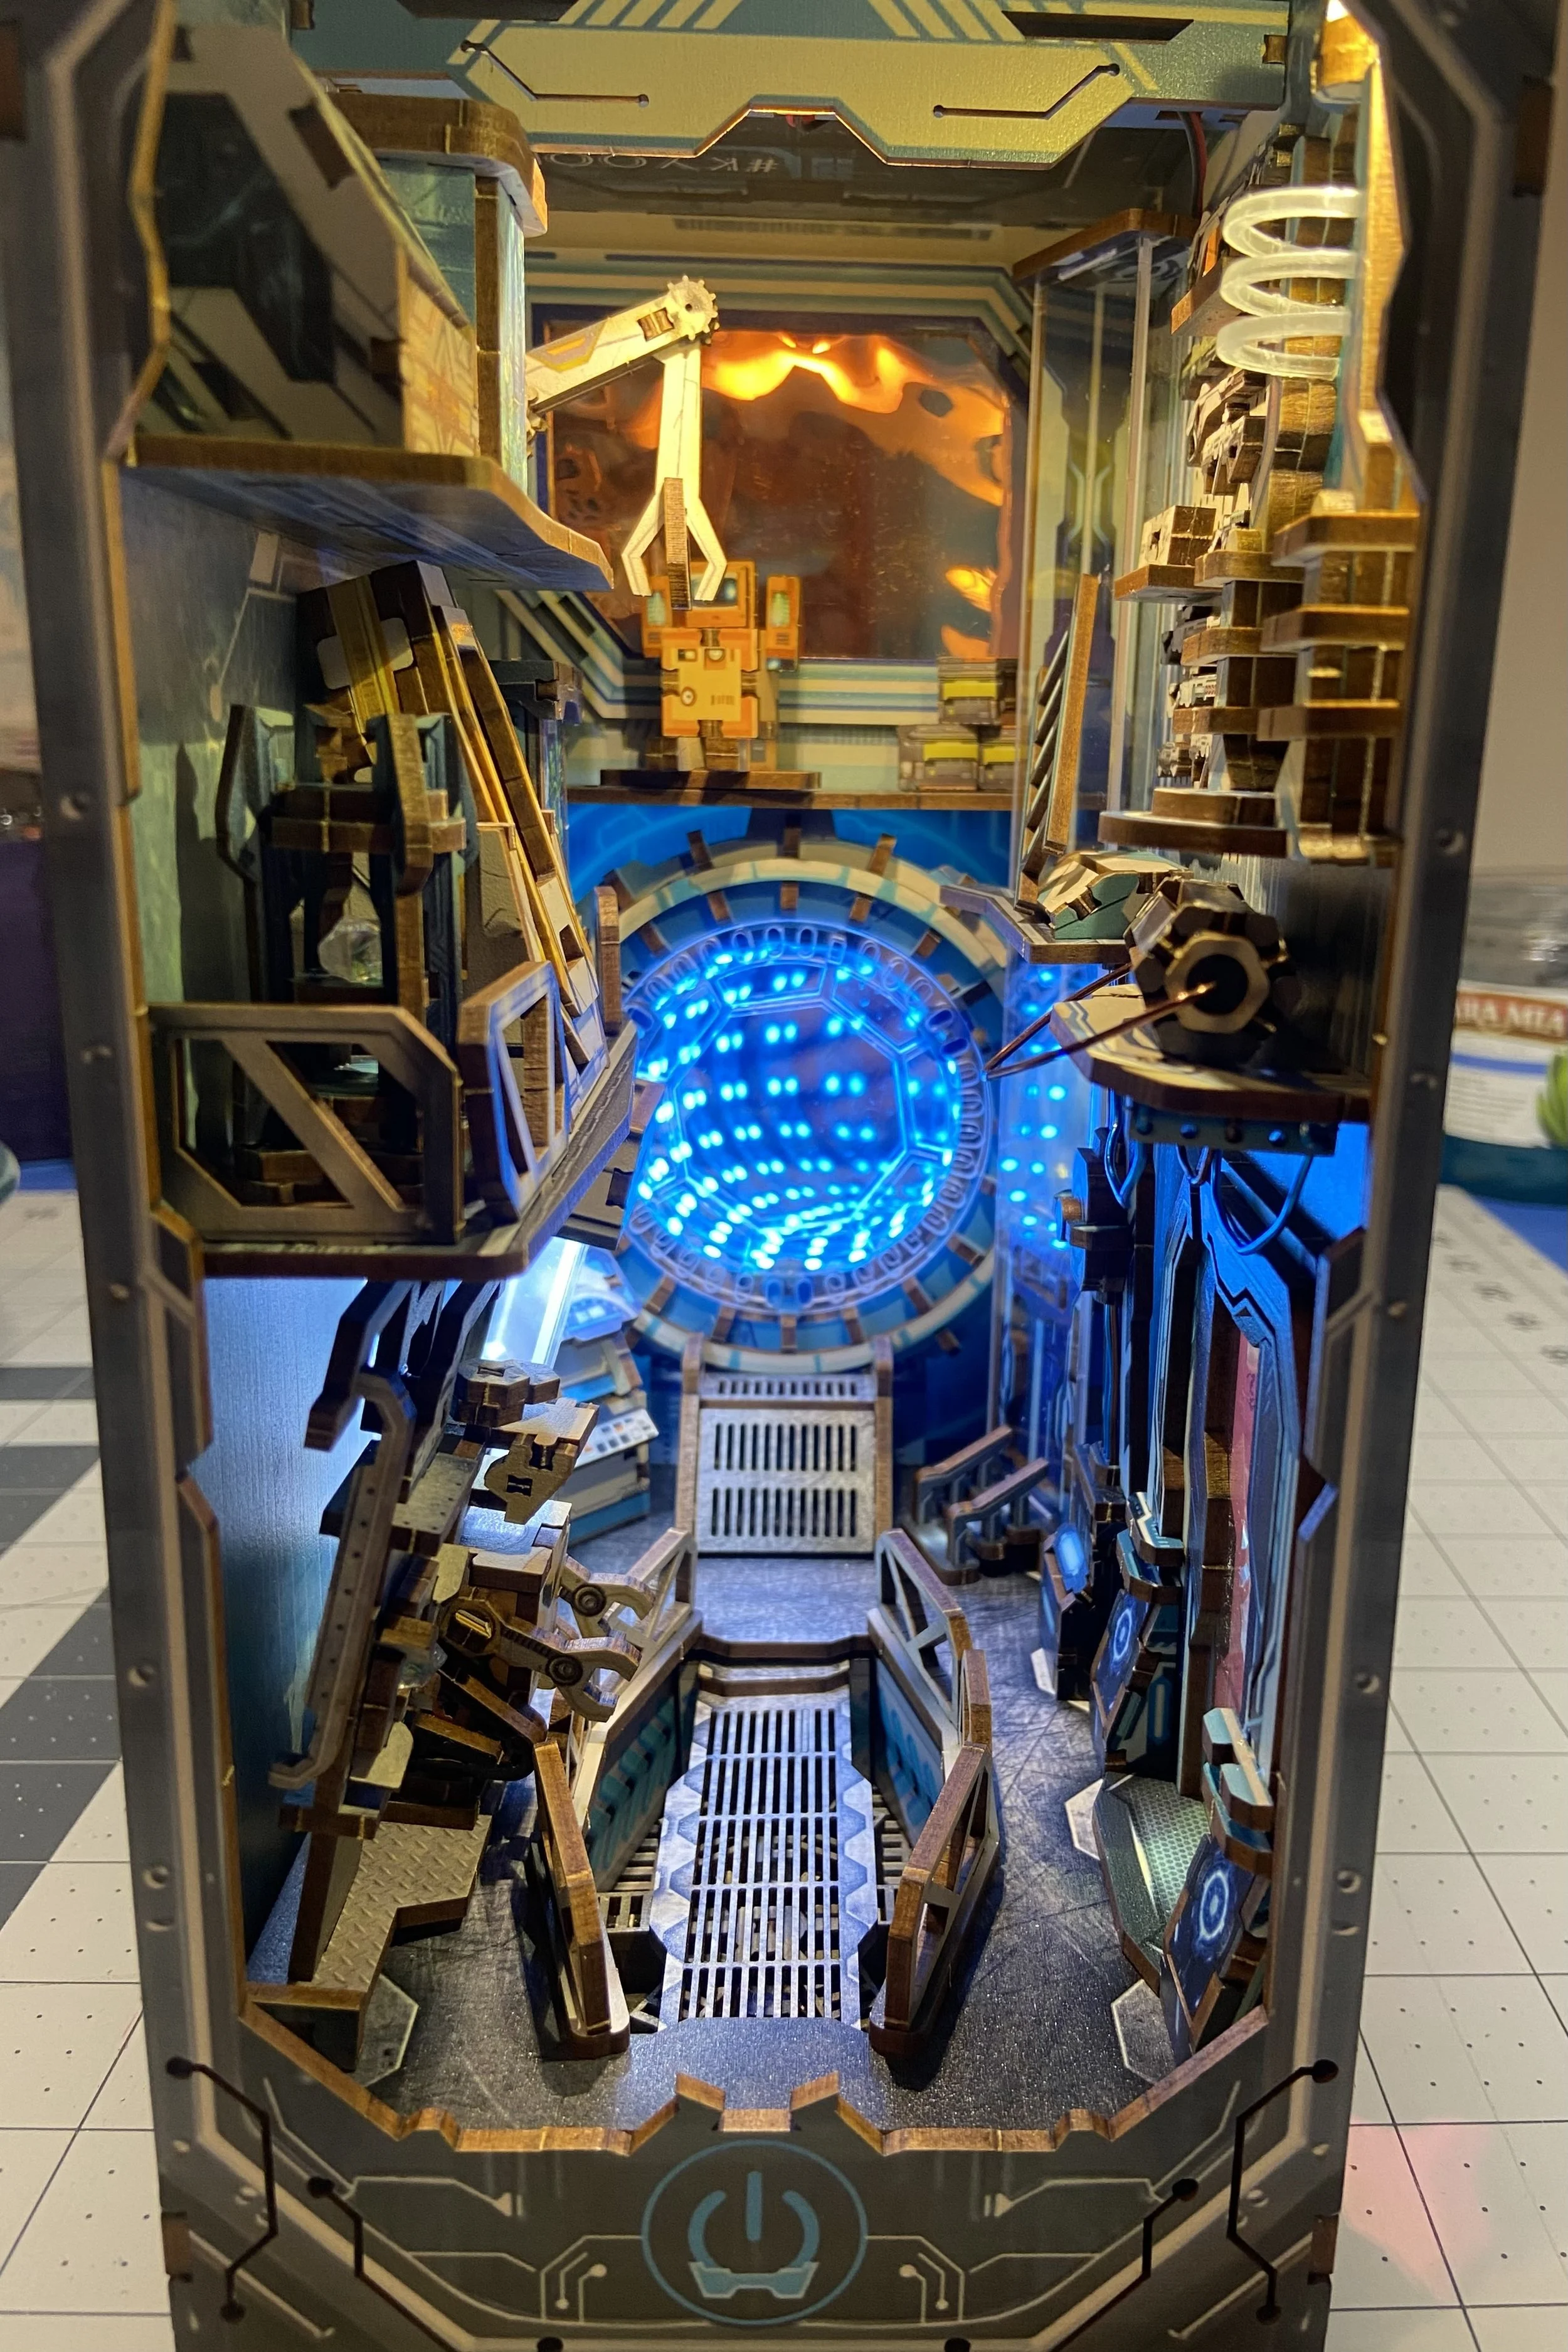
I then proceeded to build what could only be a stargate (from the movie and TV franchises of the same name). This involved a circular frame with little brackets all the way around, another circle on top of that, and a mirror attached to the back. Behind the mirror was a strip of LED lighting wrapped around the circle, and then another mirror. This would give an infinity effect when the lights were turned on. It was fabulous! Totally looked like the wormhole was arcing away out the back of the book nook.
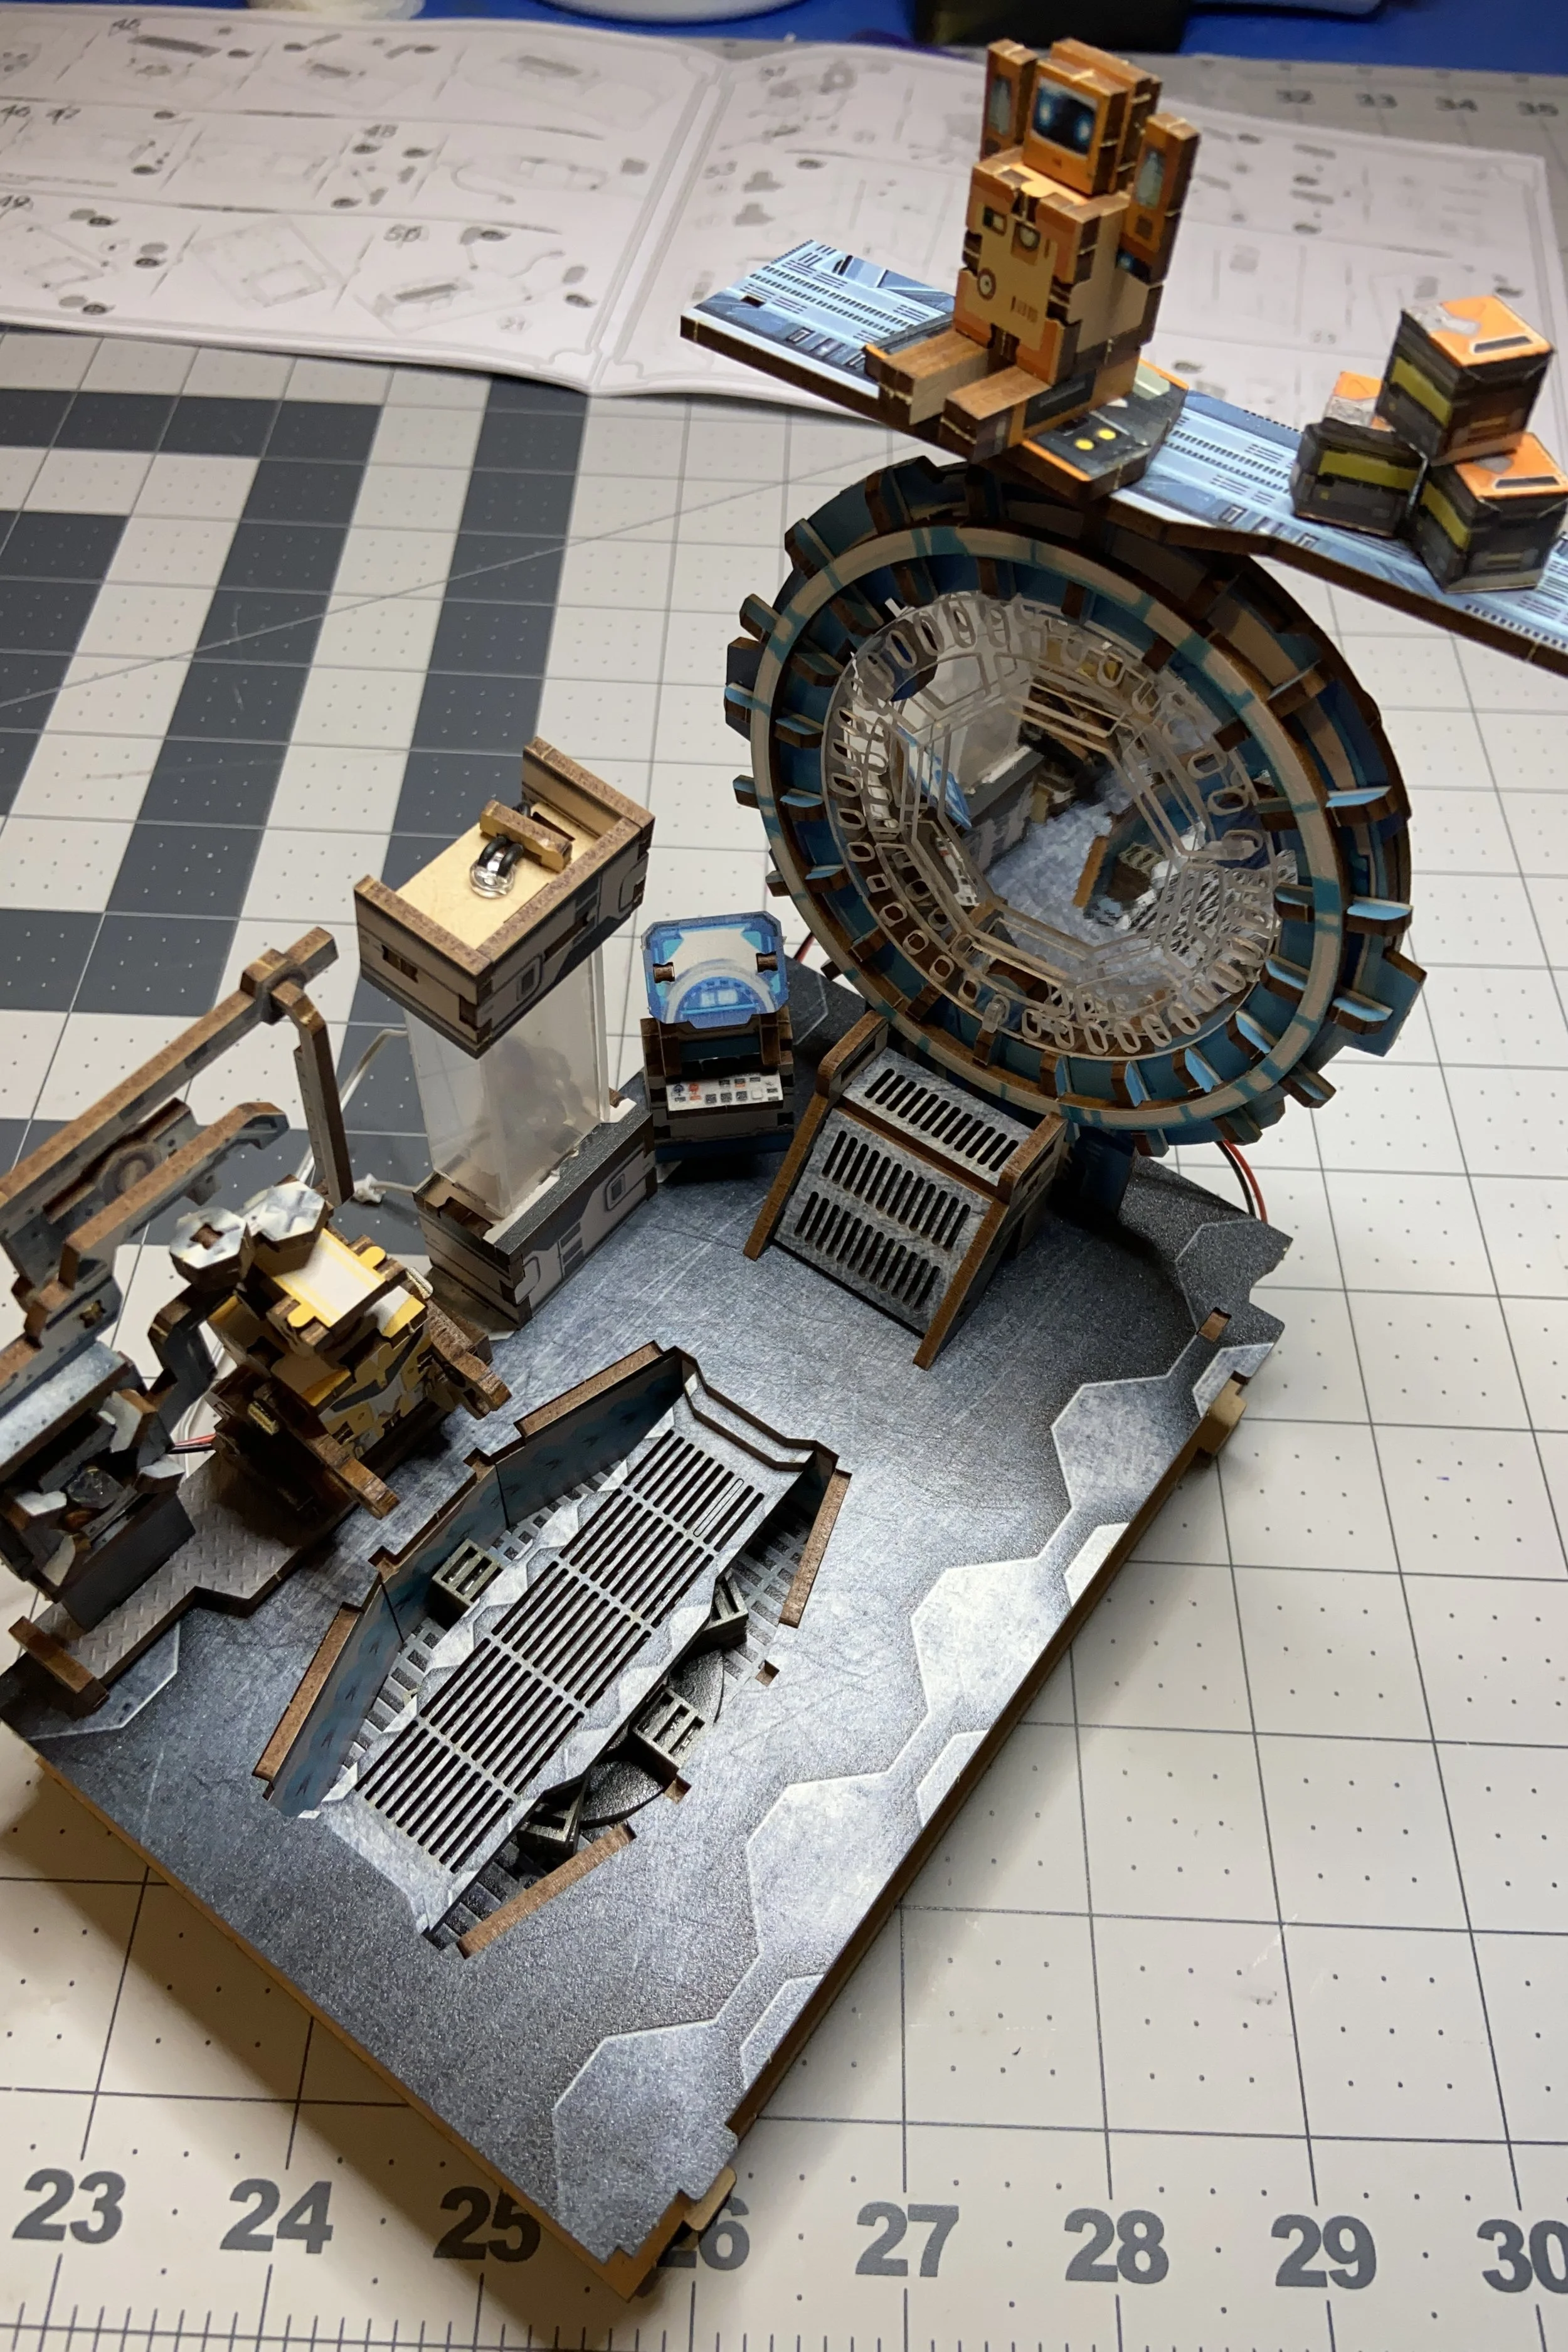
The stargate was installed on the floor along with some other items, including the cloudy dilithium chamber.
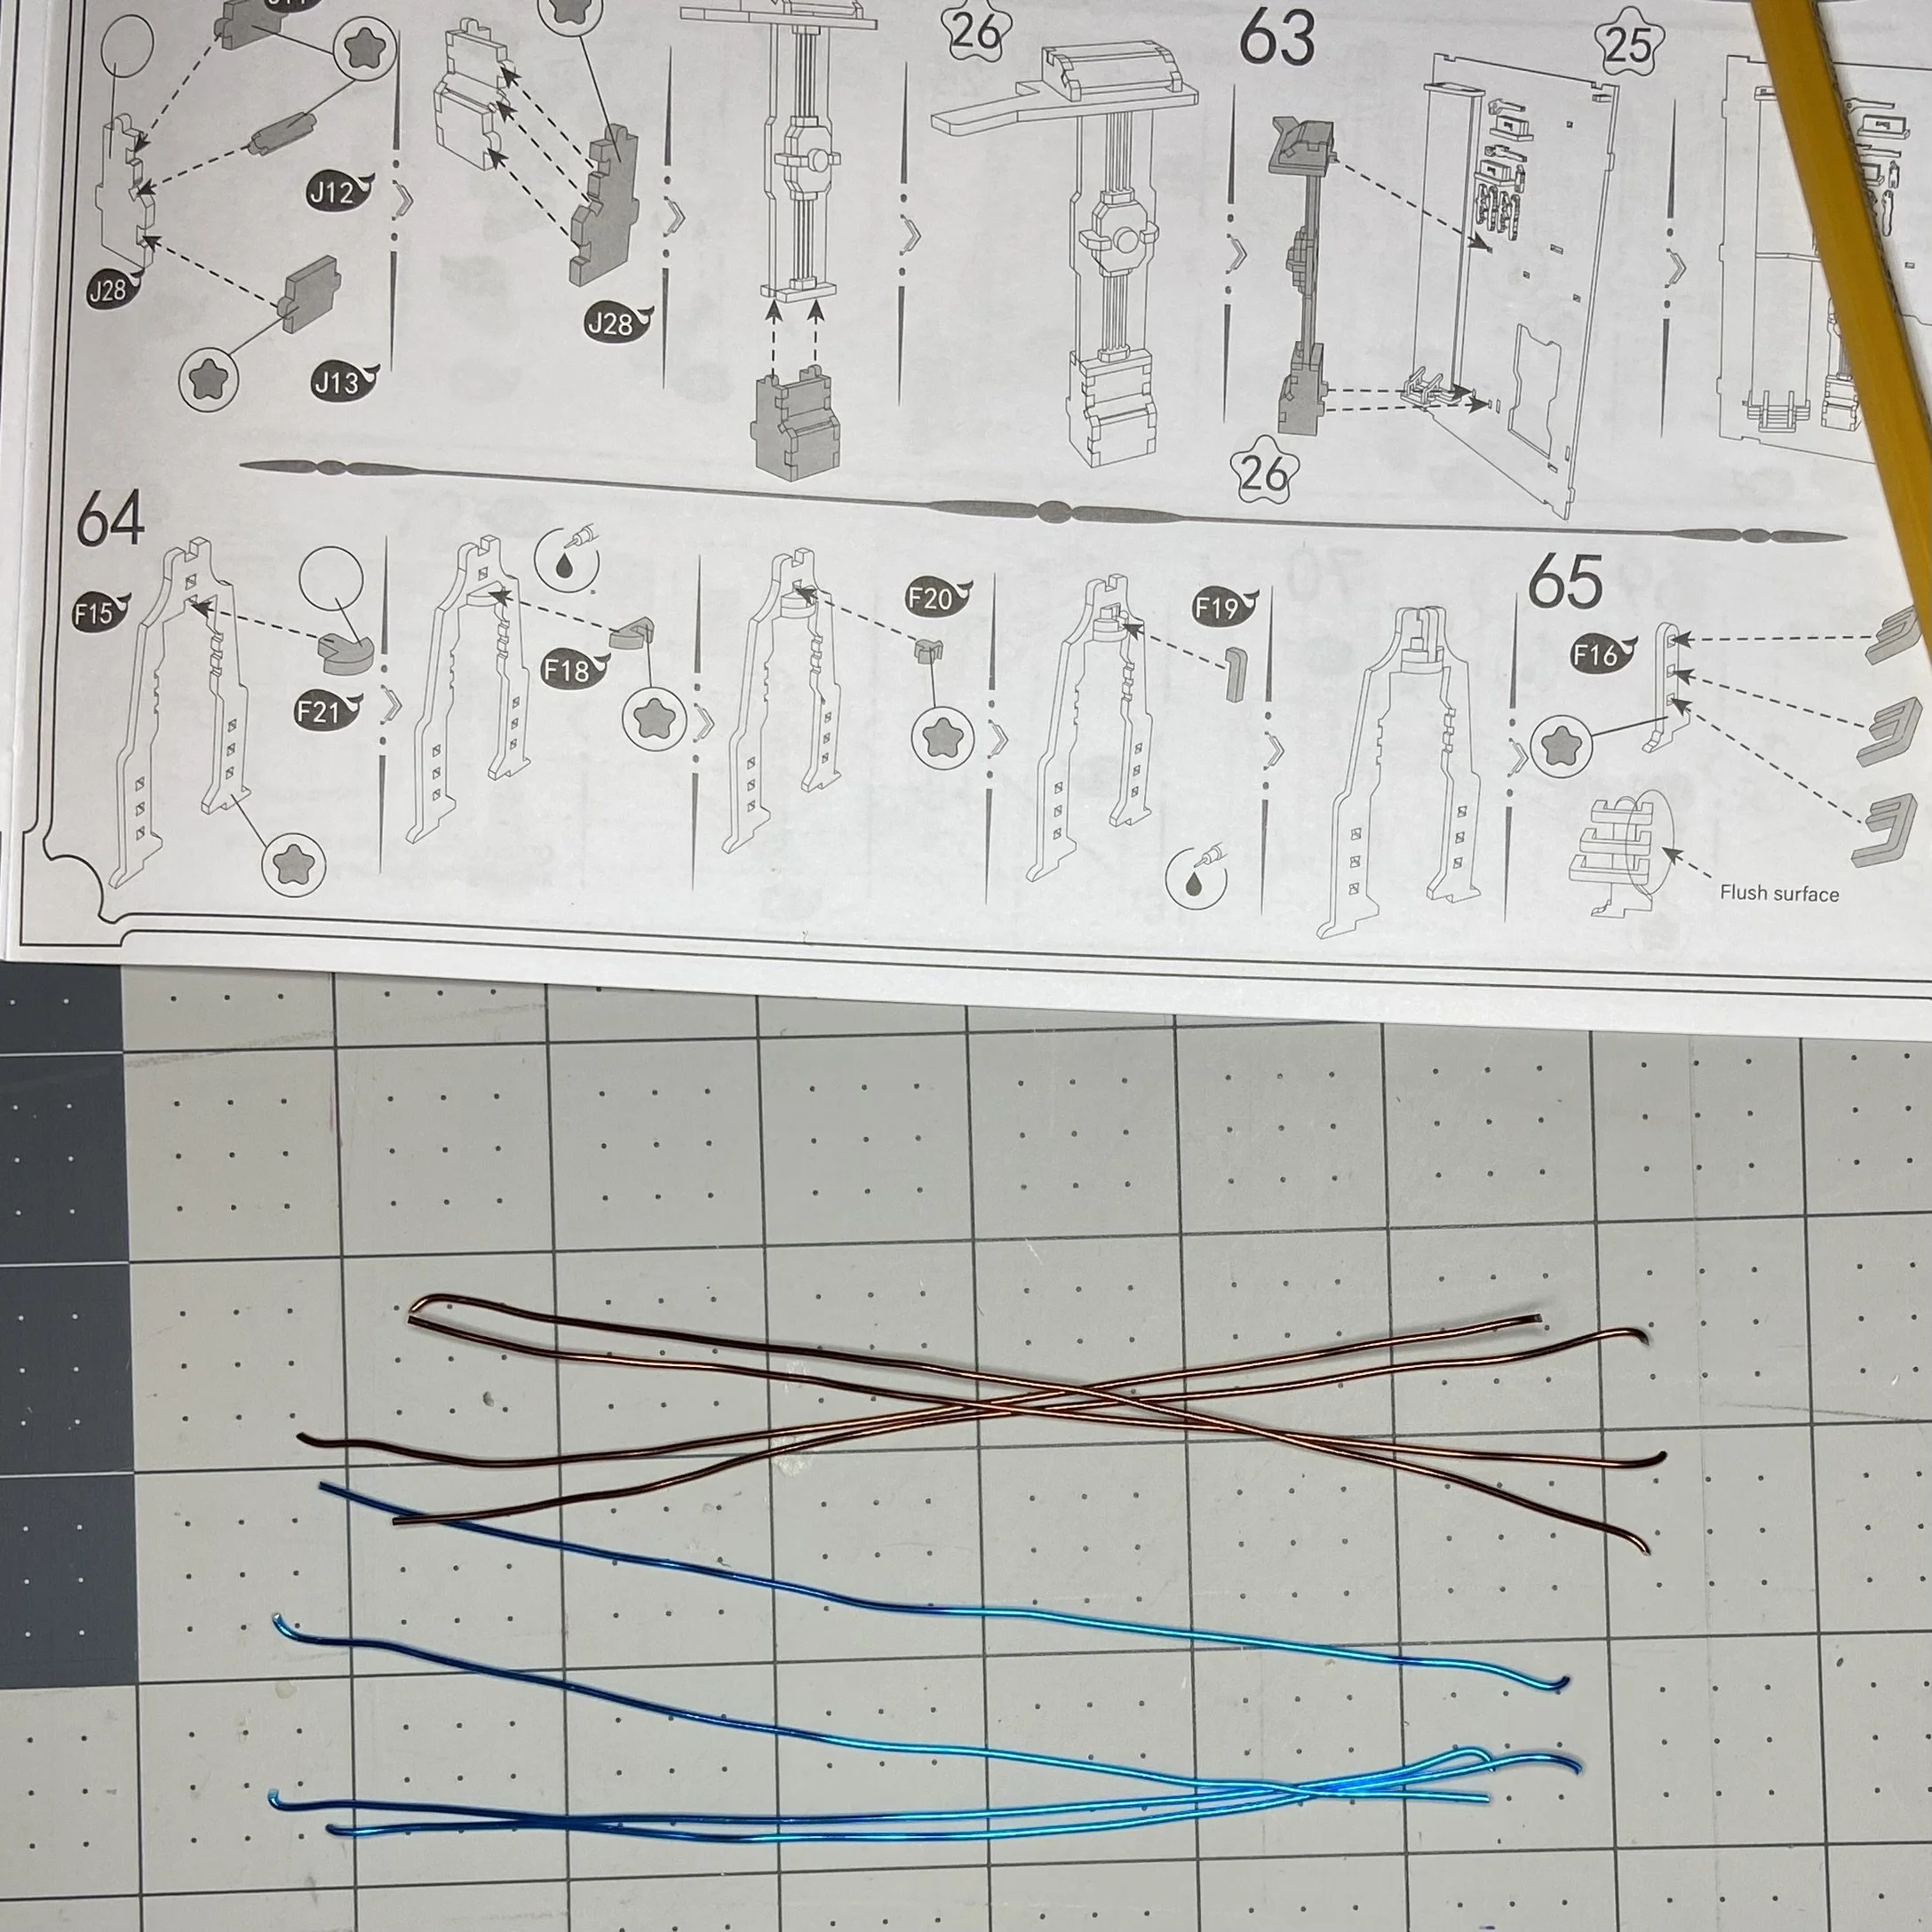
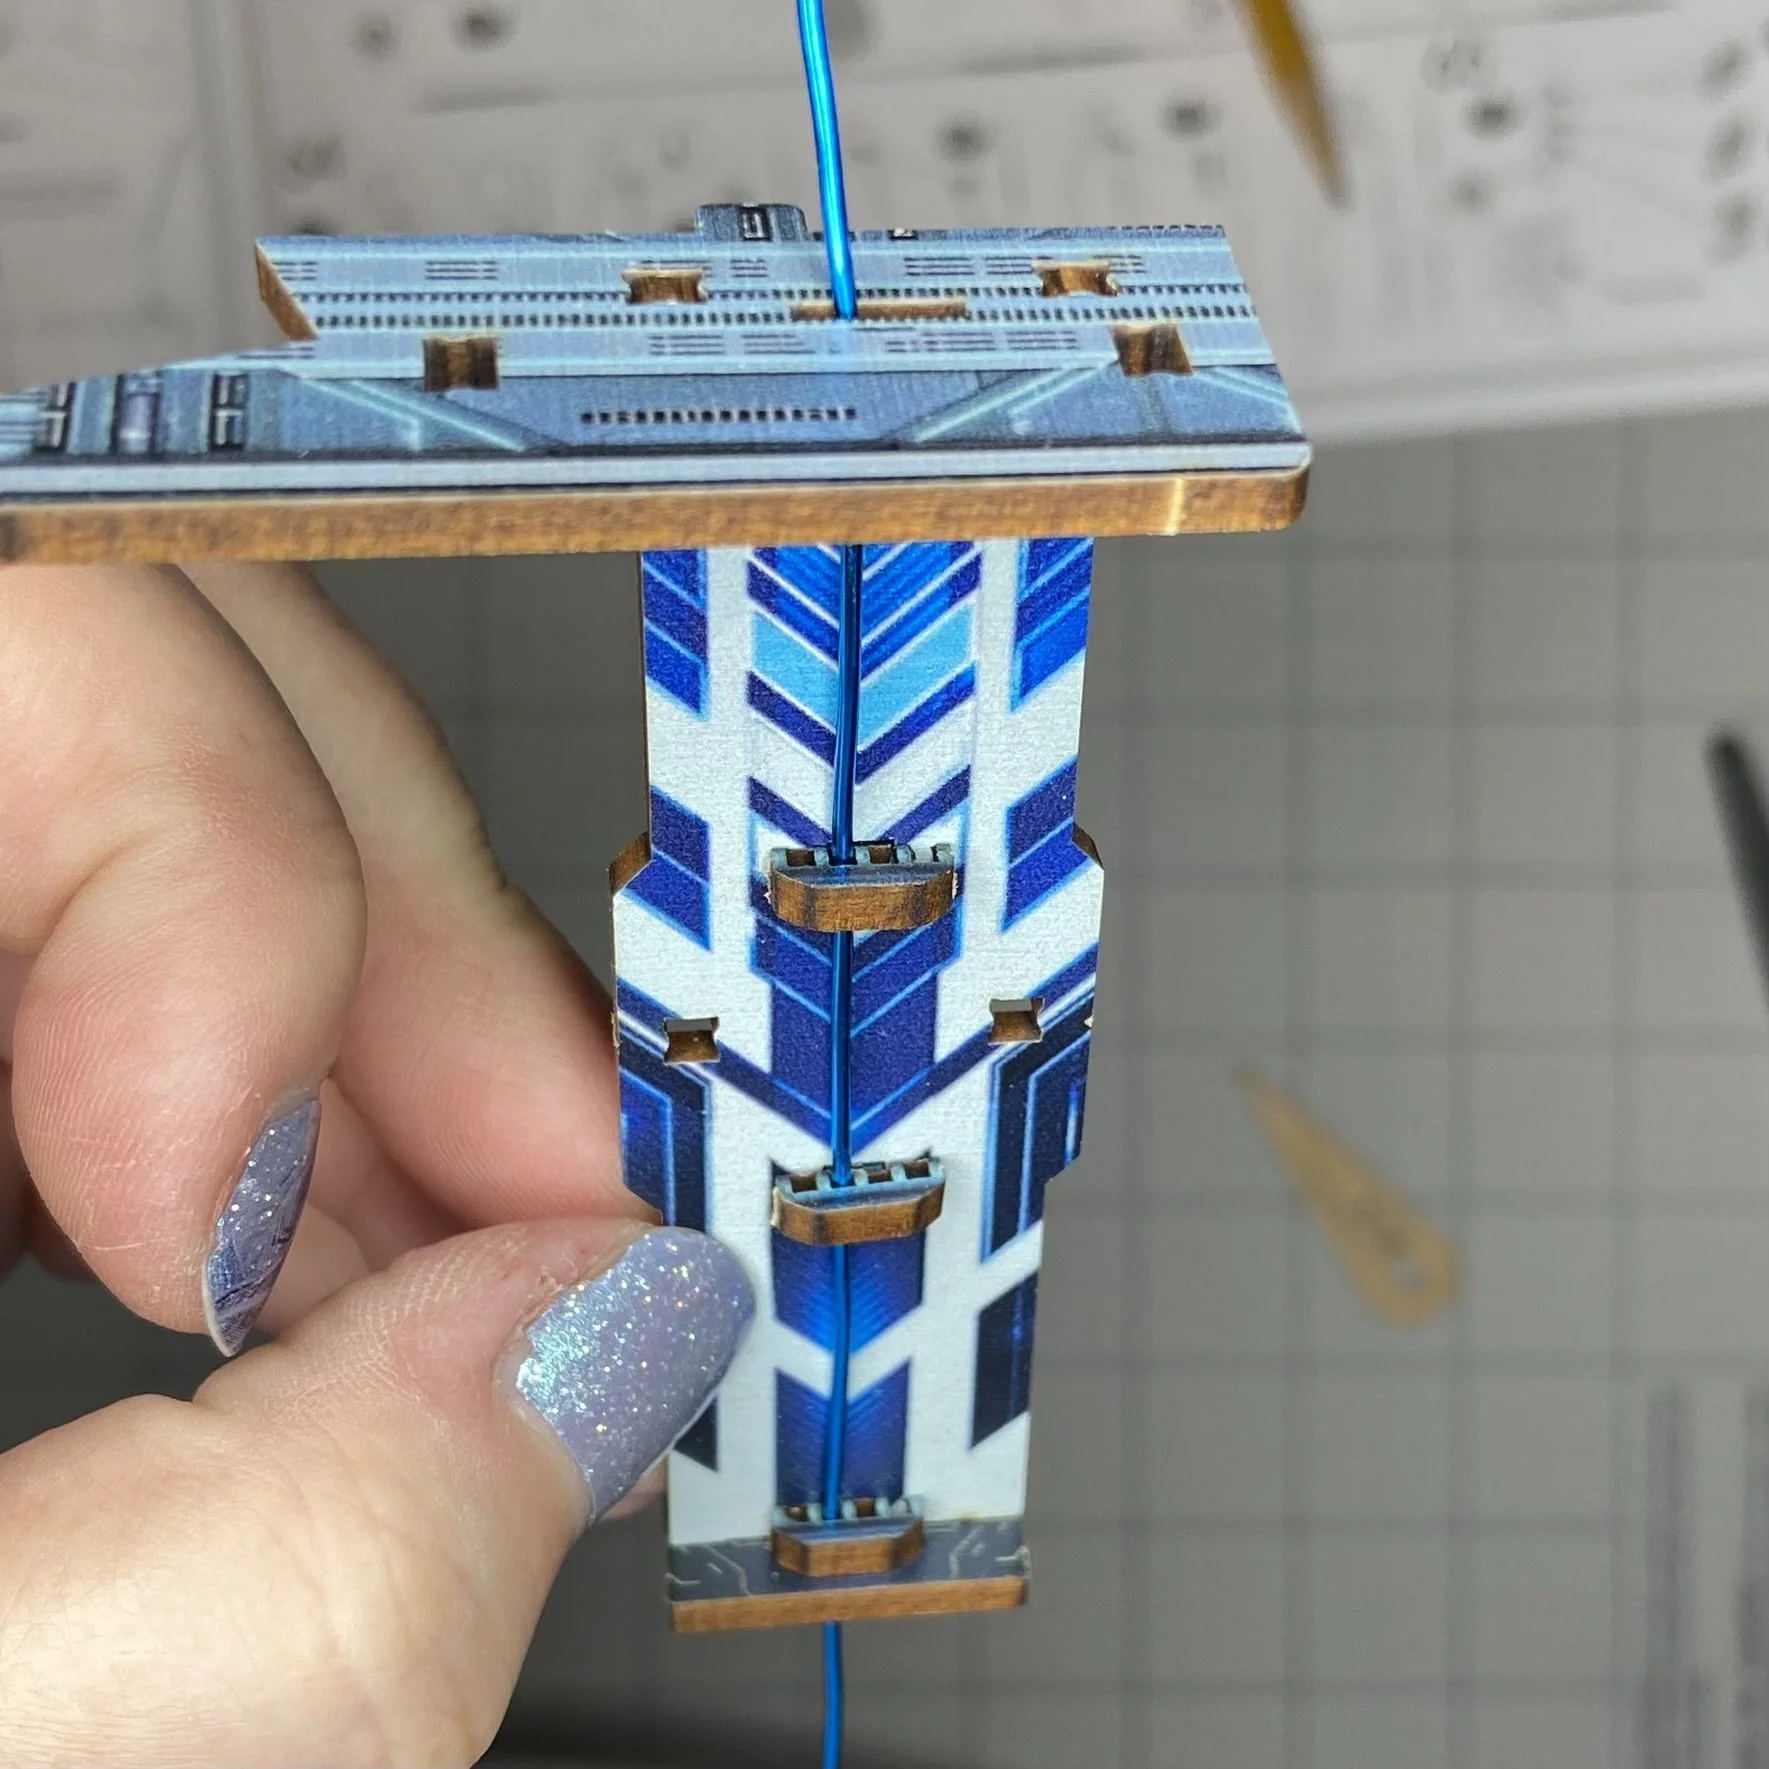
Next was assembling some other science-y looking items, including some wiring. The two wires in my kit came in pretty cobalt blue and copper colors. I cut each wire into four pieces, and installed four of the pieces in a sort of visible wall wiring arrangement. The wires slotted perfectly into the wooden pieces. The second set of four wires was set in looping lines in a sort of battery arrangement. Then both the wired pieces were installed on one of the walls.
Also on that same wall was an elevator. The elevator was encased on two sides with clear plexiglass from plastic sheet K. By this time, I knew enough to remove the protective sheets ahead of time, so the elevator shaft is nice and clear. The whole elevator actually moves up and down via a little gear/knob on the outside. So clever!
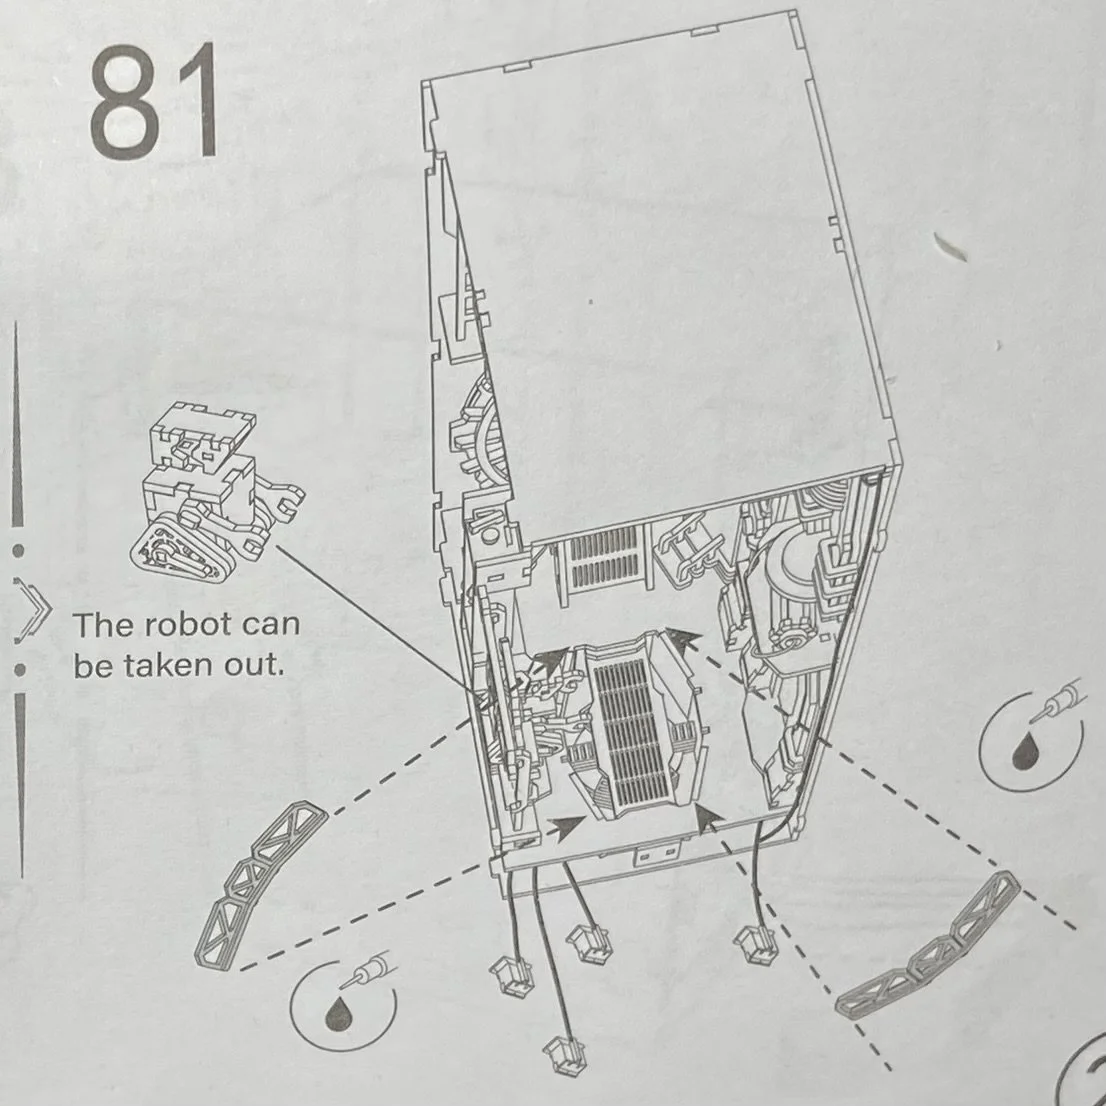
As I started to put all the sides together, forming the actual structure, I had a heck of a time figuring out where all the wires were supposed to go. They were all attached to their proper lights and set pieces but figuring out how to run the wires so they all ended up in the right place to attach to the power switch took me several tries. By which I mean, I’d get one of the walls on, and then figure out the wires were in the wrong place and have to take the wall off again. And it seemed like every time I took a wall back off, it slightly disarranged the interior pieces and the wall never went on quite right again. At one point, when I was trying to work around one of the installations on the floor, the instructions told me that the robot (which was kind of in the way) could be removed. Well, maybe in other book nooks, it could be removed…in my book nook, I’d judged it to be insufficiently secure and glued it down.
I did finally get it assembled, although the walls aren’t as tightly locked in as I would like. I’m sure there’s a piece of wire or something in the way, preventing me from locking it down properly, but I’m done pulling it apart to figure out the problem. Here are some front view pictures with the lights on…just look at that wormhole effect!
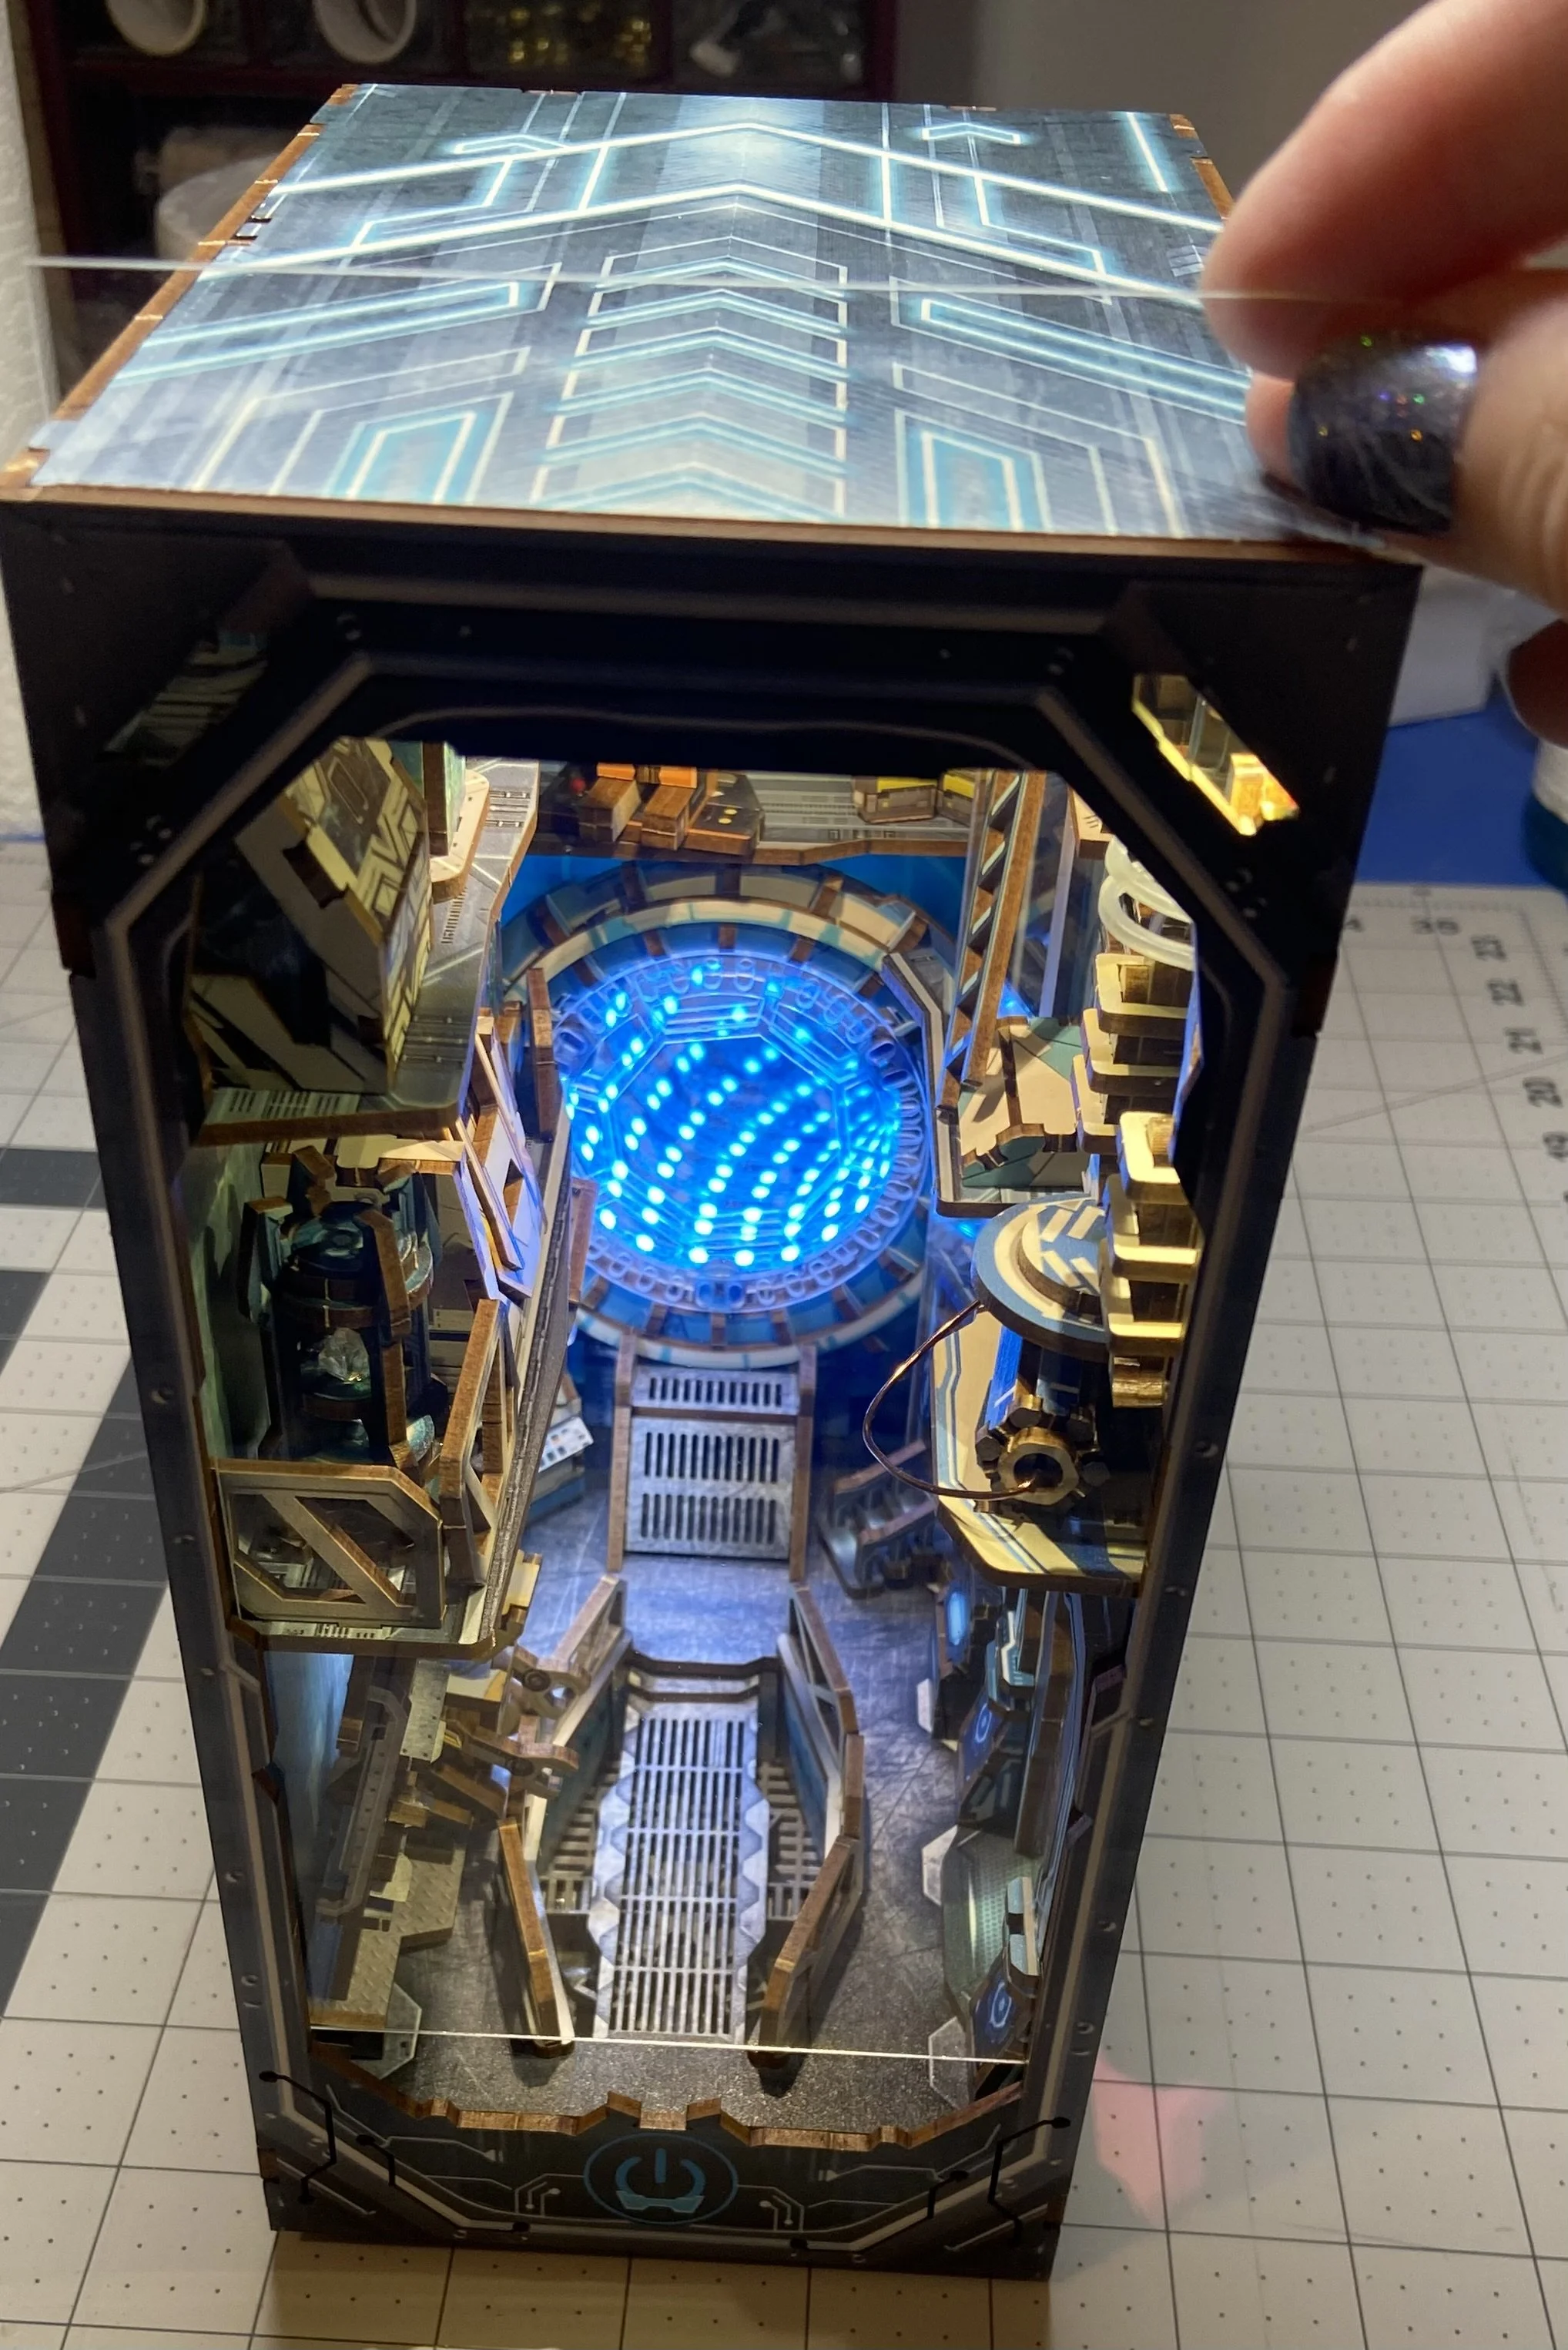
Once I’d gotten those pictures, I pulled the final piece off sheet K (and yes, I removed the plastic coating on both sides!) and installed it, closing off the front of the box. It’s completely enclosed now, so no issues with dust. Excellent!
I’ve installed the nook in a place of honor amongst my Lois McMaster Bujold books. The majority of my Bujold collection are books from the Vorkosigan series, which utilizes wormholes as part of space travel. Seems appropriate.