Adventures In Notion Containment
As an Amazon associate, I may earn a small commission if you navigate to Amazon from my site and buy something. This will not result in an extra cost to you.
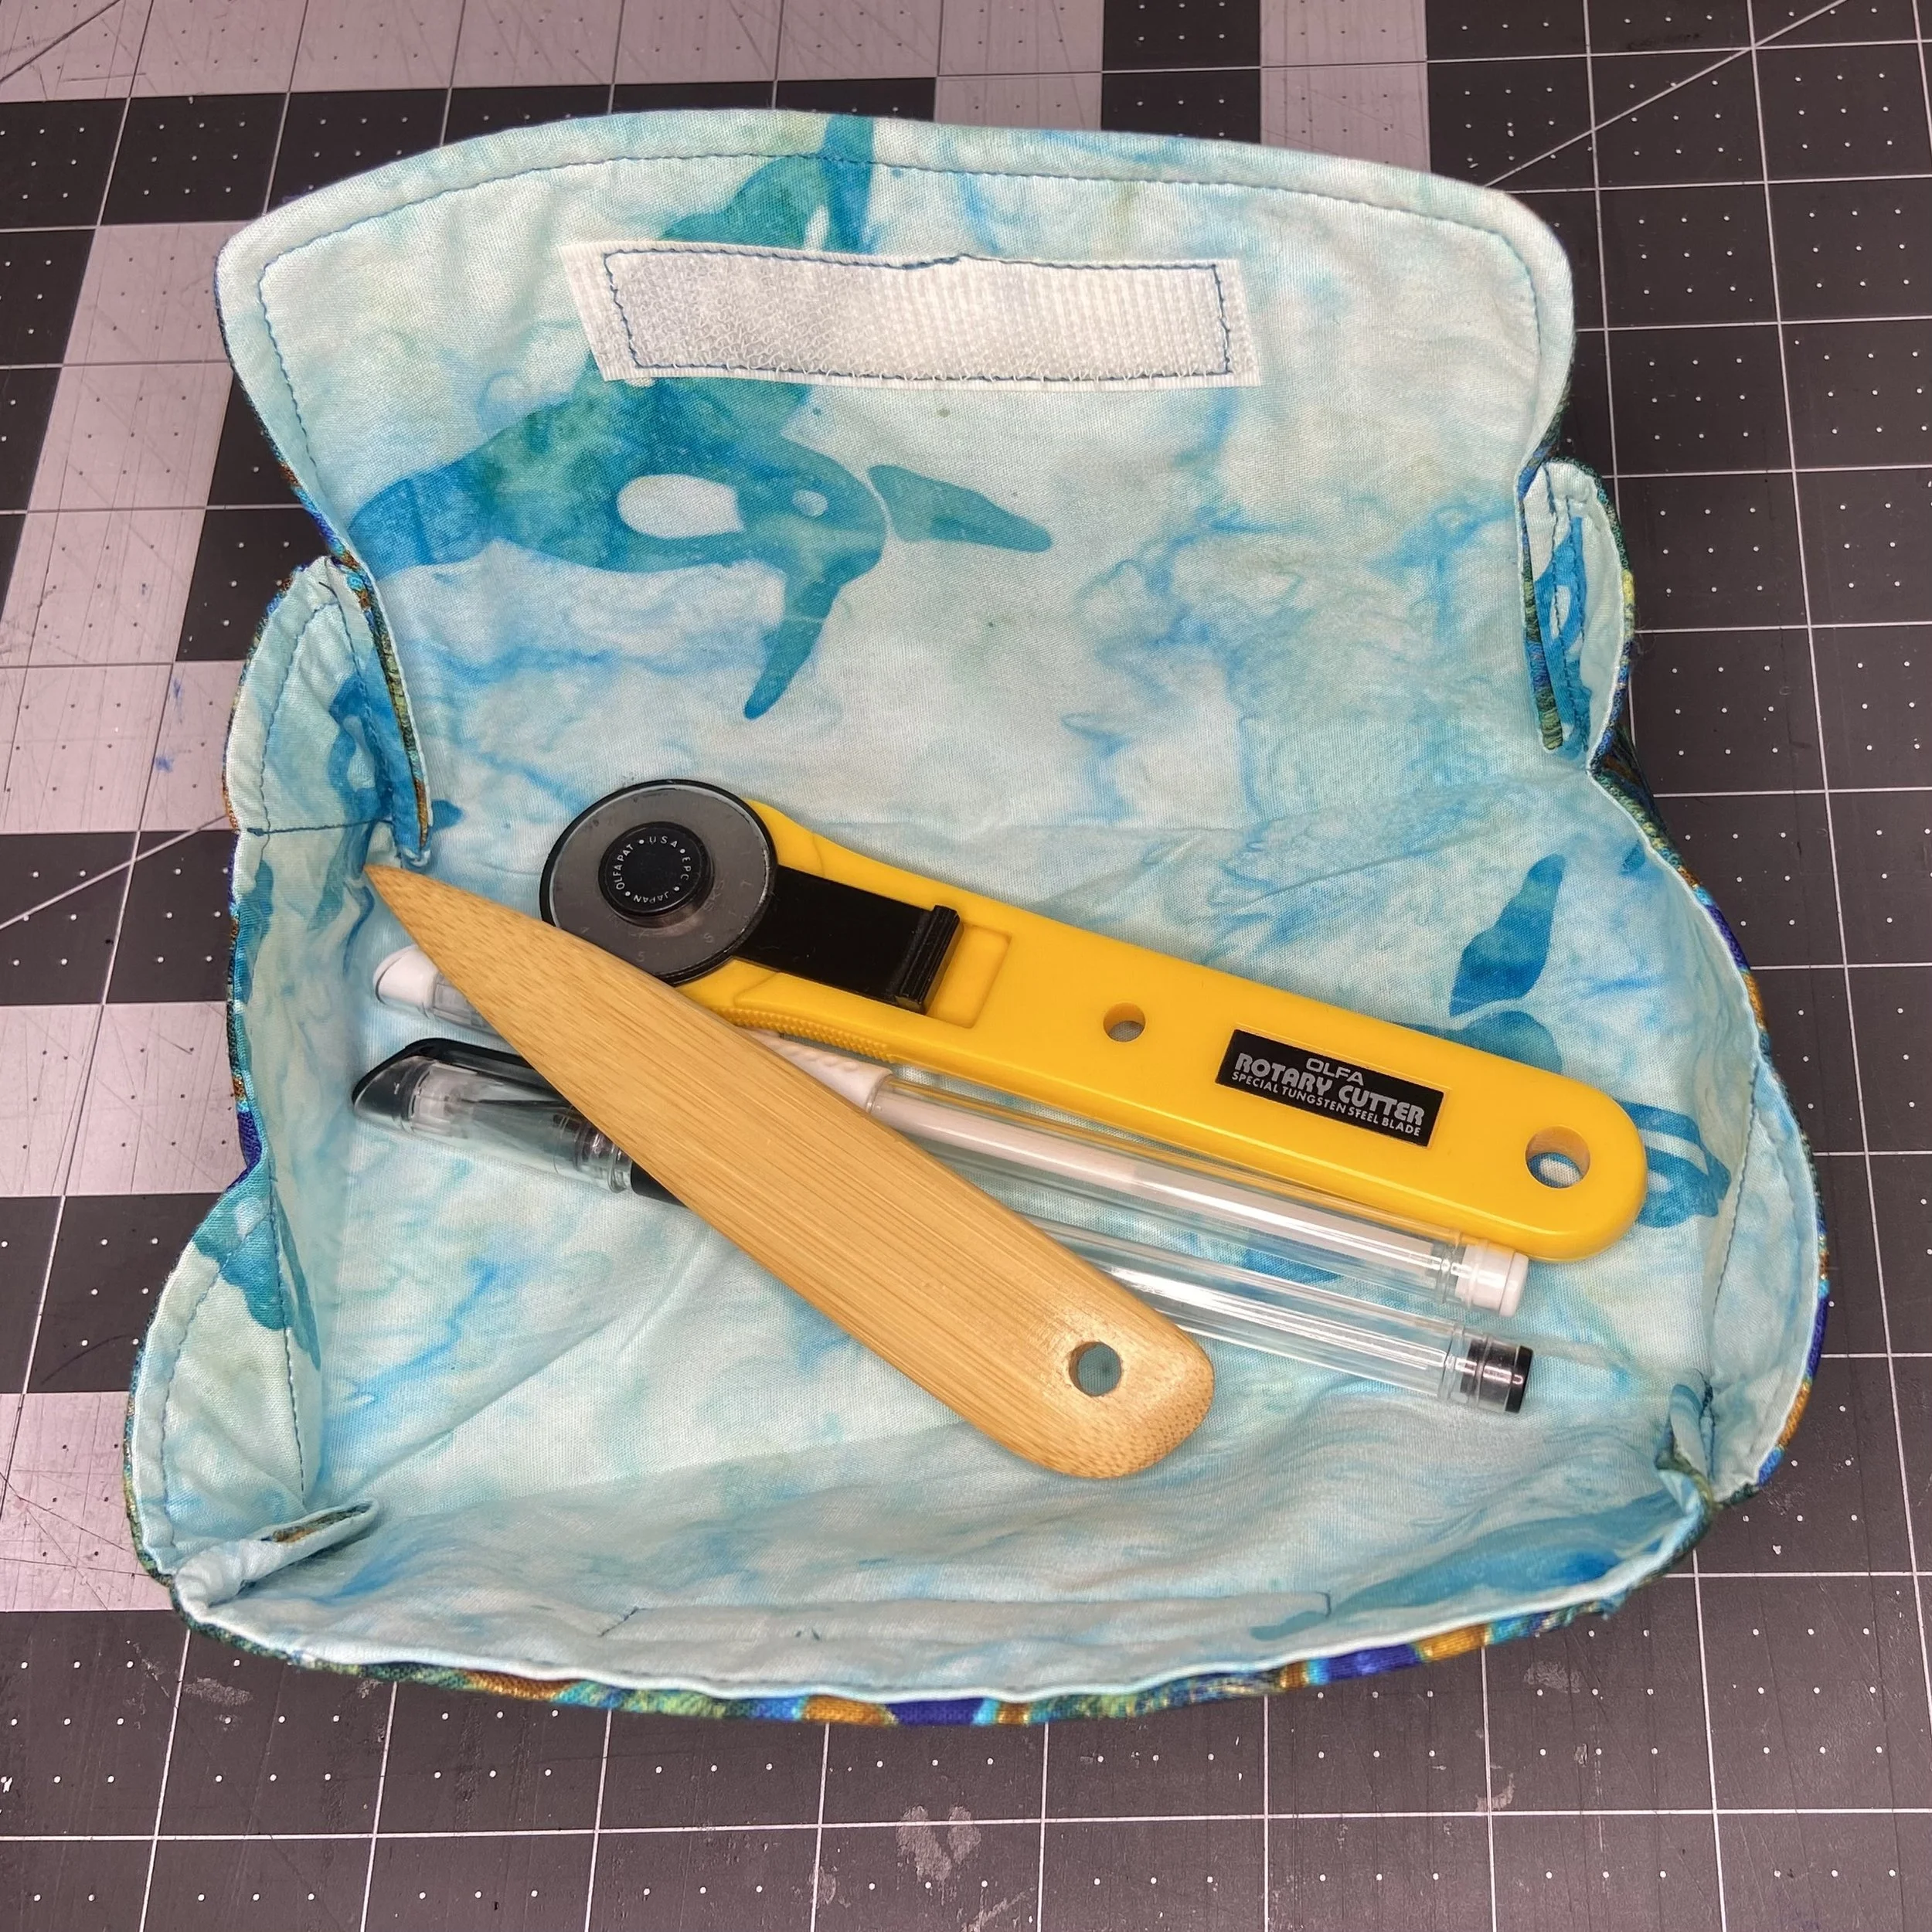
I was FaceTiming with my mother recently, and we were knitting while we chatted. Every time my mother needed some knitting notion (an extra needle, a stitch marker, a darning needle, a longer cable, a cable cap, the little key for interchangeable needles, scissors, etc), she had to get up from her work table, trot off to retrieve it, and then come back. Then, when she was done with whatever little tool she’d most recently used, she’d lay it on the work surface and promptly lose it. “It was right here a second ago!”
At the time, although I found this somewhat entertaining, I did feel a little bad for her and suggested that maybe she needed a tray to drop all her notions onto, so they’d be out of her way but ready to hand the next time they were needed. She grabbed a rimmed baking sheet from her kitchen, and made that work. But it occurred to me, after seeing a YouTube video, that I could make something for her that would work better.
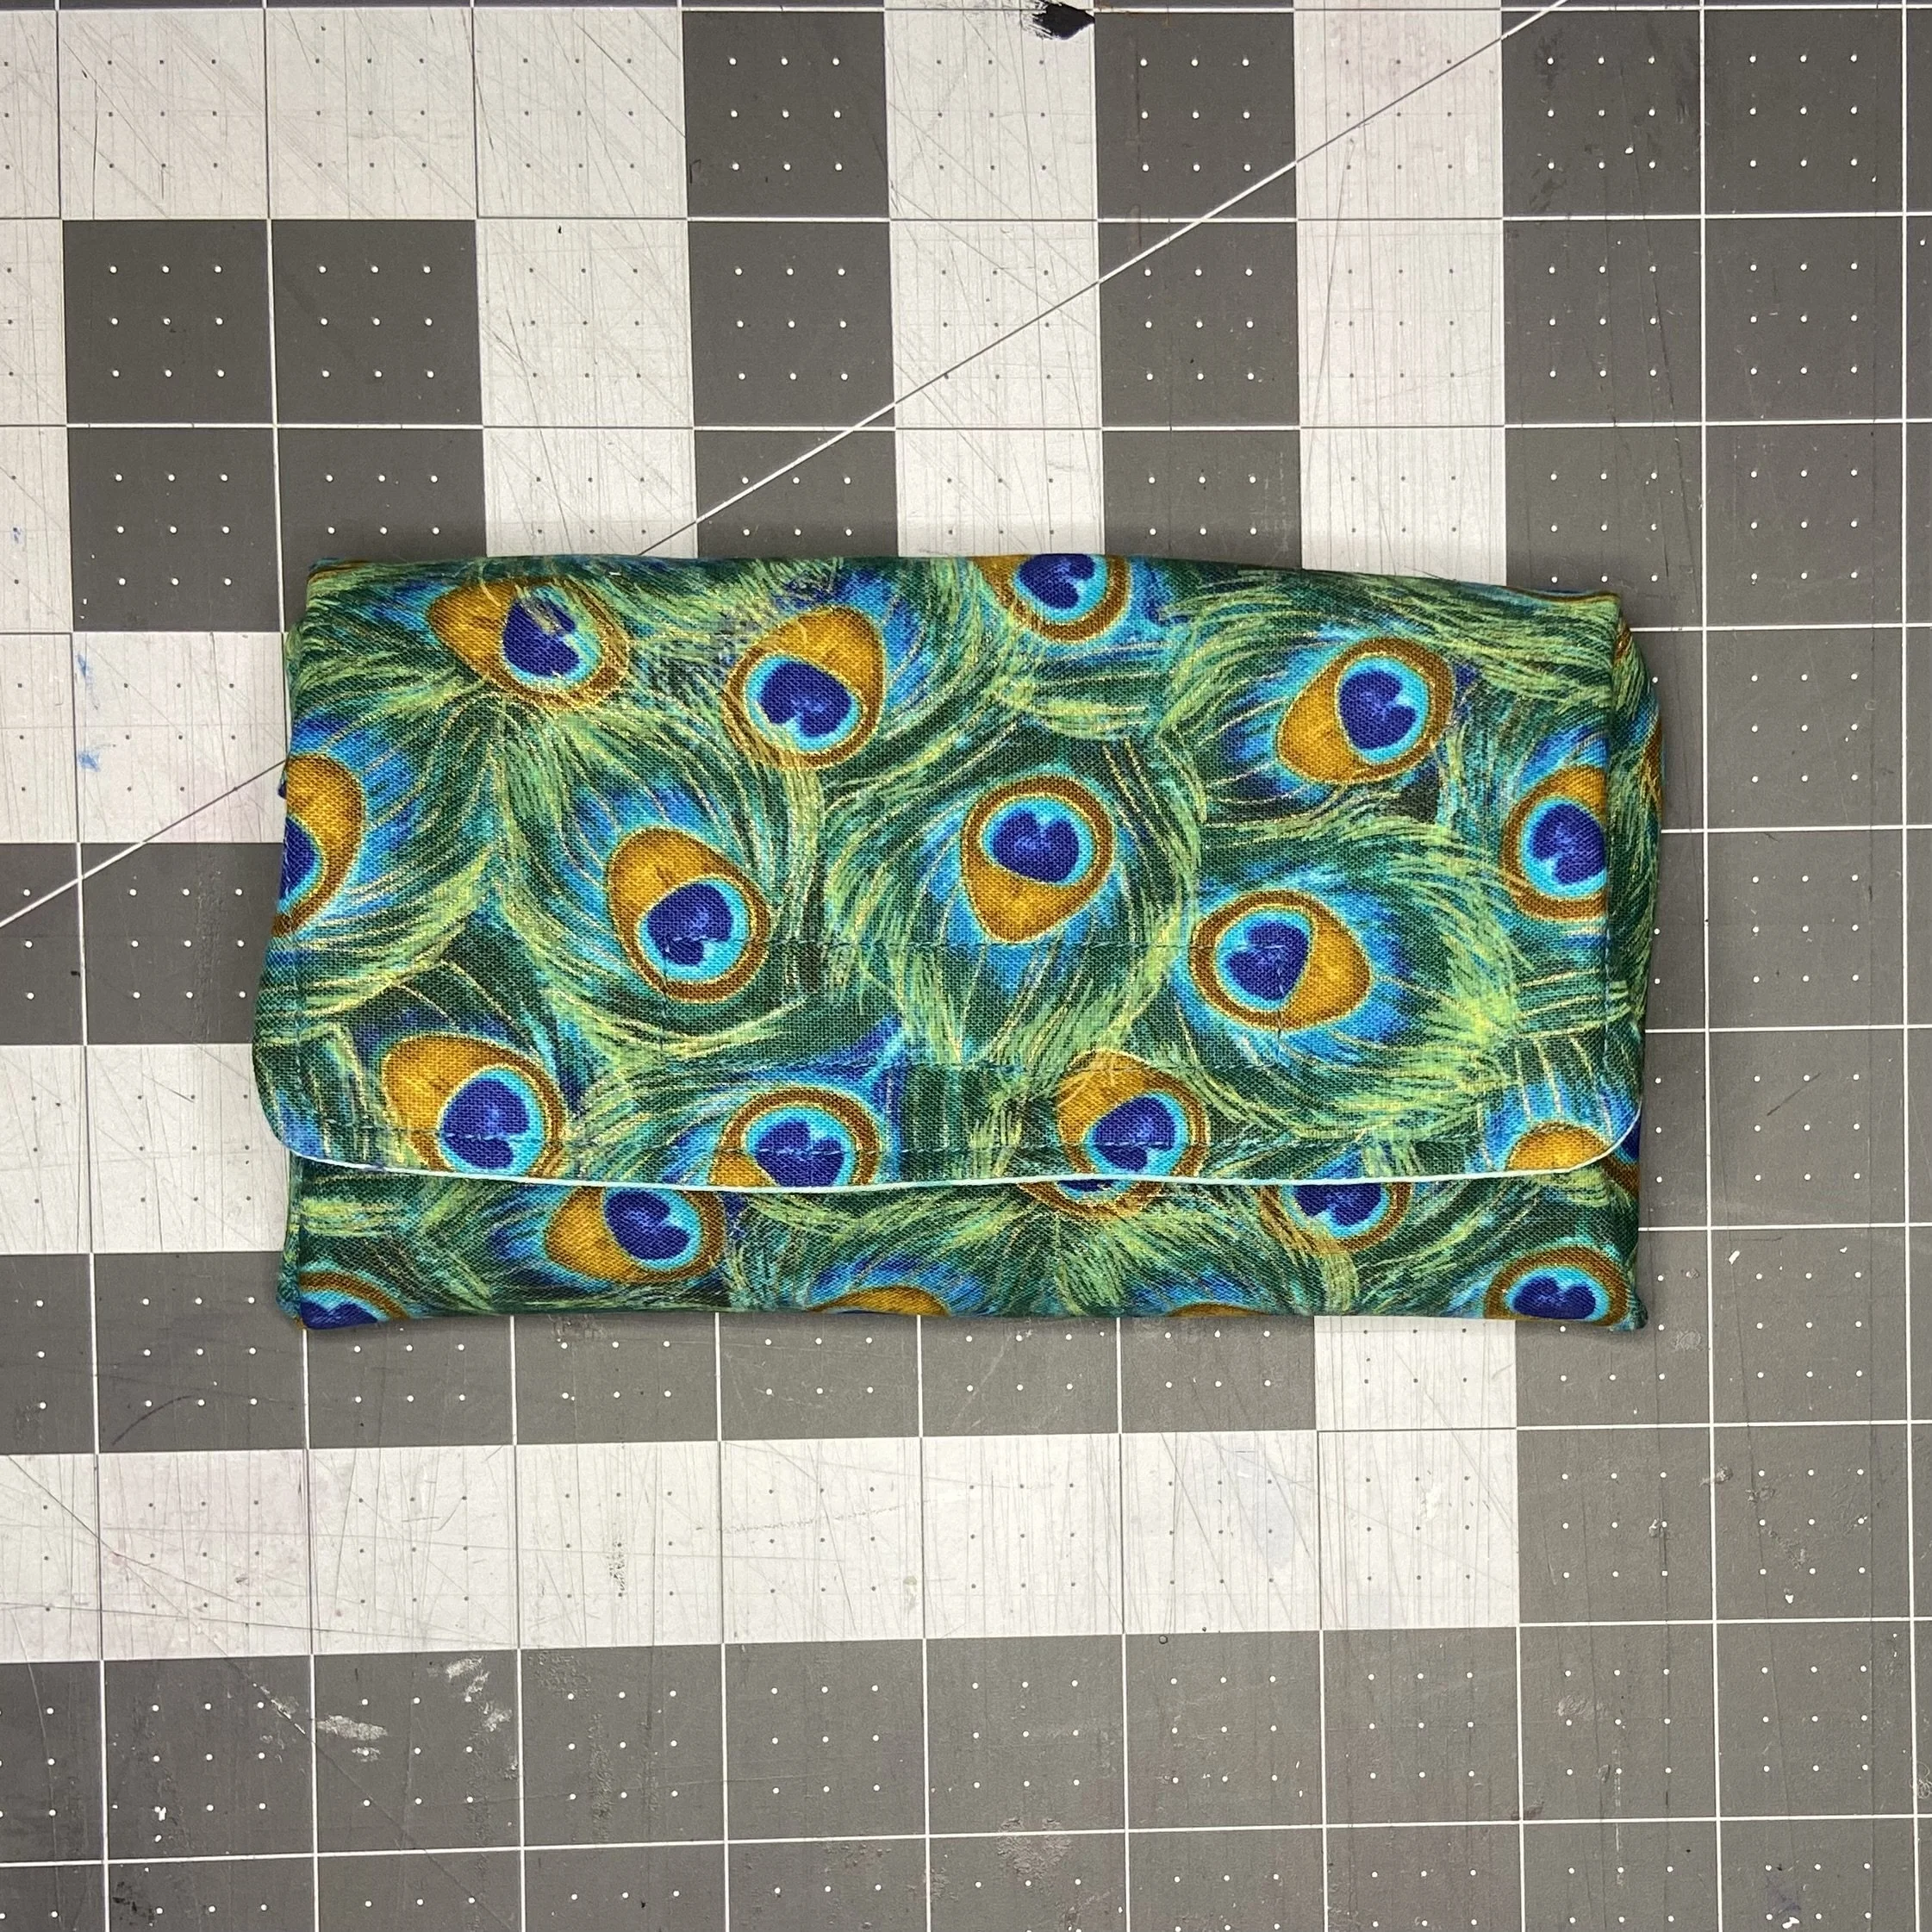
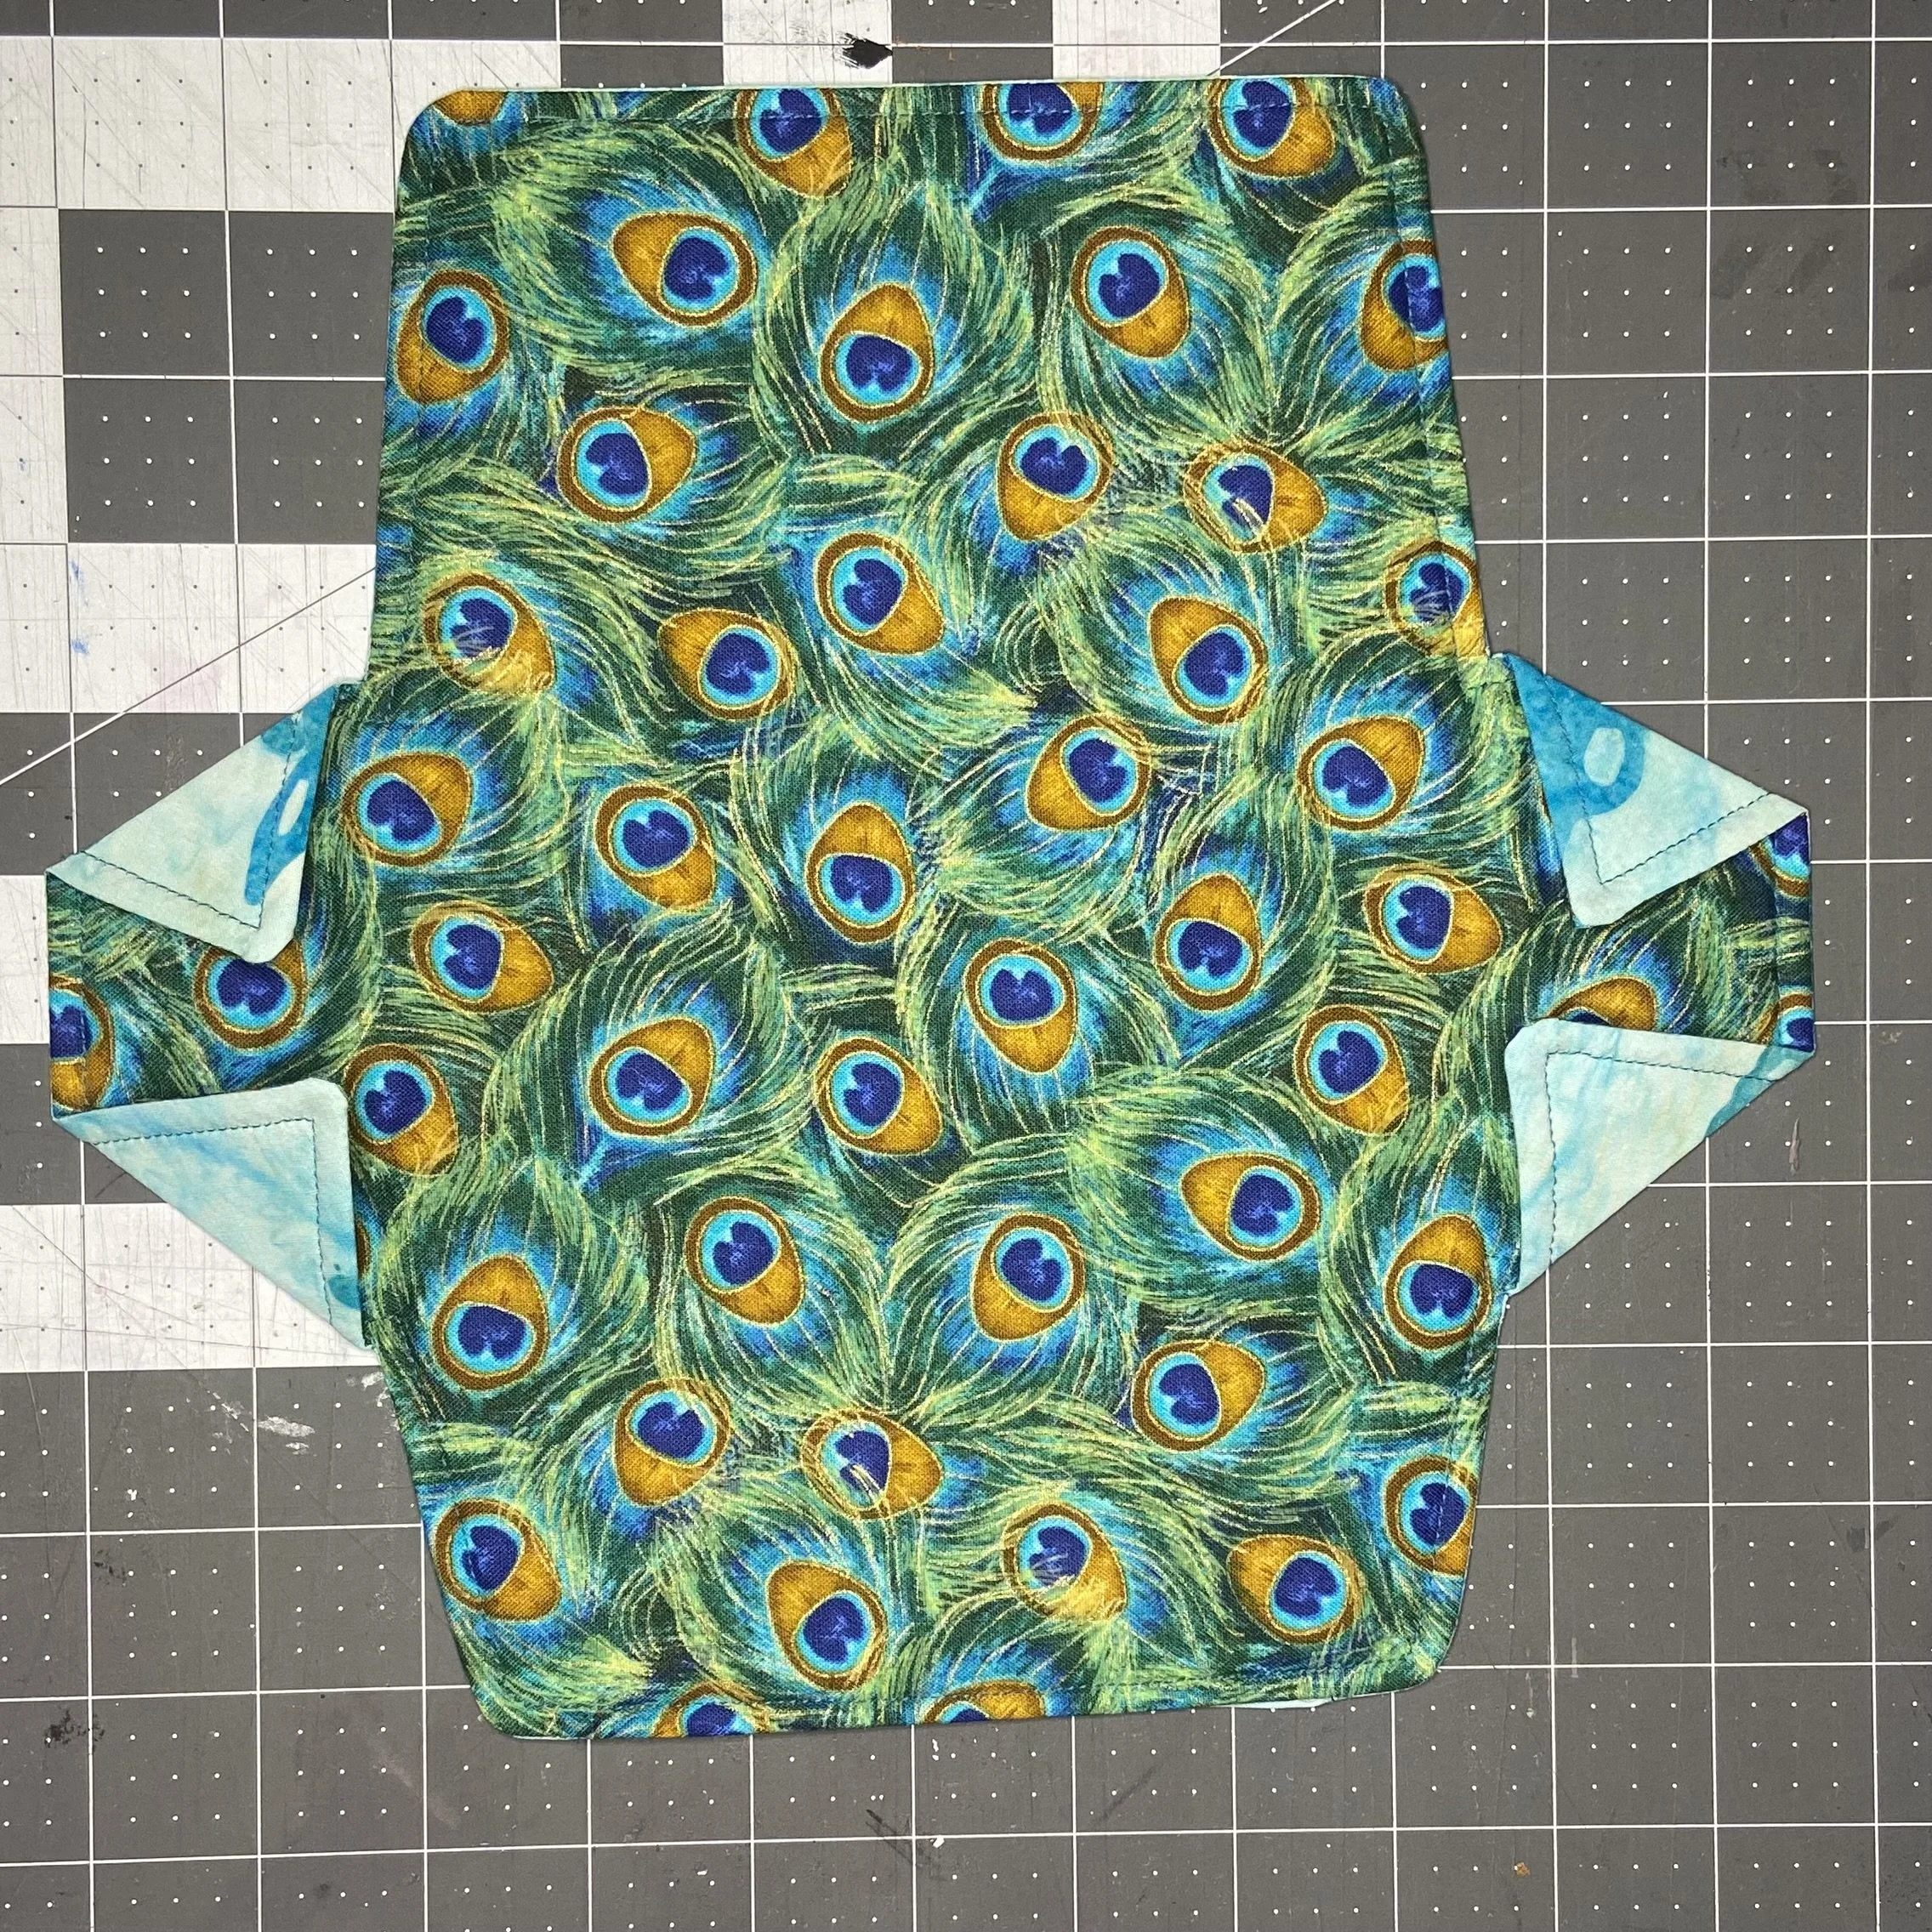
The clever little sewing project is a pouch that closes with Velcro, but when opened, forms a little tray…the perfect thing for having knitting notions always close to hand and easily accessible when they are needed. I’m hoping my mom will keep this with her current knitting project so that she always has what she needs. There are lots of such pouches on the internet and YouTube, but most of them have zippers. This is the only one I found formatted as a pouch that turns into a tray or box but with no need to sew in a zipper. Thank goodness. (Disclaimer: I am not anti-zipper, as long as someone else sews it in.)
I am going to explain how to make the pattern for this genius little pouch/tray, but if you are uninterested in making your own pattern, the designer sells them quite cheaply here. I should point out that if you do buy the pattern, you will still need to follow either my instructions or else the instructions in the video, as instructions are not included with the pattern.
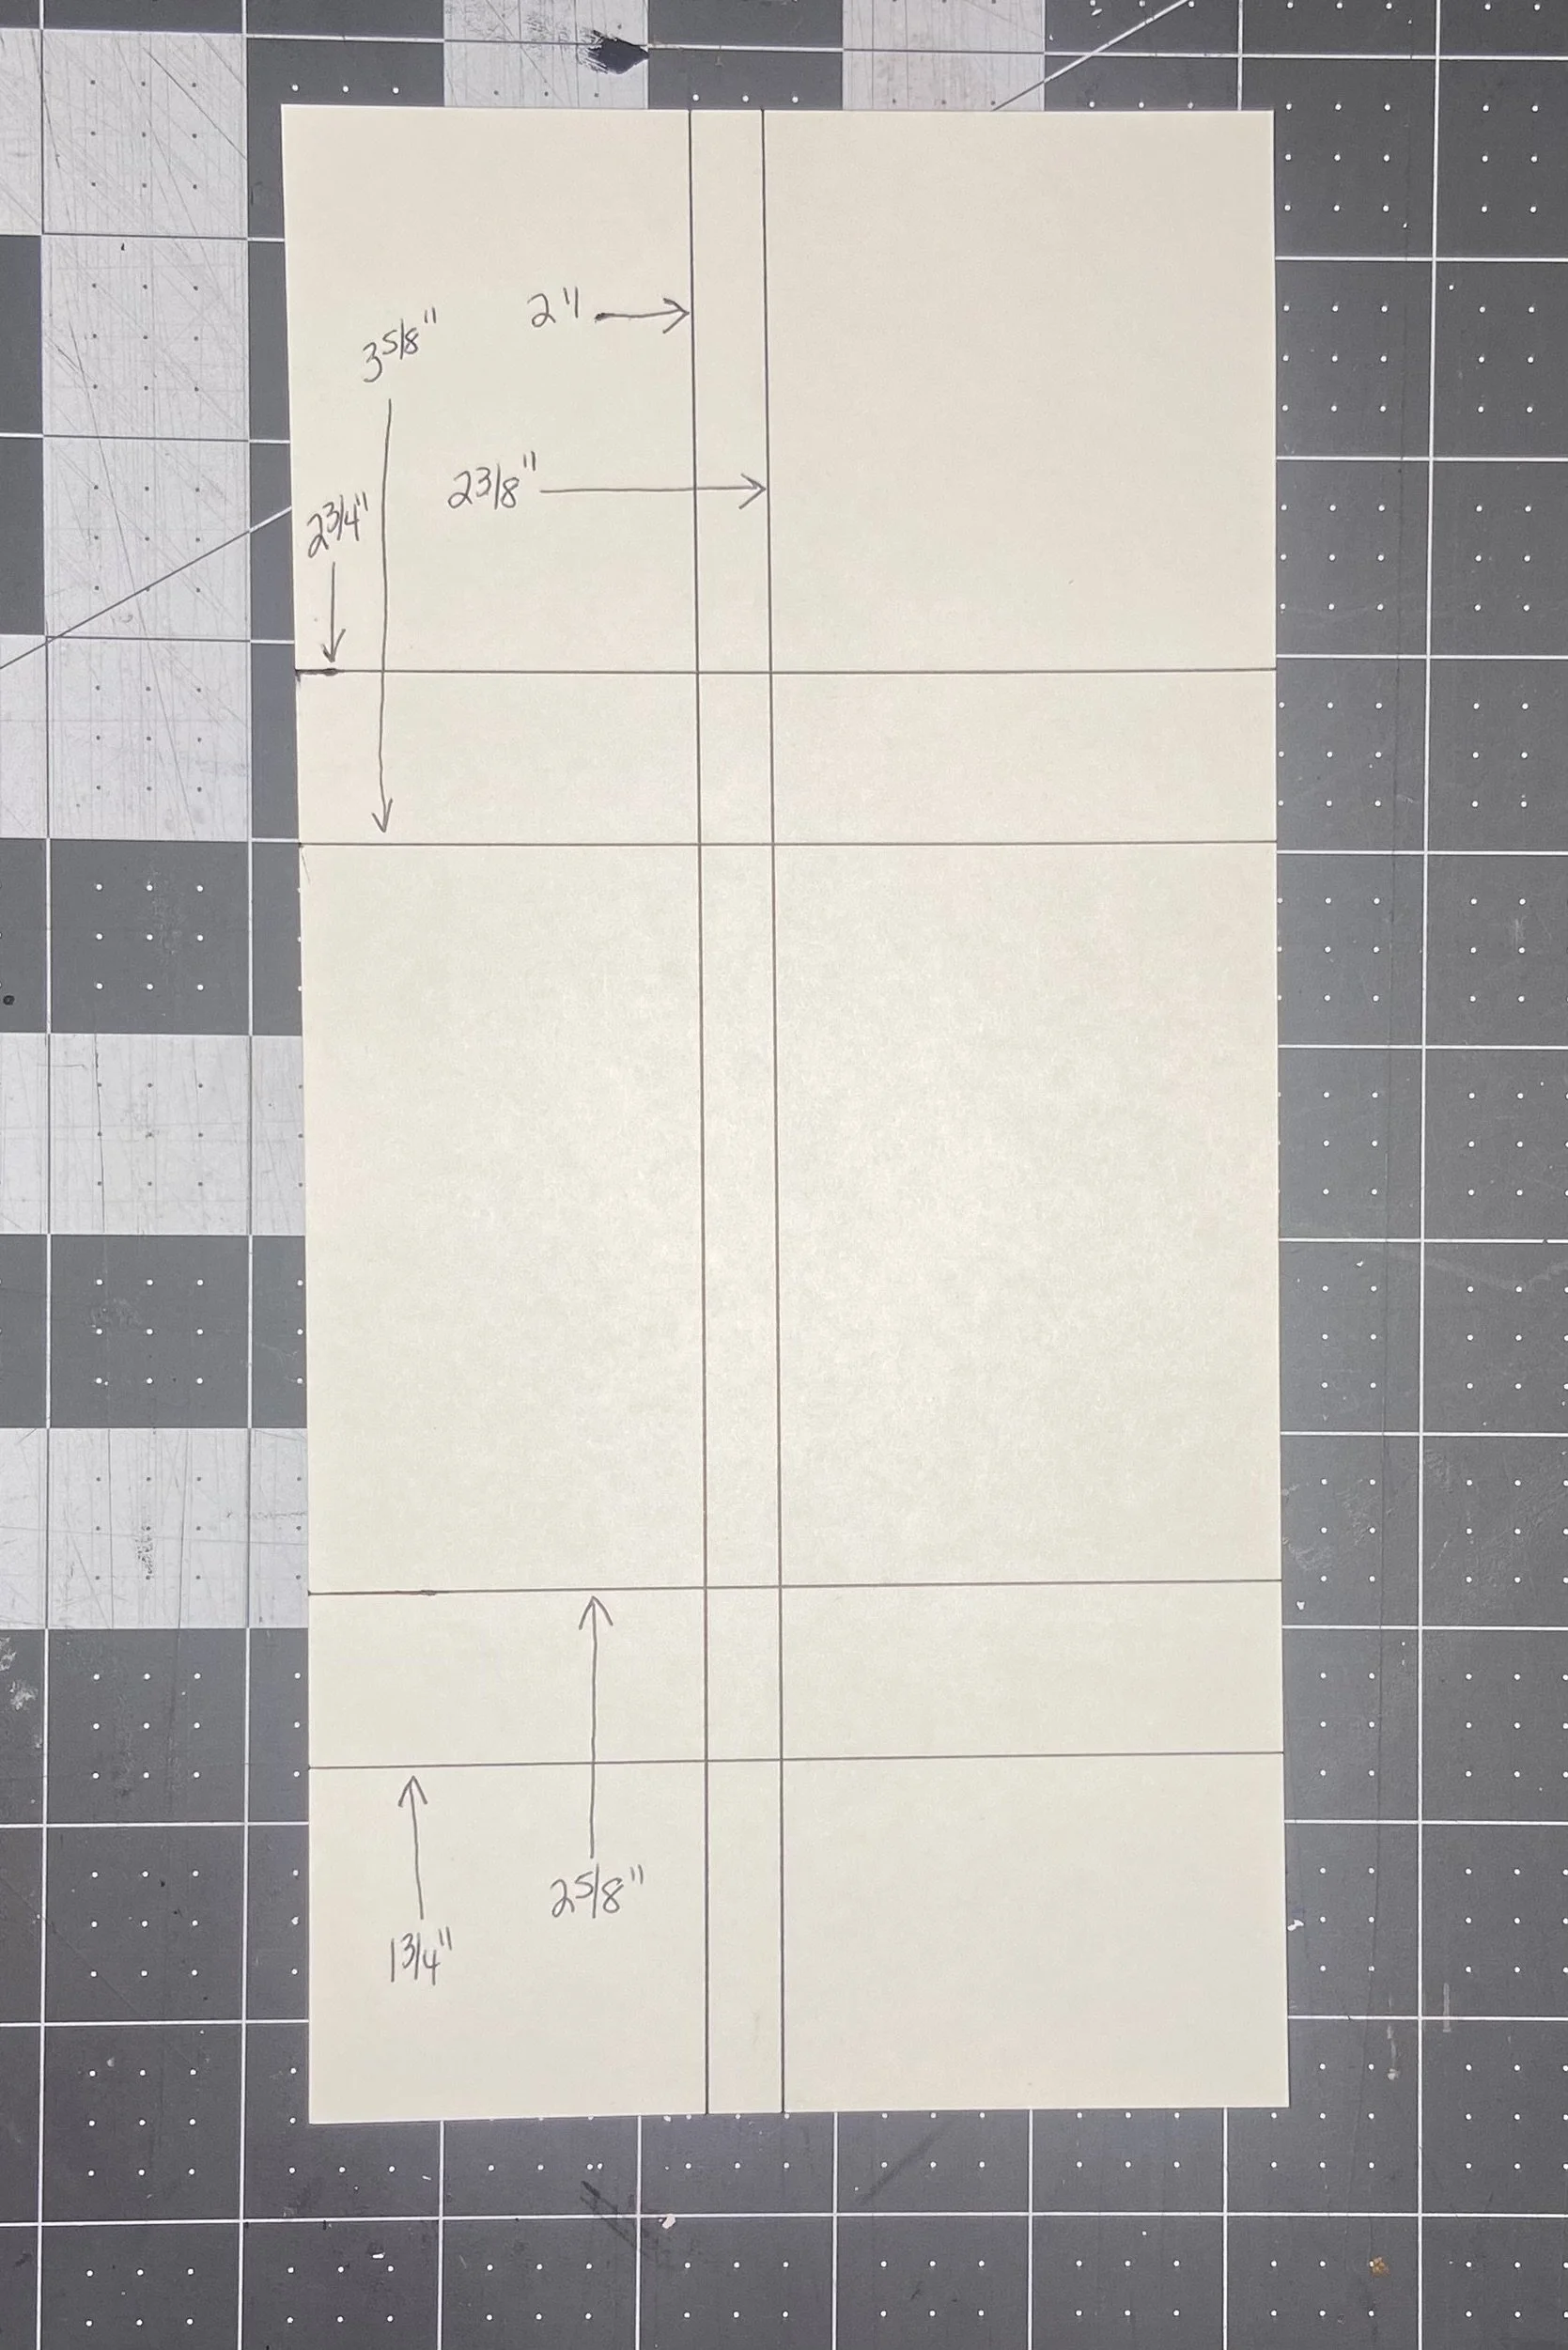
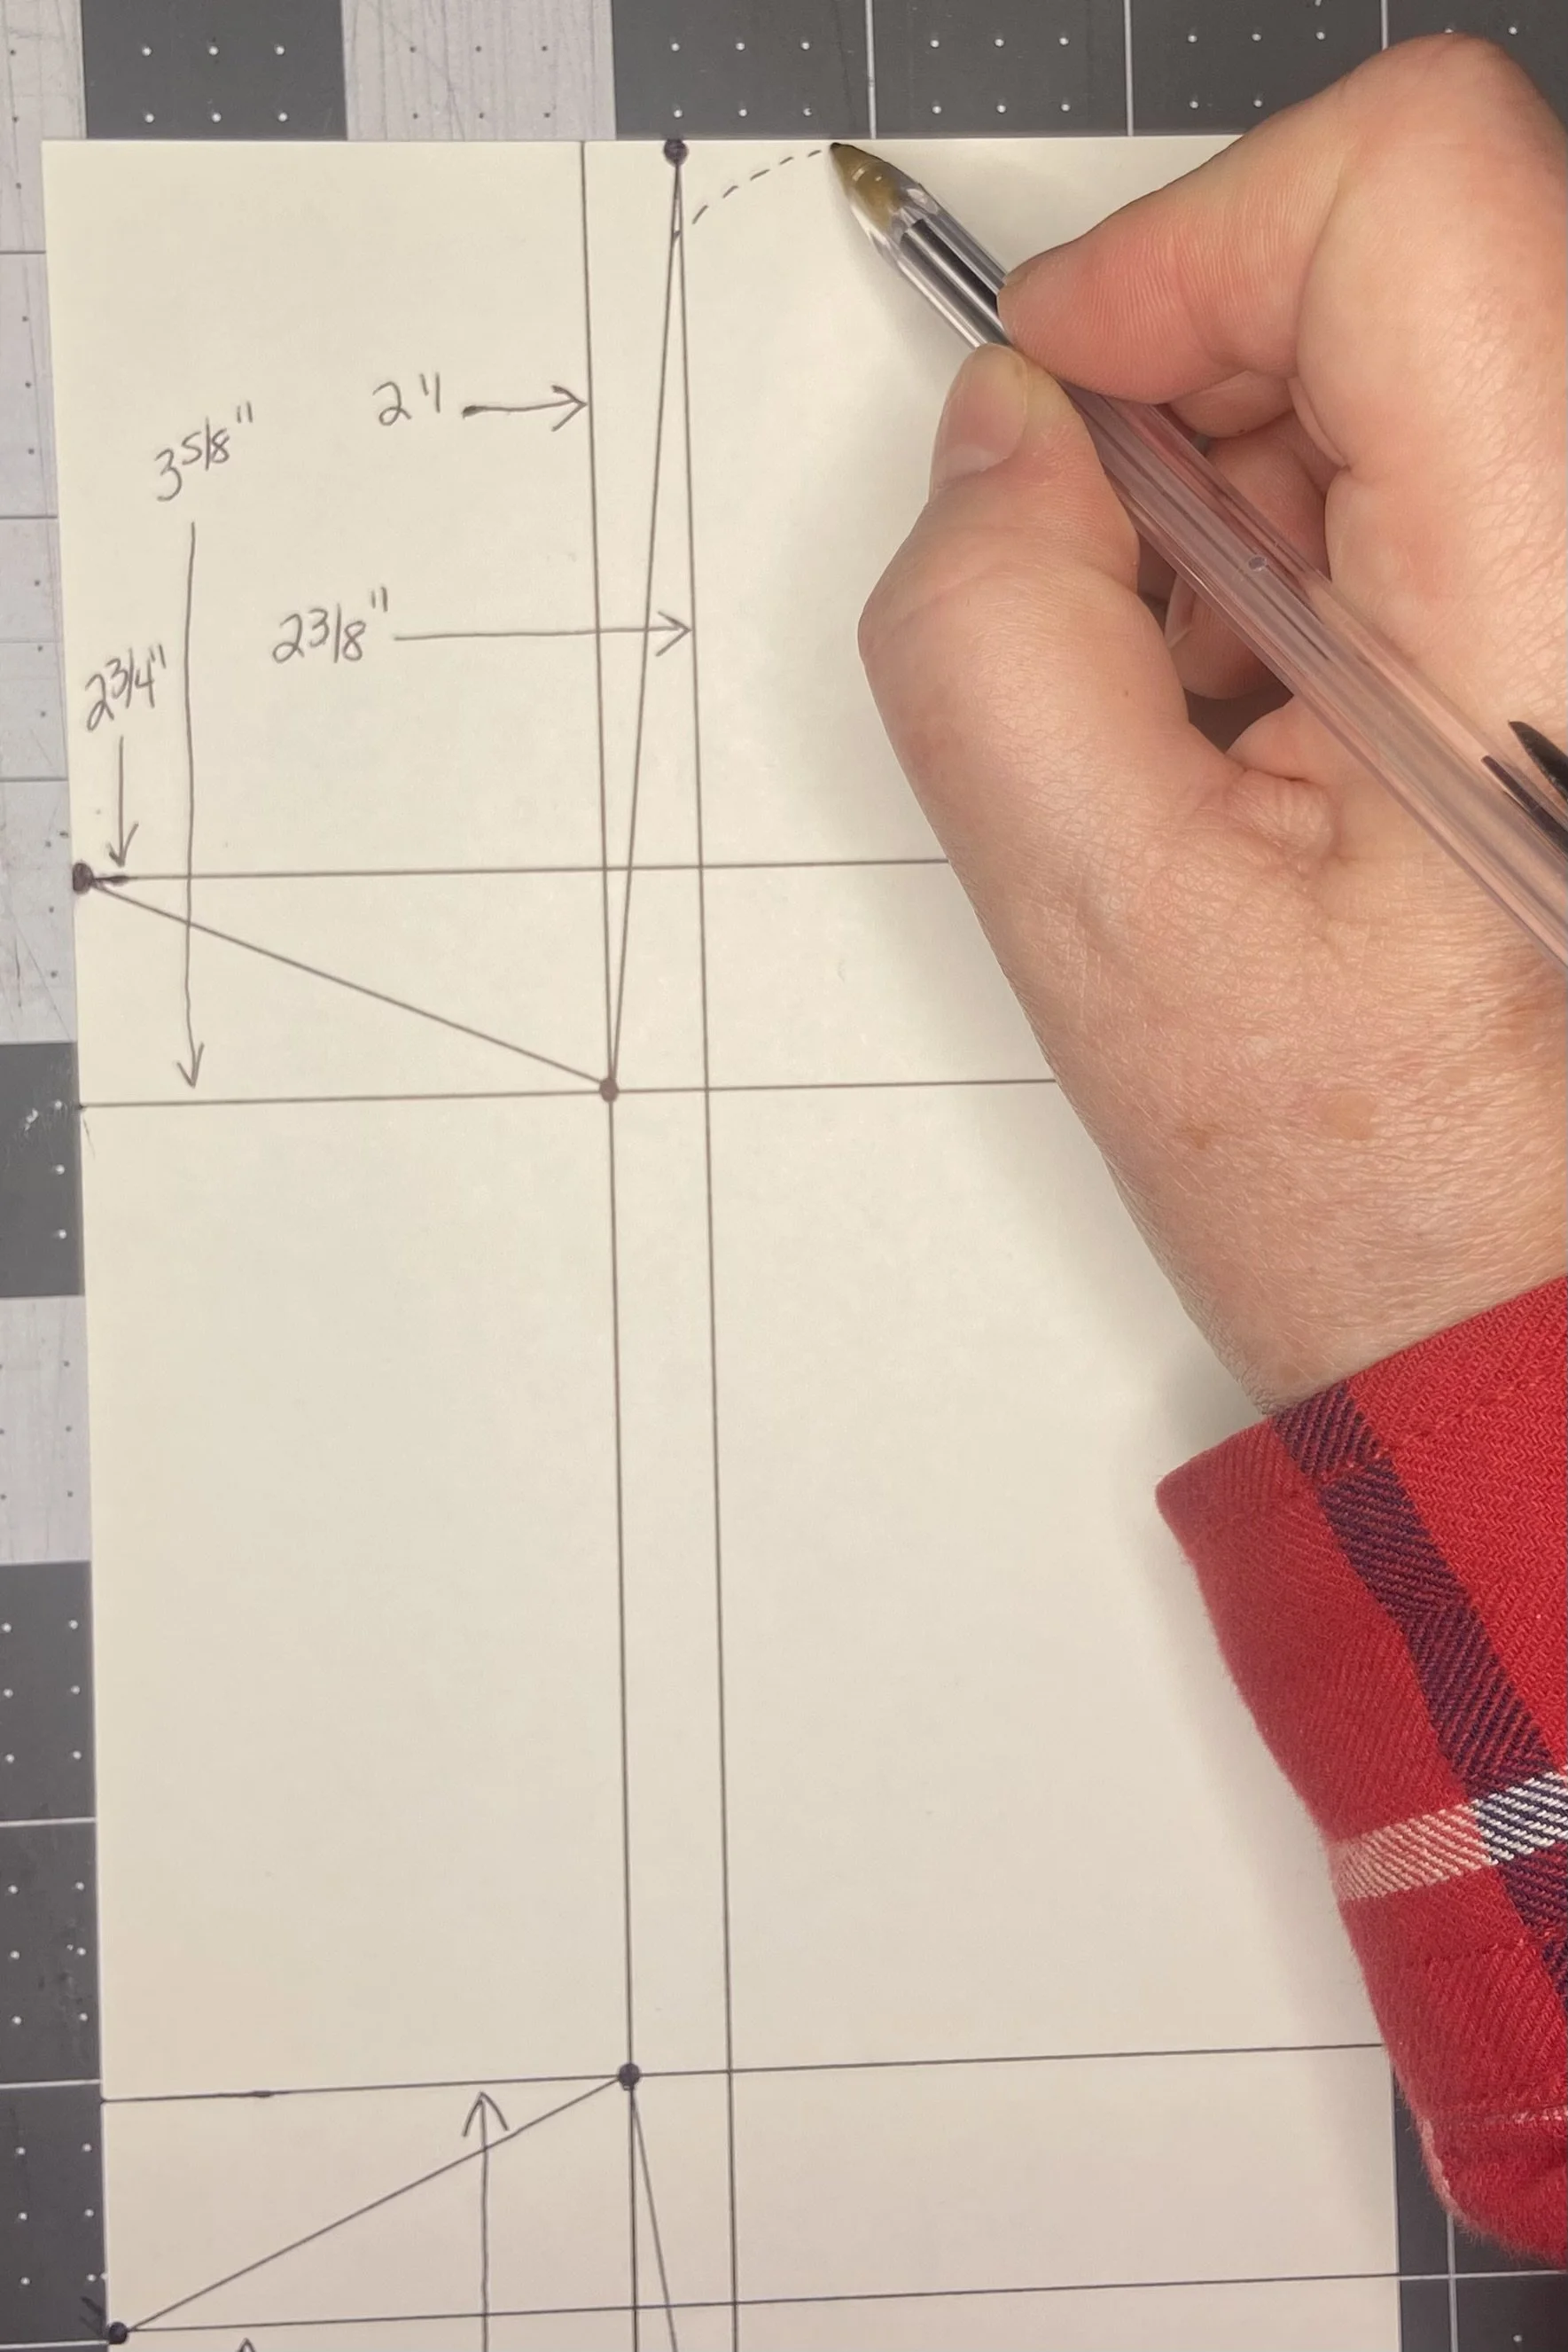
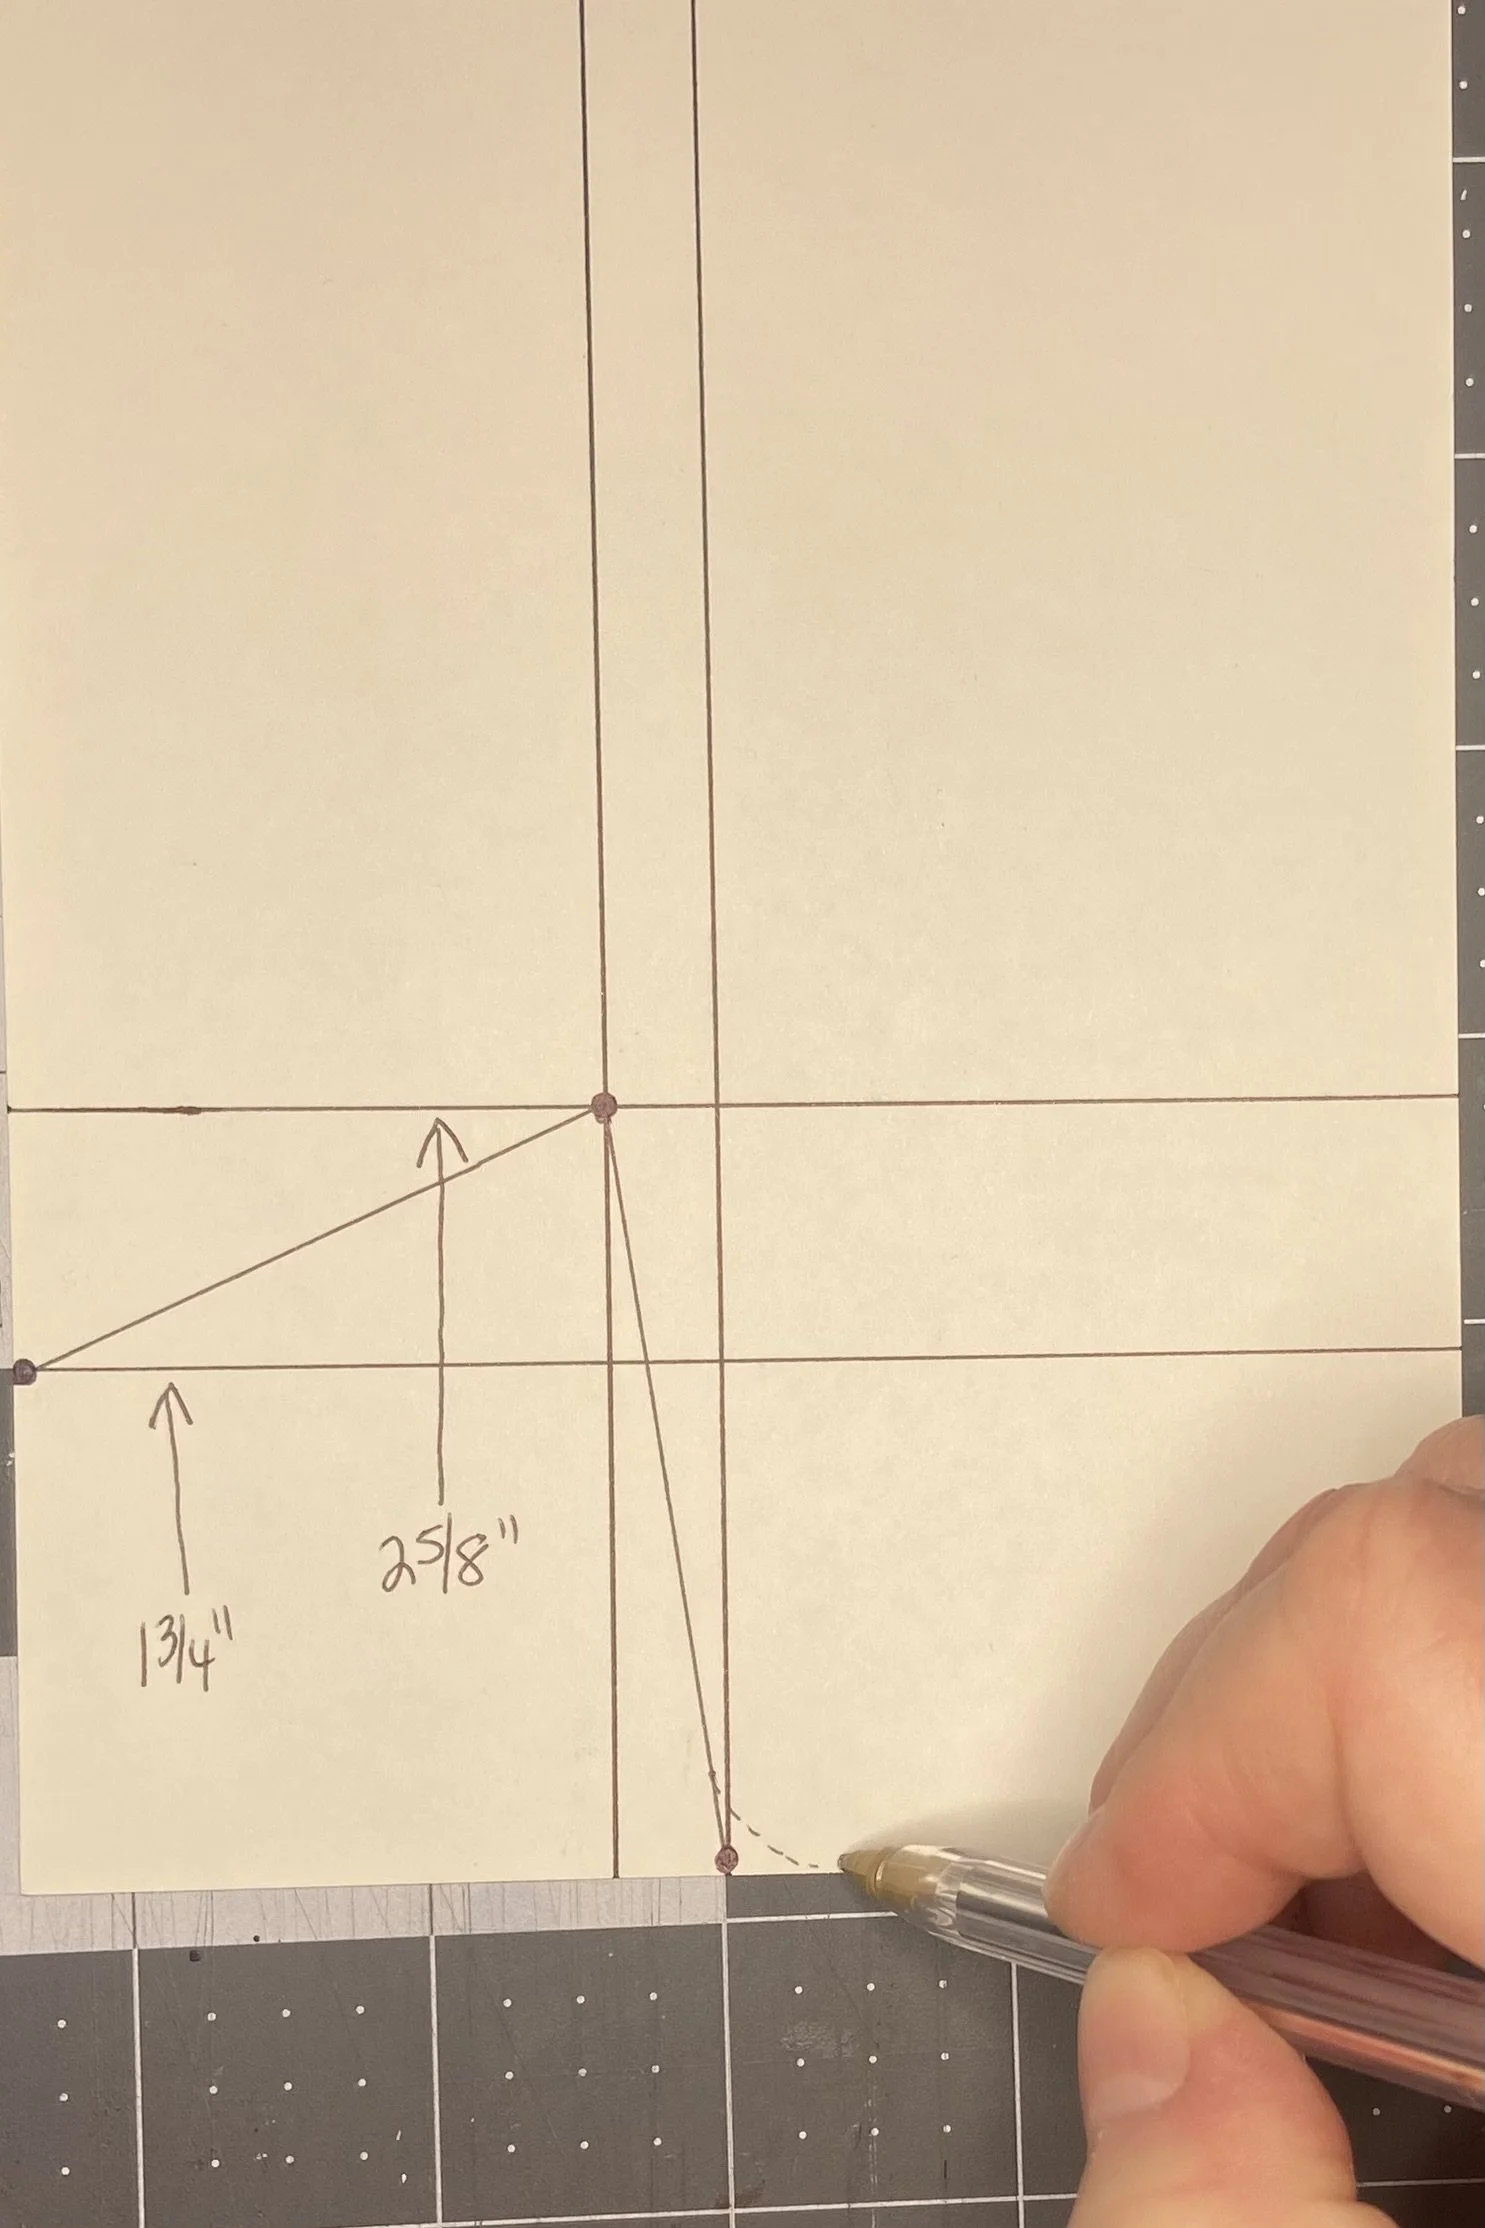
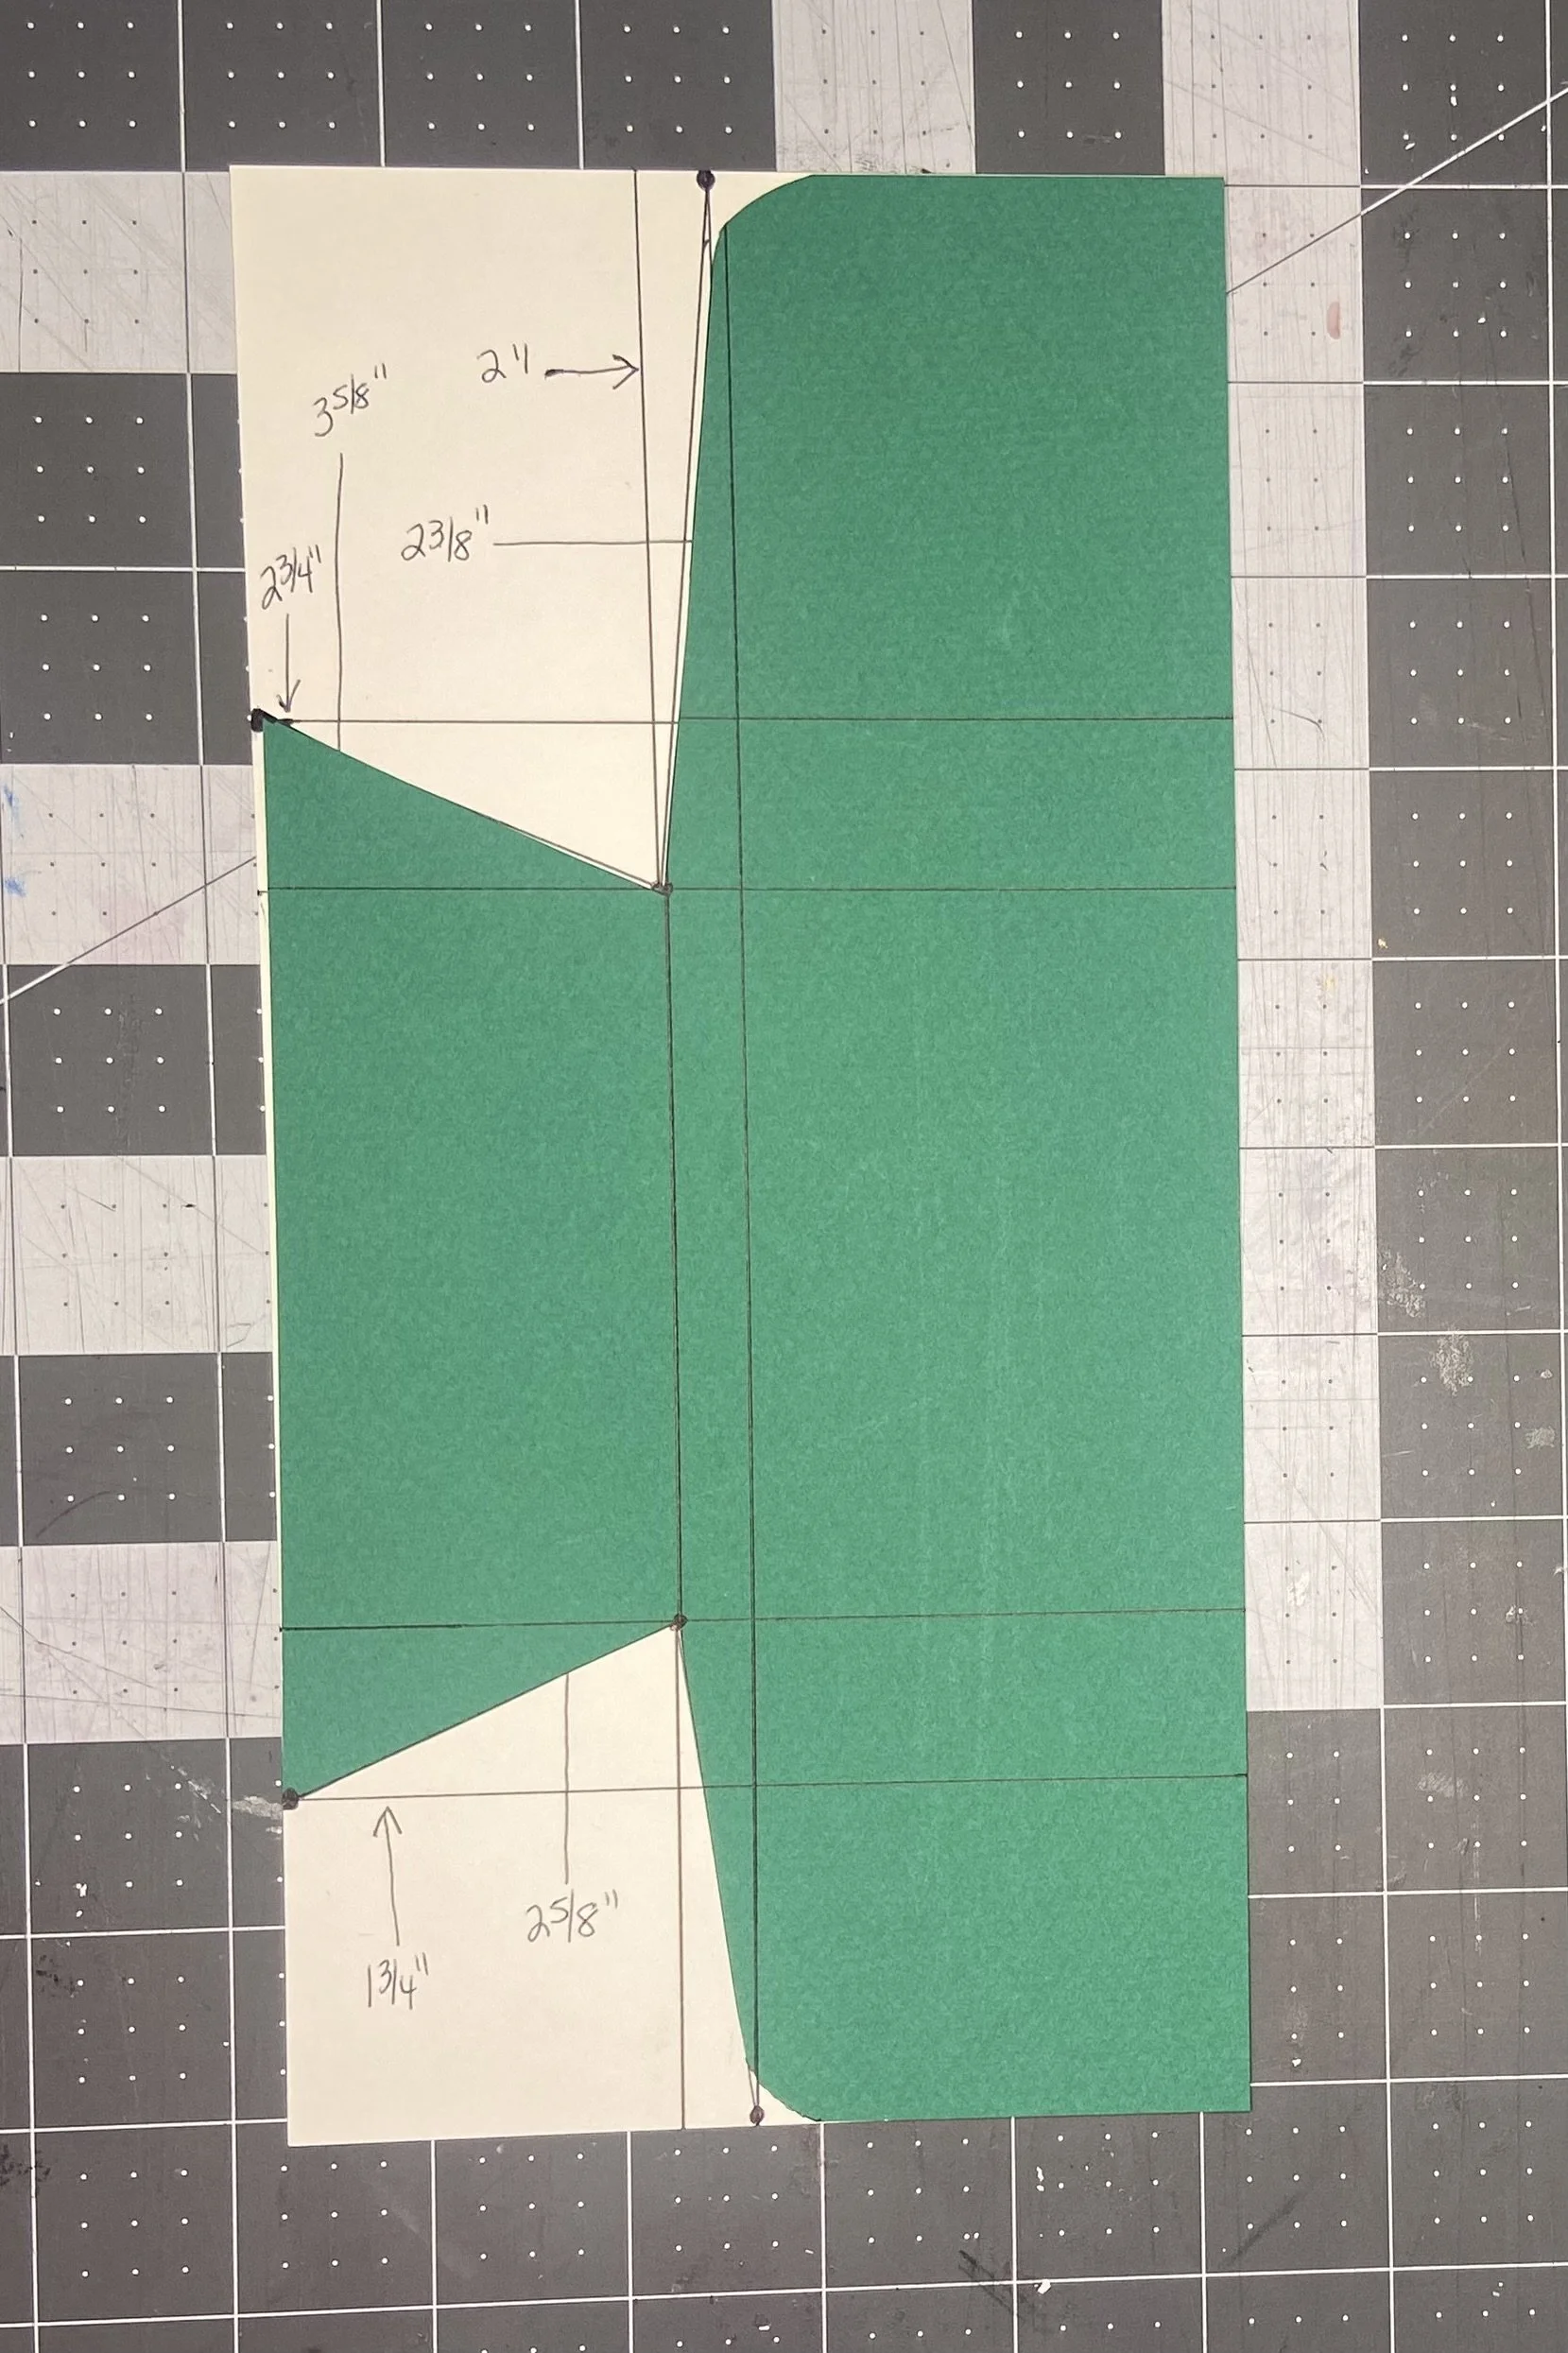
Start with a piece of paper (or better yet, sturdy card stock) that is 10 1/8” tall and 5” wide. Using a ruler (this nice quilting ruler makes this easy), draw a line top to bottom that is 2” from the left edge, and then a parallel line that is 2 3/8” from the left edge. Next, draw a line from side to side that is 2 3/4” from the top, and another parallel line that is 3 5/8” from the top. Draw two more lines from side to side, but this time, measure up from the bottom: the first line is 1 3/4” from the bottom and the second is 2 5/8” from the bottom.
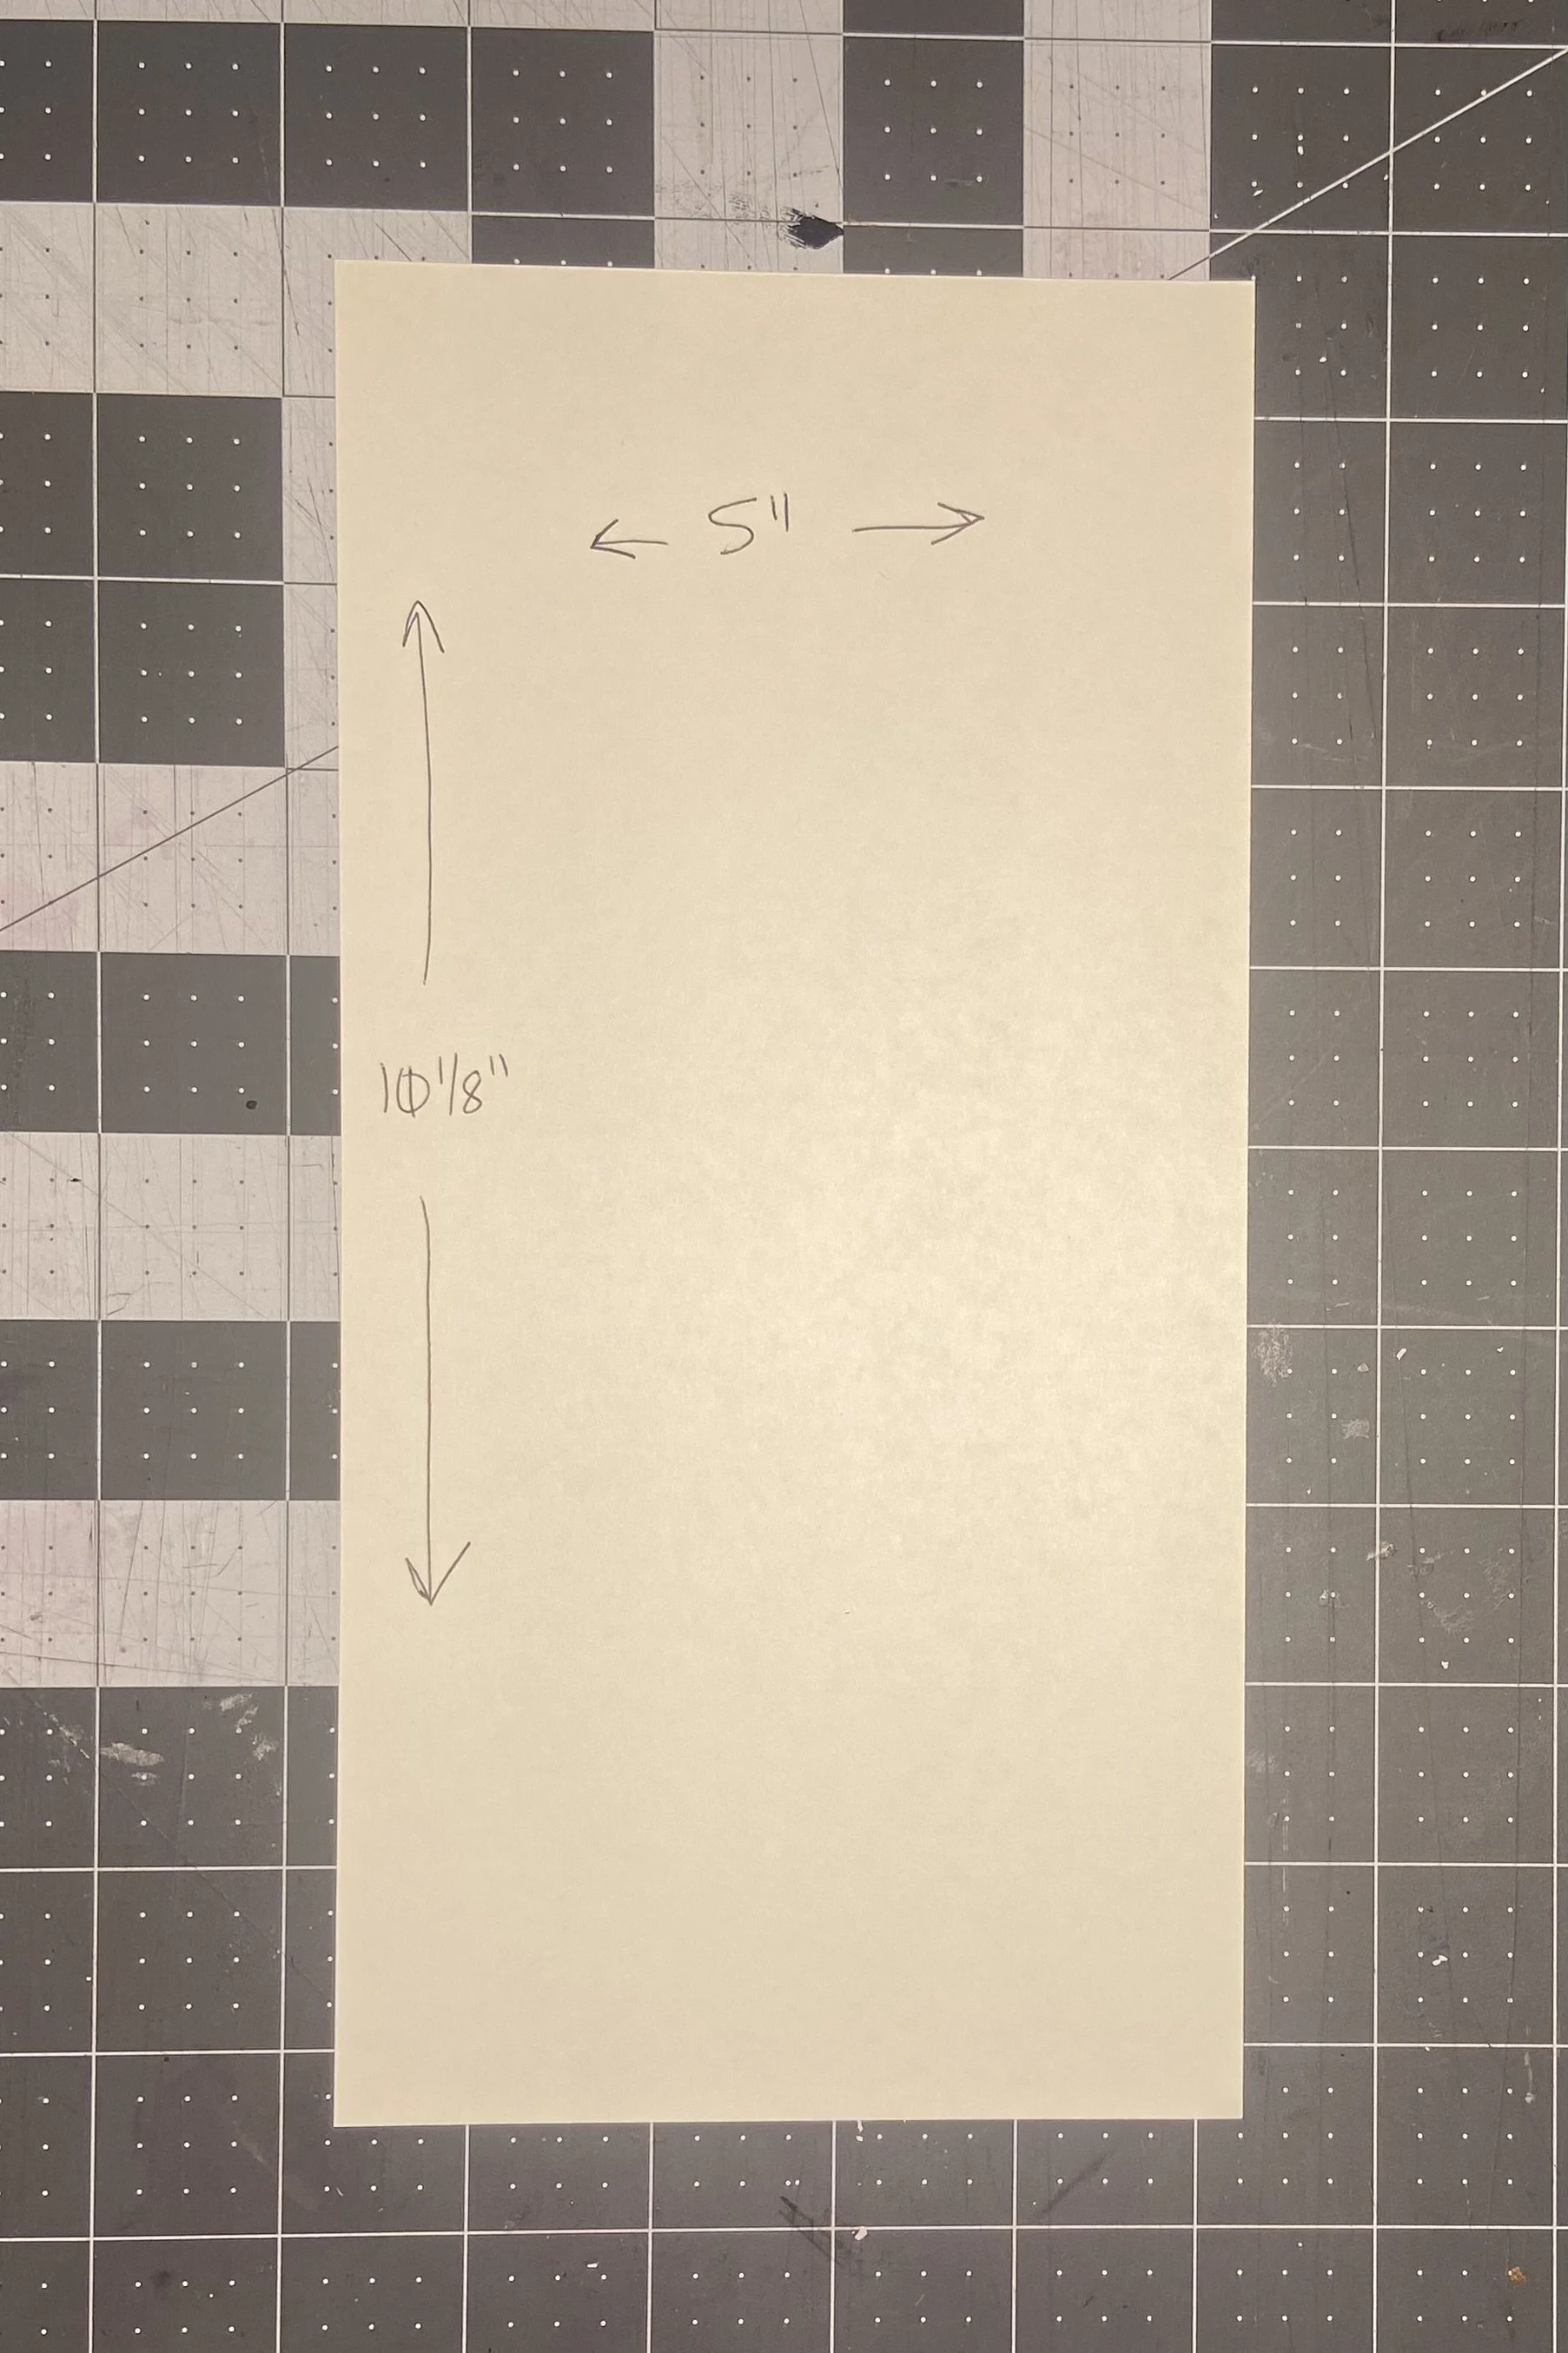
Now, you’ll want to mark the points where you will start and end your pattern lines. You will need to mark 6 points, as shown in the picture below. Then, connect the dots as shown.

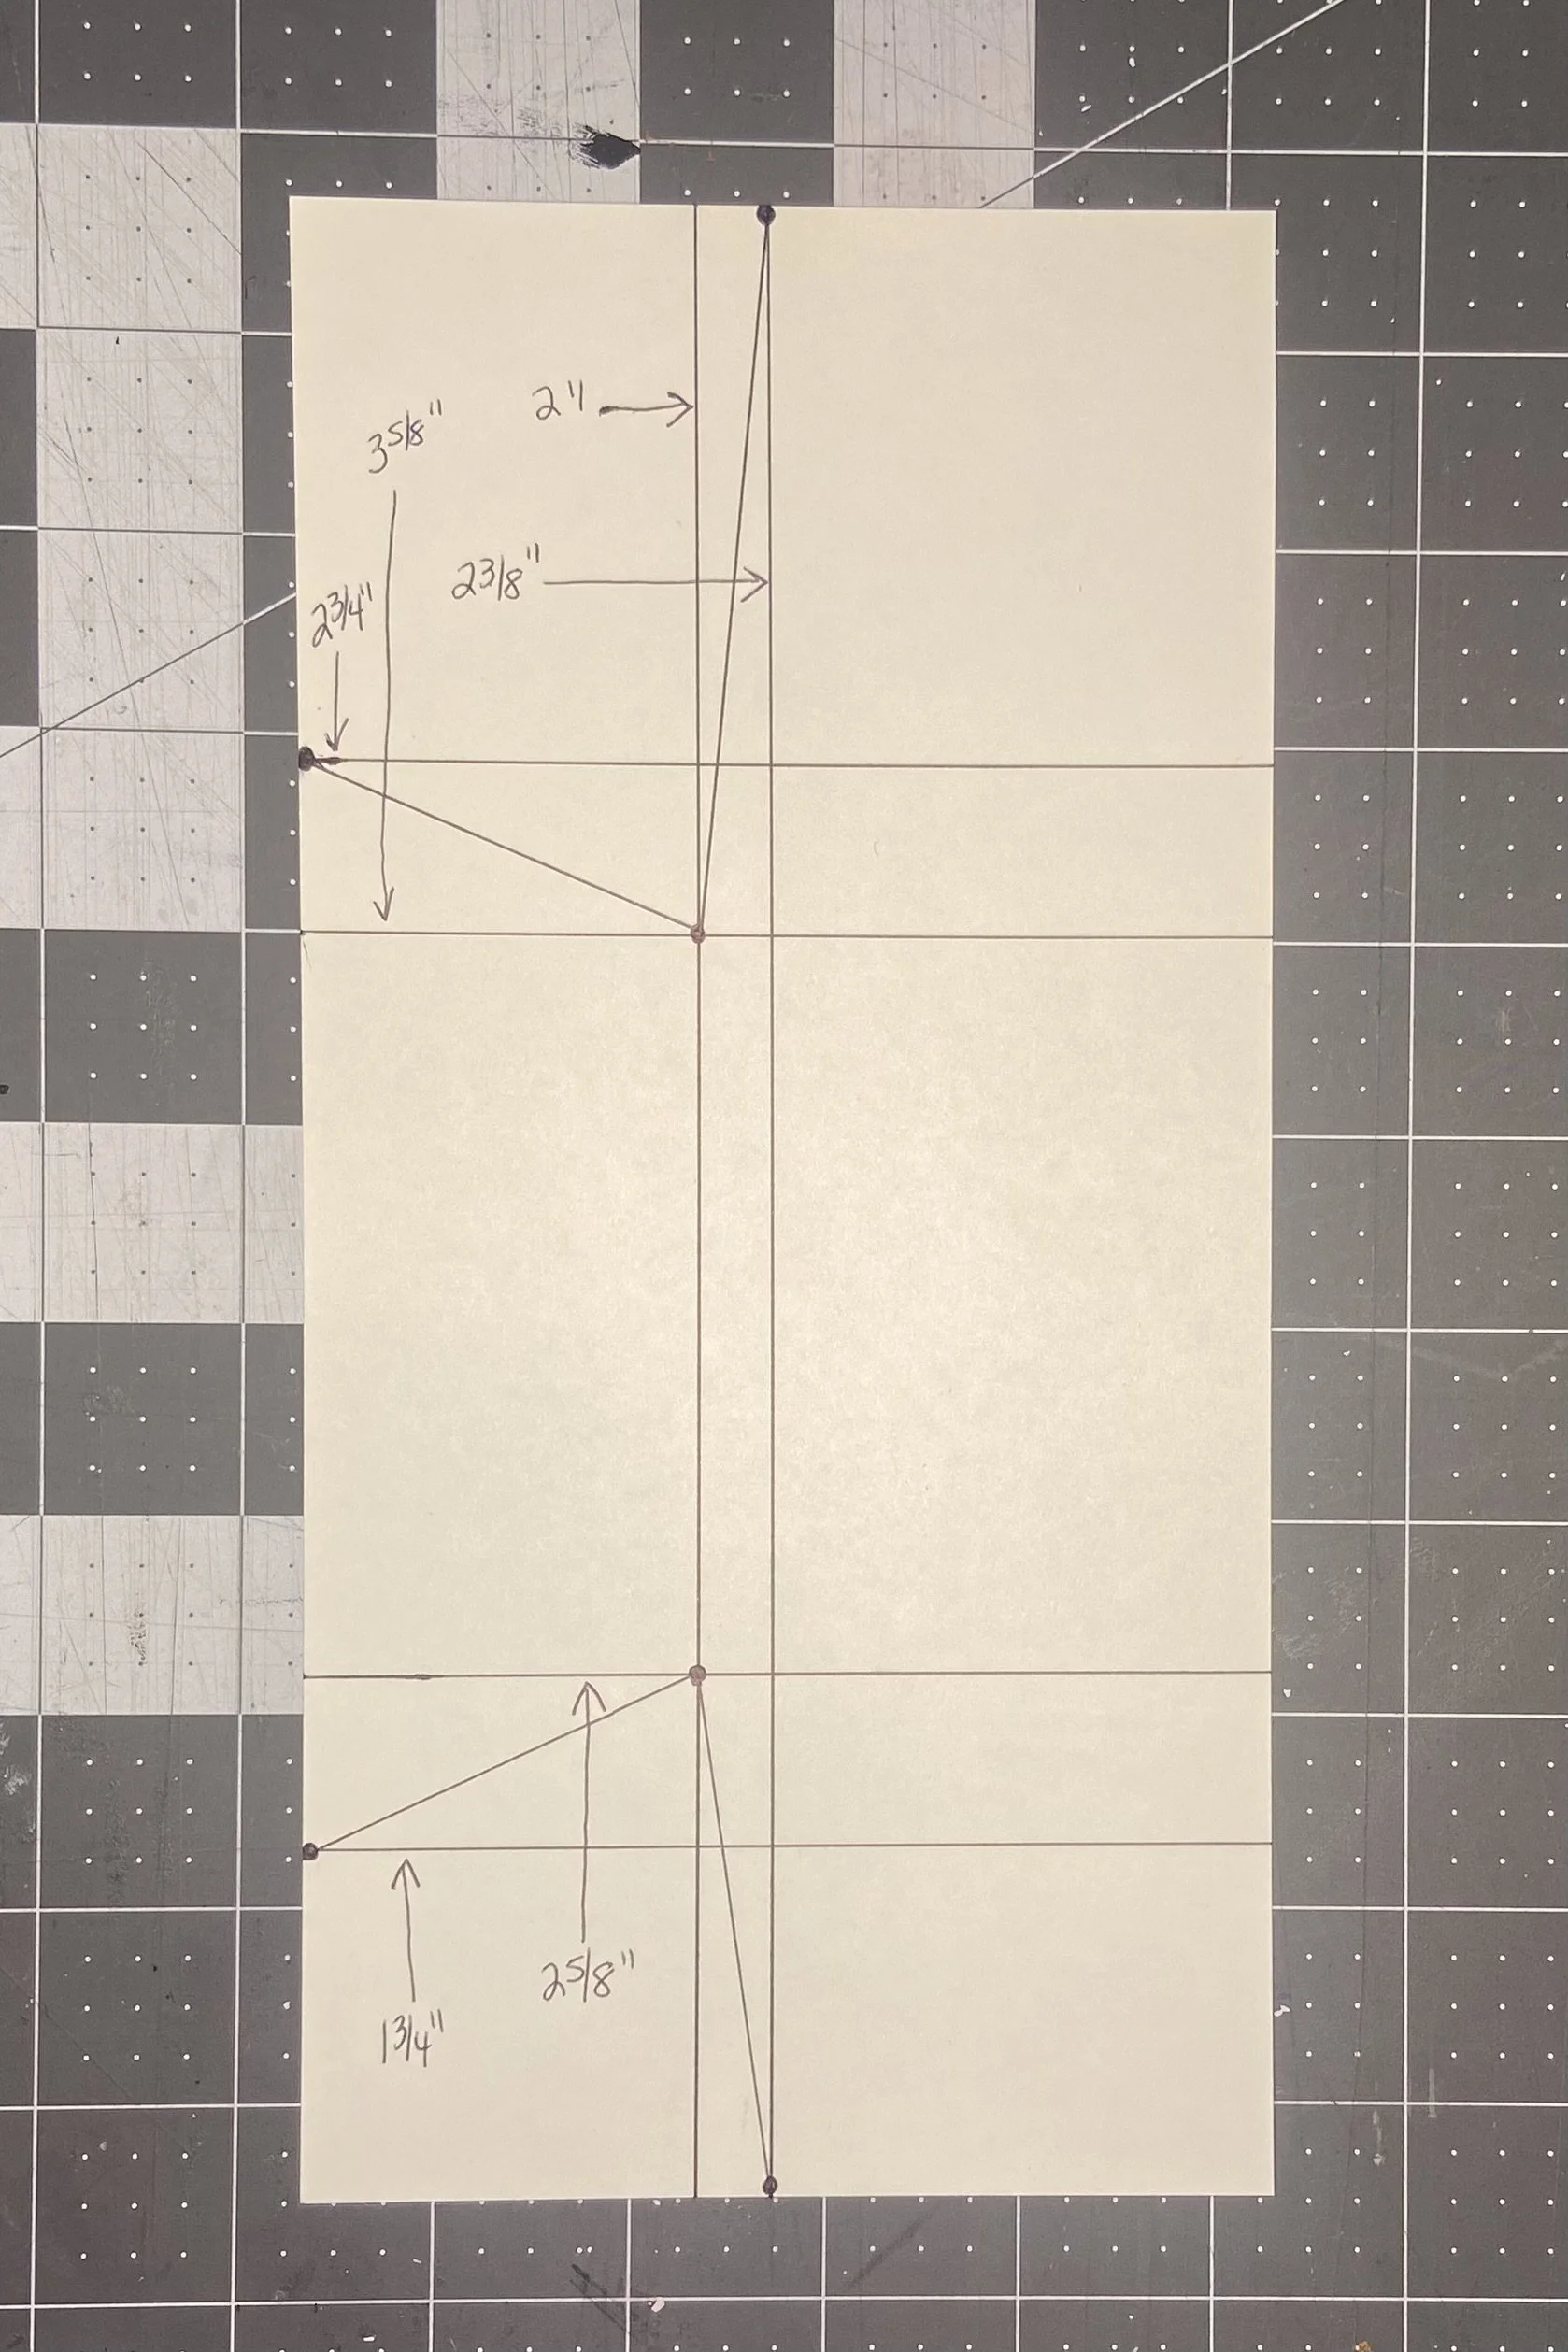
Round the corners, and then cut out your pattern.
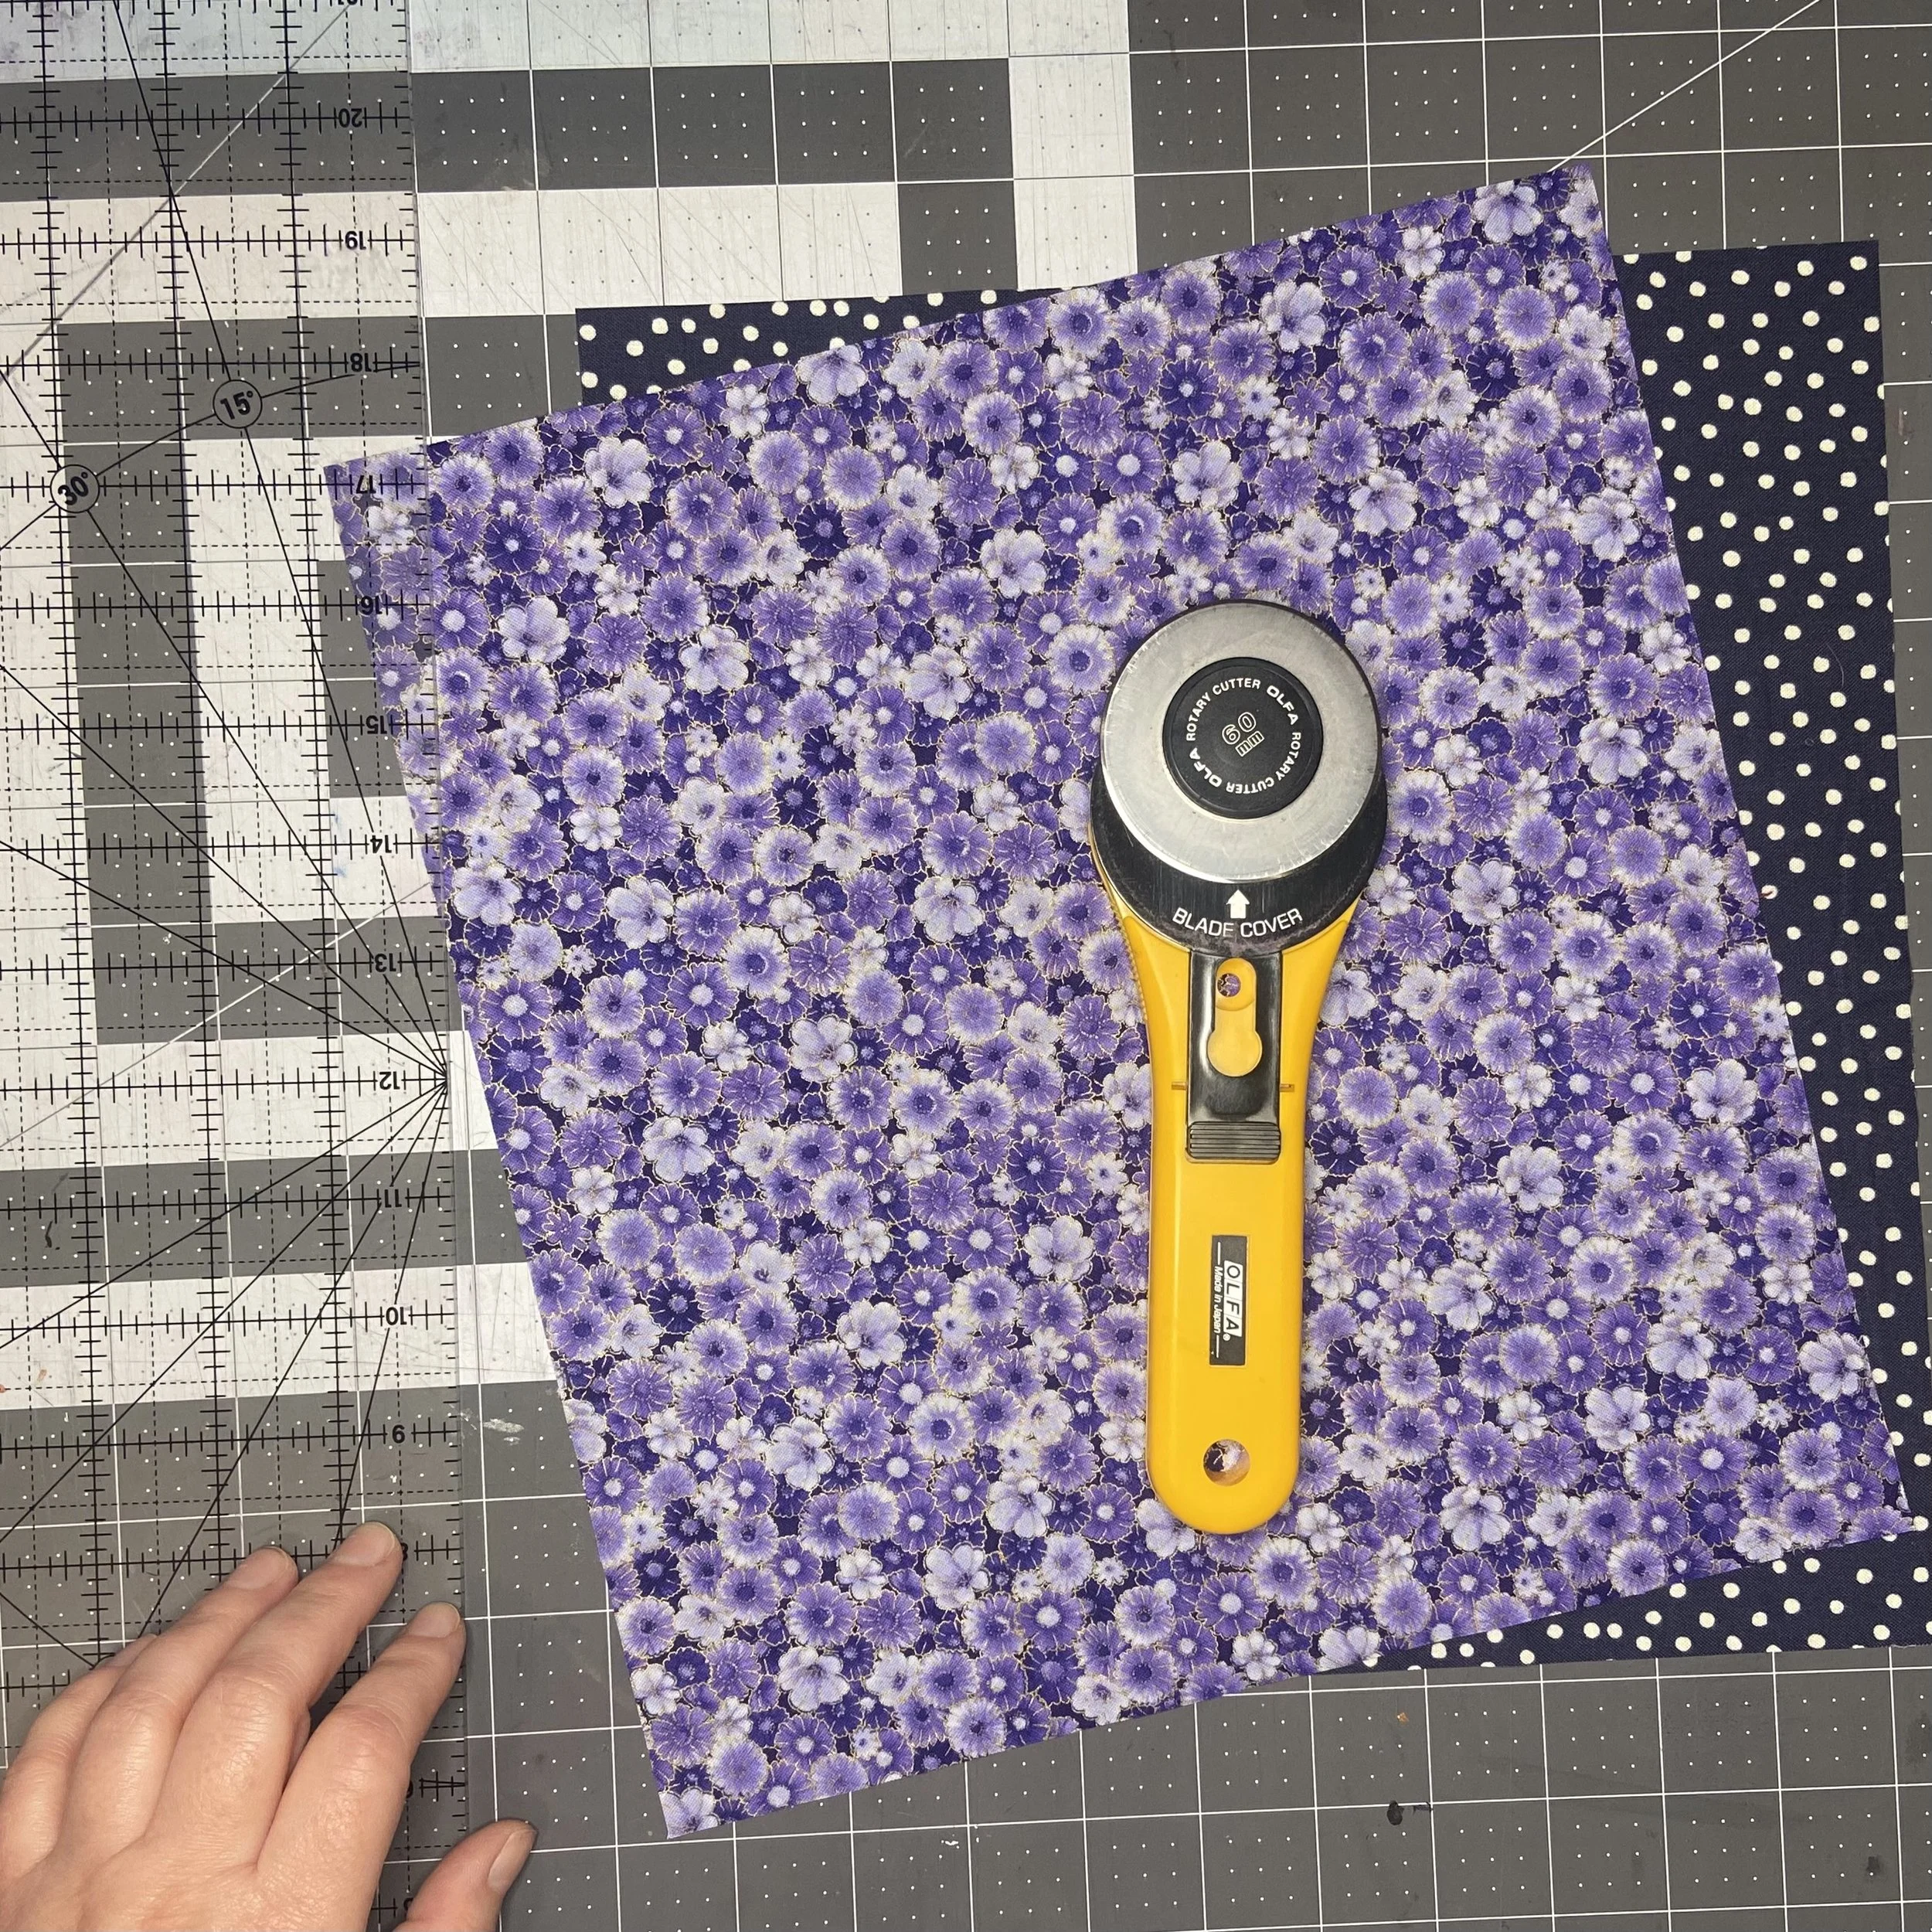
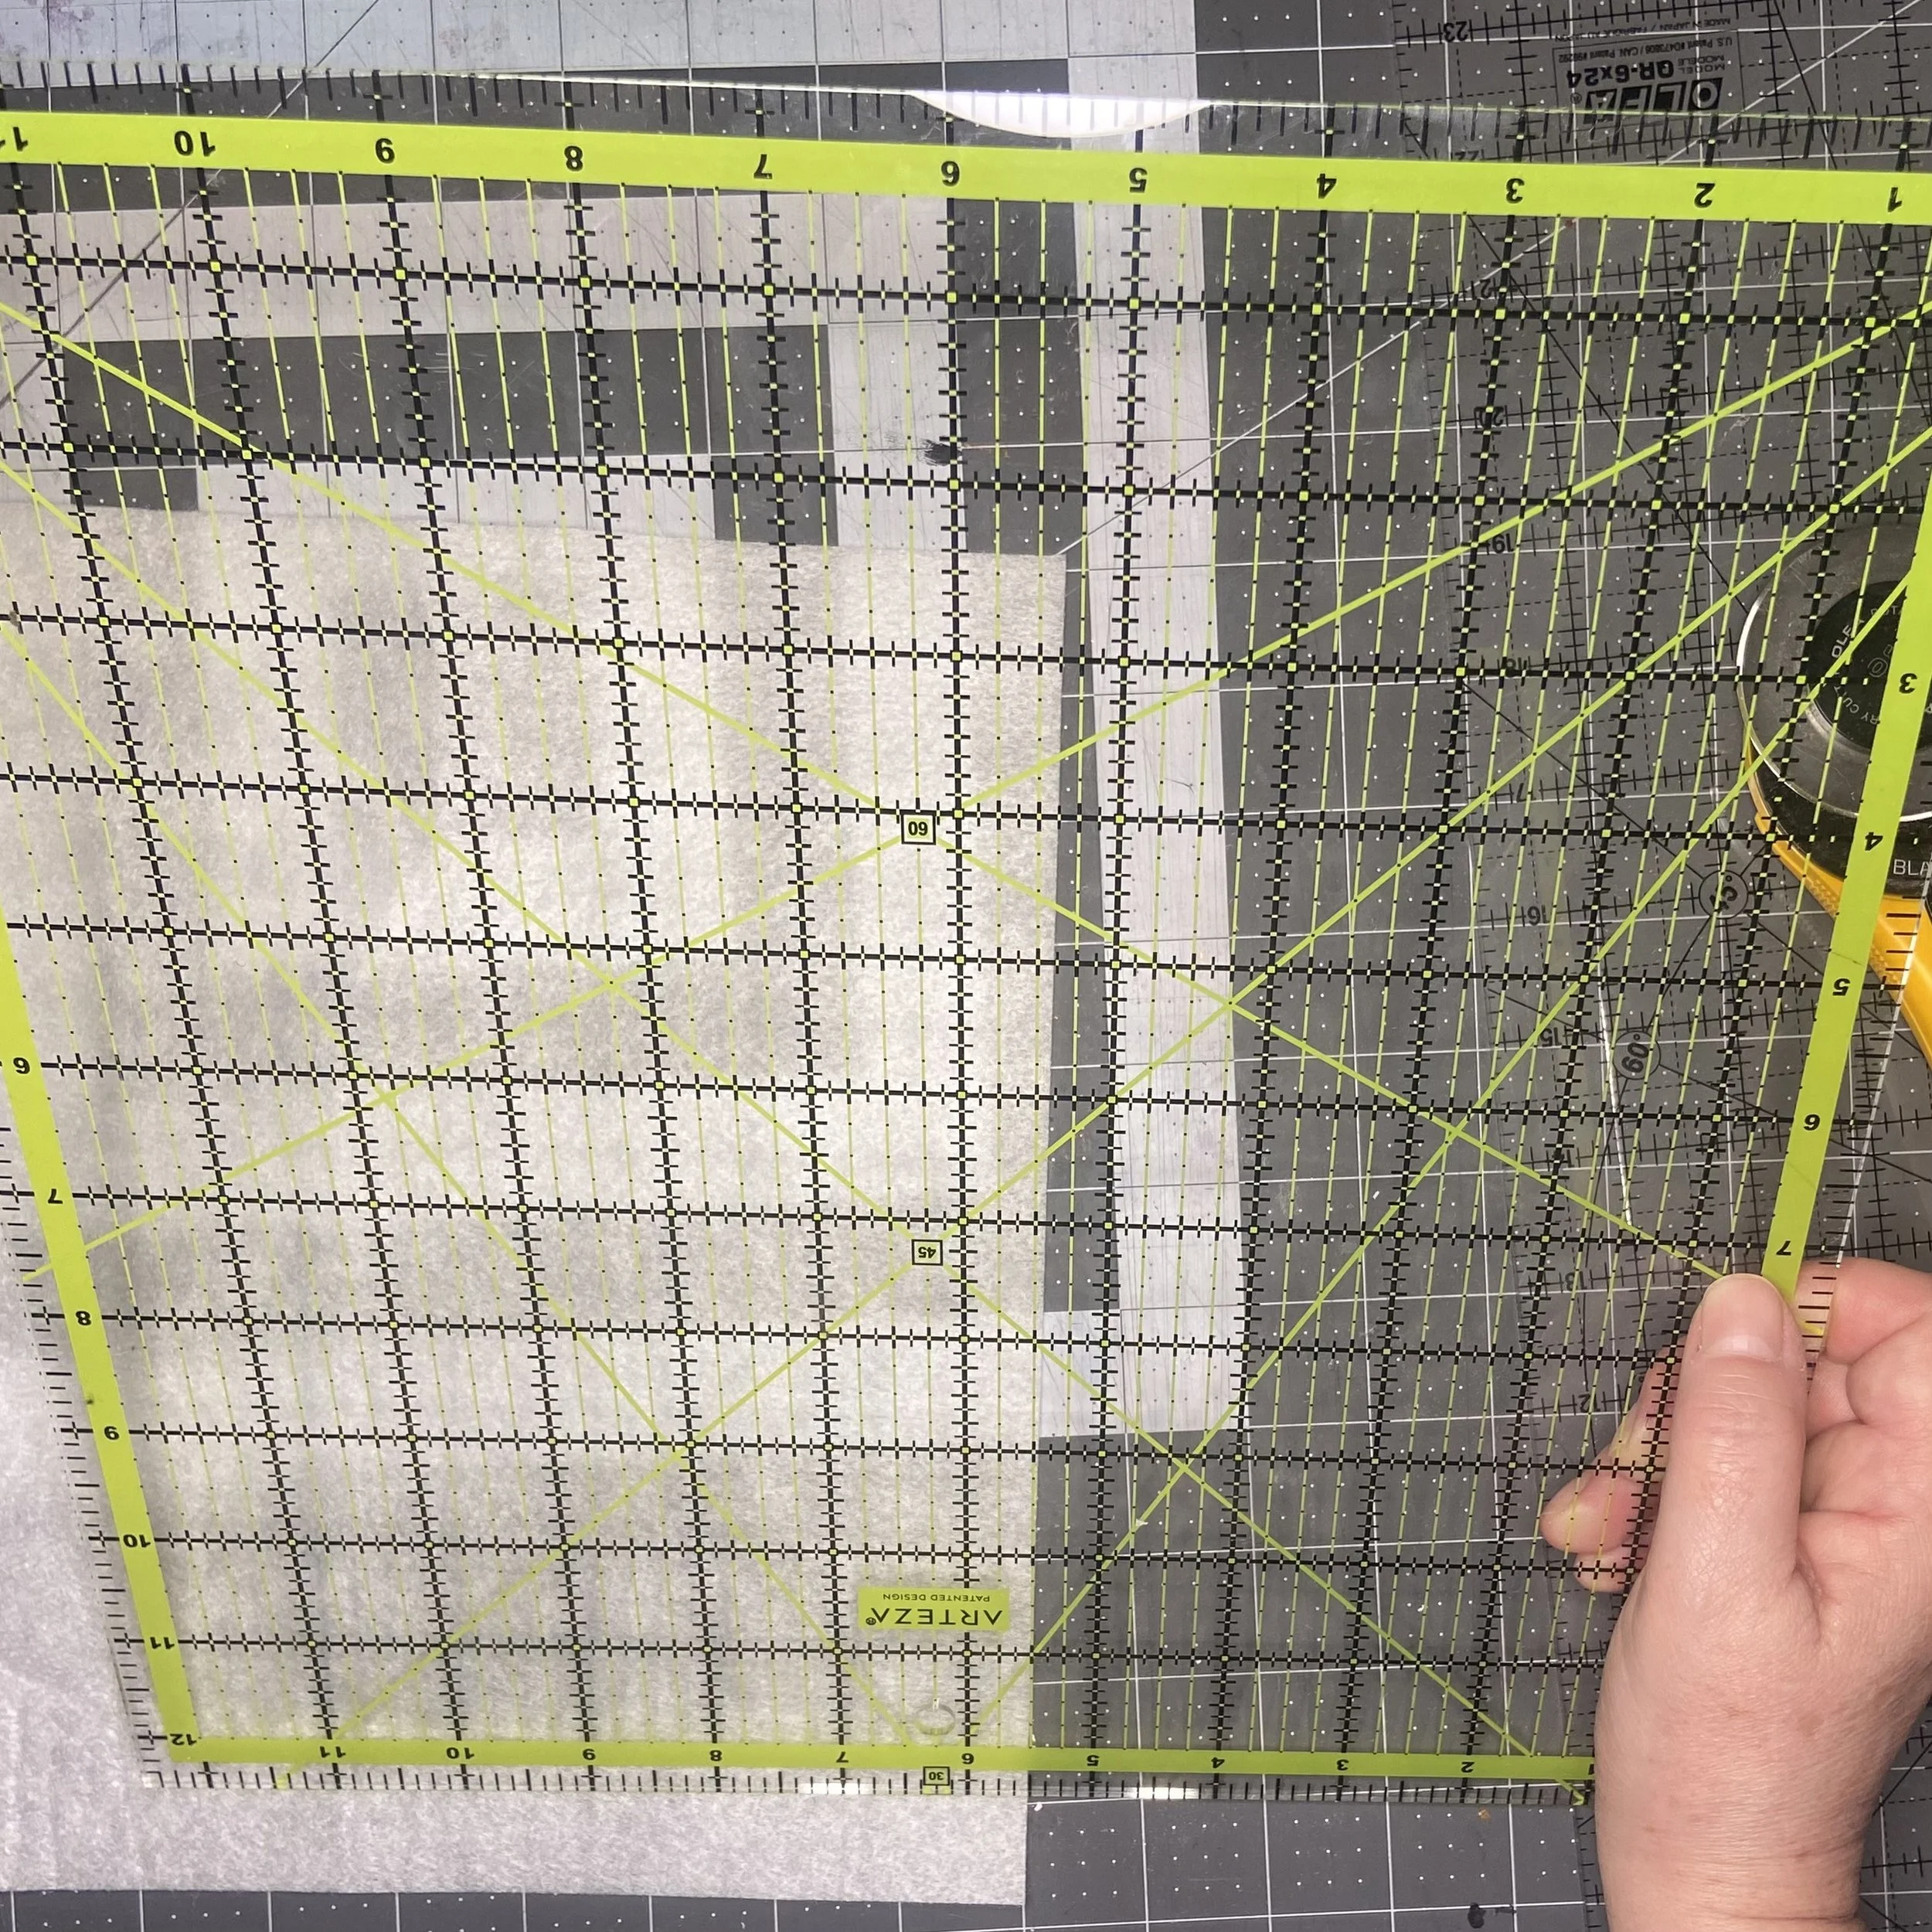
Pattern done! Now, on to materials. You will need two 11” x 12” squares of fabric, and I think the resulting pouch looks nicer if they are not the same, but that’s up to you. You will also need a 10 7/8” x 10 1/8” square of fusible fleece, such as Pellon. If you prefer, you could certainly use a very heavy interfacing, but it needs to be fusible and it needs to be sufficiently substantial to give structure to the end result. A rotary cutter, a self-healing cutting mat, and a lovely quilting ruler are lovely to work with but not completely essential. Also on the “convenient but not essential” list is a large quilting square, such as this one. It does an excellent job of giving you straight squared edges.
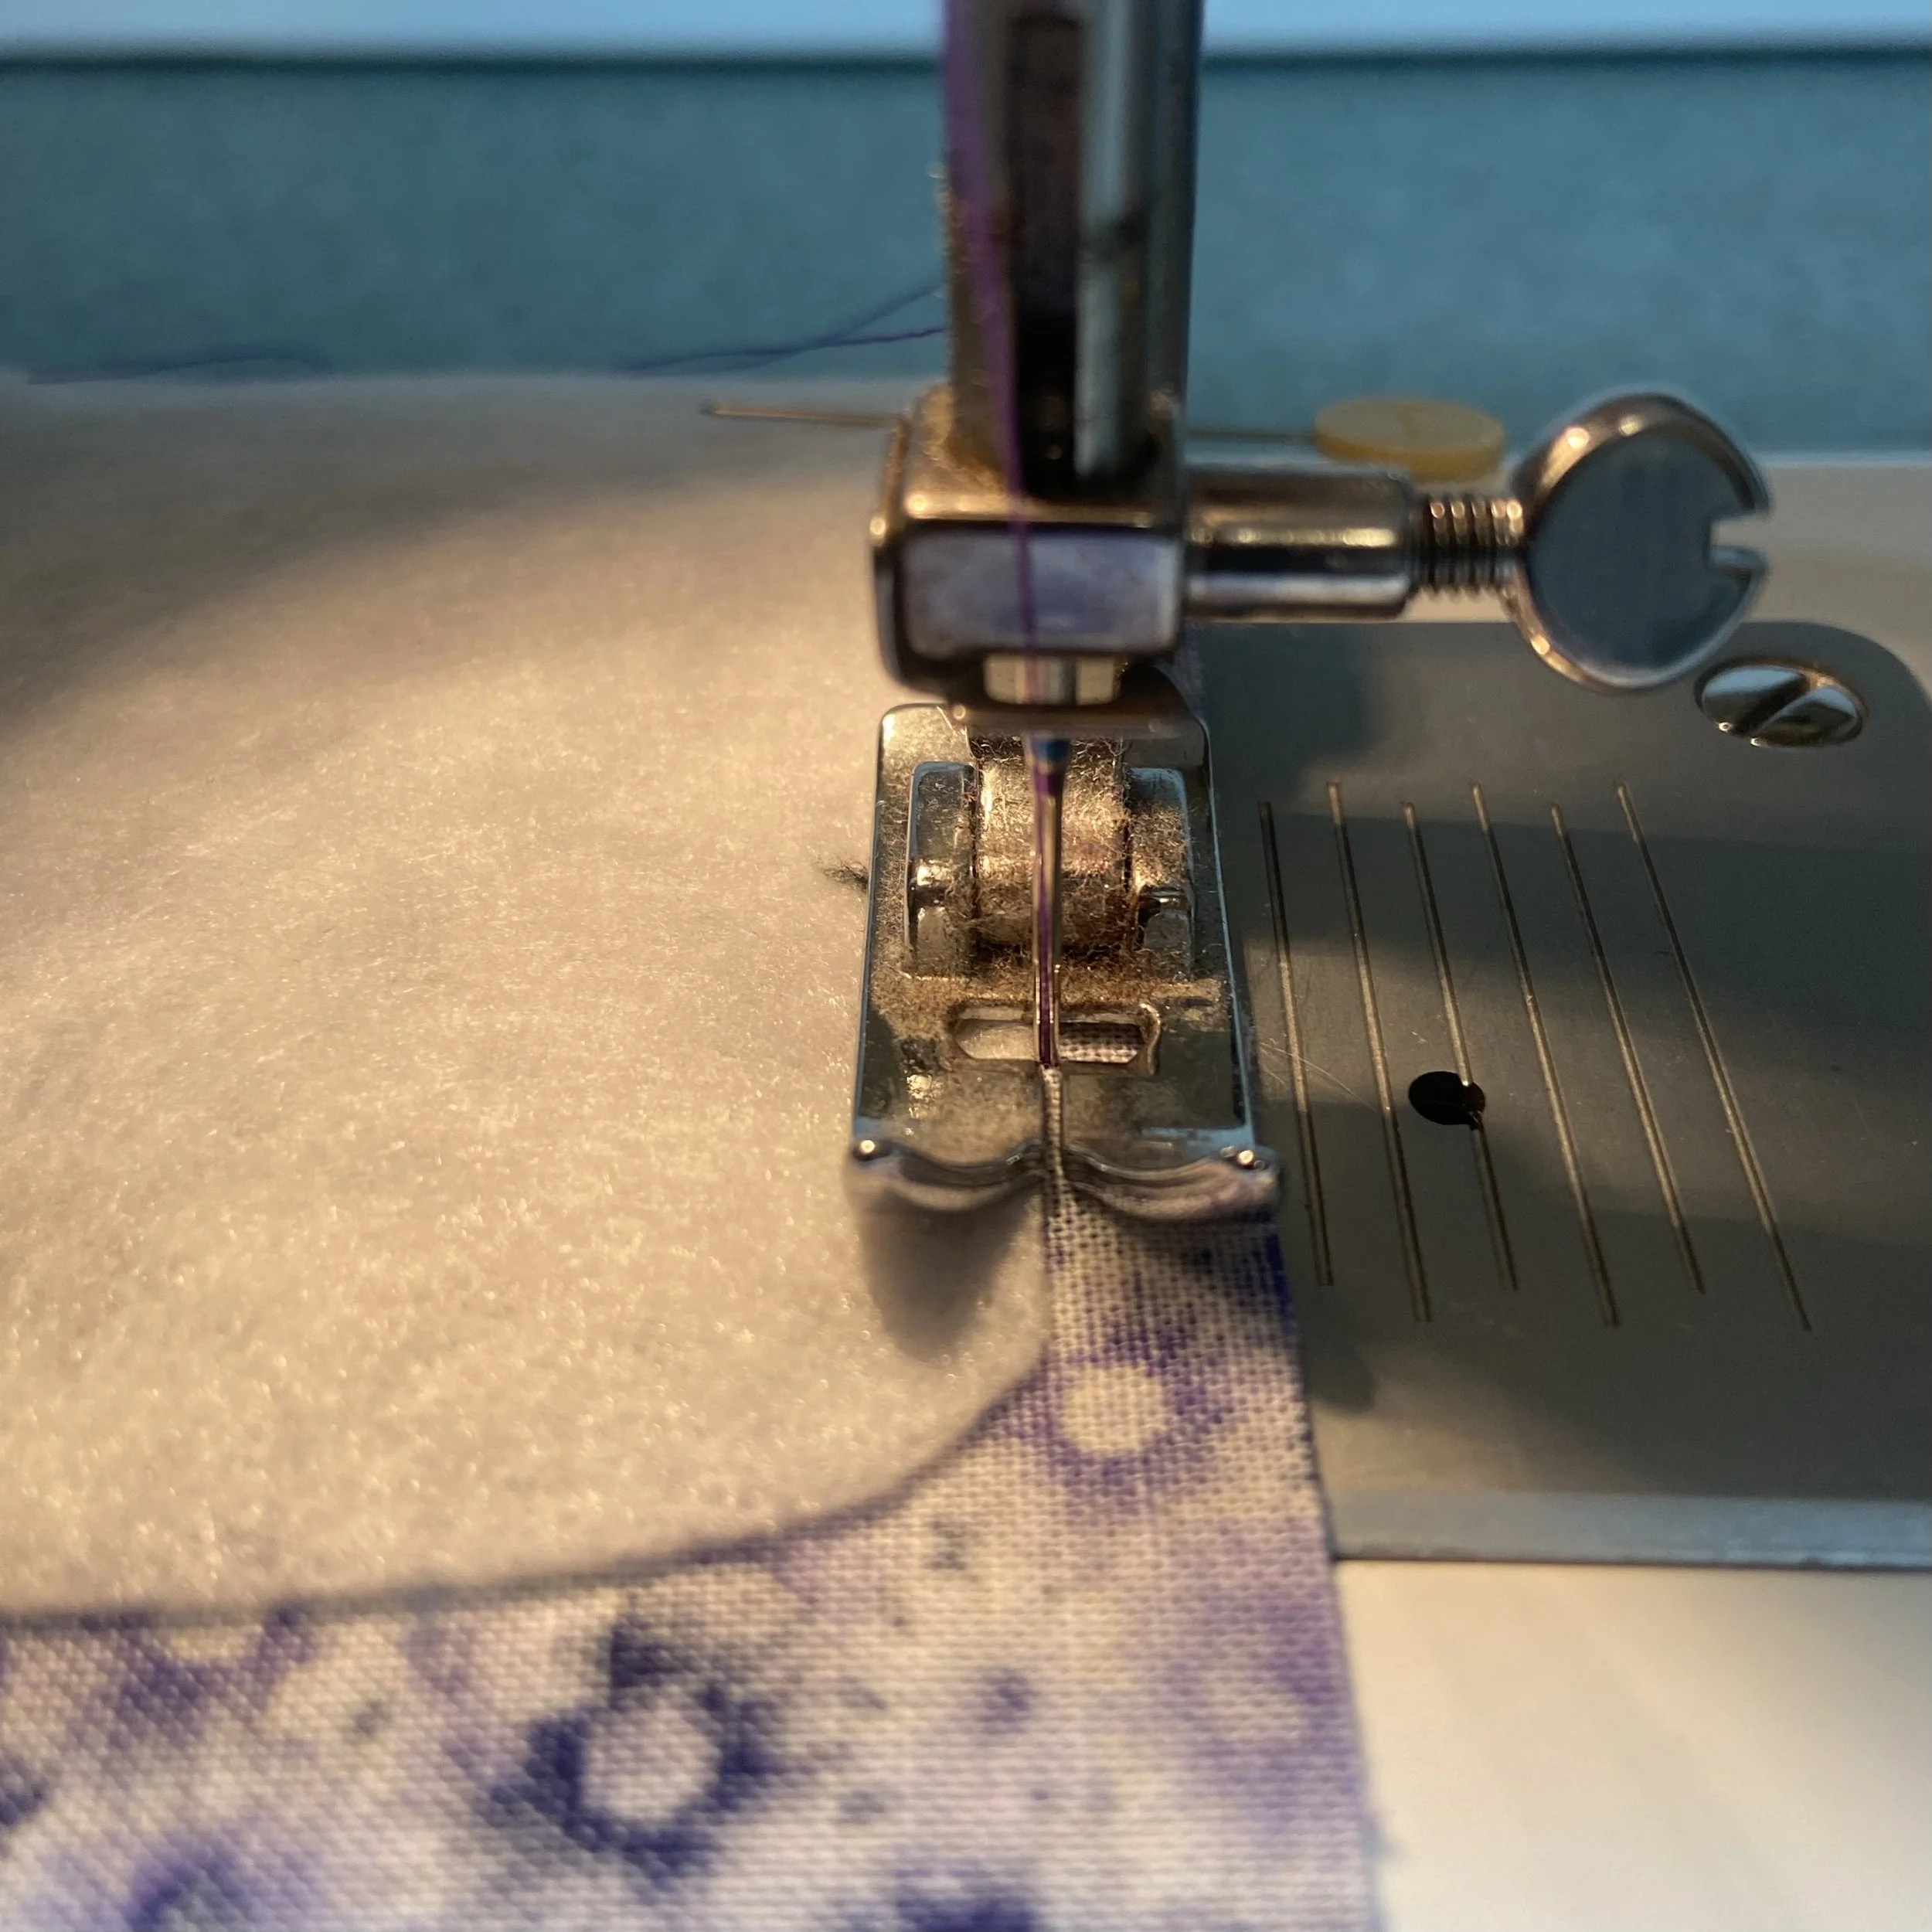
You will start with your piece of fusible fleece. Working on the unglued side, place the pattern you just made along the left edge (obviously, the sides will be the 10 1/8” measurements, and the longer measurements will be along the top and bottom). Trace around your pattern with a pen (doesn’t matter if it’s an erasable pen or not).
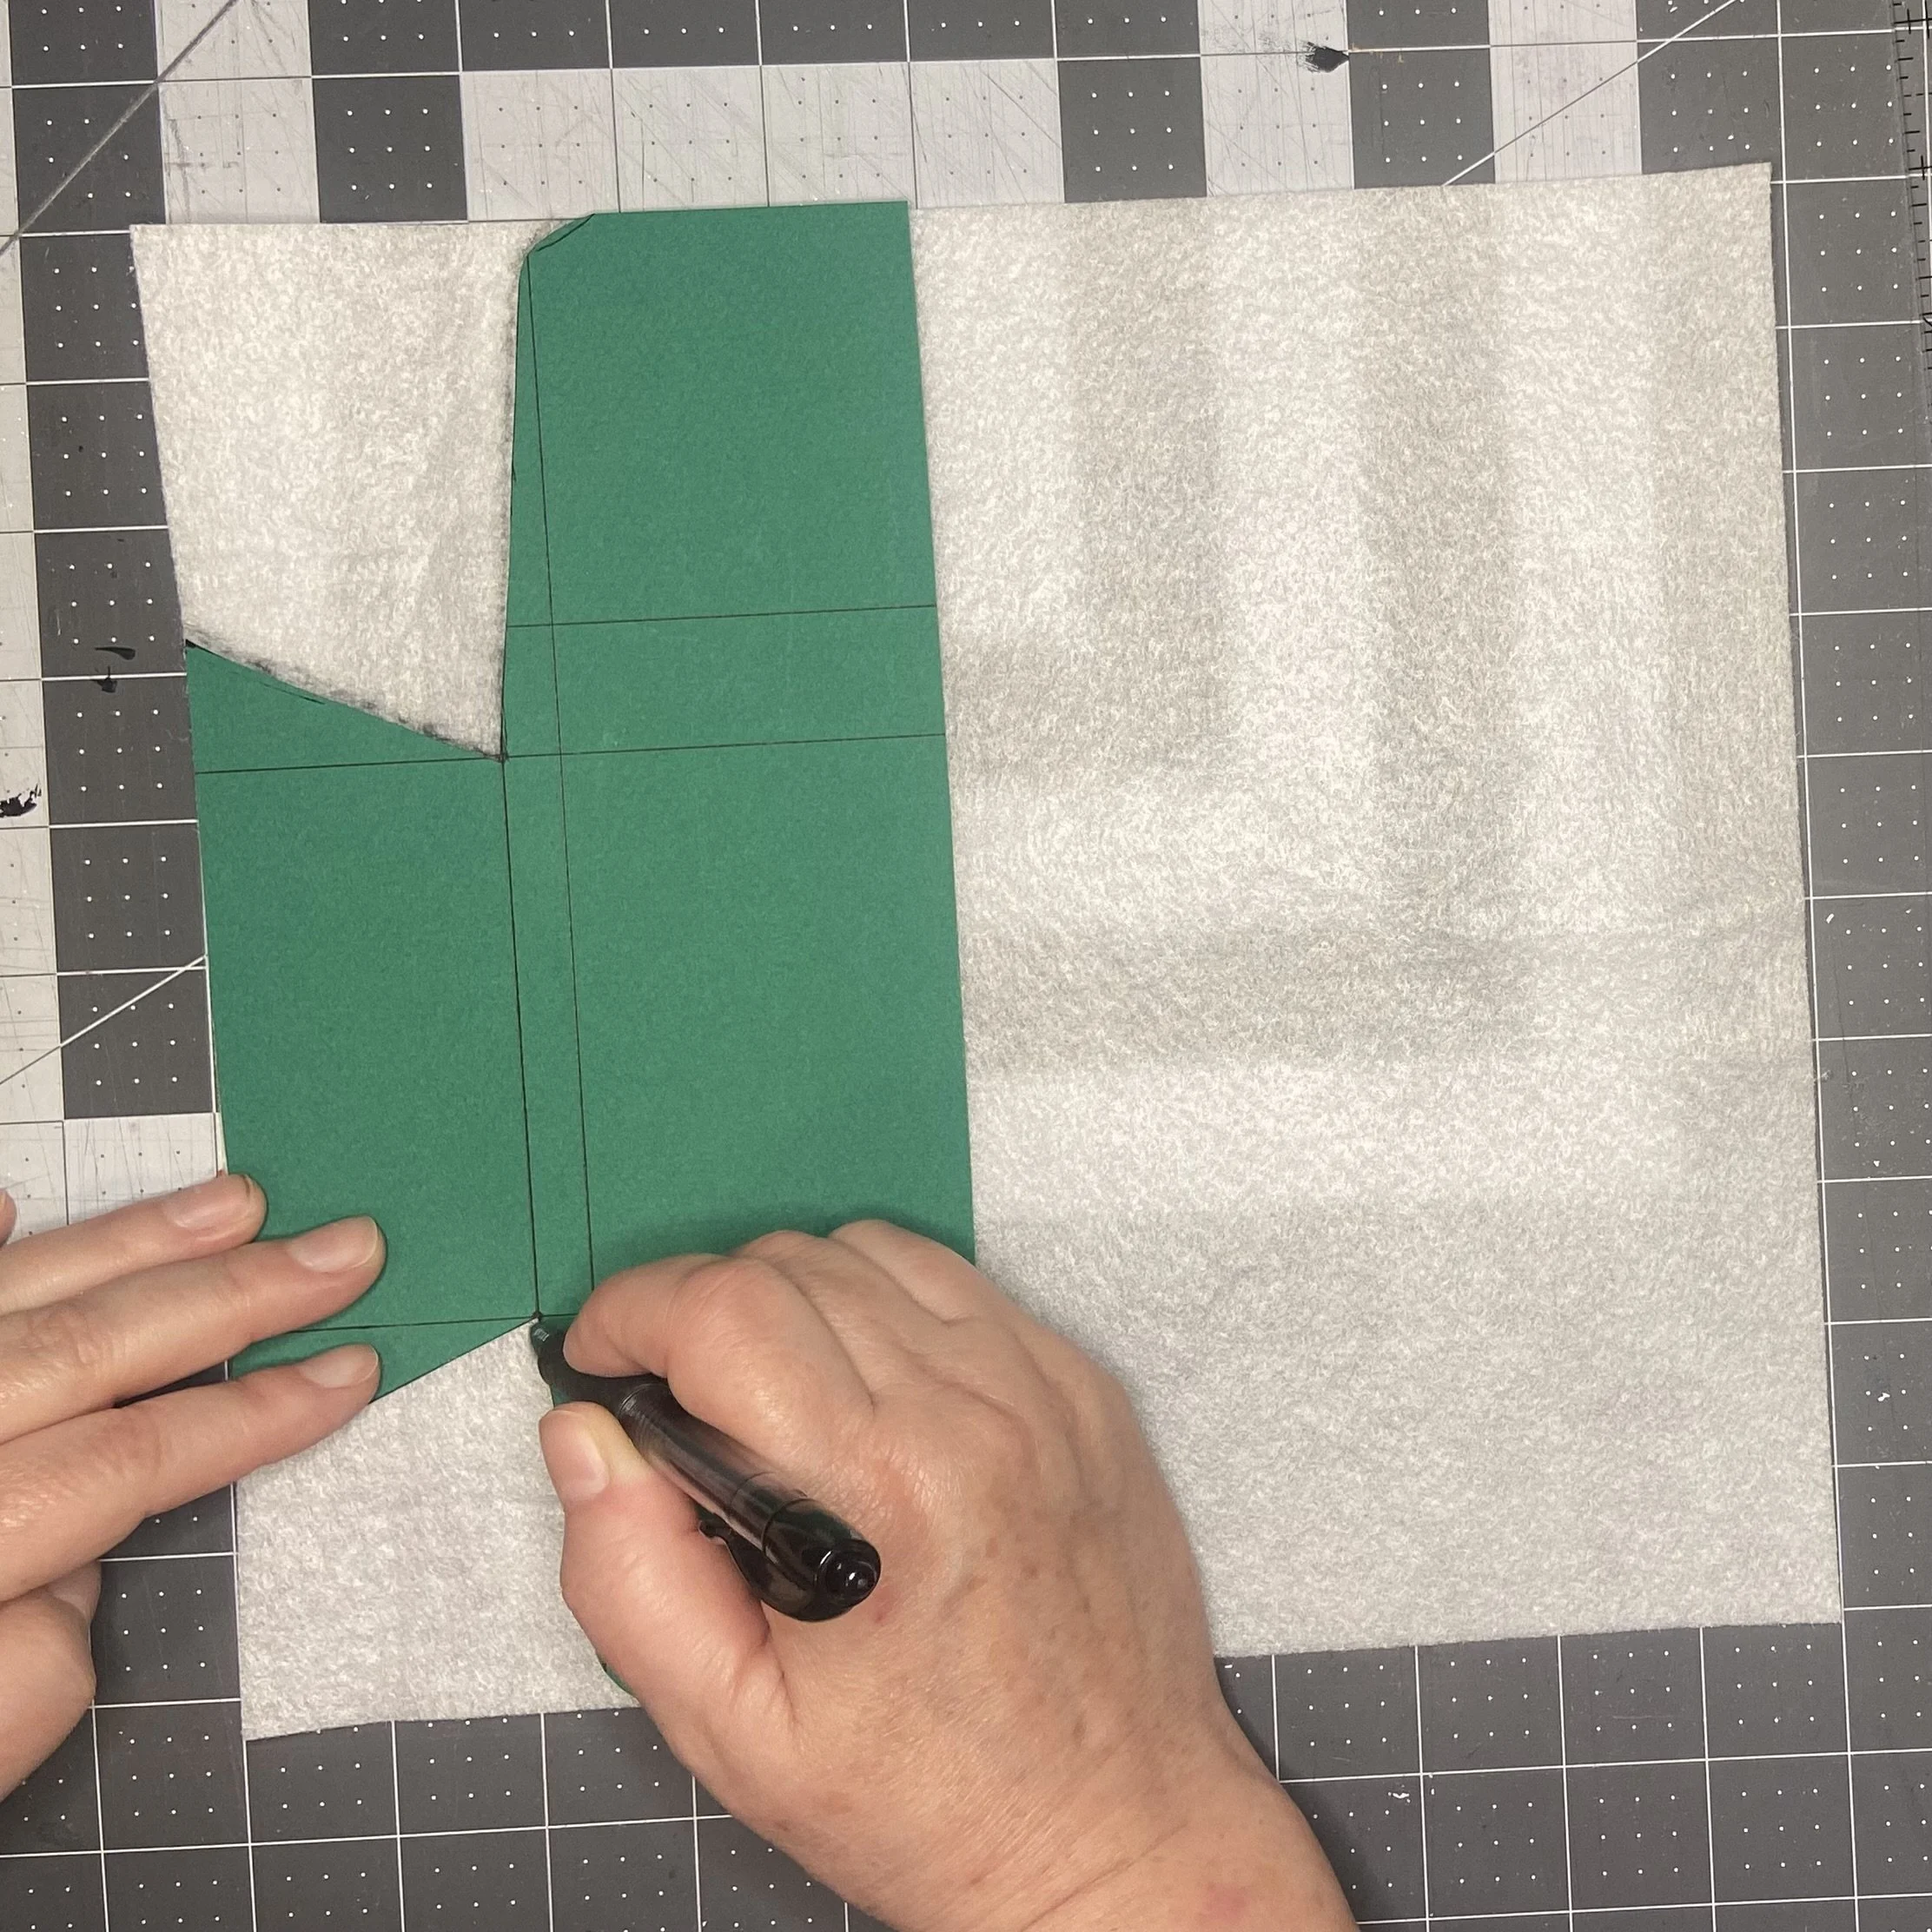
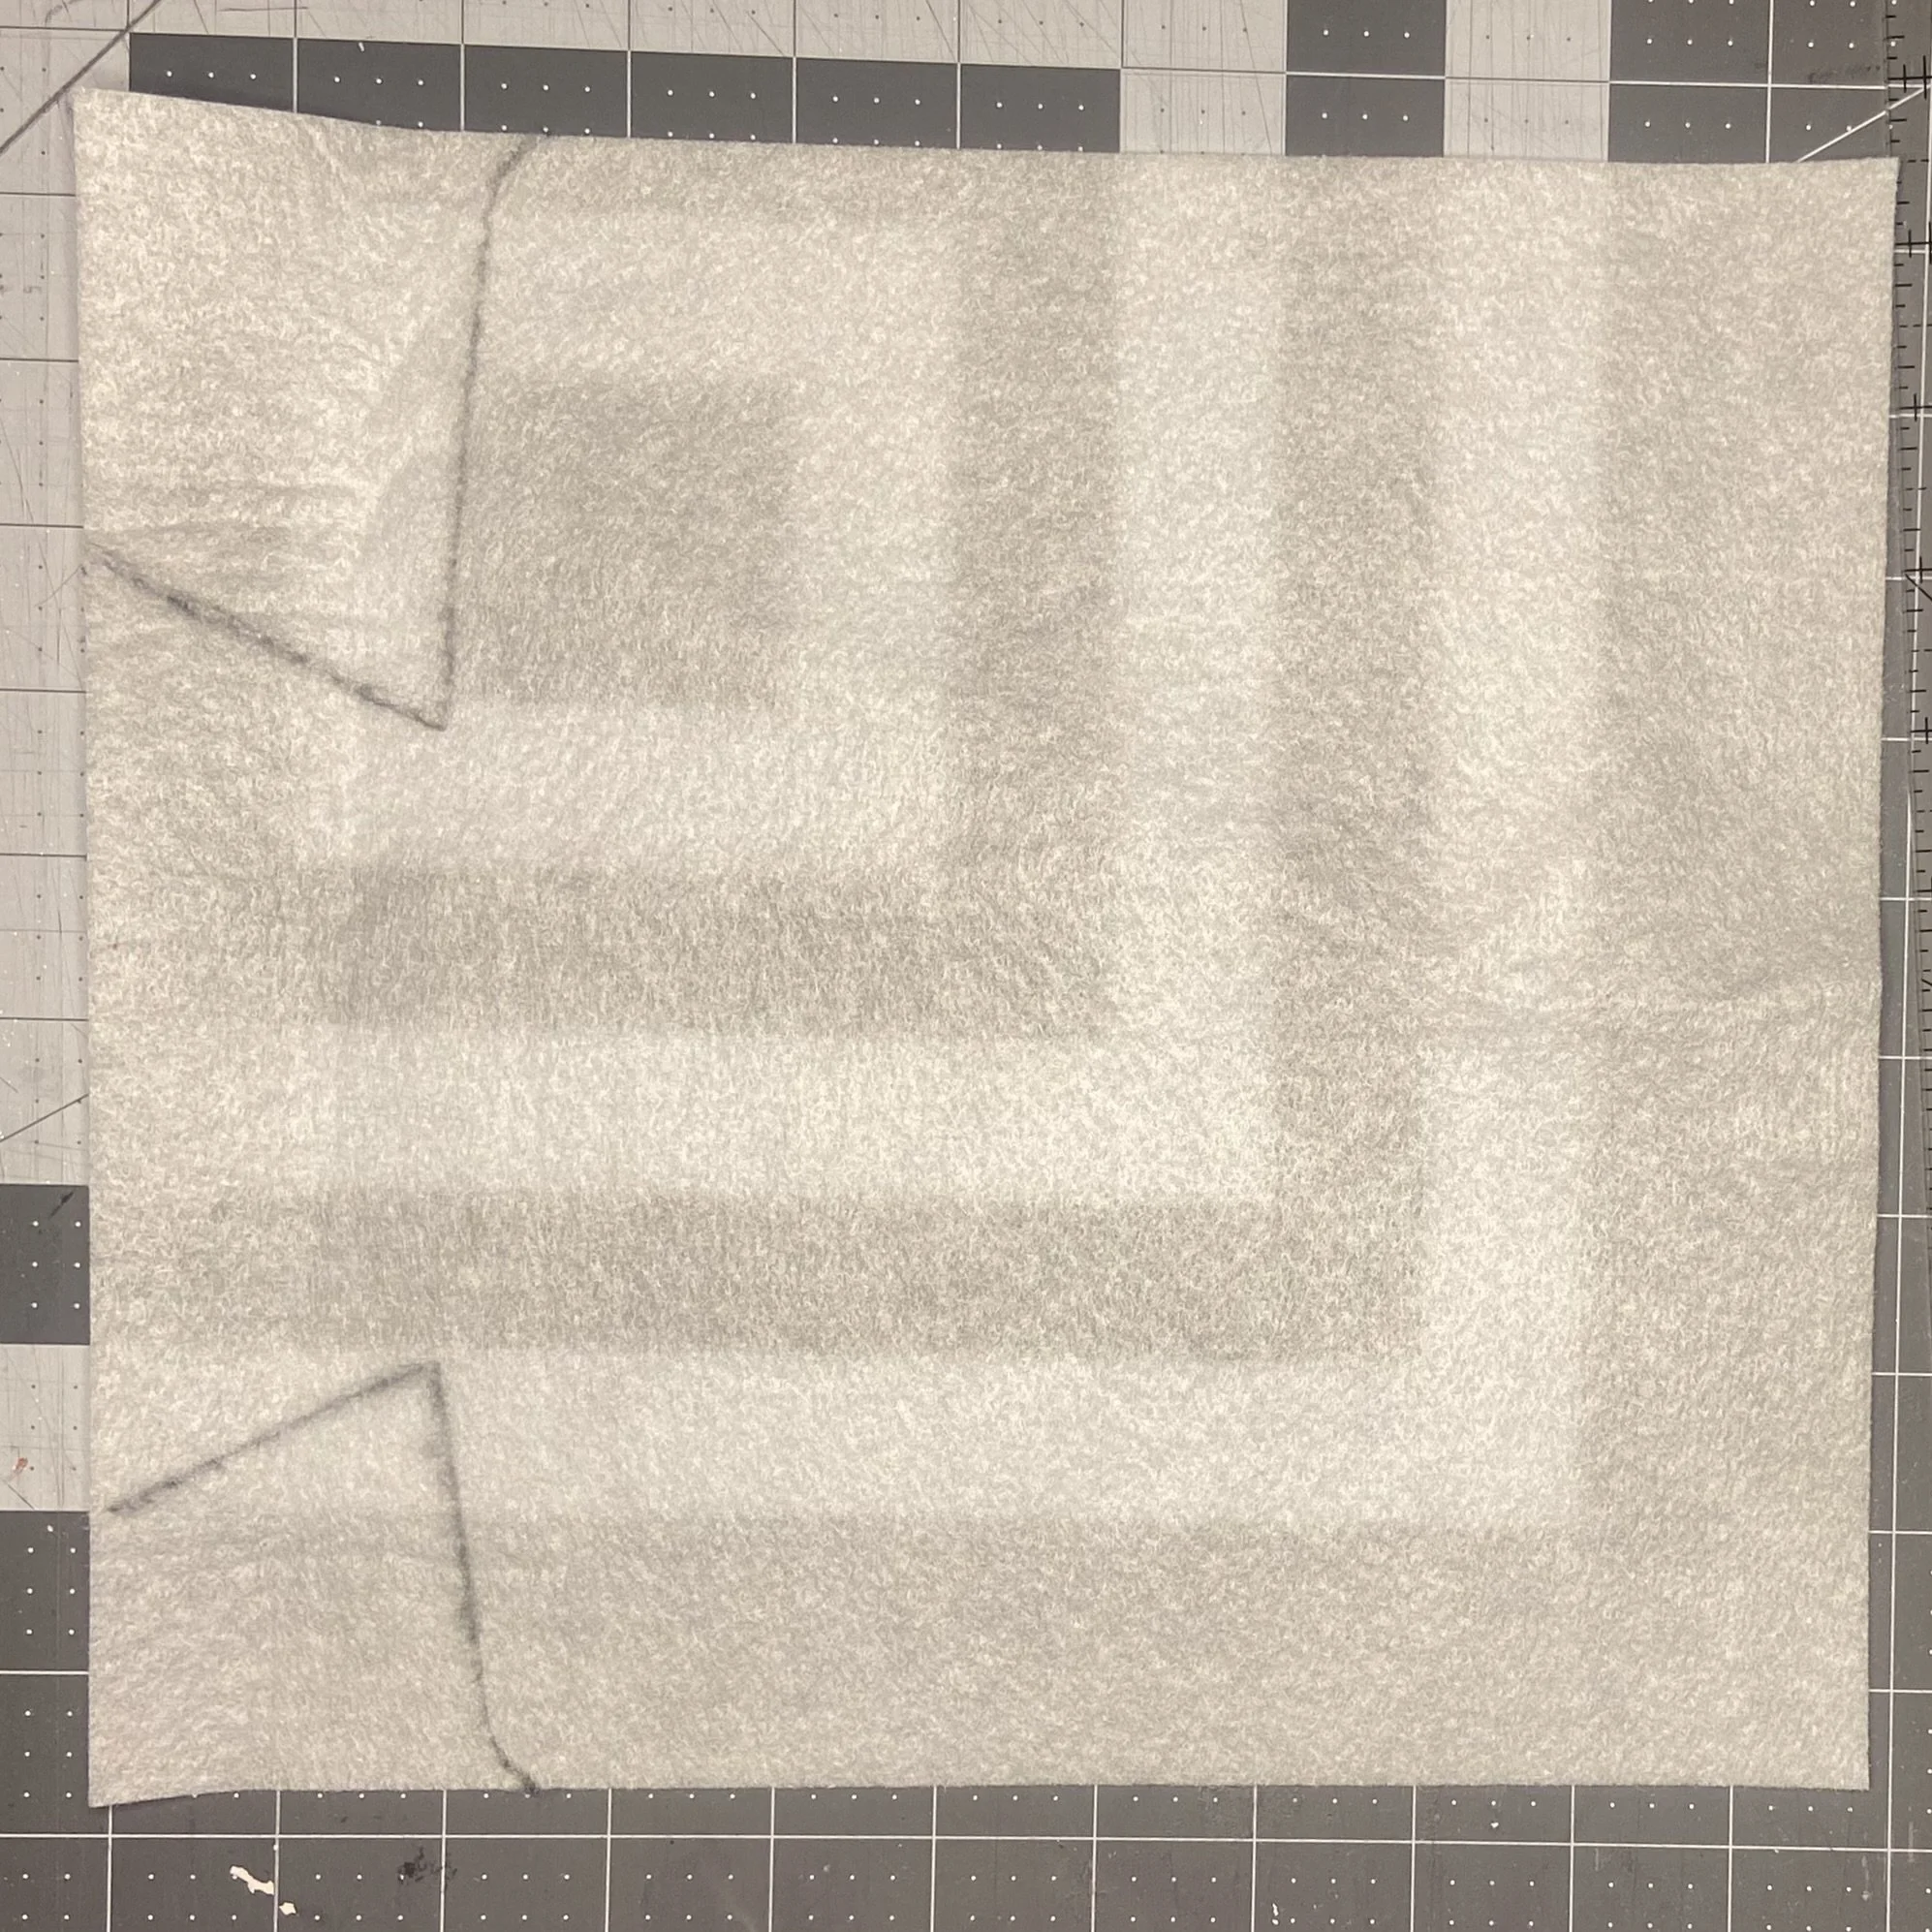
Fold your fusible fleece in half so that the 10 1/8” edges are together, and pin in place. Now cut along the pattern markings you just drew. When you’re done, both sides will be cut identically.

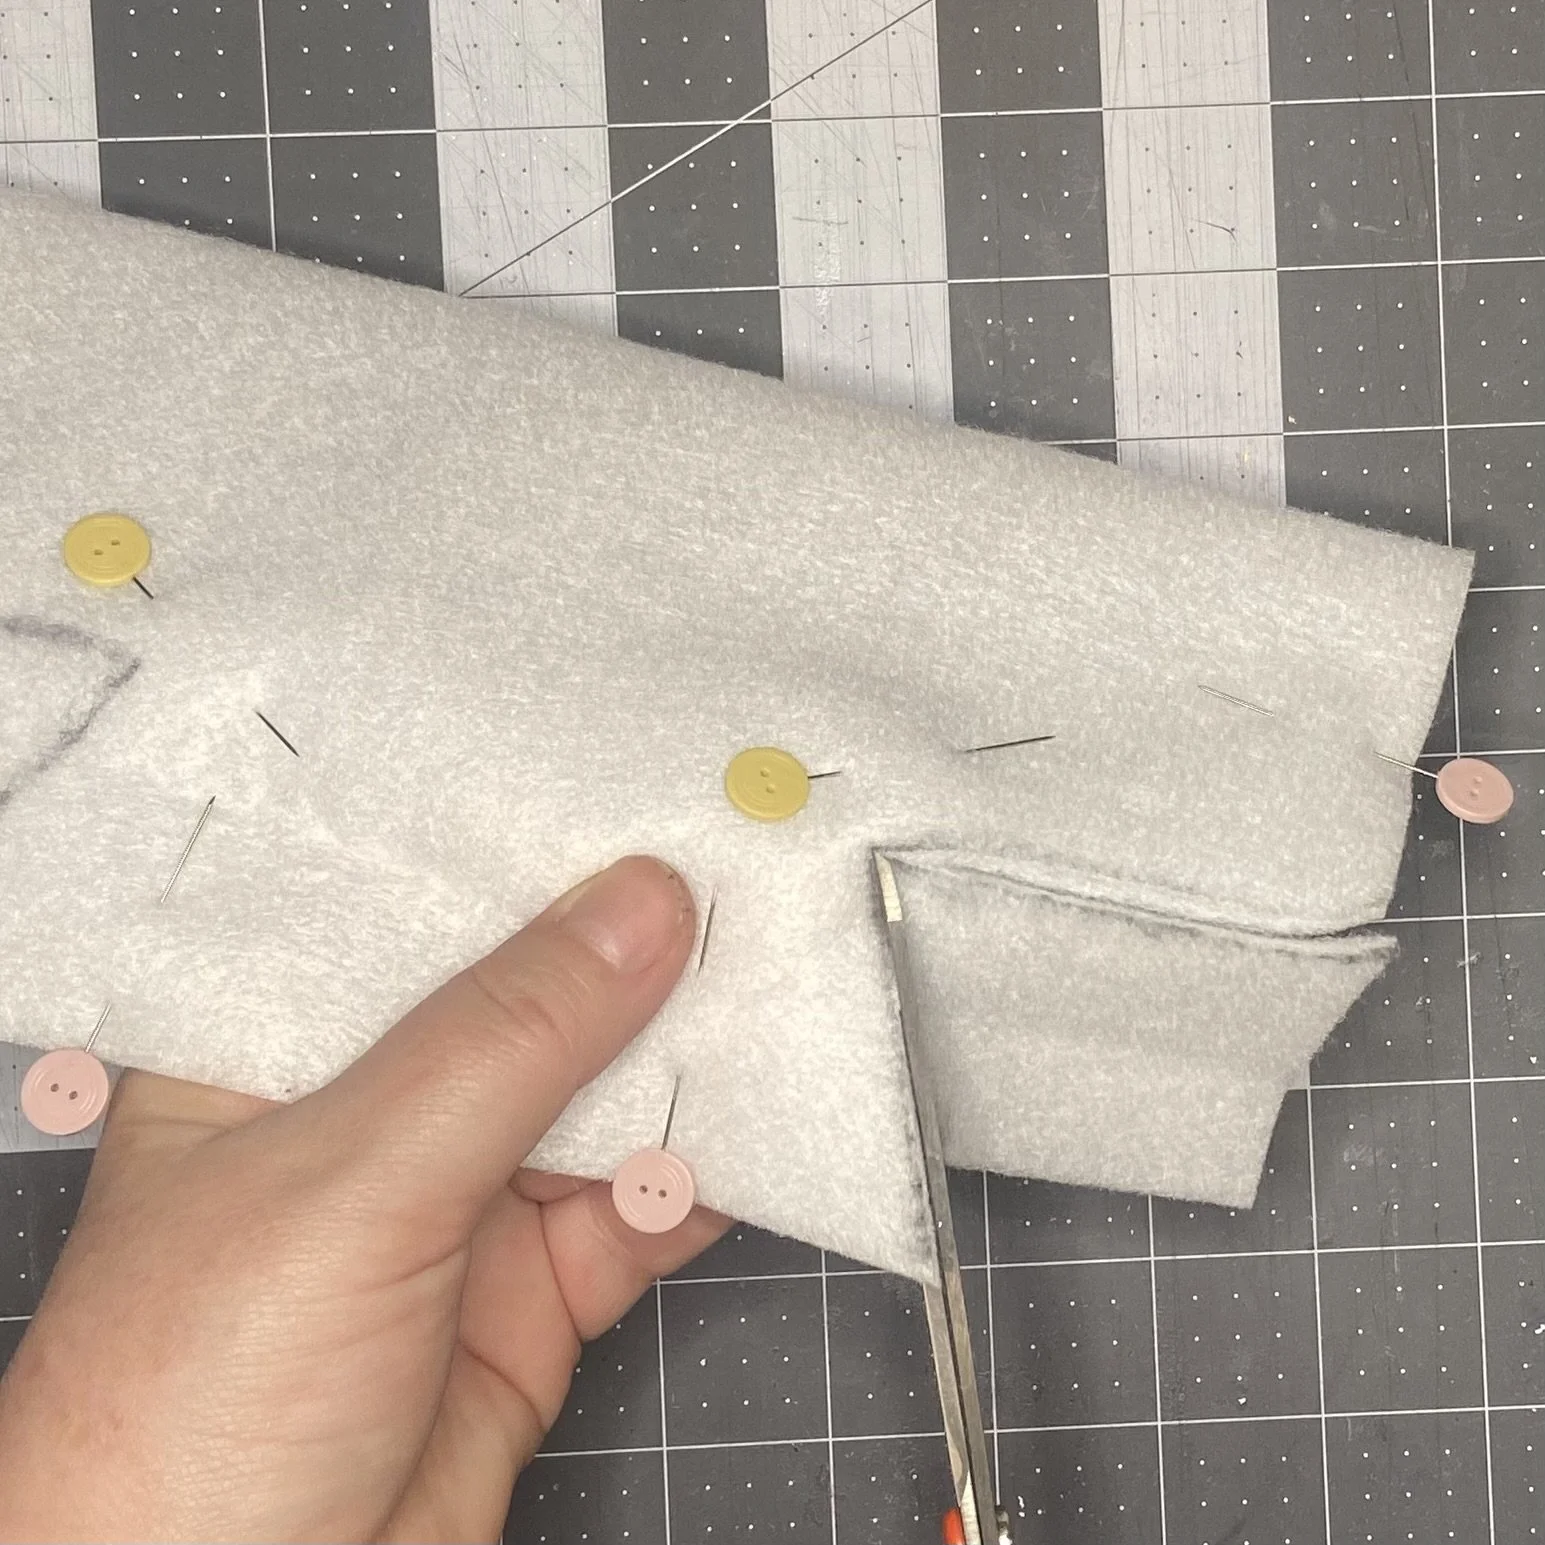
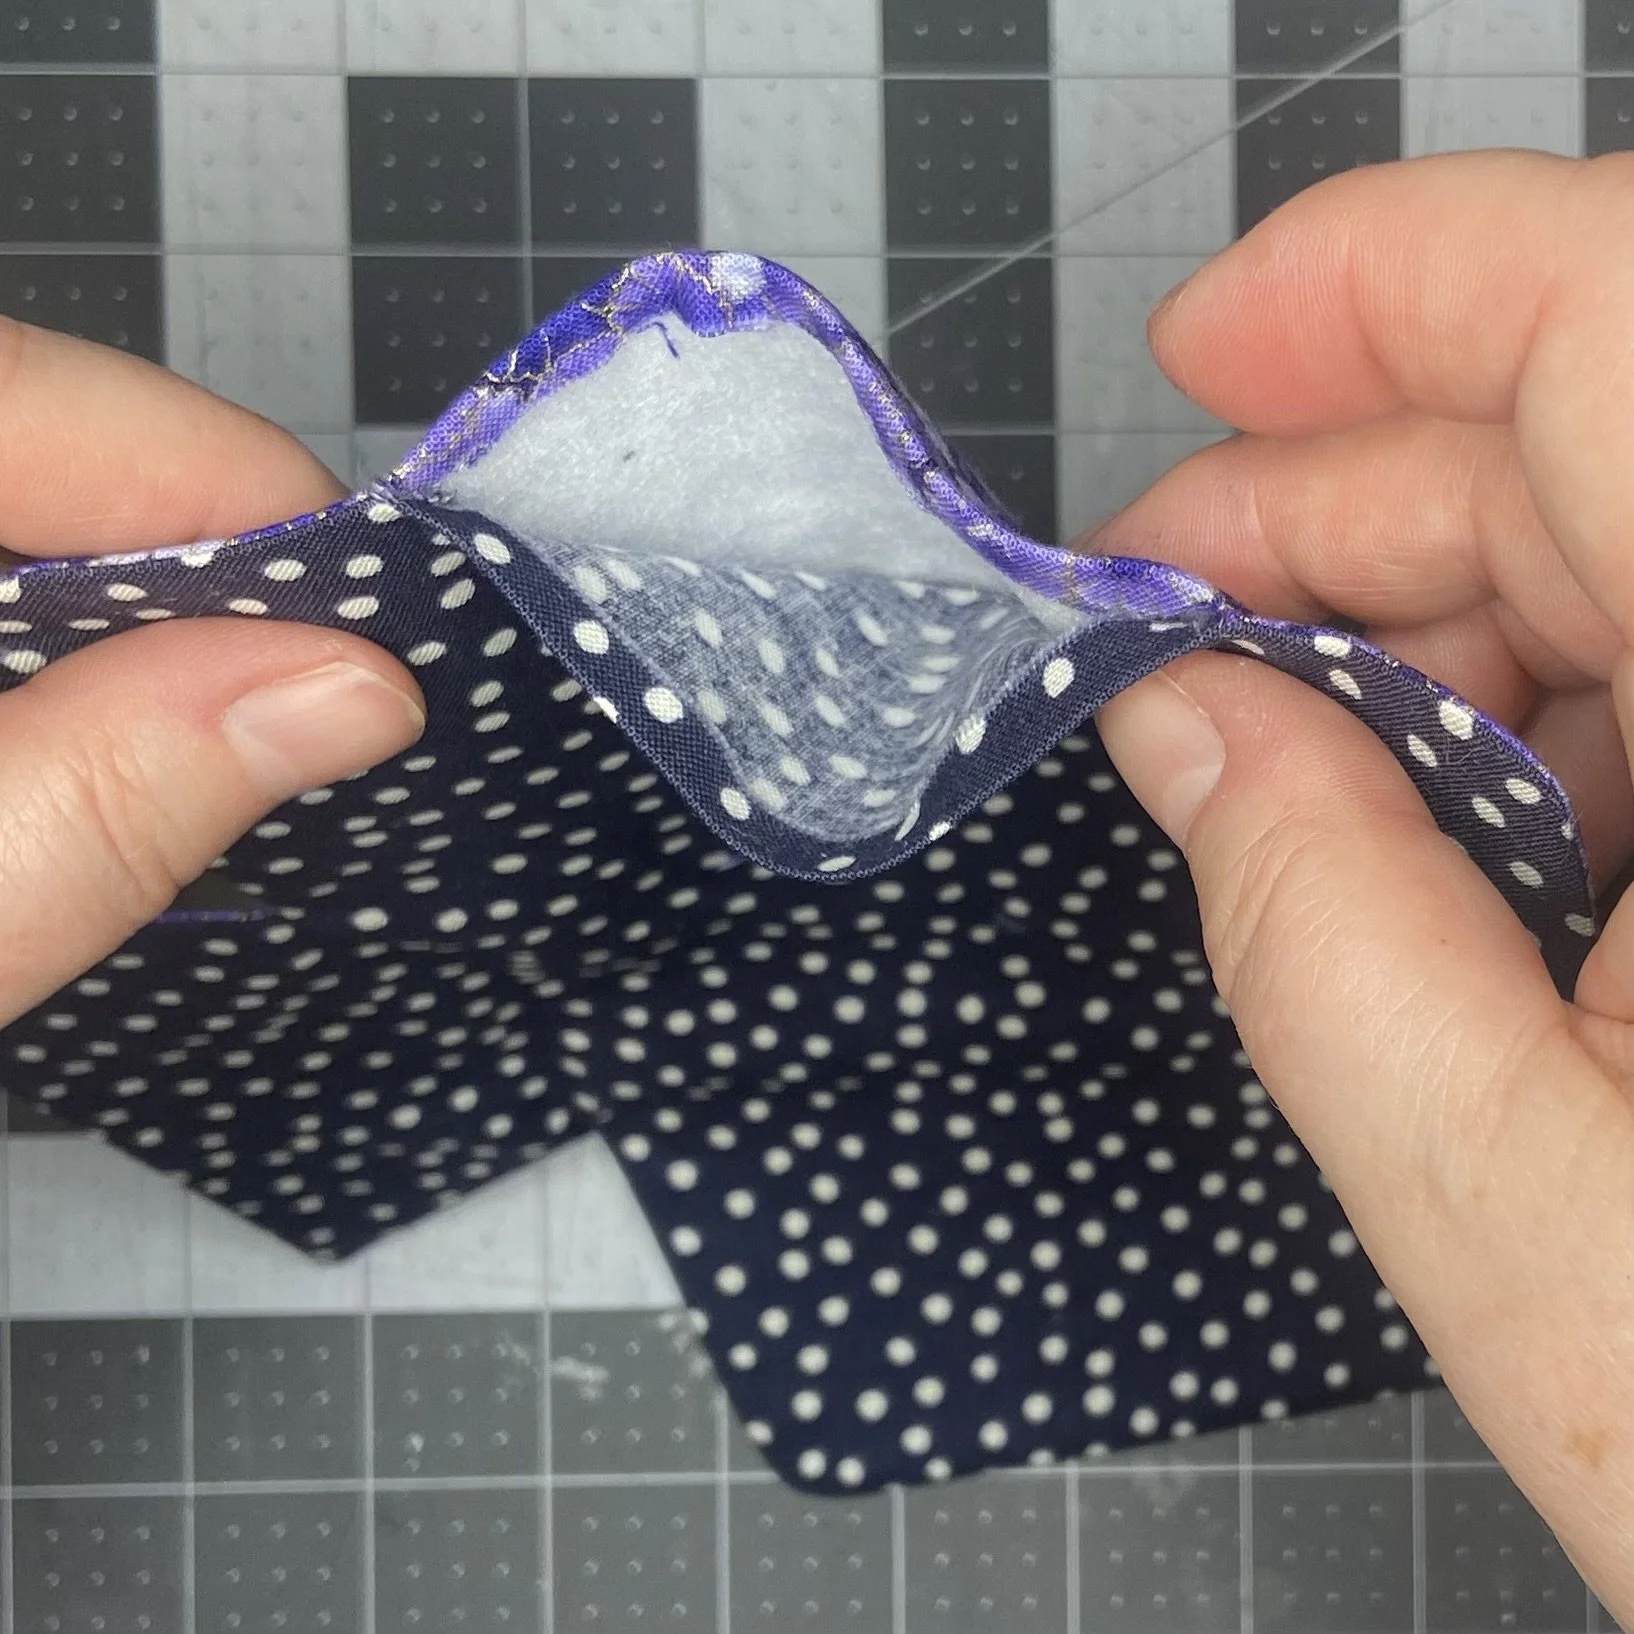
Take one of your fabric pieces and turn it wrong side up. Center the fusible fleece in the middle and use your iron to fuse it. Make sure that the “glue” side of the fusible fleece is facing your fabric and not (as a not-random example) your pressing cloth. (I don’t want to talk about it.) Then place your fused piece of fabric on your unfused piece of fabric, right sides together, pin, and sew around the outside of the fusible fleece, leaving a generous space unsewn so that you can turn it right side out later. Do your best to sew right up against the edge of the fusible fleece, but not on the fusible fleece; you want to keep that bulk out of your seam.
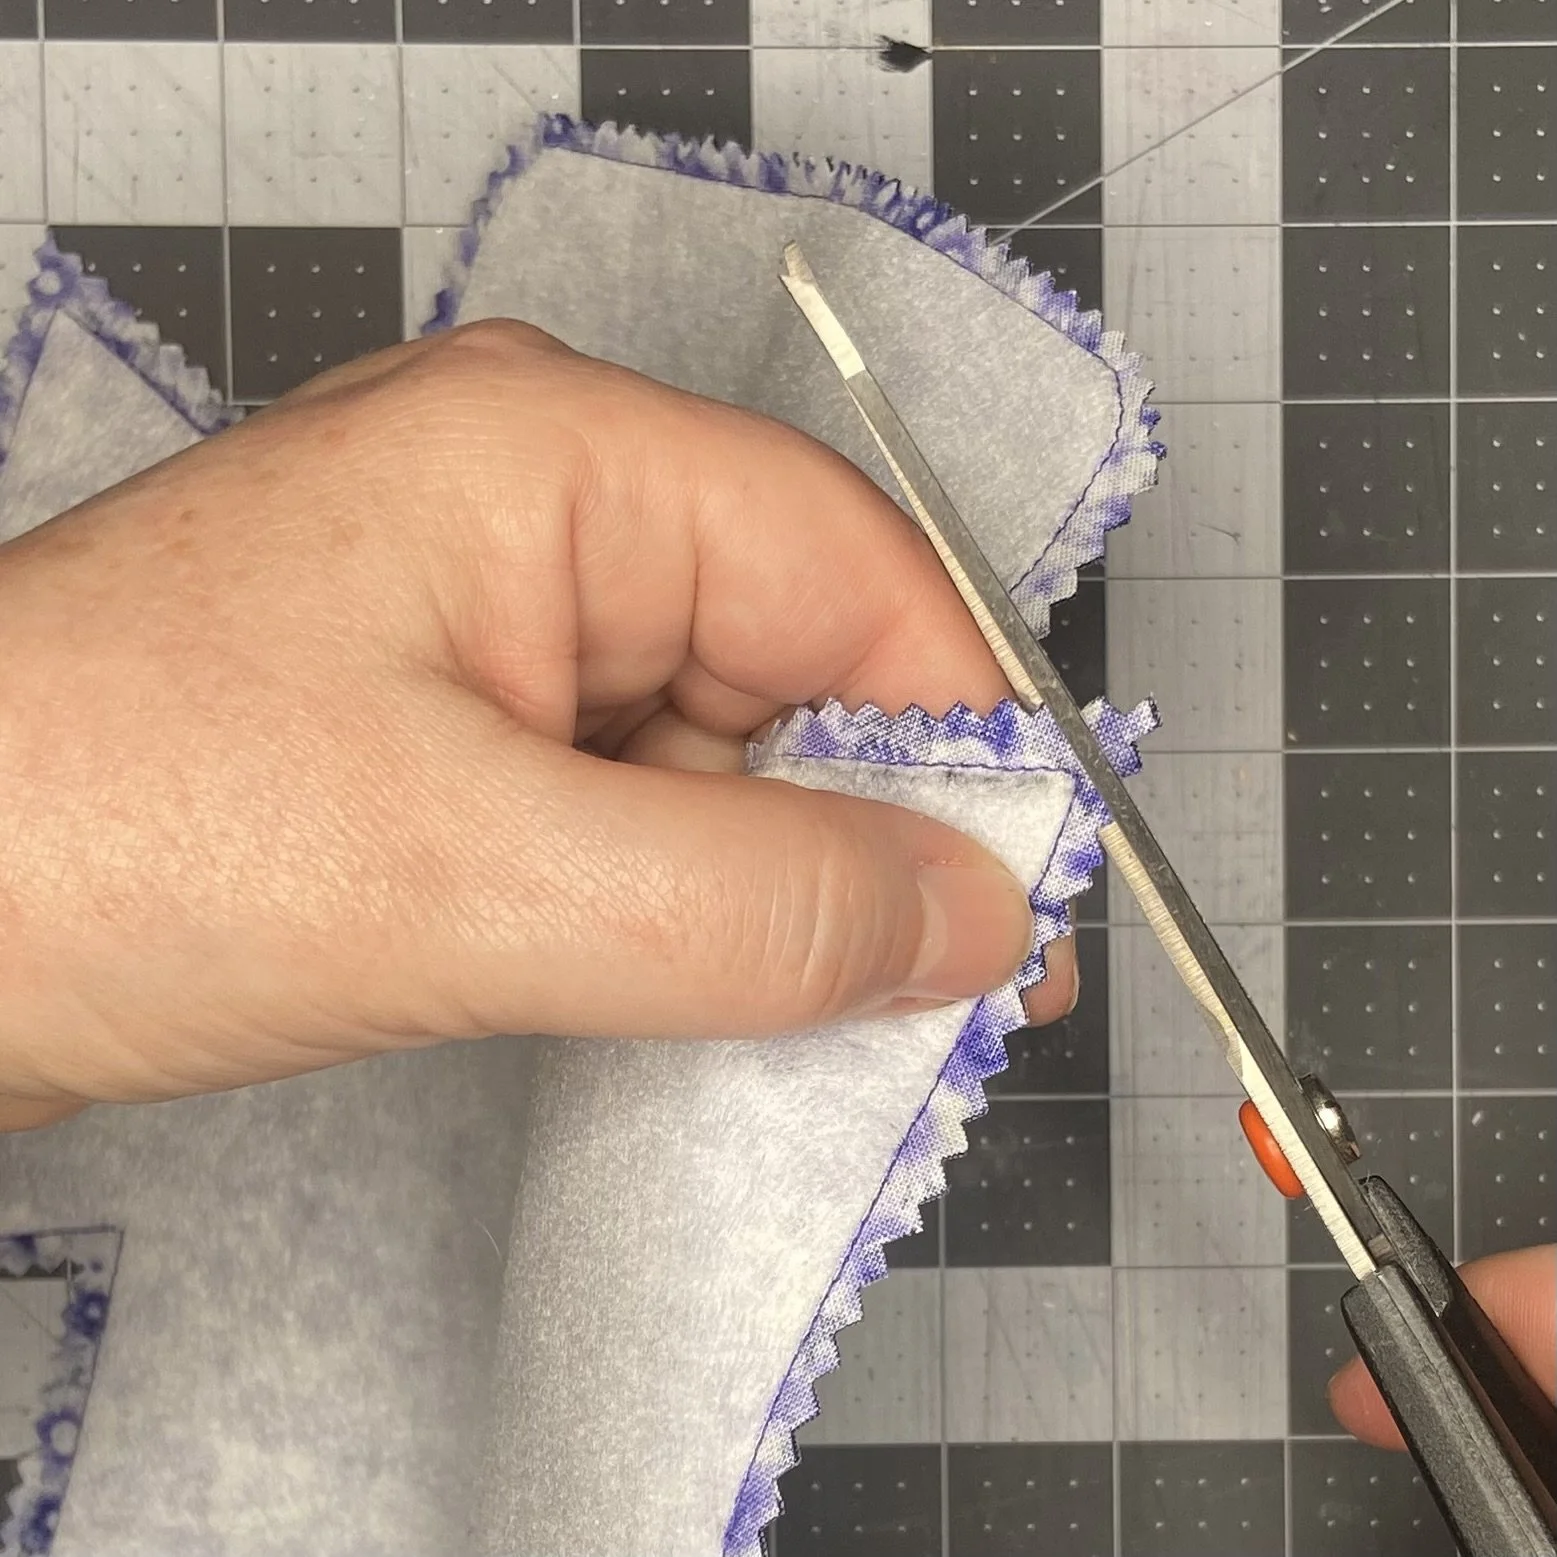
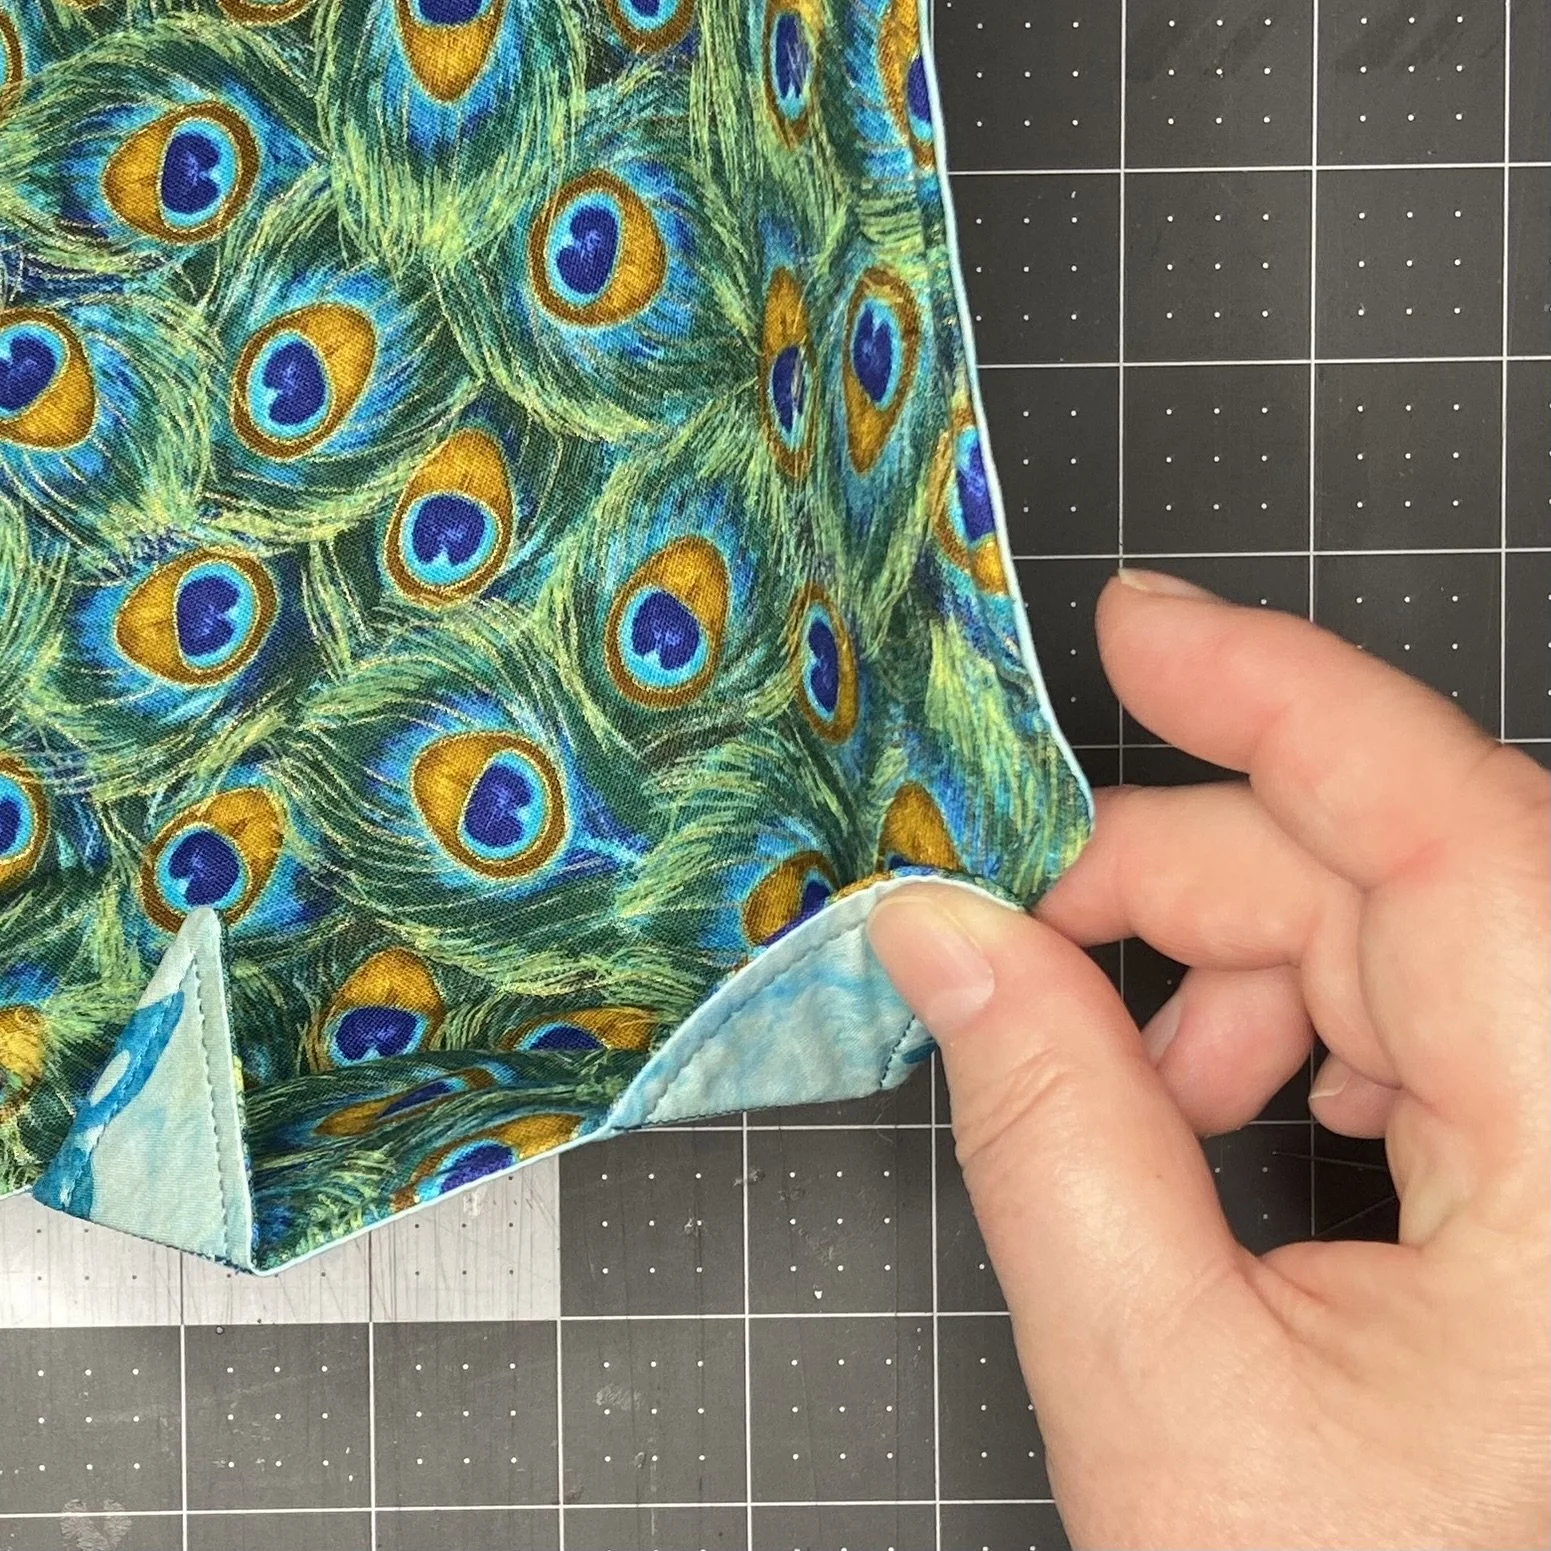
Before you turn the piece right side out, you’ll want to trim the seams a bit. First, do not trim the seam along the space you left open for turning. For the rest of the work, pinking shears do a very nice job of reducing bulk and also cutting notches around the curved corners. Cut off the protruding pointed corners, and then snip into the indented corners, in both cases being very careful not to cut into your stitches.


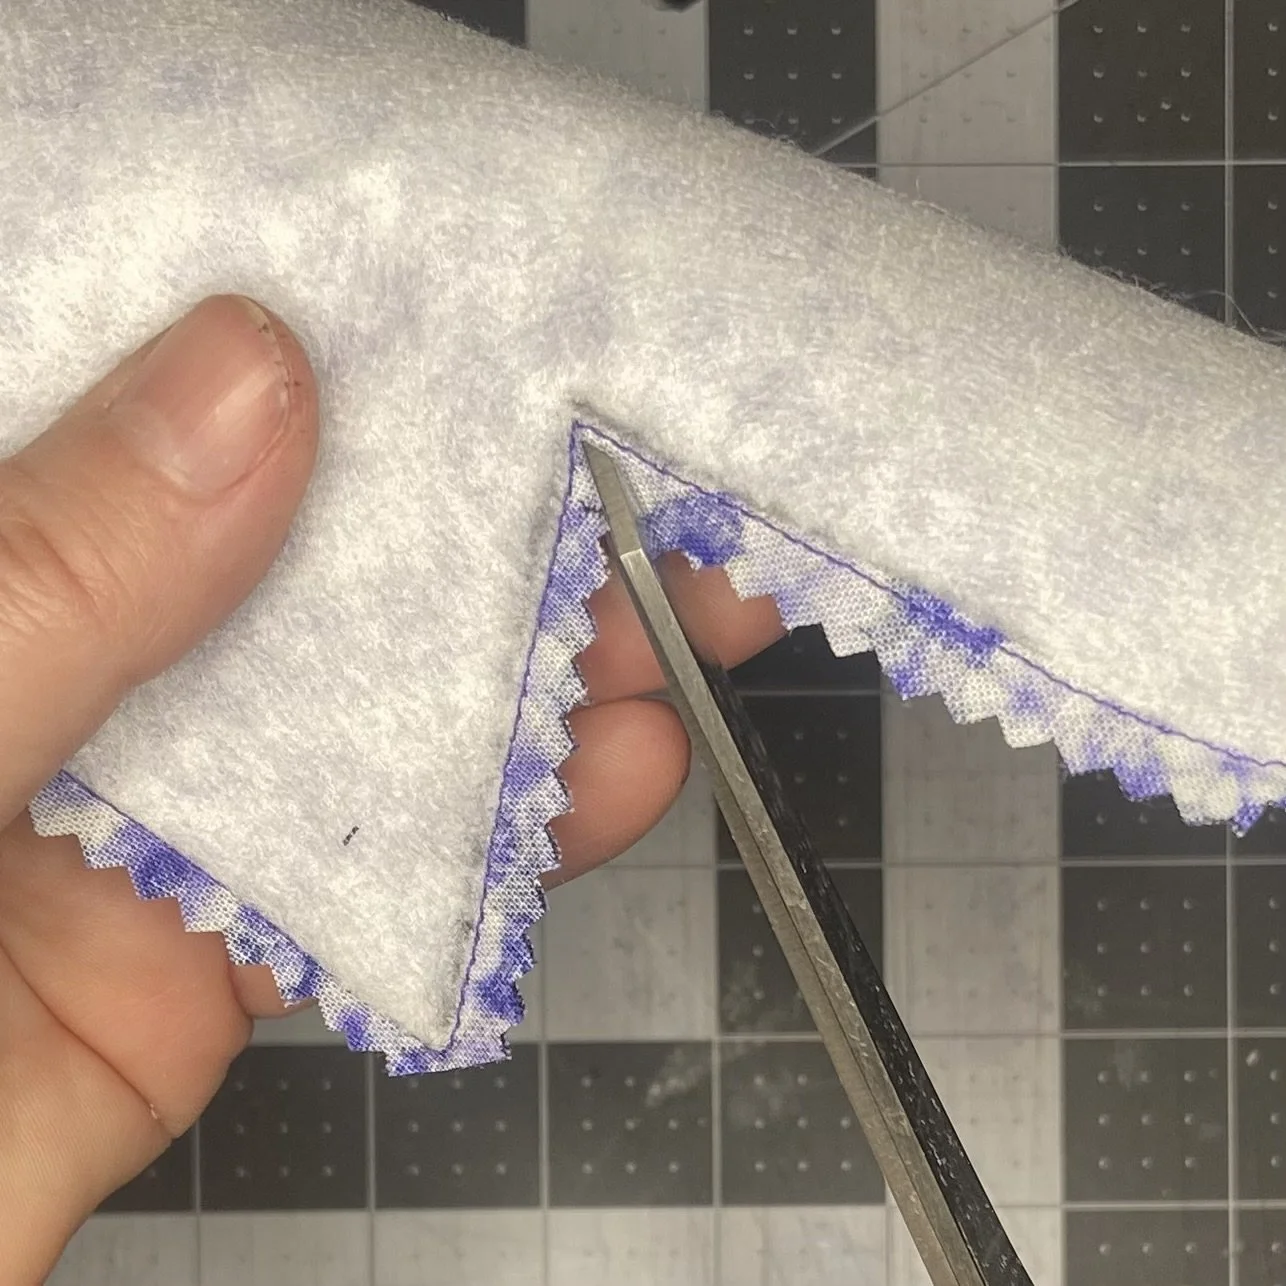
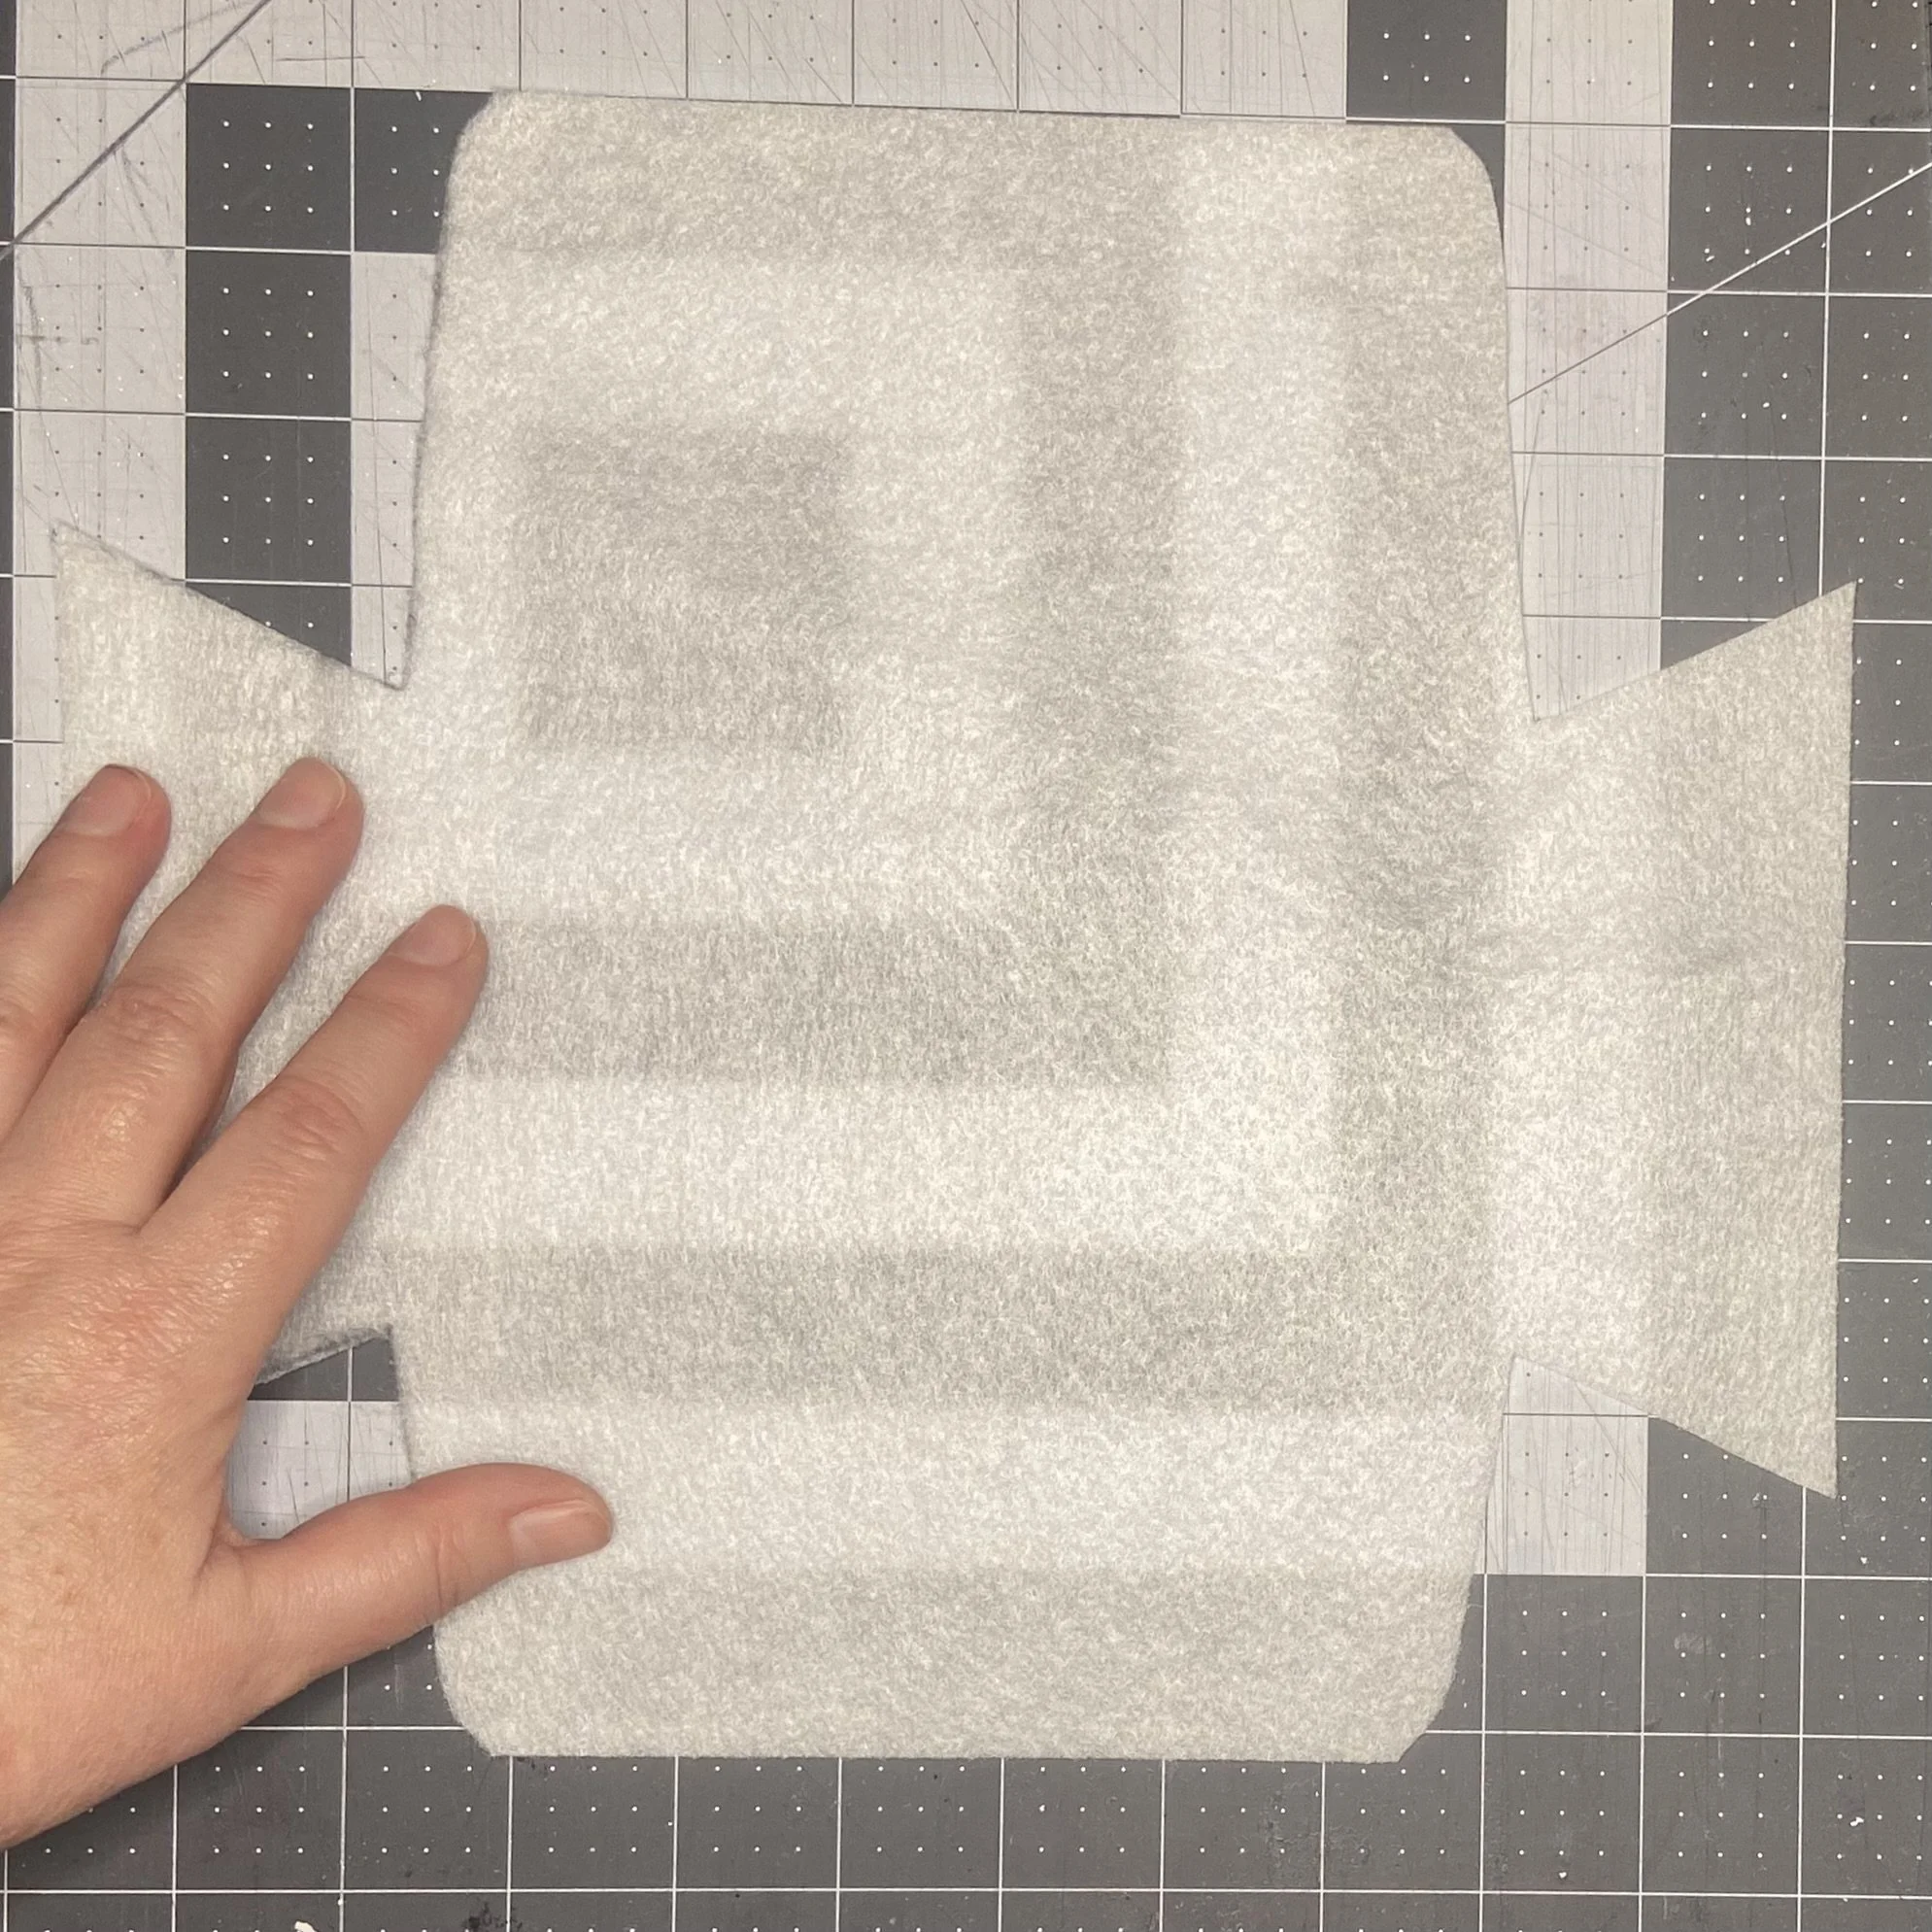
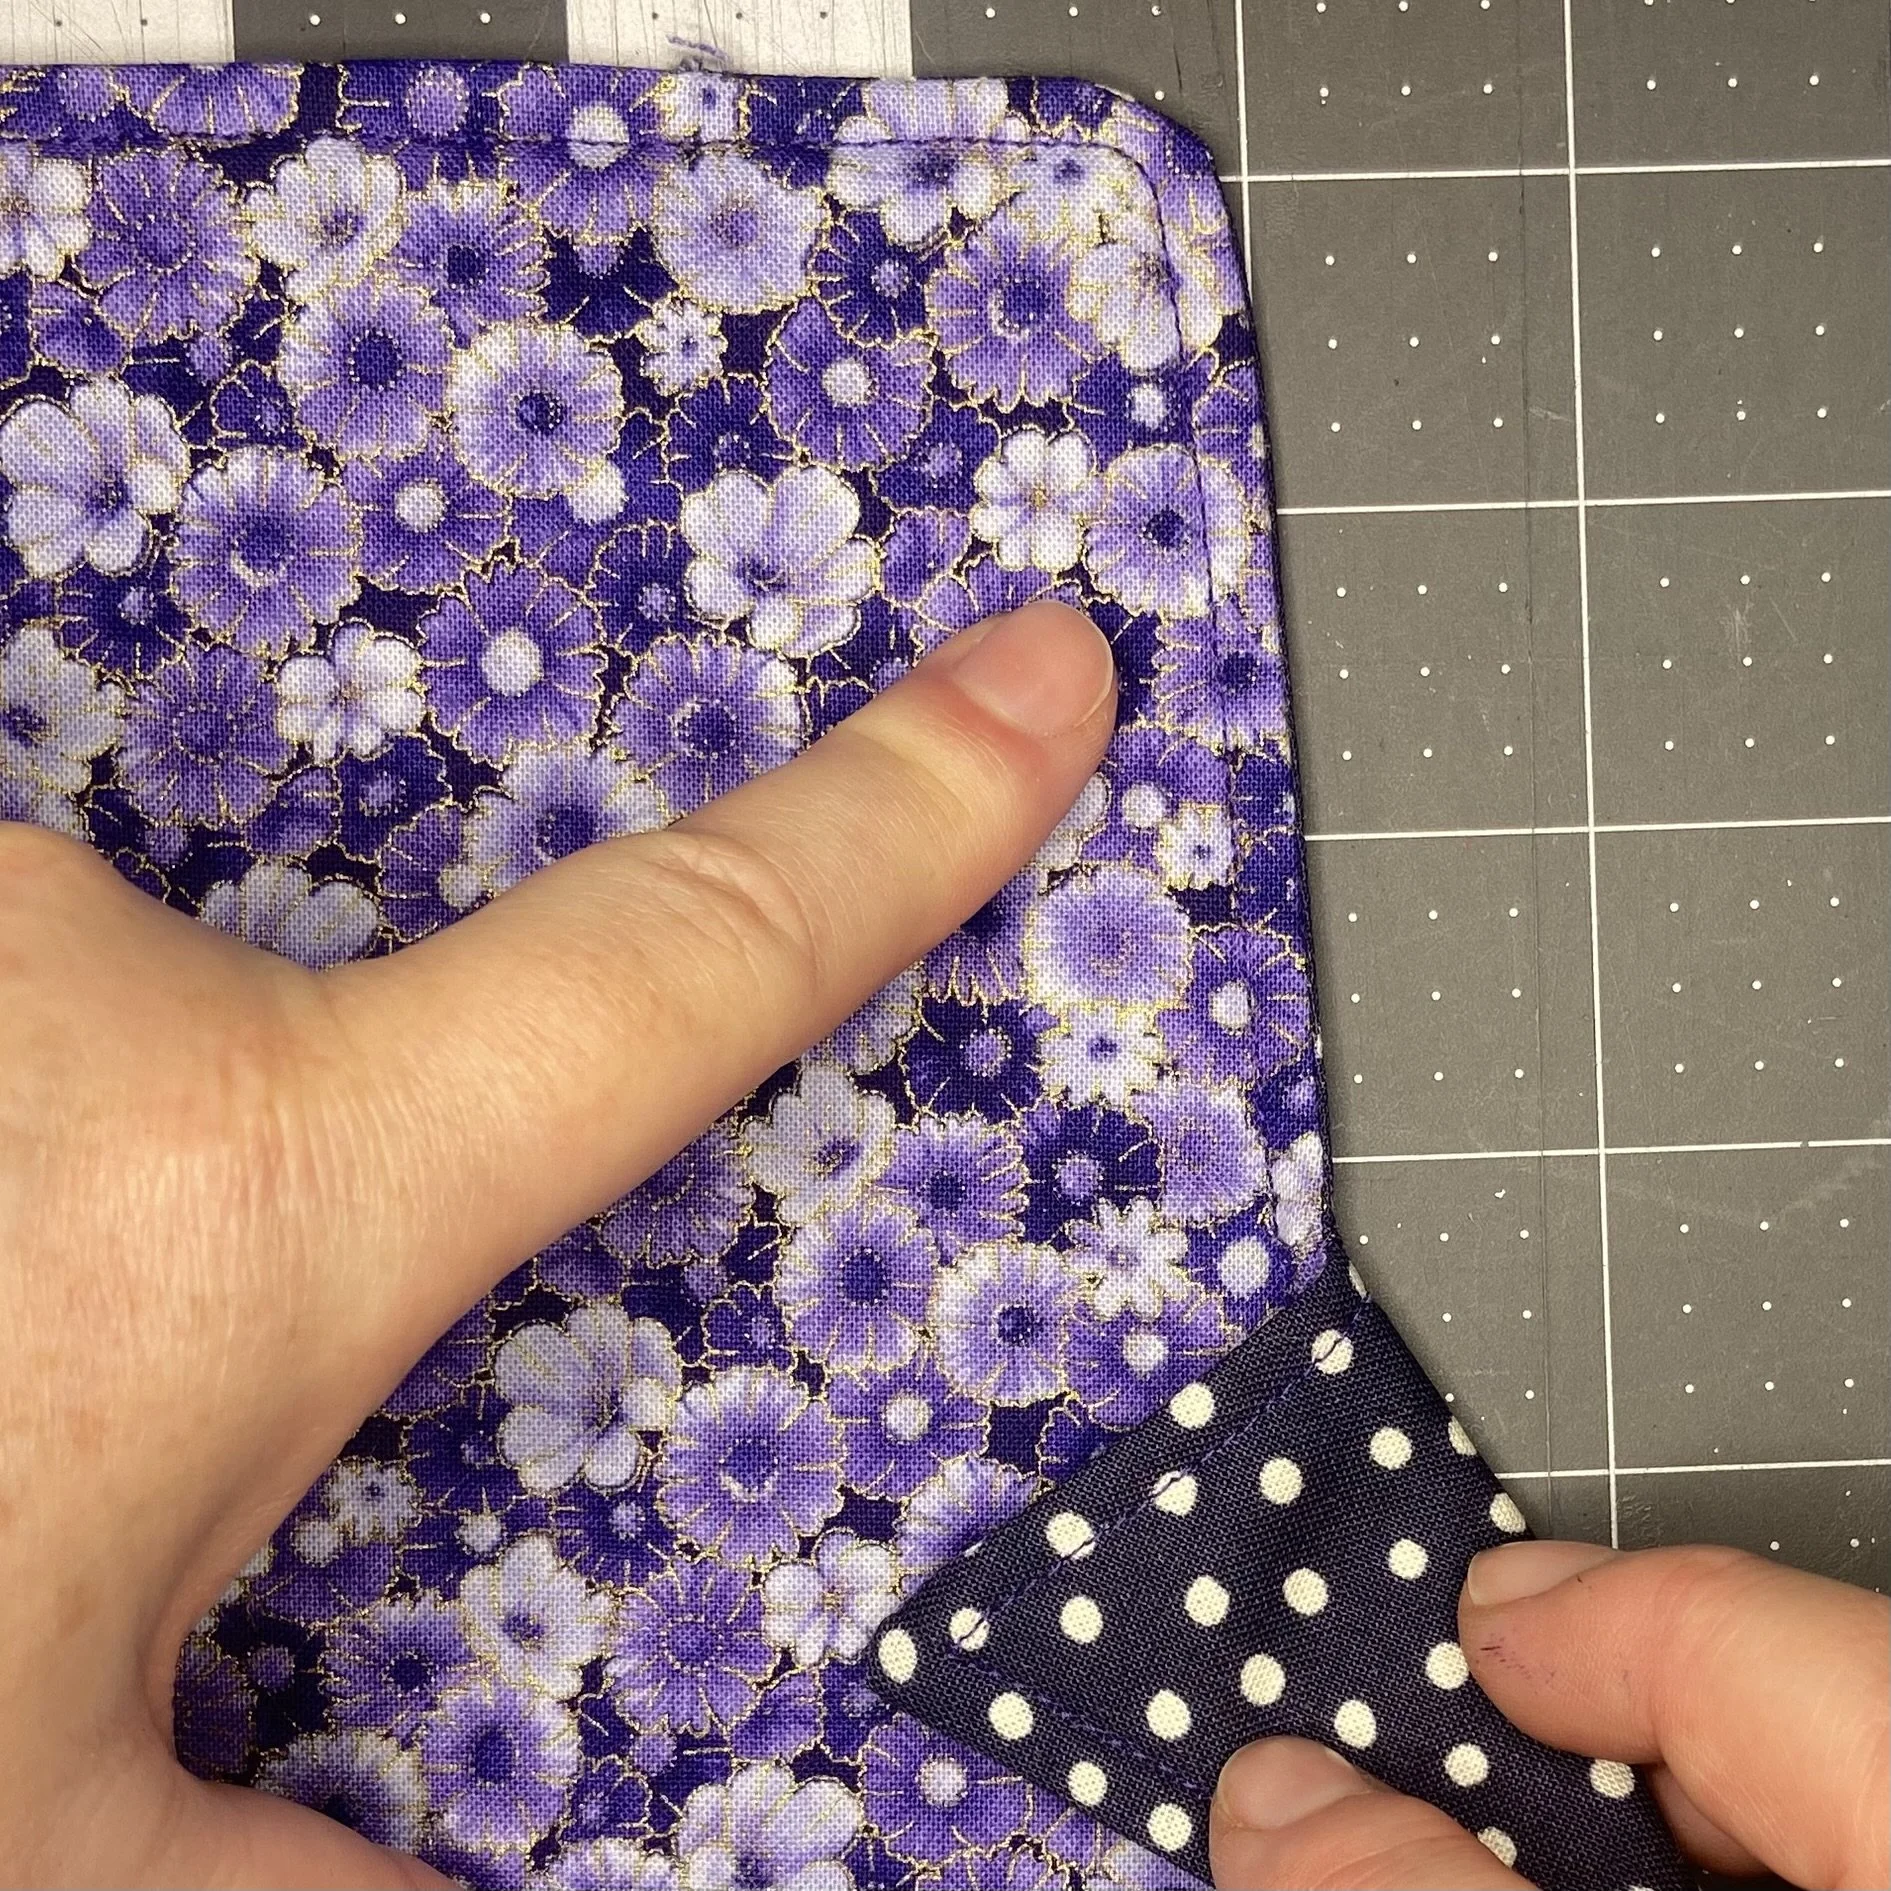
Turn the work right side out, fold your unsewn edges to the interior so that they are even with the seam, and press. Then top stitch all the way around the perimeter.
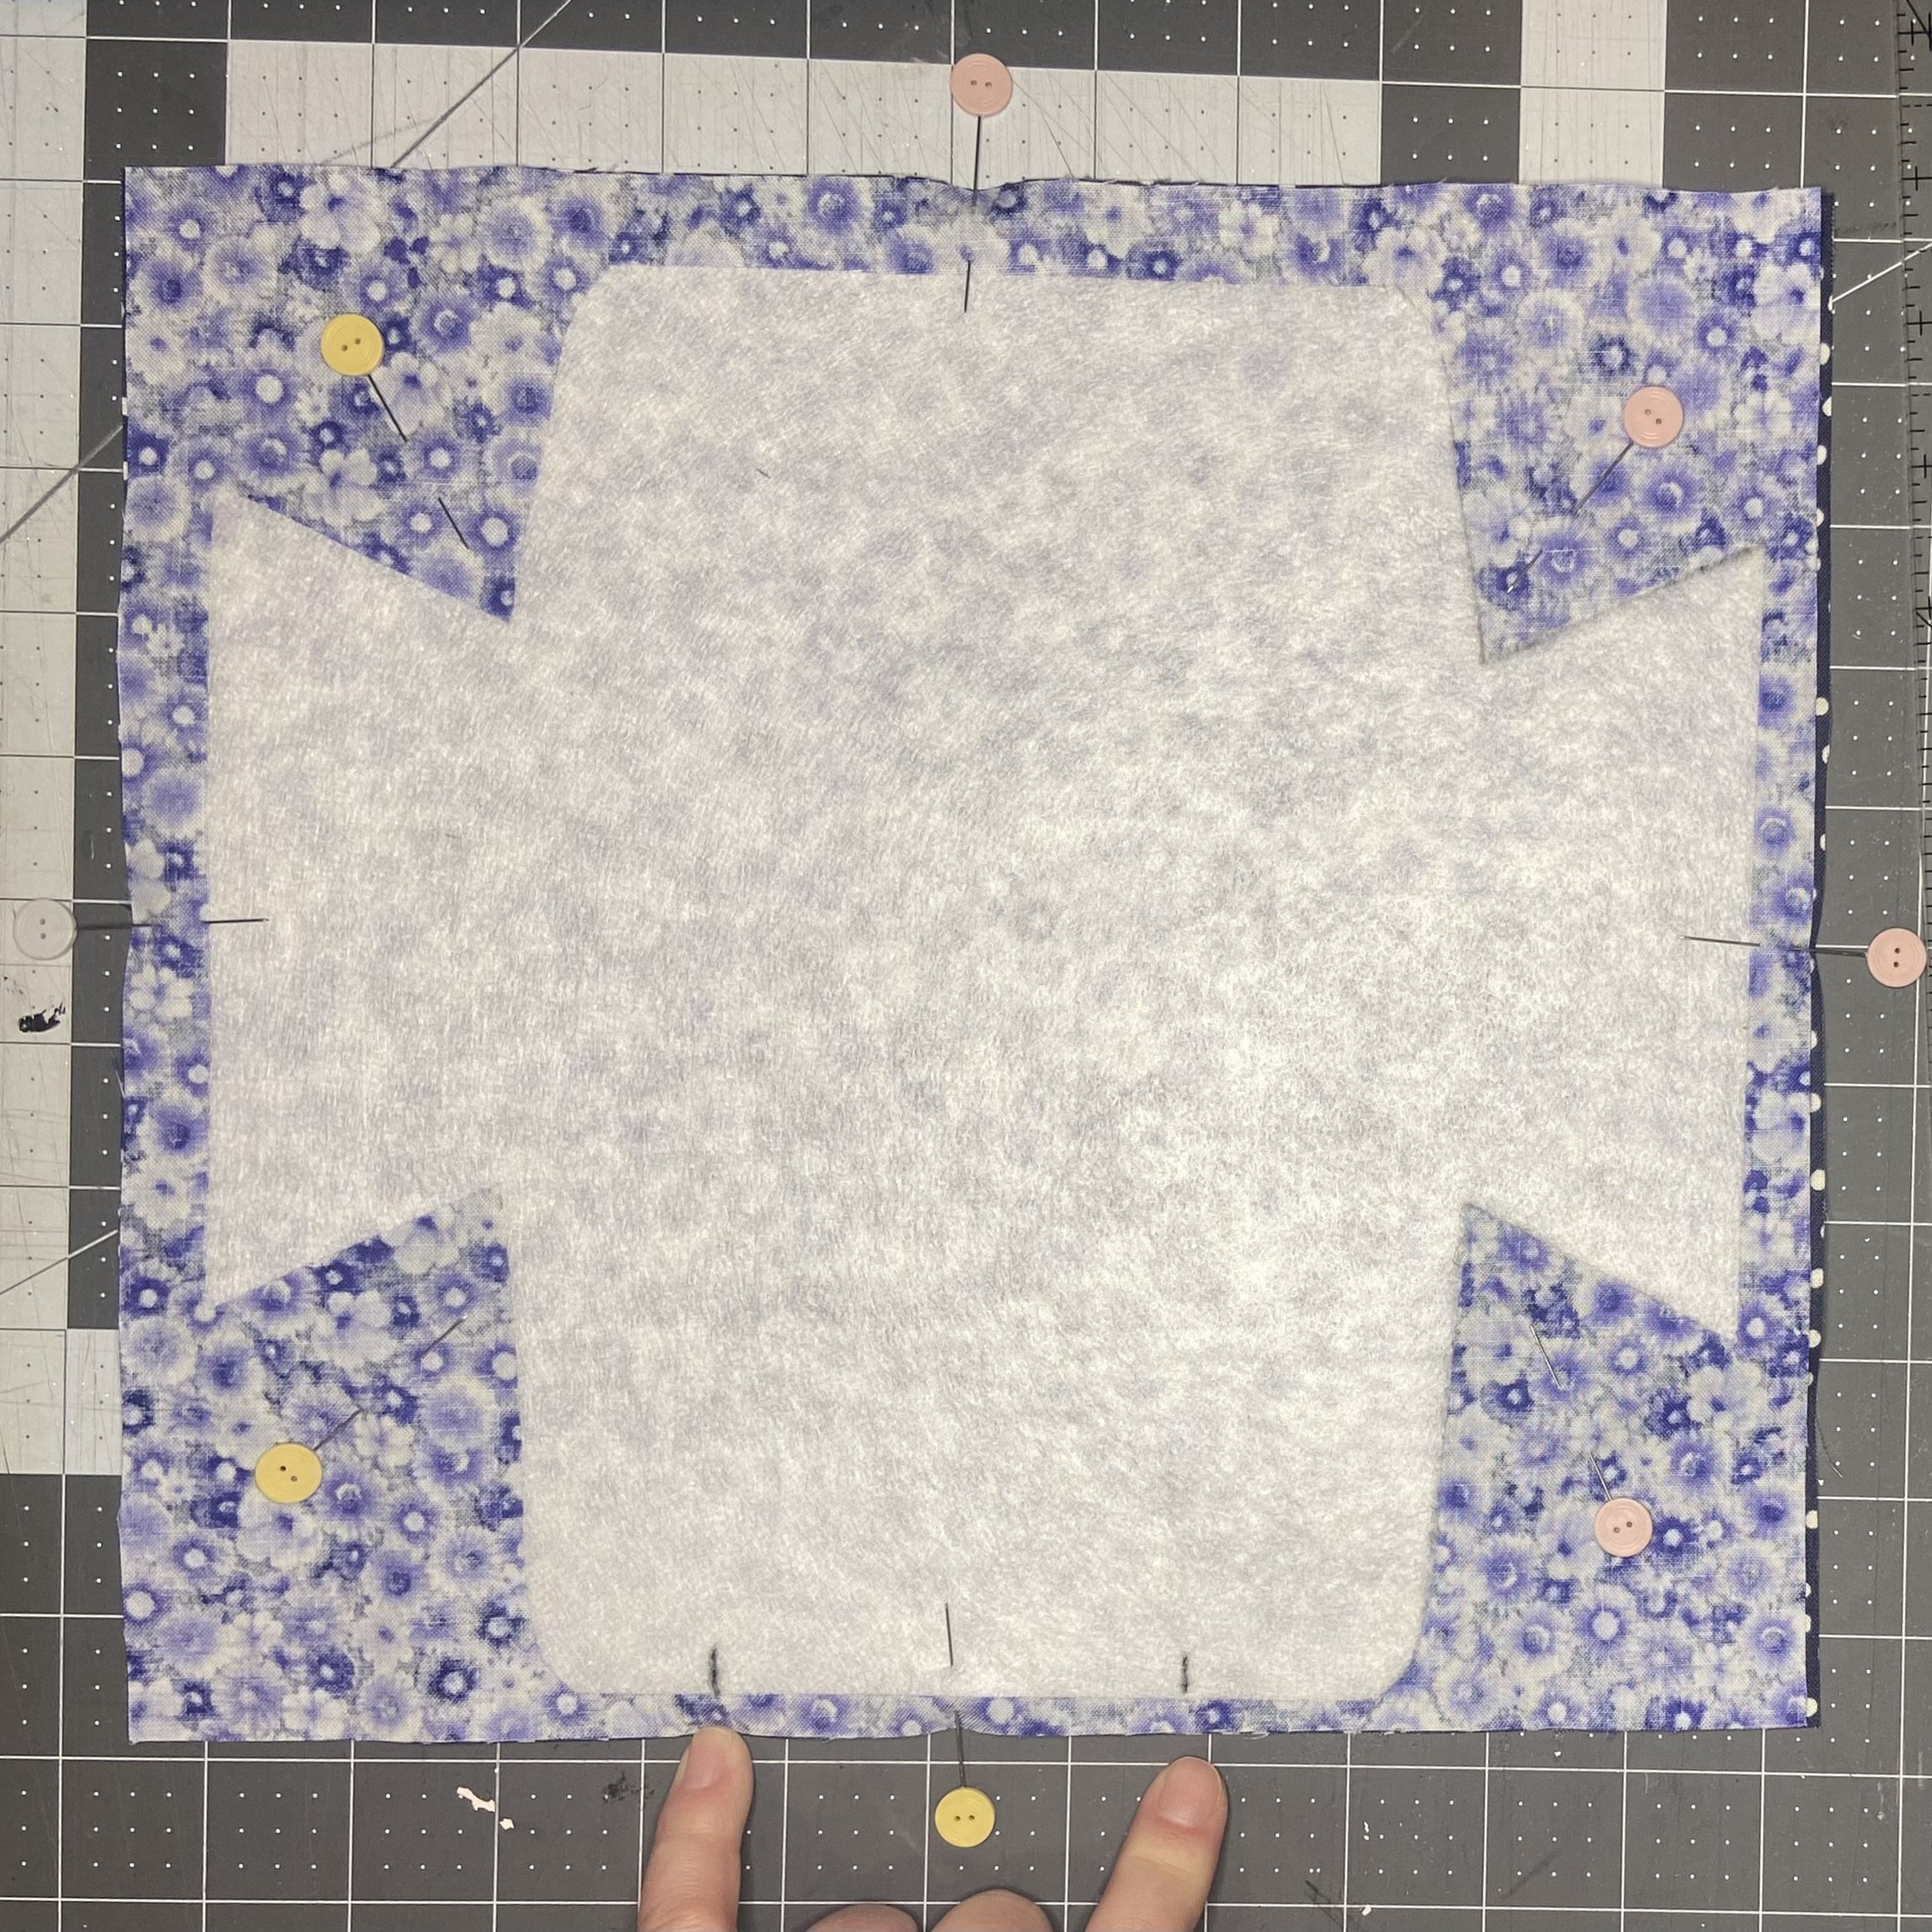
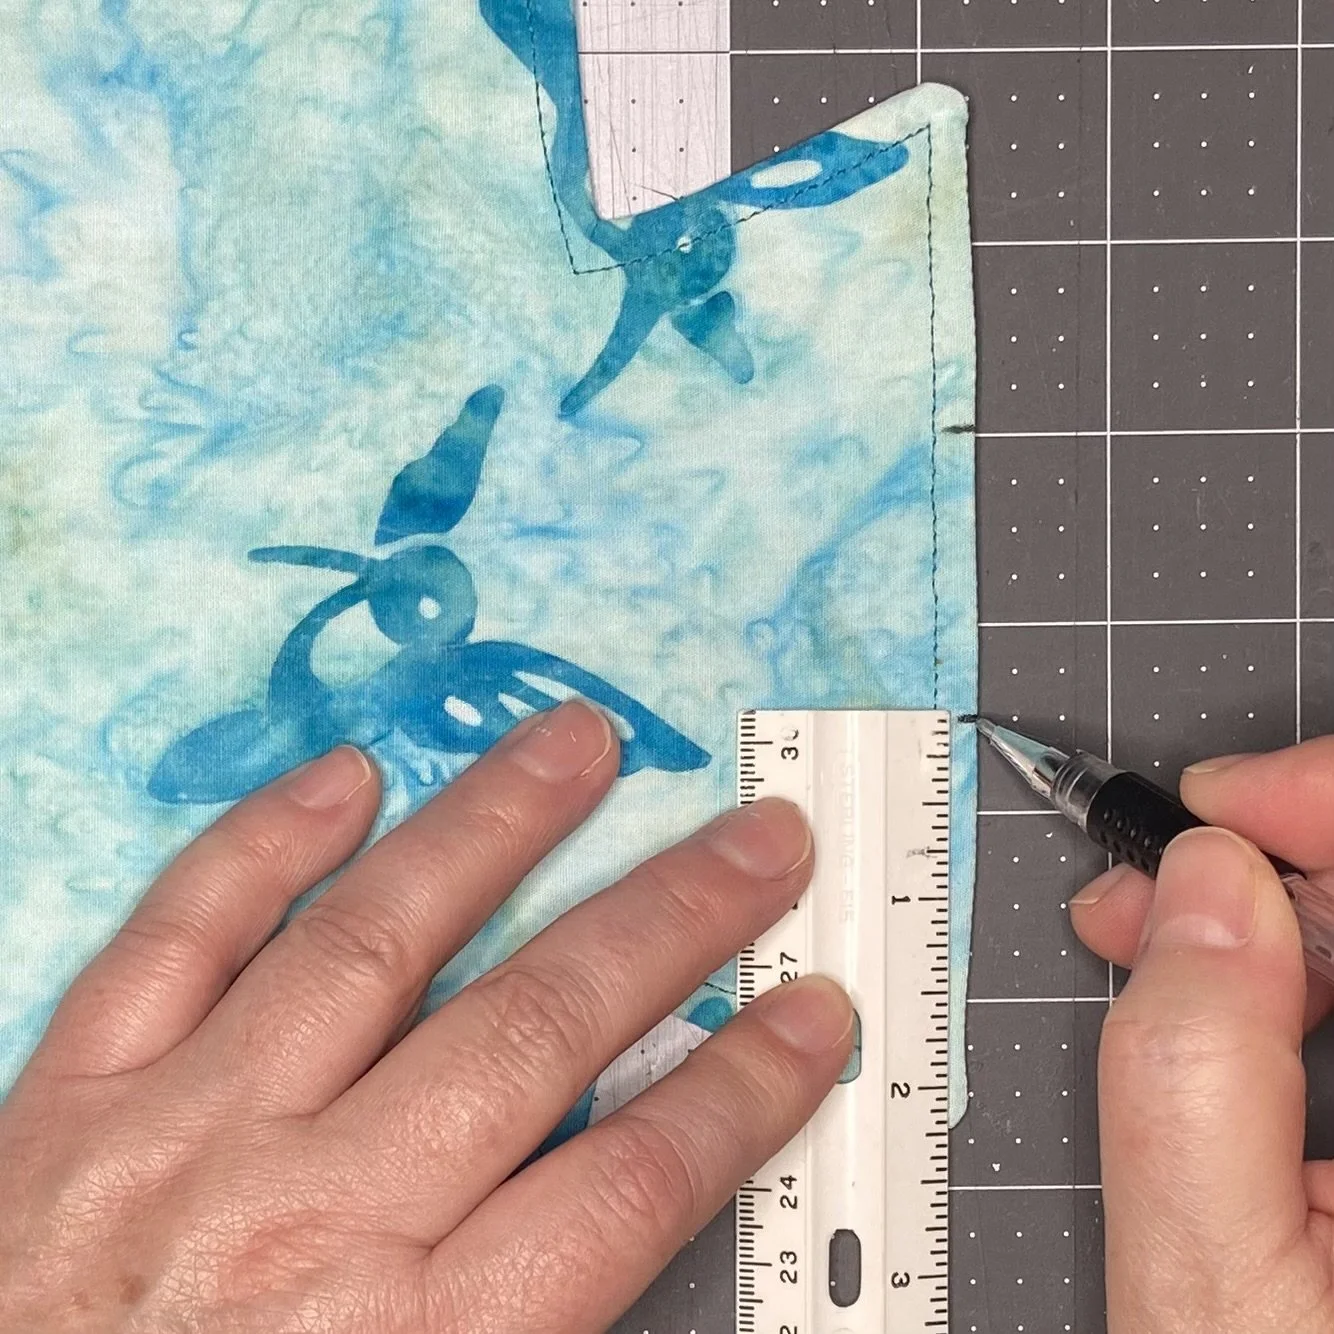
Next, working on the wrong side of the fabric and using an erasable marker, you will mark up the “wings” of the work. Pay attention to the orientation of the work…the longer section is the top, the shorter section is the bottom, and the “wings” are on either side. Measuring down from the top of the wing, make a mark at 1 3/4” on either wing. Measure up from the bottom and make another mark at 2 1/4” on either side. Then connect that mark with the corner where the wing joins the body of the work.

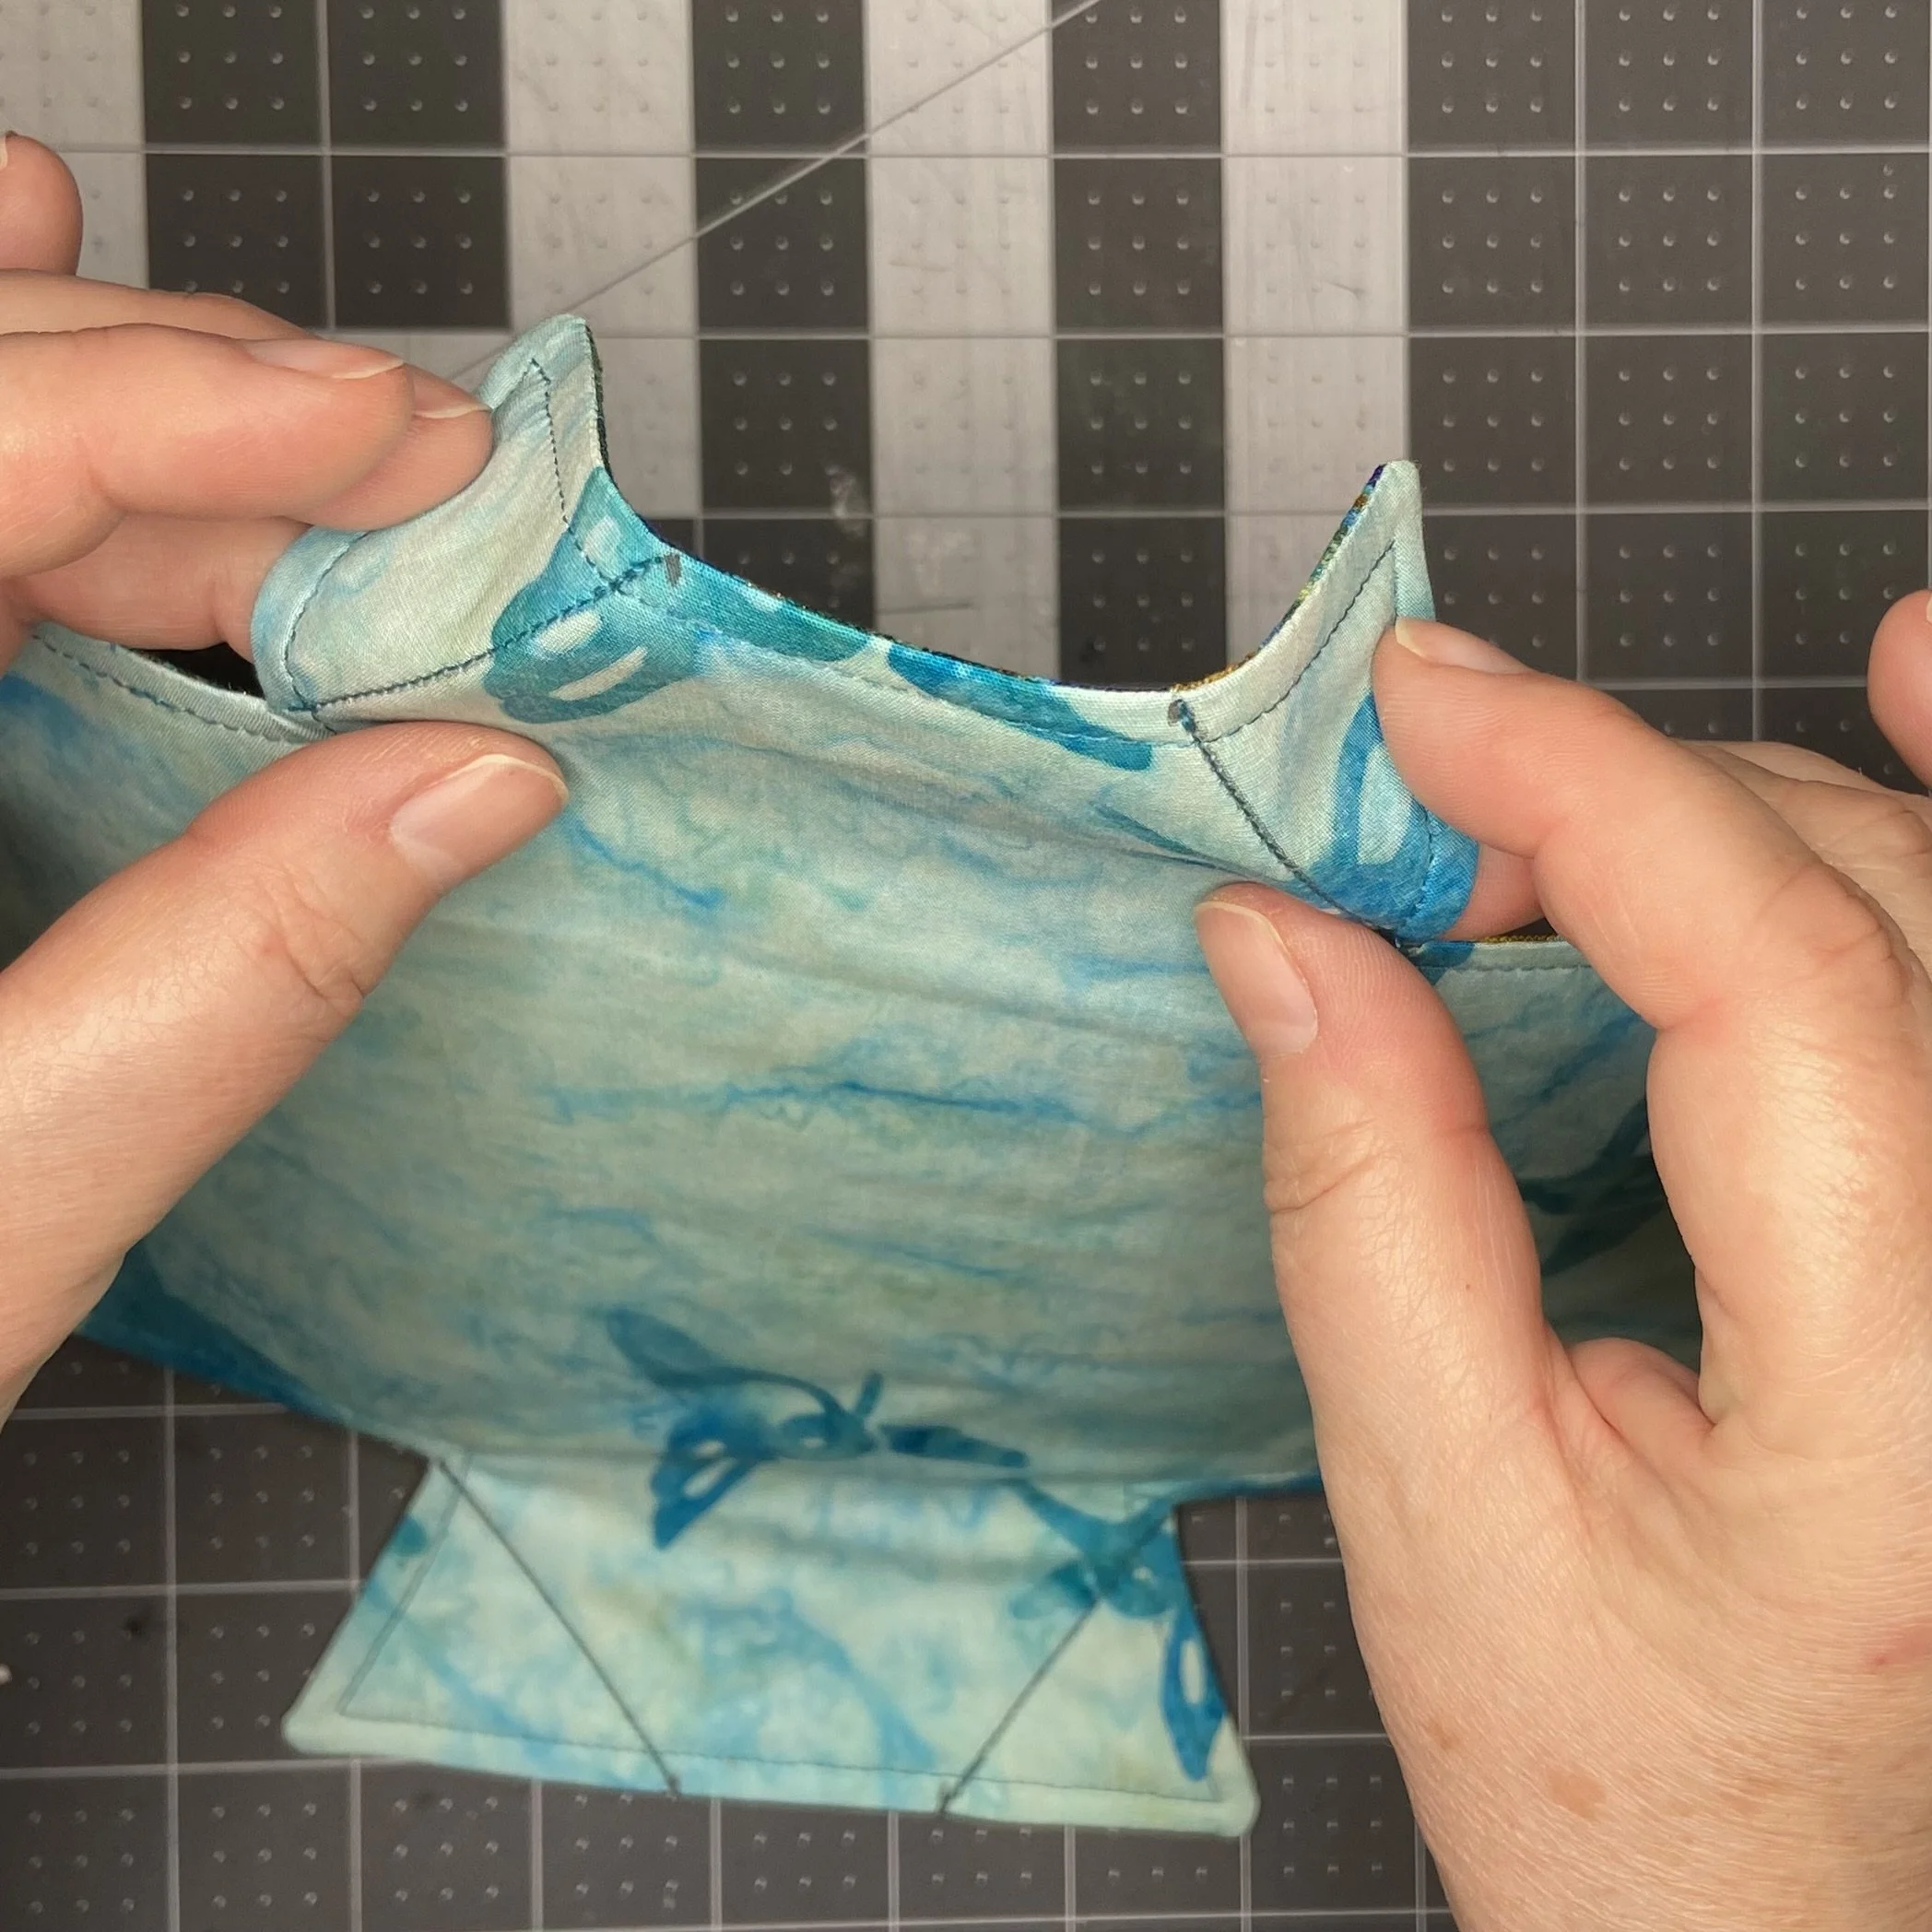
Stitch along the lines that you made on all four corners of the wings and then press those sections toward the front of the work.
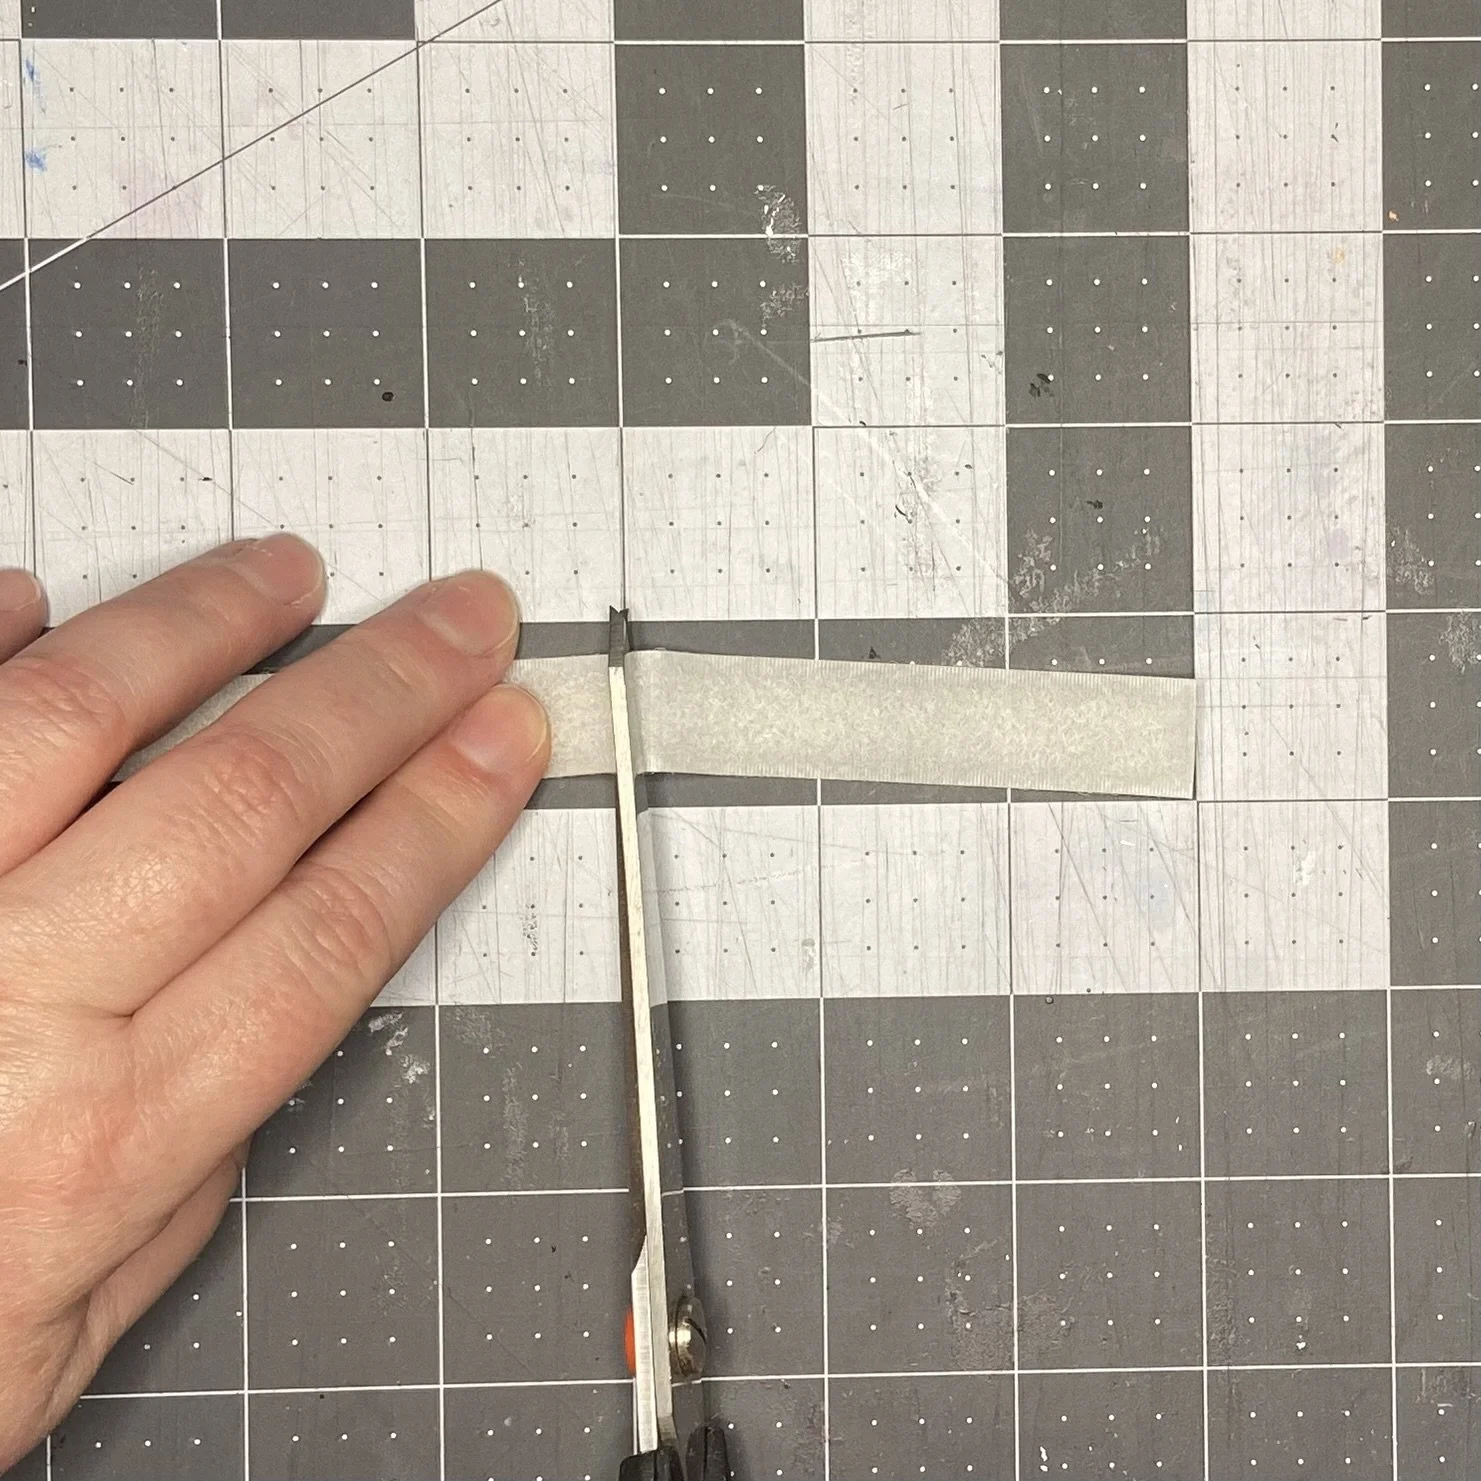
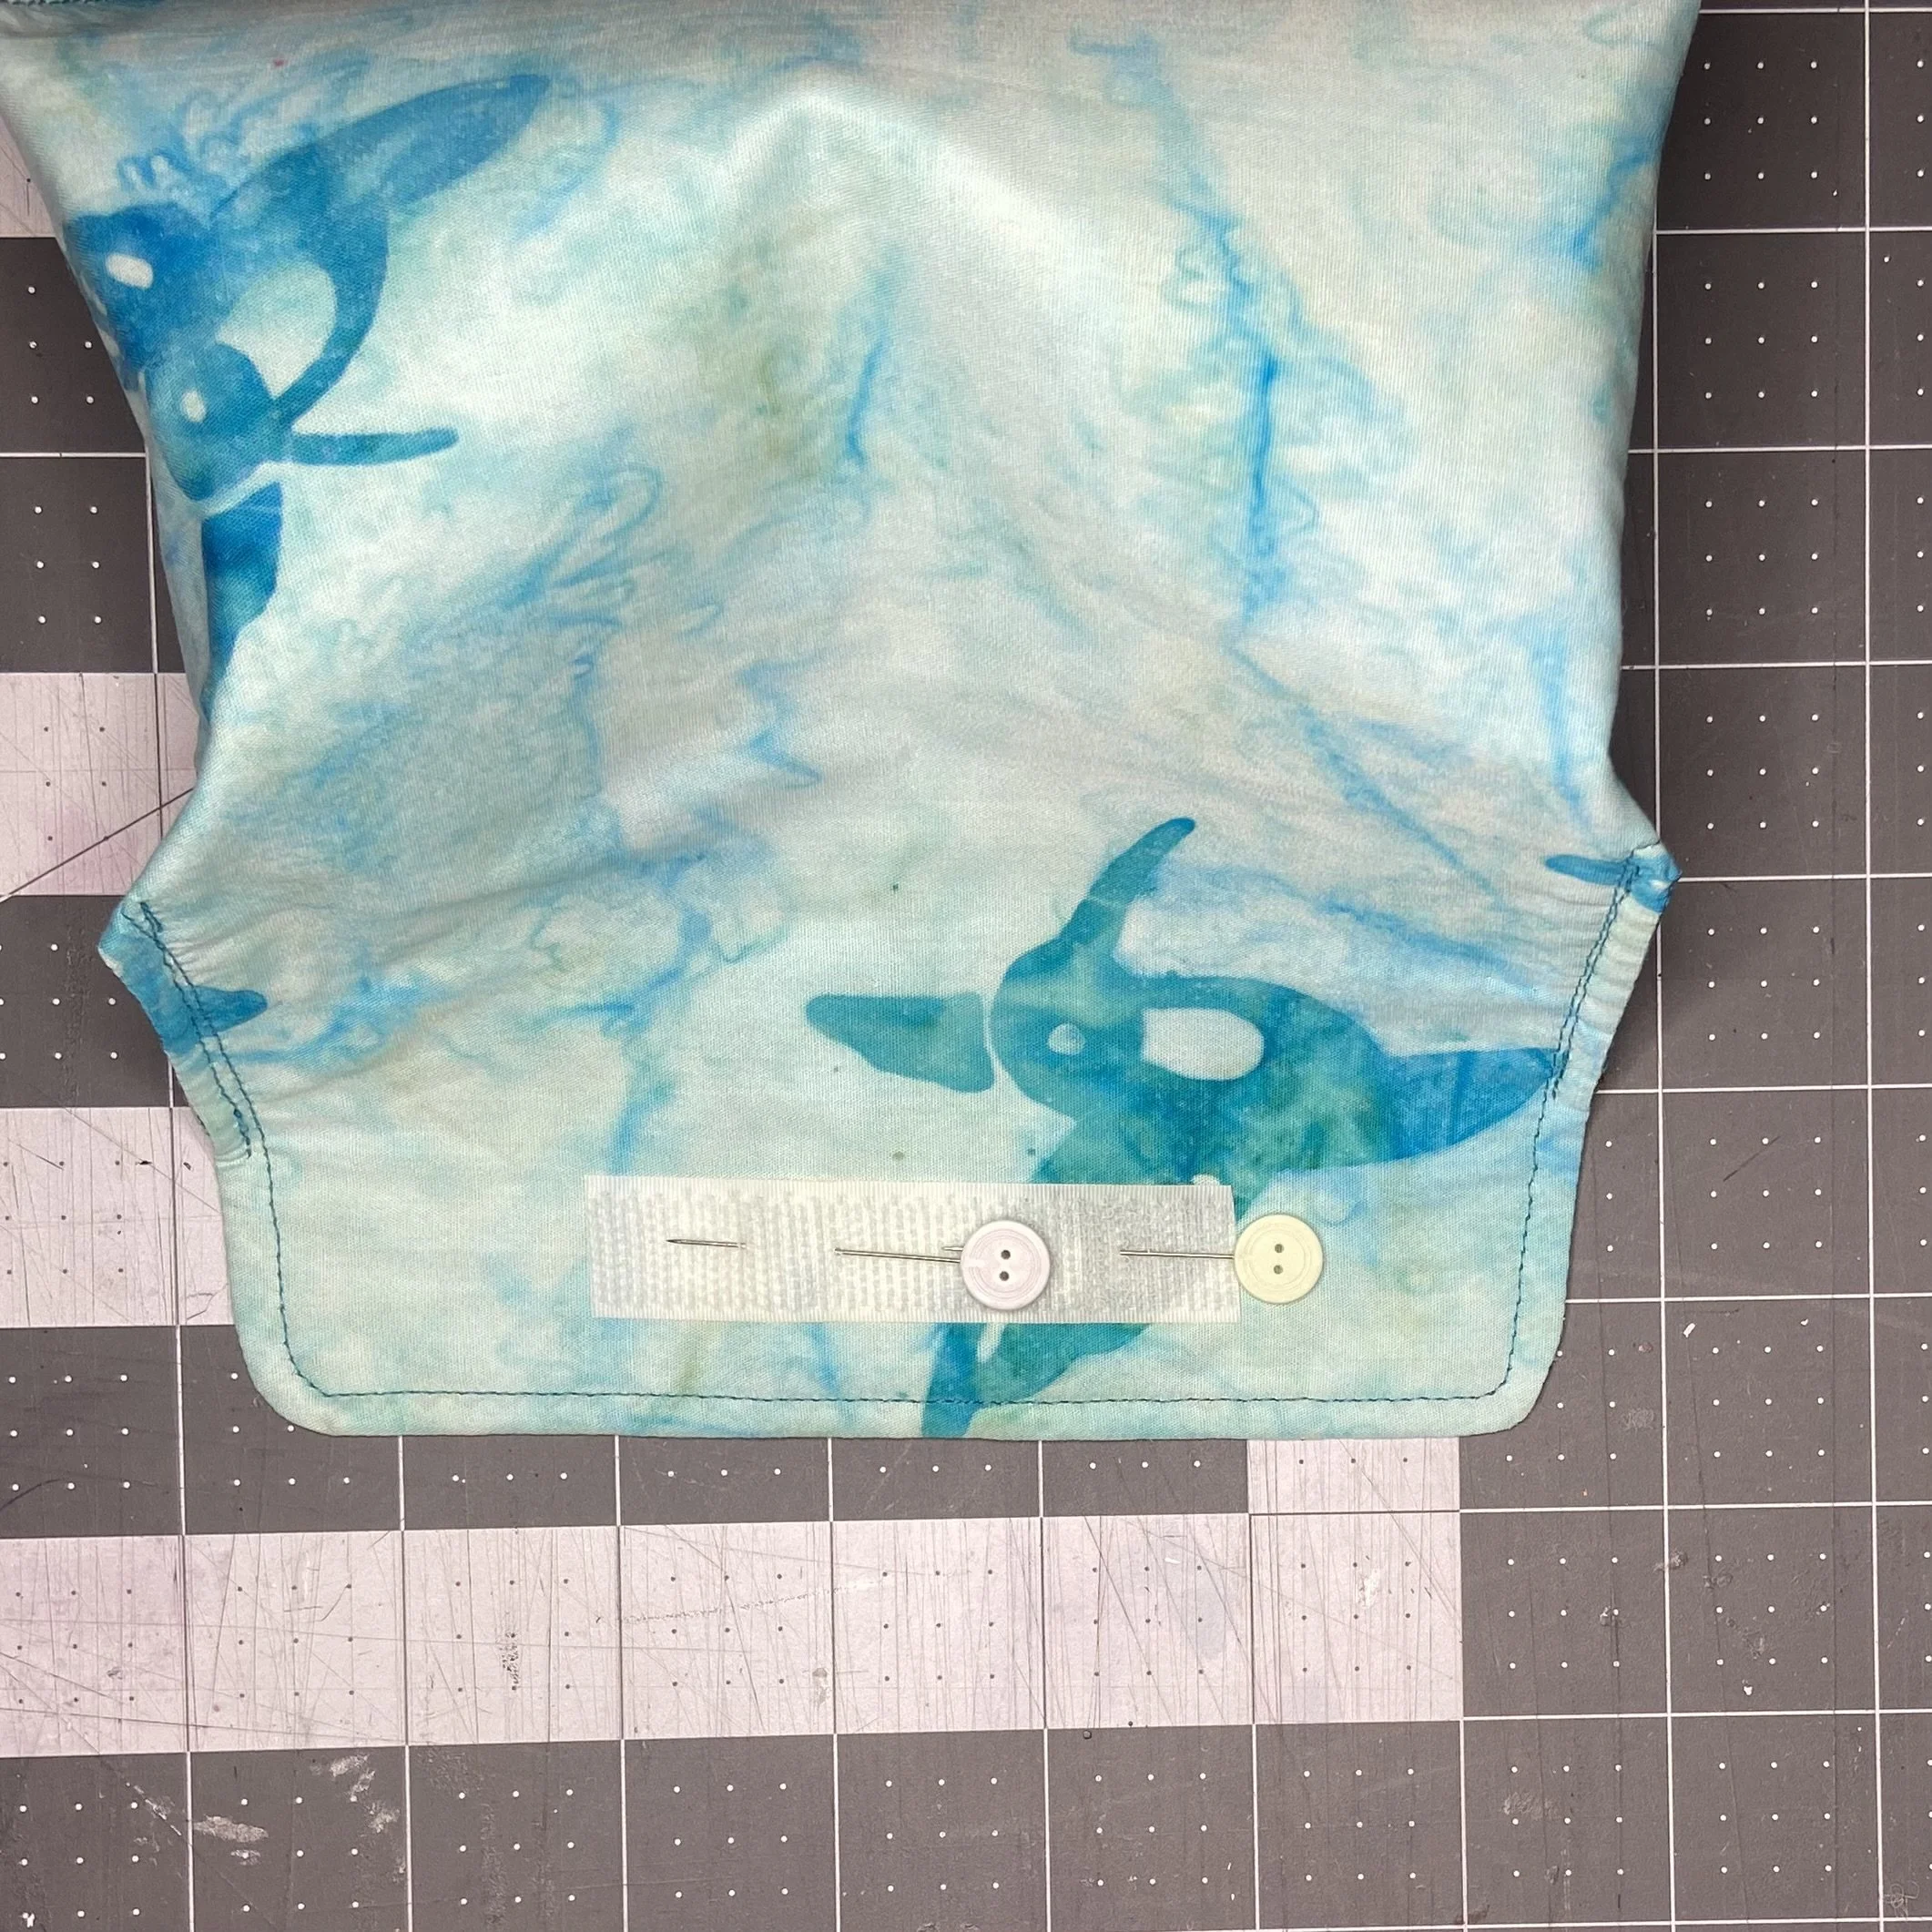
If you are planning to attach Velcro for a closure instead of a snap, then this is the time to do it (not later, when you’ve already sewn the box together, like I did). Cut a 3” long piece of Velcro, and attach it 5/8” up from the edge on the top and bottom edges. Remember that on the top edge, you’ll need to attach it on the wrong side of the work (the inside of the box), and on the bottom edge, it will go on the right side of the work (the outside of the box).
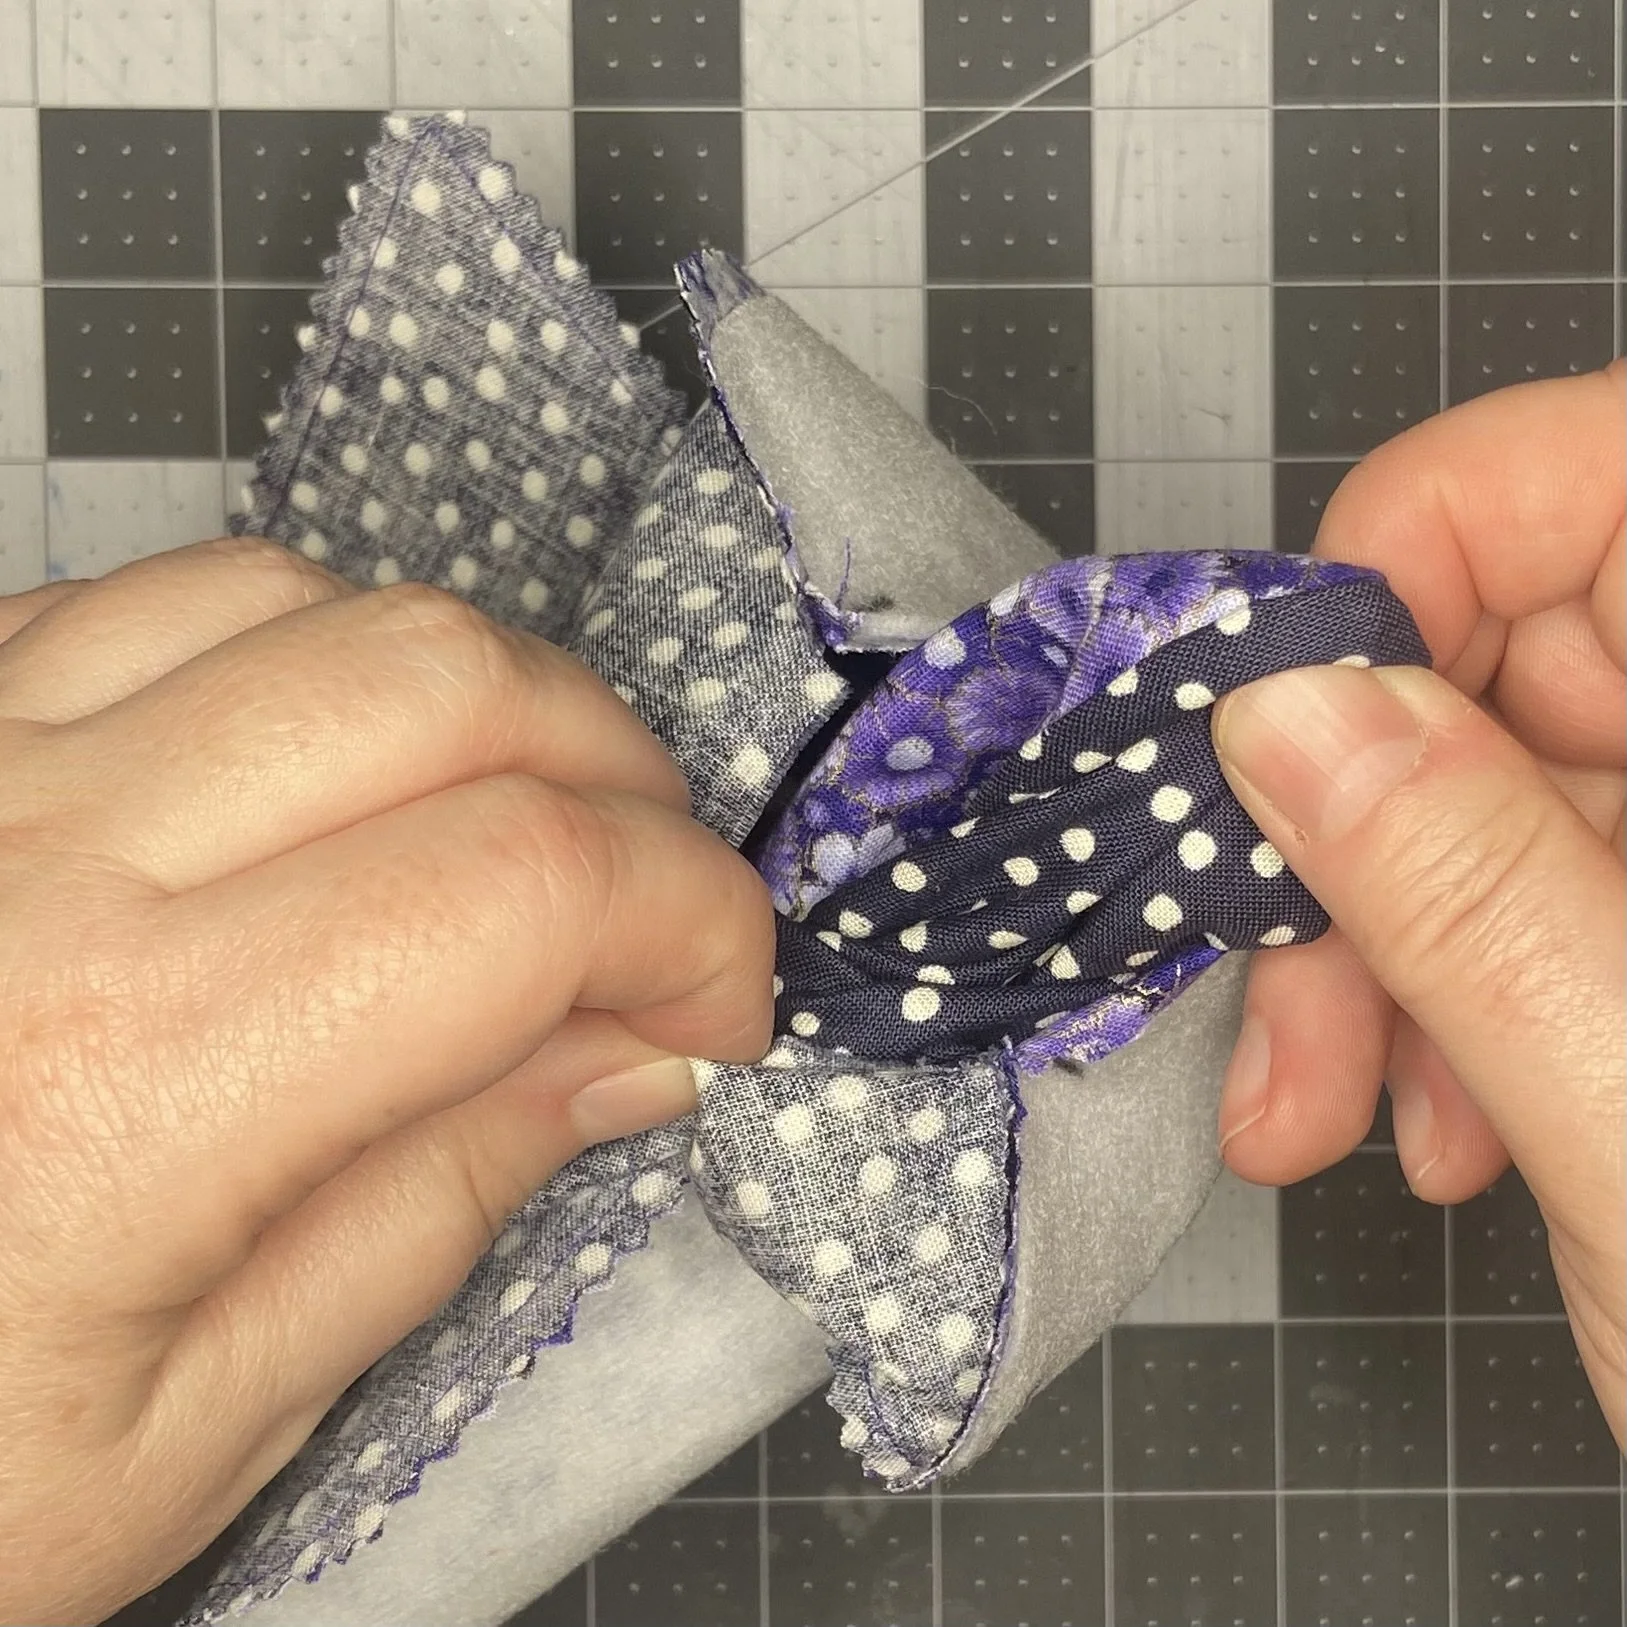
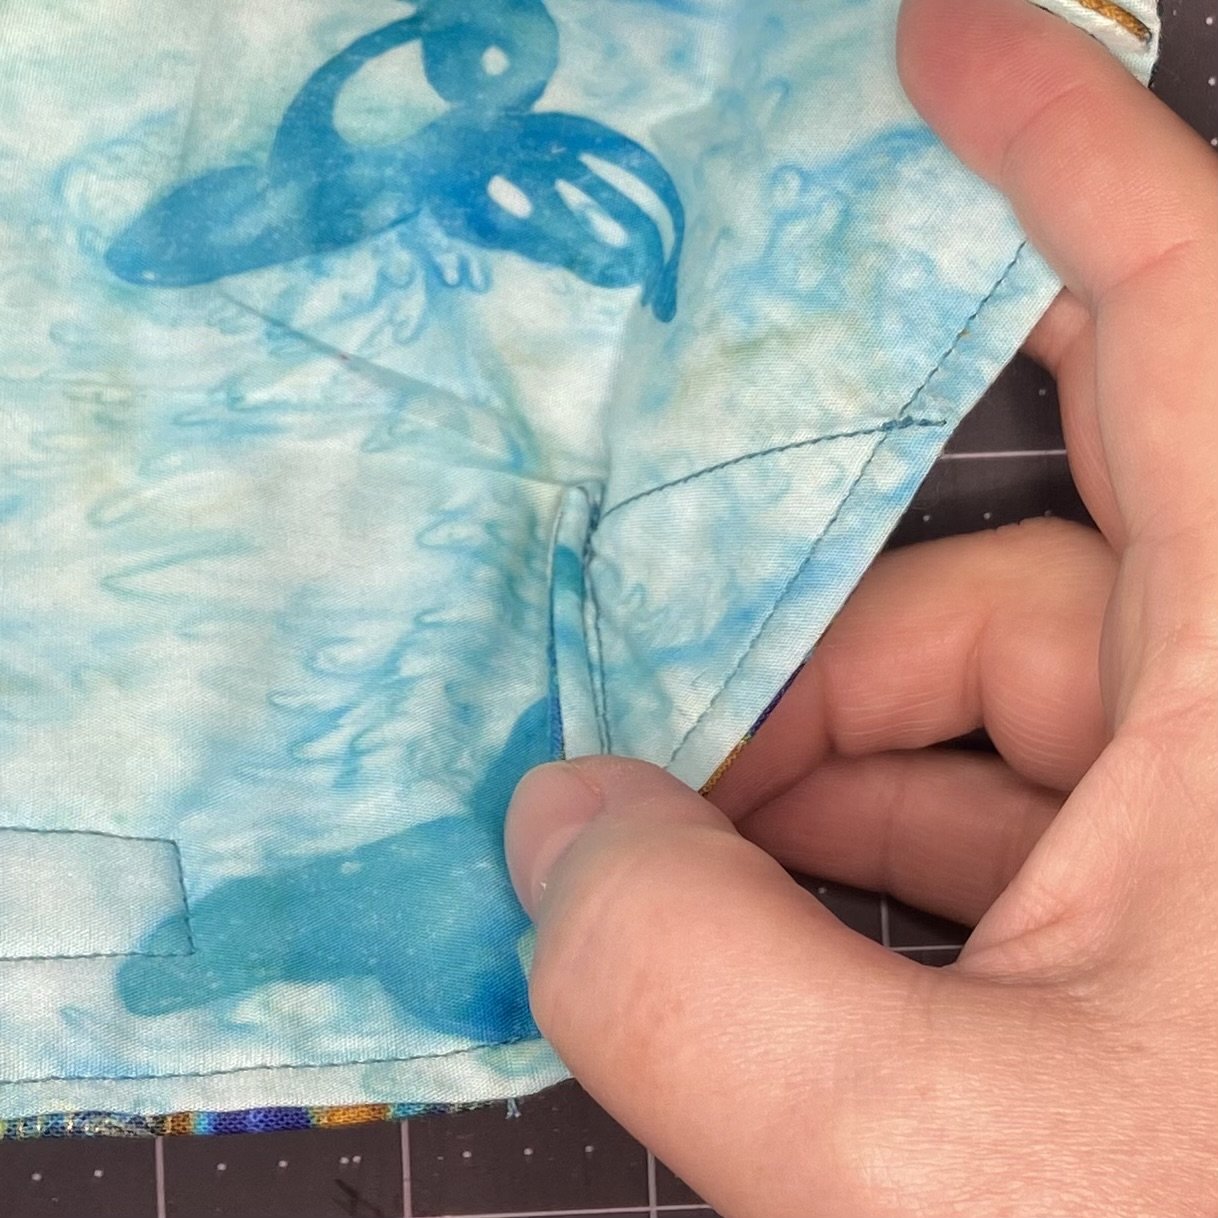
Once the Velcro is sewn on, you’re ready to close the box. You’re going to join the edge of the wing to the adjacent edge of the body, and stitch it. All four little corners of the wings will be attached this way. Make sure that the right sides (outside of the box) of your fabric are together for this seam.
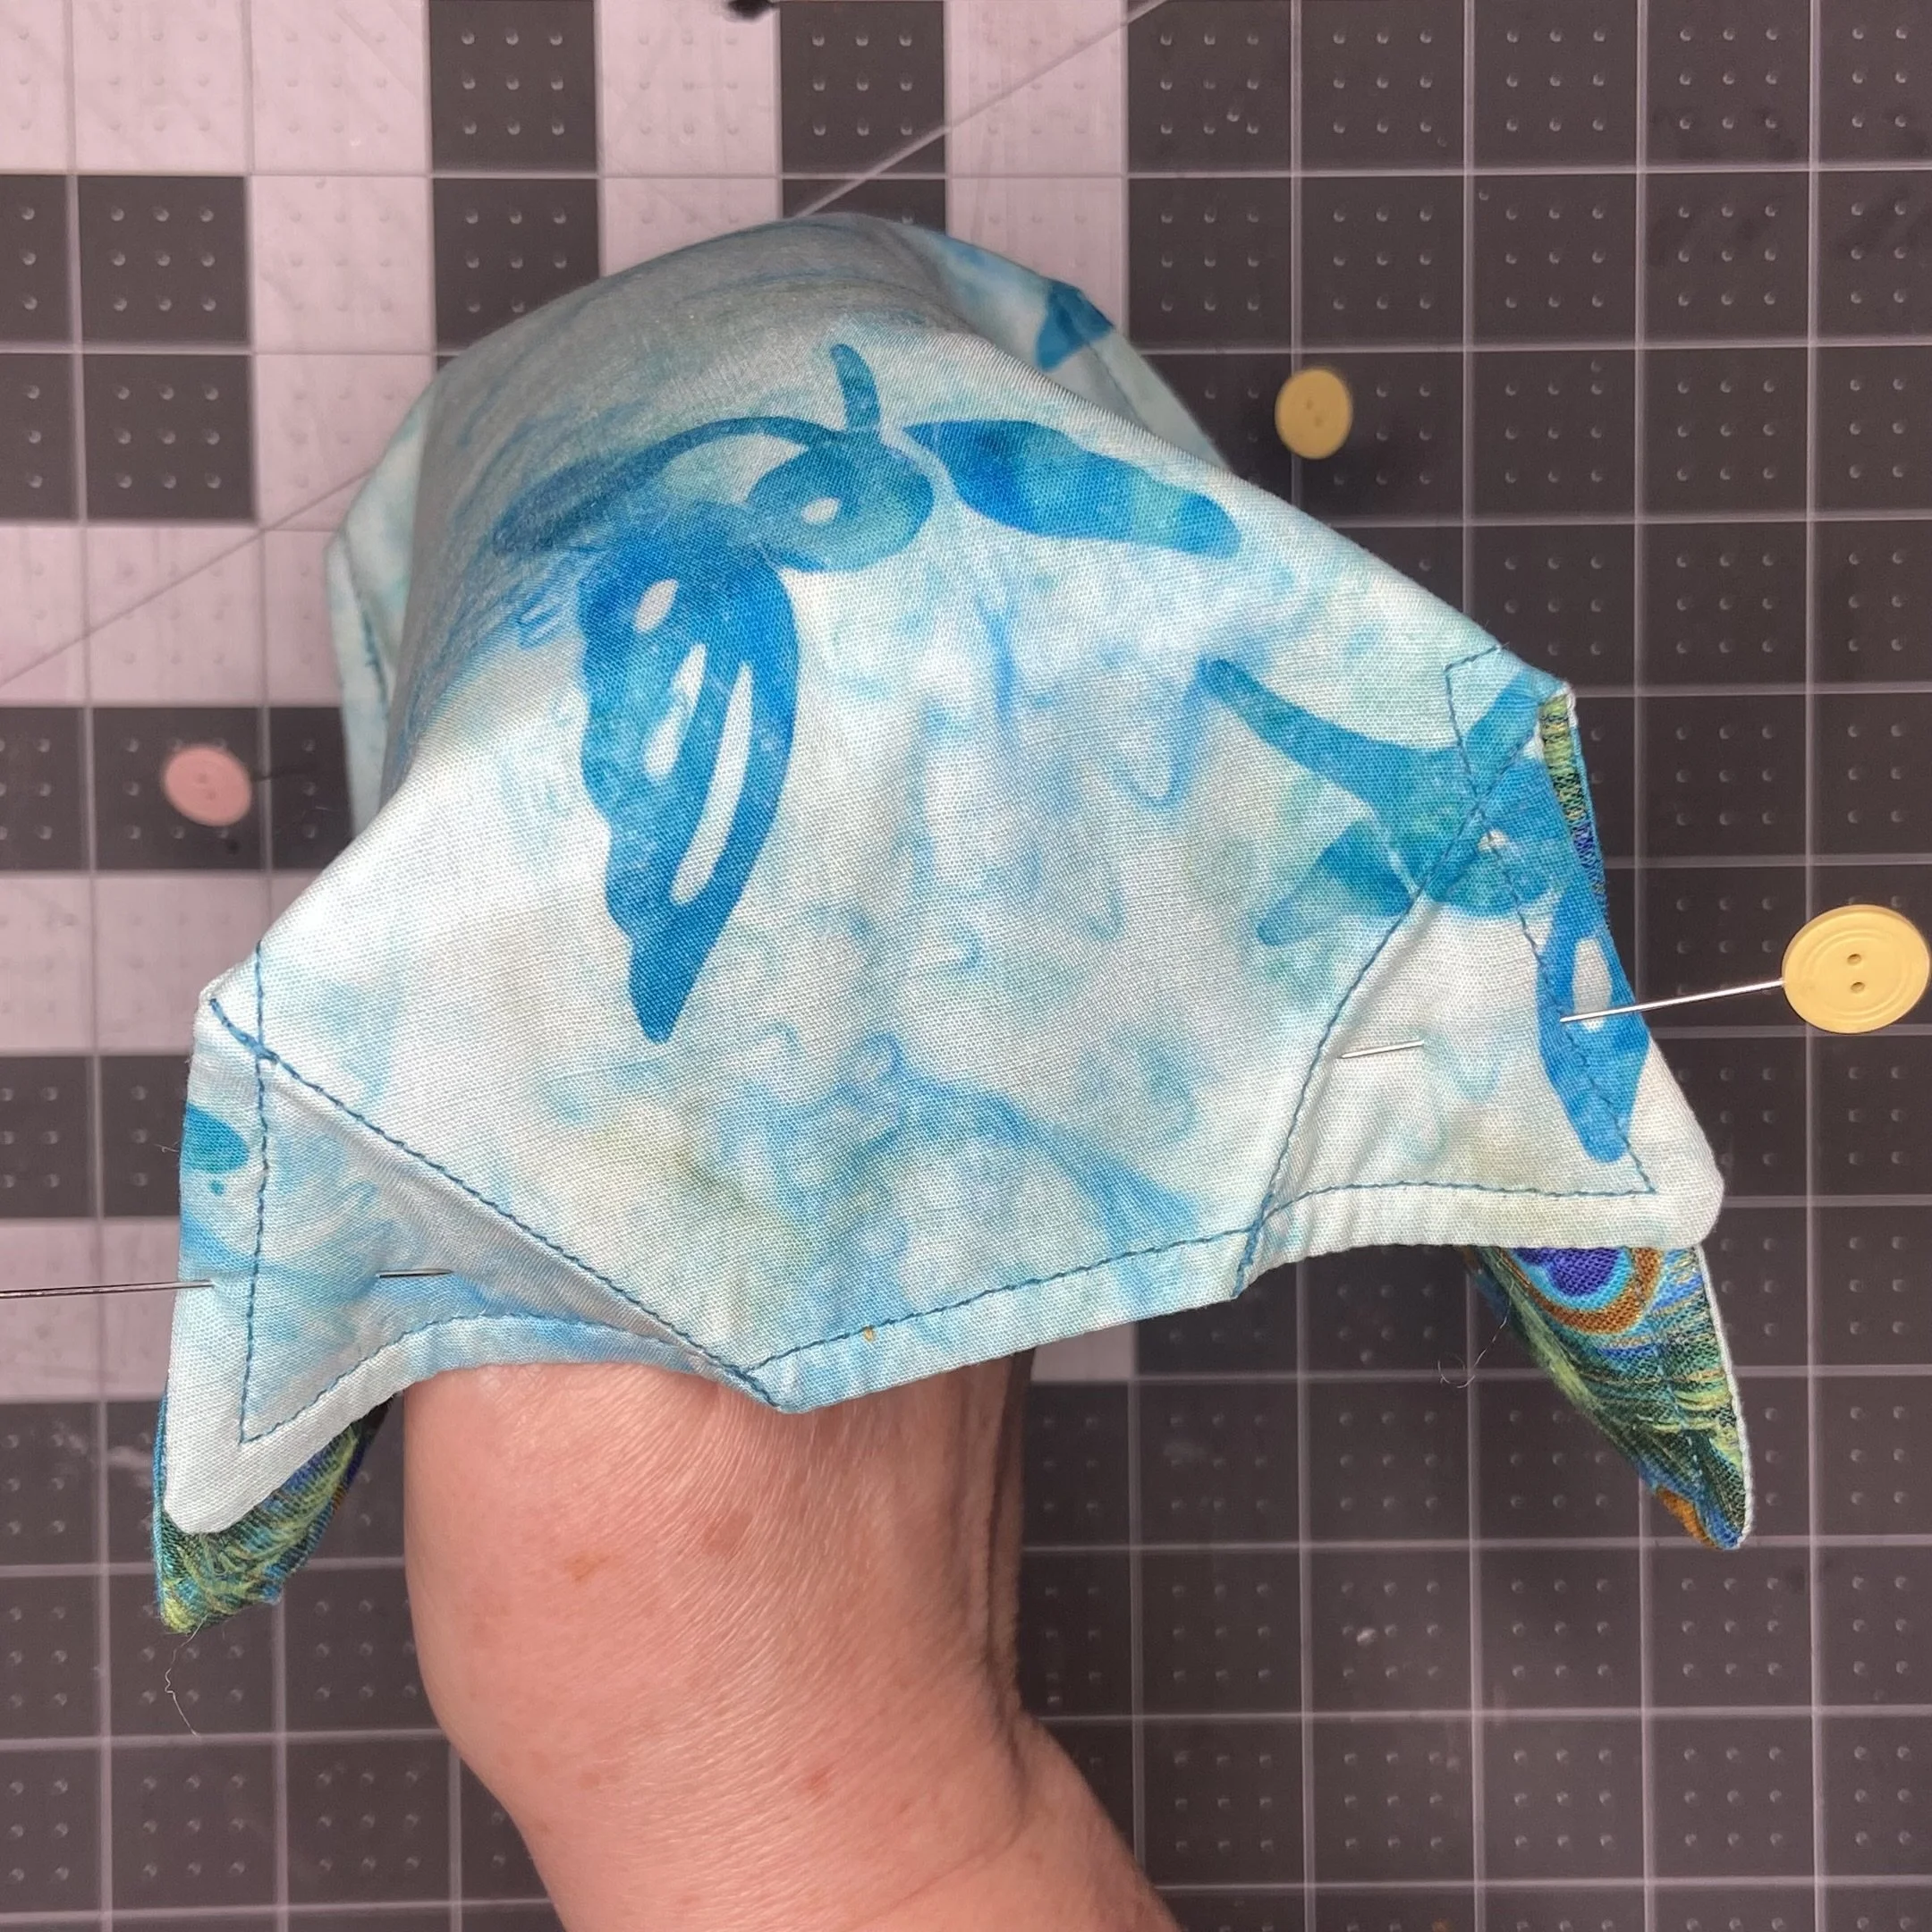
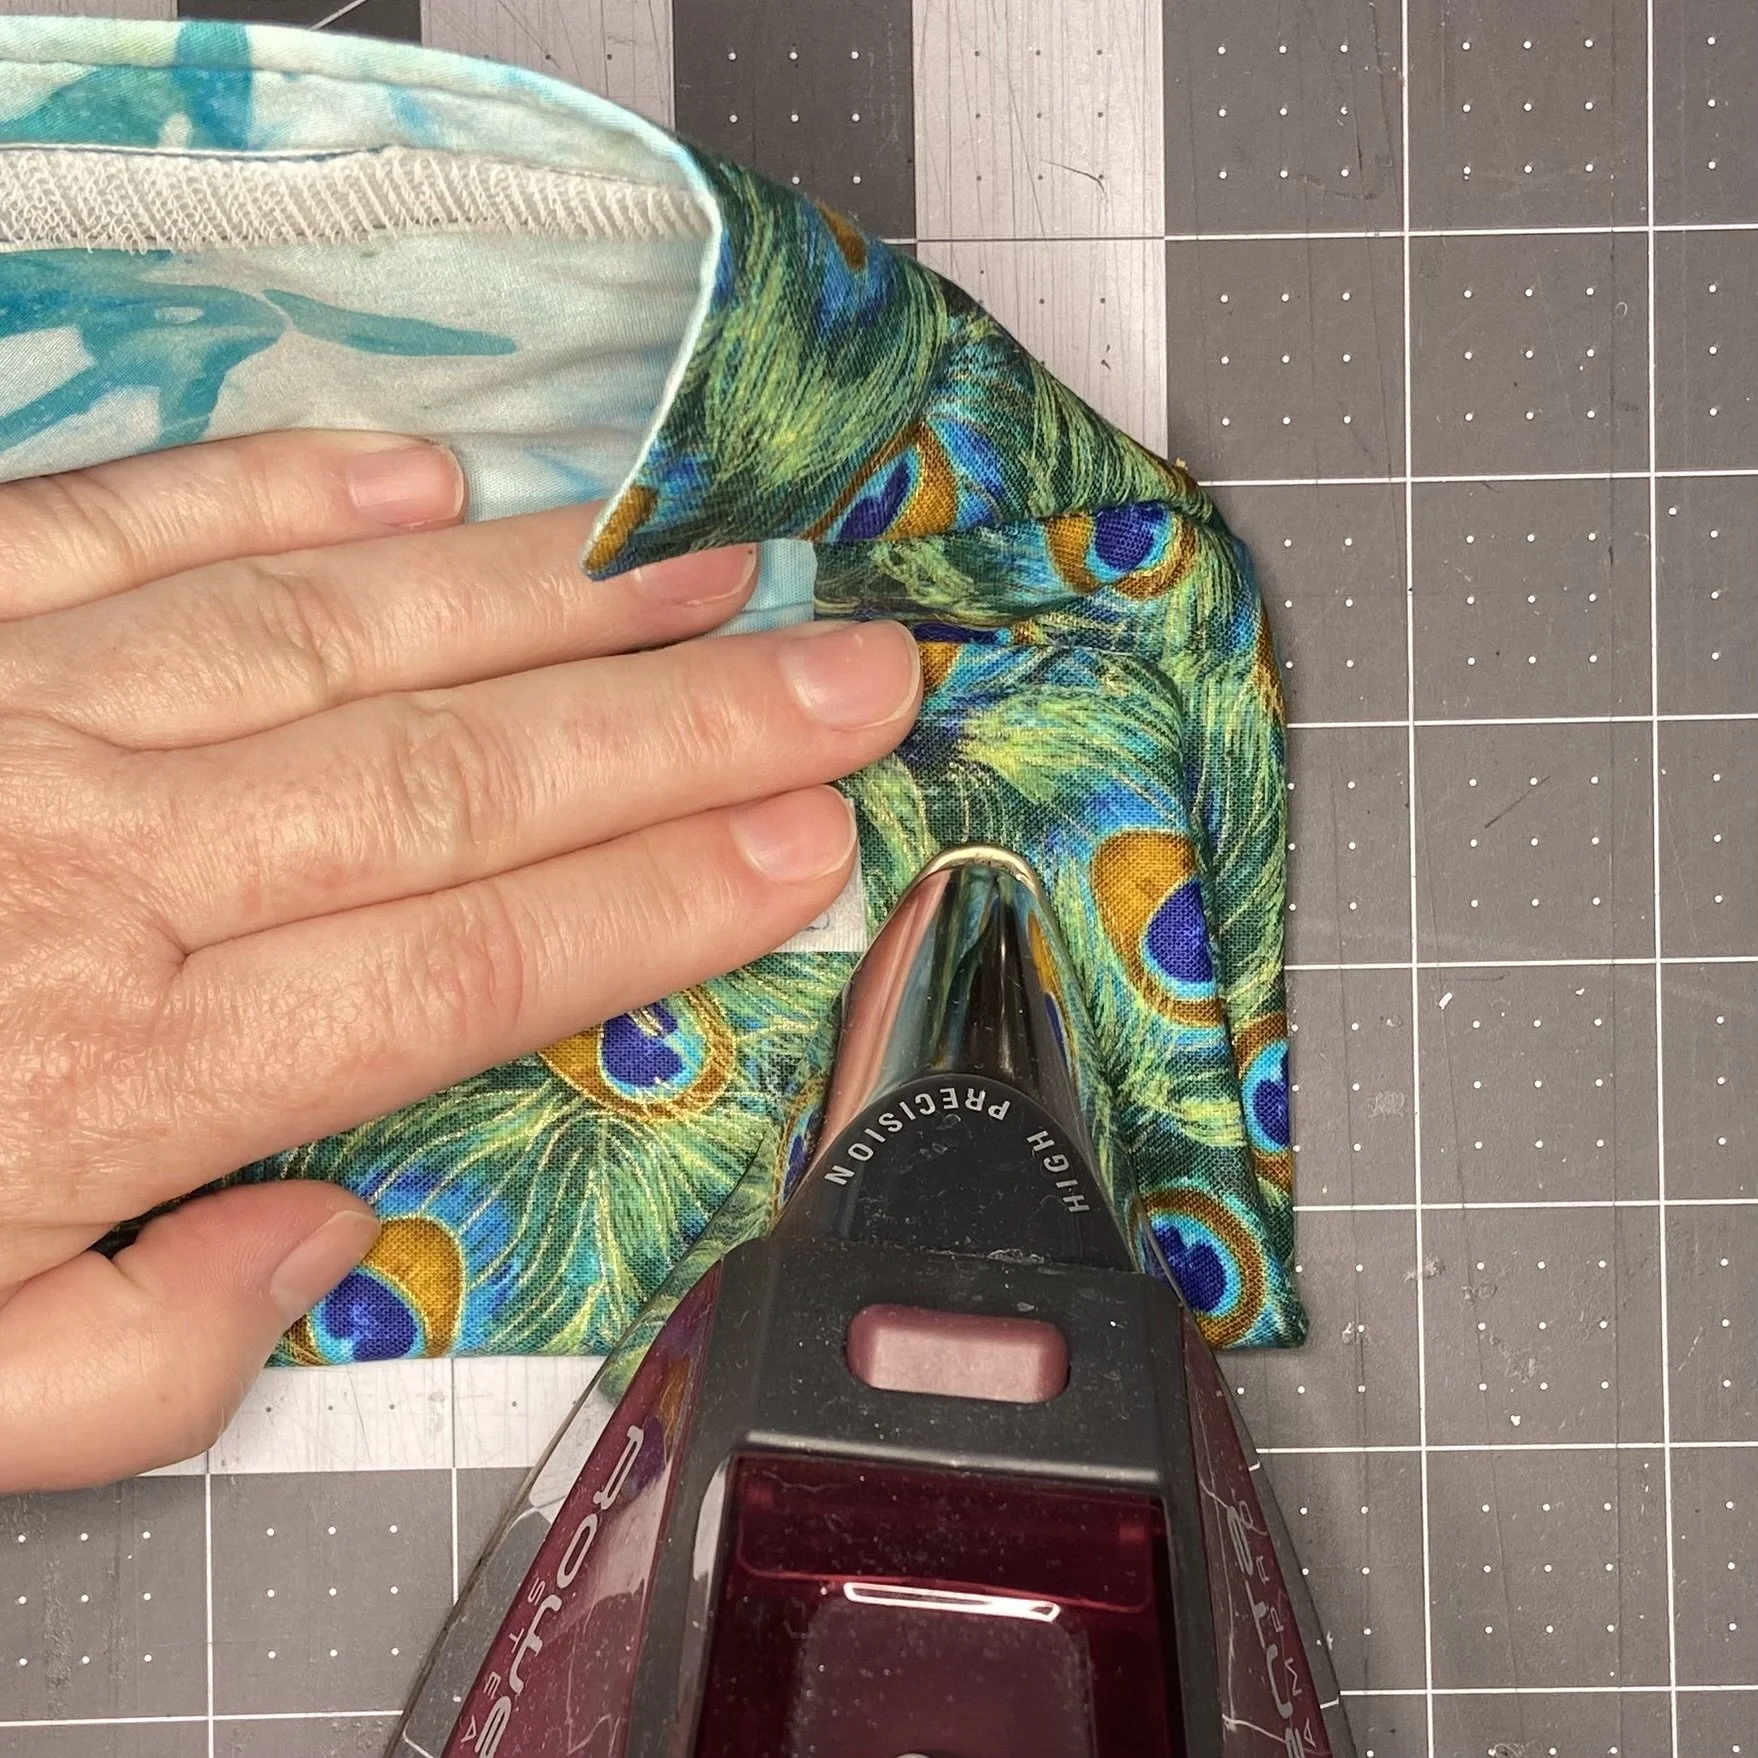
You’re almost done! Turn your box right side out. At this point, you’ll need to fiddle with it a little to get it to close properly. Start with the bottom (shorter) edge, and fold it up toward the middle of the body, while using your other hand to poke in the sides along those folds you stitched and pressed in. The box will be reluctant, but persevere and insist. Once you’ve got the bottom folded up and the sides pushed in properly, use your iron to reinforce the pressing on the folded-in portion. Don’t press the edge of the body or your box won’t stay open when you open it (ask me how I know); just press the fold, which will be between layers of fabric now. Do the same for the top and you’re finished!

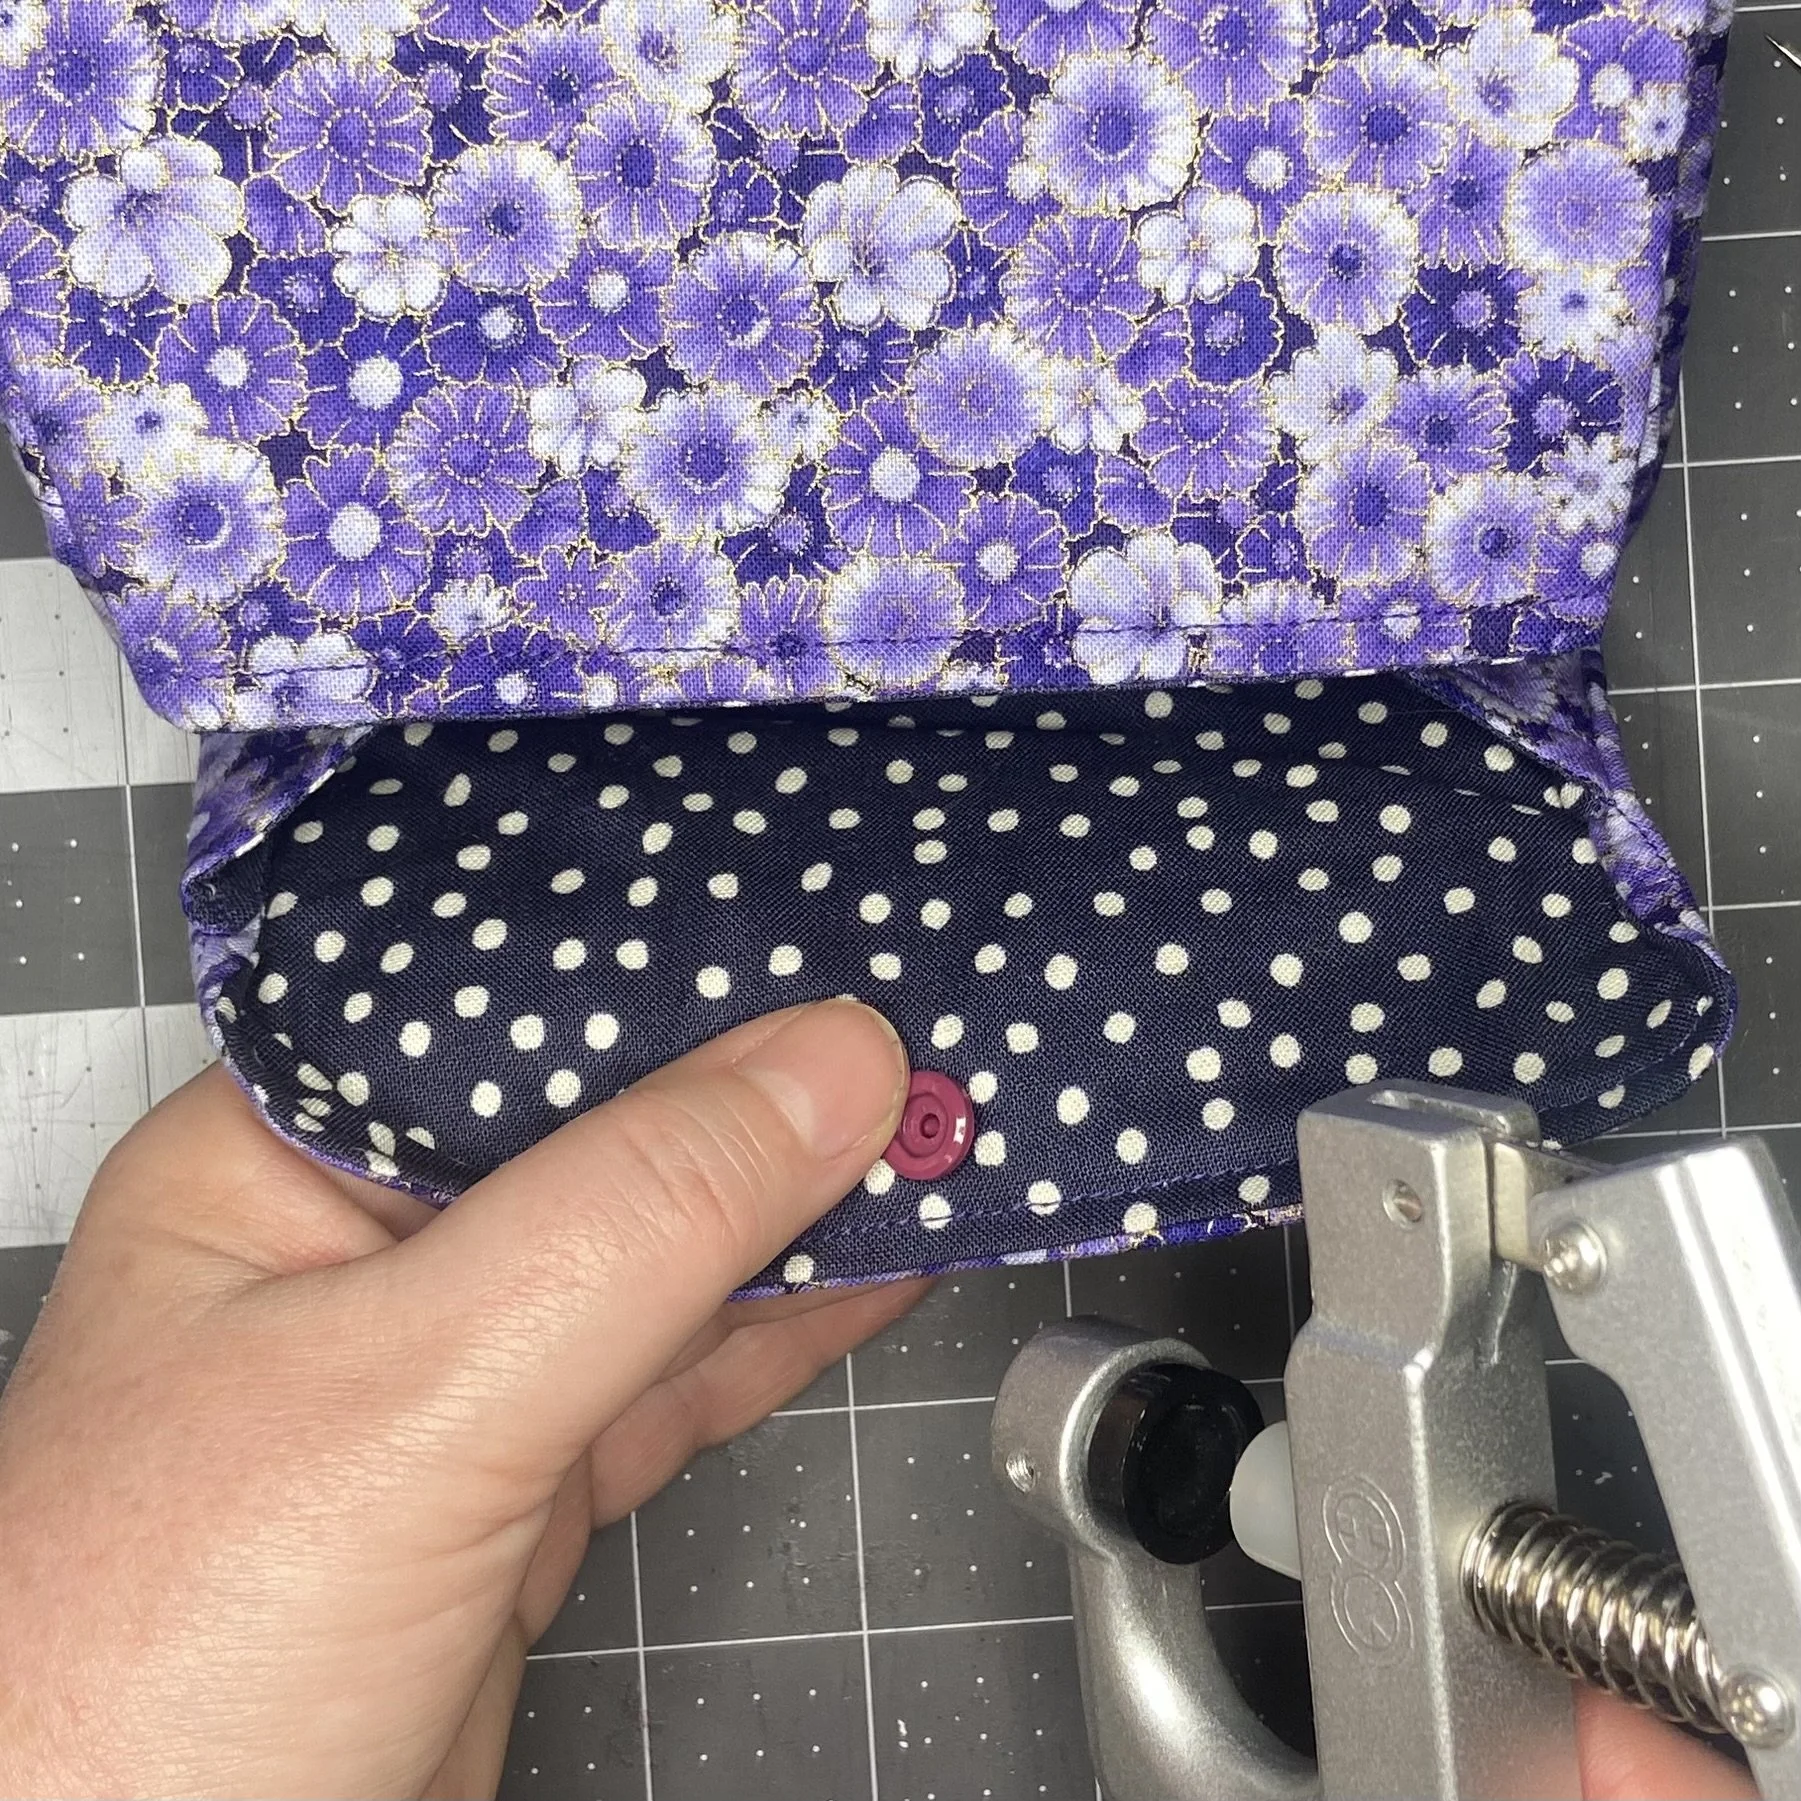
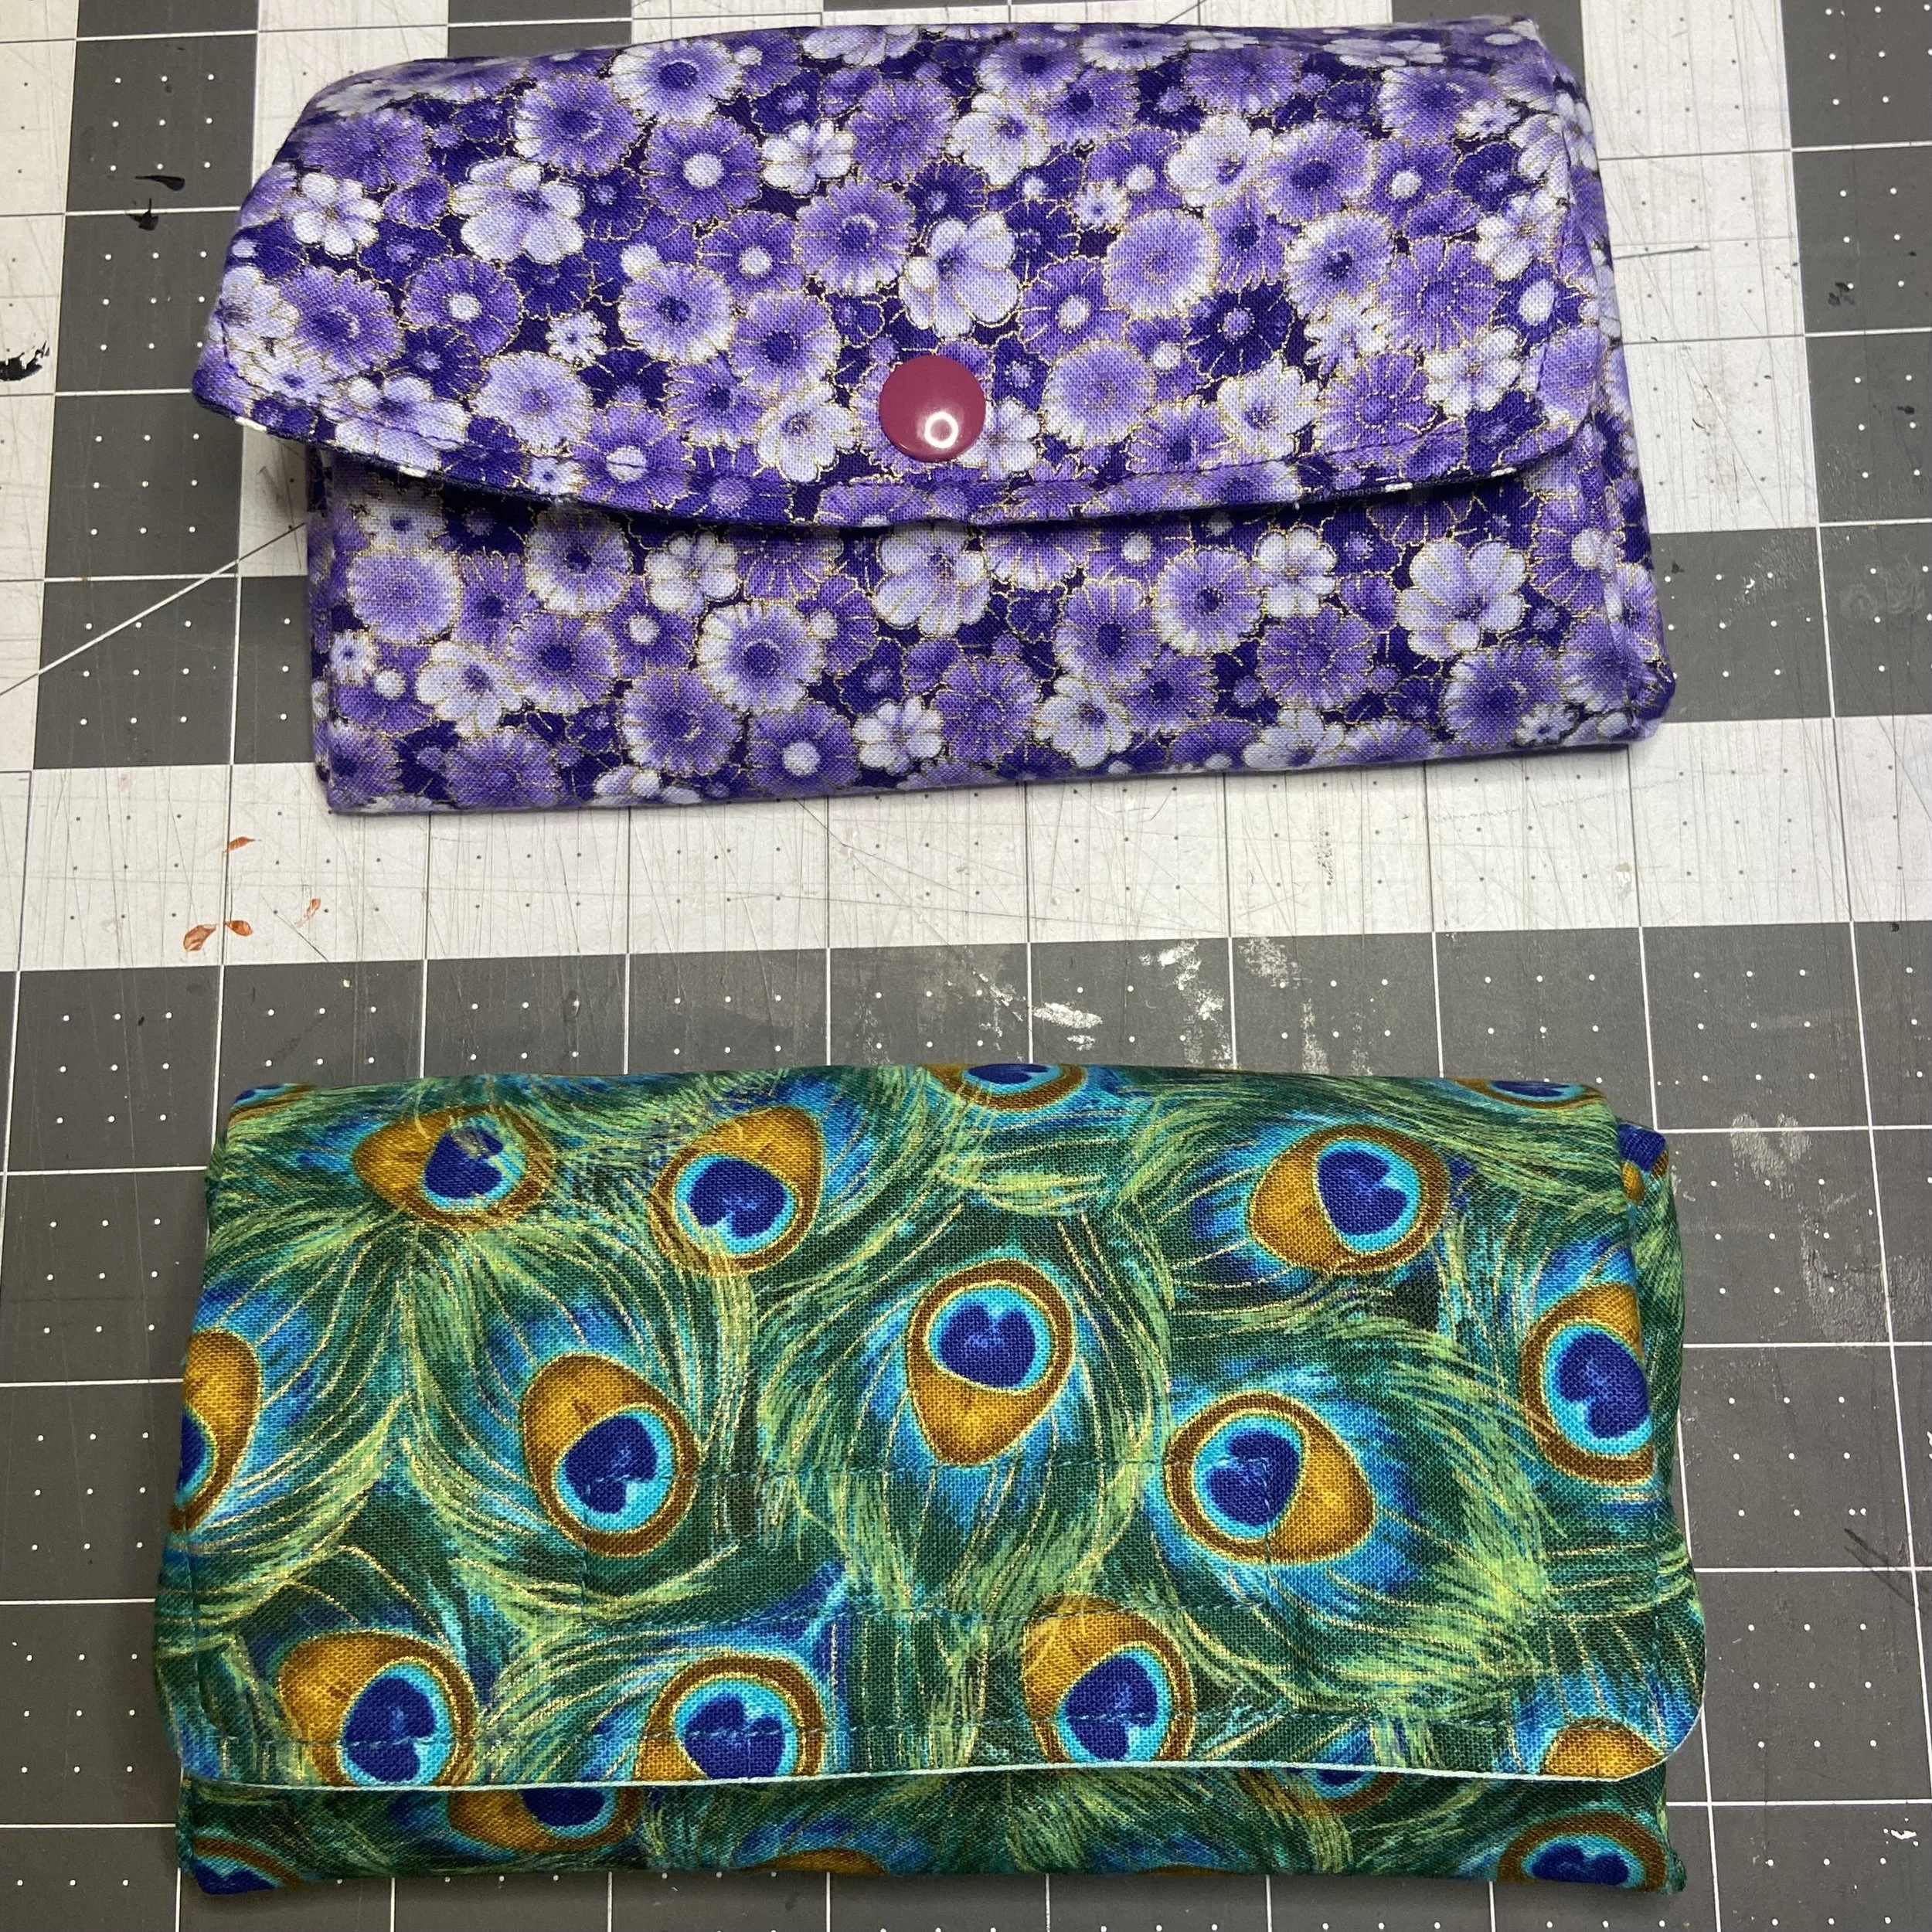
On my first pouch, I opted to put in a snap with my Kam Snap kit. This is of course faster than sewing on strips of Velcro and I personally think it looks nicer. But the snap is slightly fussier when you are opening and closing the pouch/tray, since you can’t yank on these plastic snaps or they will come out. All in all, I think the Velcro works better.
Both these pouch/trays are quite pretty and very functional. My mom will get one and I will keep the other. Very handy! This is a quick and fun project…give it a try!