Adventures In Patchwork
As an Amazon associate, I may earn a small commission if you navigate to Amazon from my site and buy something. This will not result in an extra cost to you.
I believe I might have mentioned once or twice that I watch a lot of YouTube. At the moment, I’ve been watching a lot of quilting videos, which got me to thinking about small projects that use up scraps. Why not coasters? They’re quite small, done quickly, are pretty and useful, and make lovely gifts. Oh, and they’re fun to make. So today, two different methods of doing patchwork and quilting to make a set of four coasters.
Before I knew anything at all about quilting, I’d often gaze in awe and admiration at the huge piecework quilts you see at county fairs. So many small pieces, sewn together with such amazing precision! But as I started to watch videos, I came to understand that often, quilters use methods I’d describe as shortcuts to make multiple sections that look like small piecework but in fact are larger pieces cut down, or else sewn together in a very clever way that makes it look harder than it was. One such video recently showed me a quick and easy way to make several four patch squares pretty much all at once.

For the four patch square coasters, you will need: four different pieces of fabric, each 5” square; four pieces of backing fabric, each 4.5” square; and four pieces of fusible fleece, each 4” square. Lay out your four different pieces of fabric and decide how you want them to lay. It’s helpful if you have some sort of “two and two” thing going, like two light fabrics and two dark. In my case, I had two fabrics that were green/blue and two that were not. Lay two of your pieces of fabric together with right sides facing; in my case, that would be a green/blue piece and a not green/blue piece. Then do the same with the other two pieces. Sew a 1/4” seam on either side of each fabric sandwich.


Press the seams to set them and then lay your patches out on a cutting mat and cut them right down the middle, parallel to the two seams you just sewed. This will yield you two rectangles which are each 2.5” wide. Open up your two rectangles and press them, with the seam going to one side. For my pieces, I pressed them to the not-green/blue sides.


Now you’re going to sew the pieces together again. Take care how you line them up, because that will decide the final layout of your four-patch. So don’t sew like to like. In my case, I made sure to line up the green/blue with the other colors and not together. With right sides together, make sure that the seams you just sewed and pressed are nested together. Then sew on both sides of your squares; these seams will be perpendicular to your first seam down the middle.


Again, press the seams to set them, and then use your cutting mat to cut the squares in half in between the two seams you just sewed. Open up your squares and marvel…four perfect four-patch 4.5” squares. You will need to press the seams on the back of the work fully open, rather than pressing them to one side.


Take your four new patchwork squares and lay them out wrong side up. Then take your 4” fusible fleece squares, center one over each patchwork square, and use your iron (and a pressing cloth) to fuse the fleece to the wrong side of your squares. Take care that the glue side of the fleece is against your fabric and not, say, your pressing cloth. (I don’t want to talk about it.) Then lay your patchwork square and a background square with right sides together, pin, and sew around the perimeter, keeping your stitches as close as possible to the edge of the fusible fleece, but without sewing on the fleece. You don’t want that bulk in your seams. Leave yourself 2-3” unsewn along one edge so that you can turn your work right side out.


Press your seams to set them and then trim the corners off the work. Trim close to the stitching line without cutting into your stitches. I also like to use my pinking shears to cut around the rest of the work, although that’s optional. If you choose to do that, do not trim away the fabric where your turning opening is. Then turn the work right side out, using your finger or some other pointy object to get the corners turned all the way out. Turn the edges of your opening to the inside so that the edges line up with the rest of the seam, and press the work.


For the finishing work, I tried four different options. The first was to simply top stitch around the outer edge (which closes the opening) and then stitch-in-the-ditch from top to bottom and side to side. This is quick and easy and perfectly effective. I just don’t think it’s very attractive.


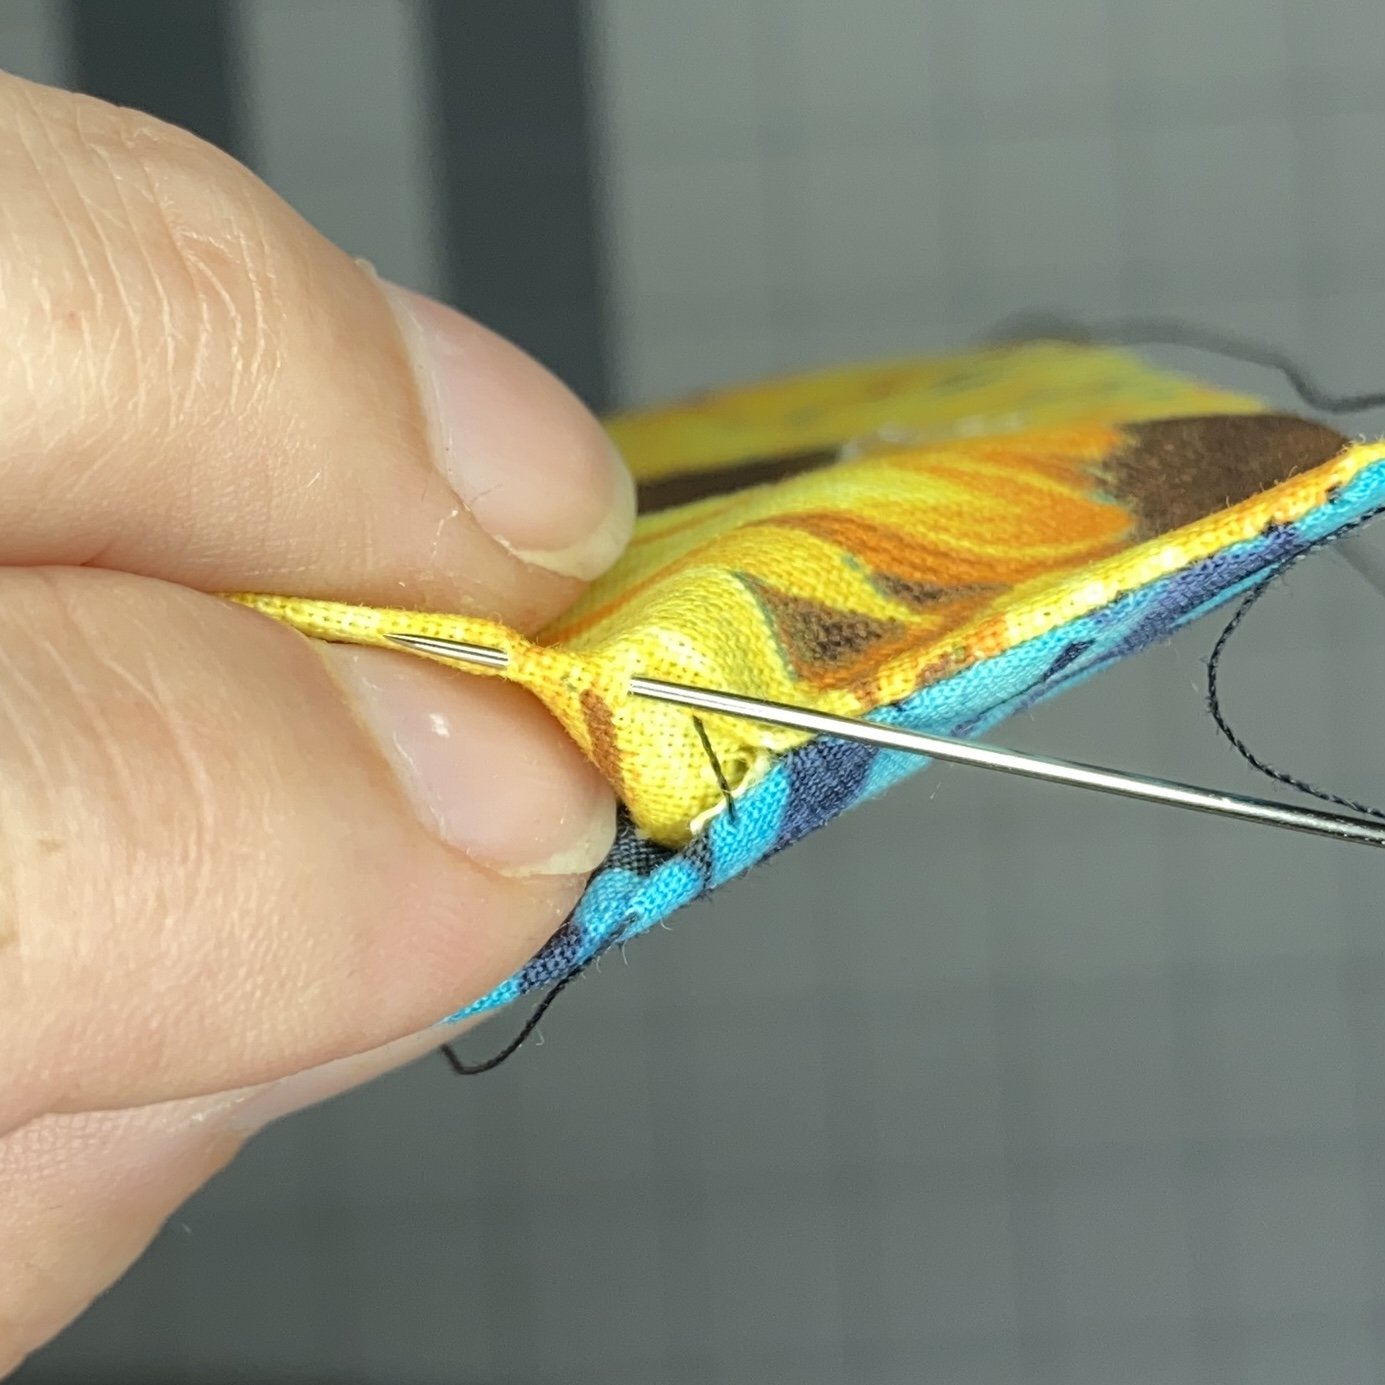
The next option I tried involved some hand-stitching to close the opening invisibly. This involves using the ladder stitch. I recommend this YouTube tutorial on the technique but essentially, you bring your needle up through the crease at the edge of one side, then straight across to the other side, go down into that crease and up again a little farther on. Once you’ve done a few of these stitches, you can see a ladder forming. It’s very satisfying to pull on your thread and see all the ladders tighten up and the seam close. I used black thread for this article, but if you used a matching thread, the seam would be completely invisible.


Once the opening was closed, I used my heat erasable pen to draw a line from corner to corner, and stitched on the line. I used that line of stitching against the side of my presser foot to sew parallel lines until I was finished. Then I drew another line the other direction and repeated the process. On the first set of quilting seams, I didn’t sew quite to the edge. On the second set, I stitched just off the edge before back stitching. I think it looks a little better where I stitched off the edge.


The third option again used a top stitch around the perimeter to close the opening. Then I sewed two more parallel squares inside my first line of stitching. Again this was quick, easy, and effective. But not very attractive. And finally, on the fourth square, I used the ladder stitch again to close the opening and then just sewed wiggly lines back and forth for the quilting. This was very easy, and I think I like this look the best. You could certainly choose a little simple hand-quilting instead of doing it by machine. These are small projects, so it wouldn’t take long and would be quite striking.


So there you have it…a perfect four-patch coaster with four different quilting/finishing options.
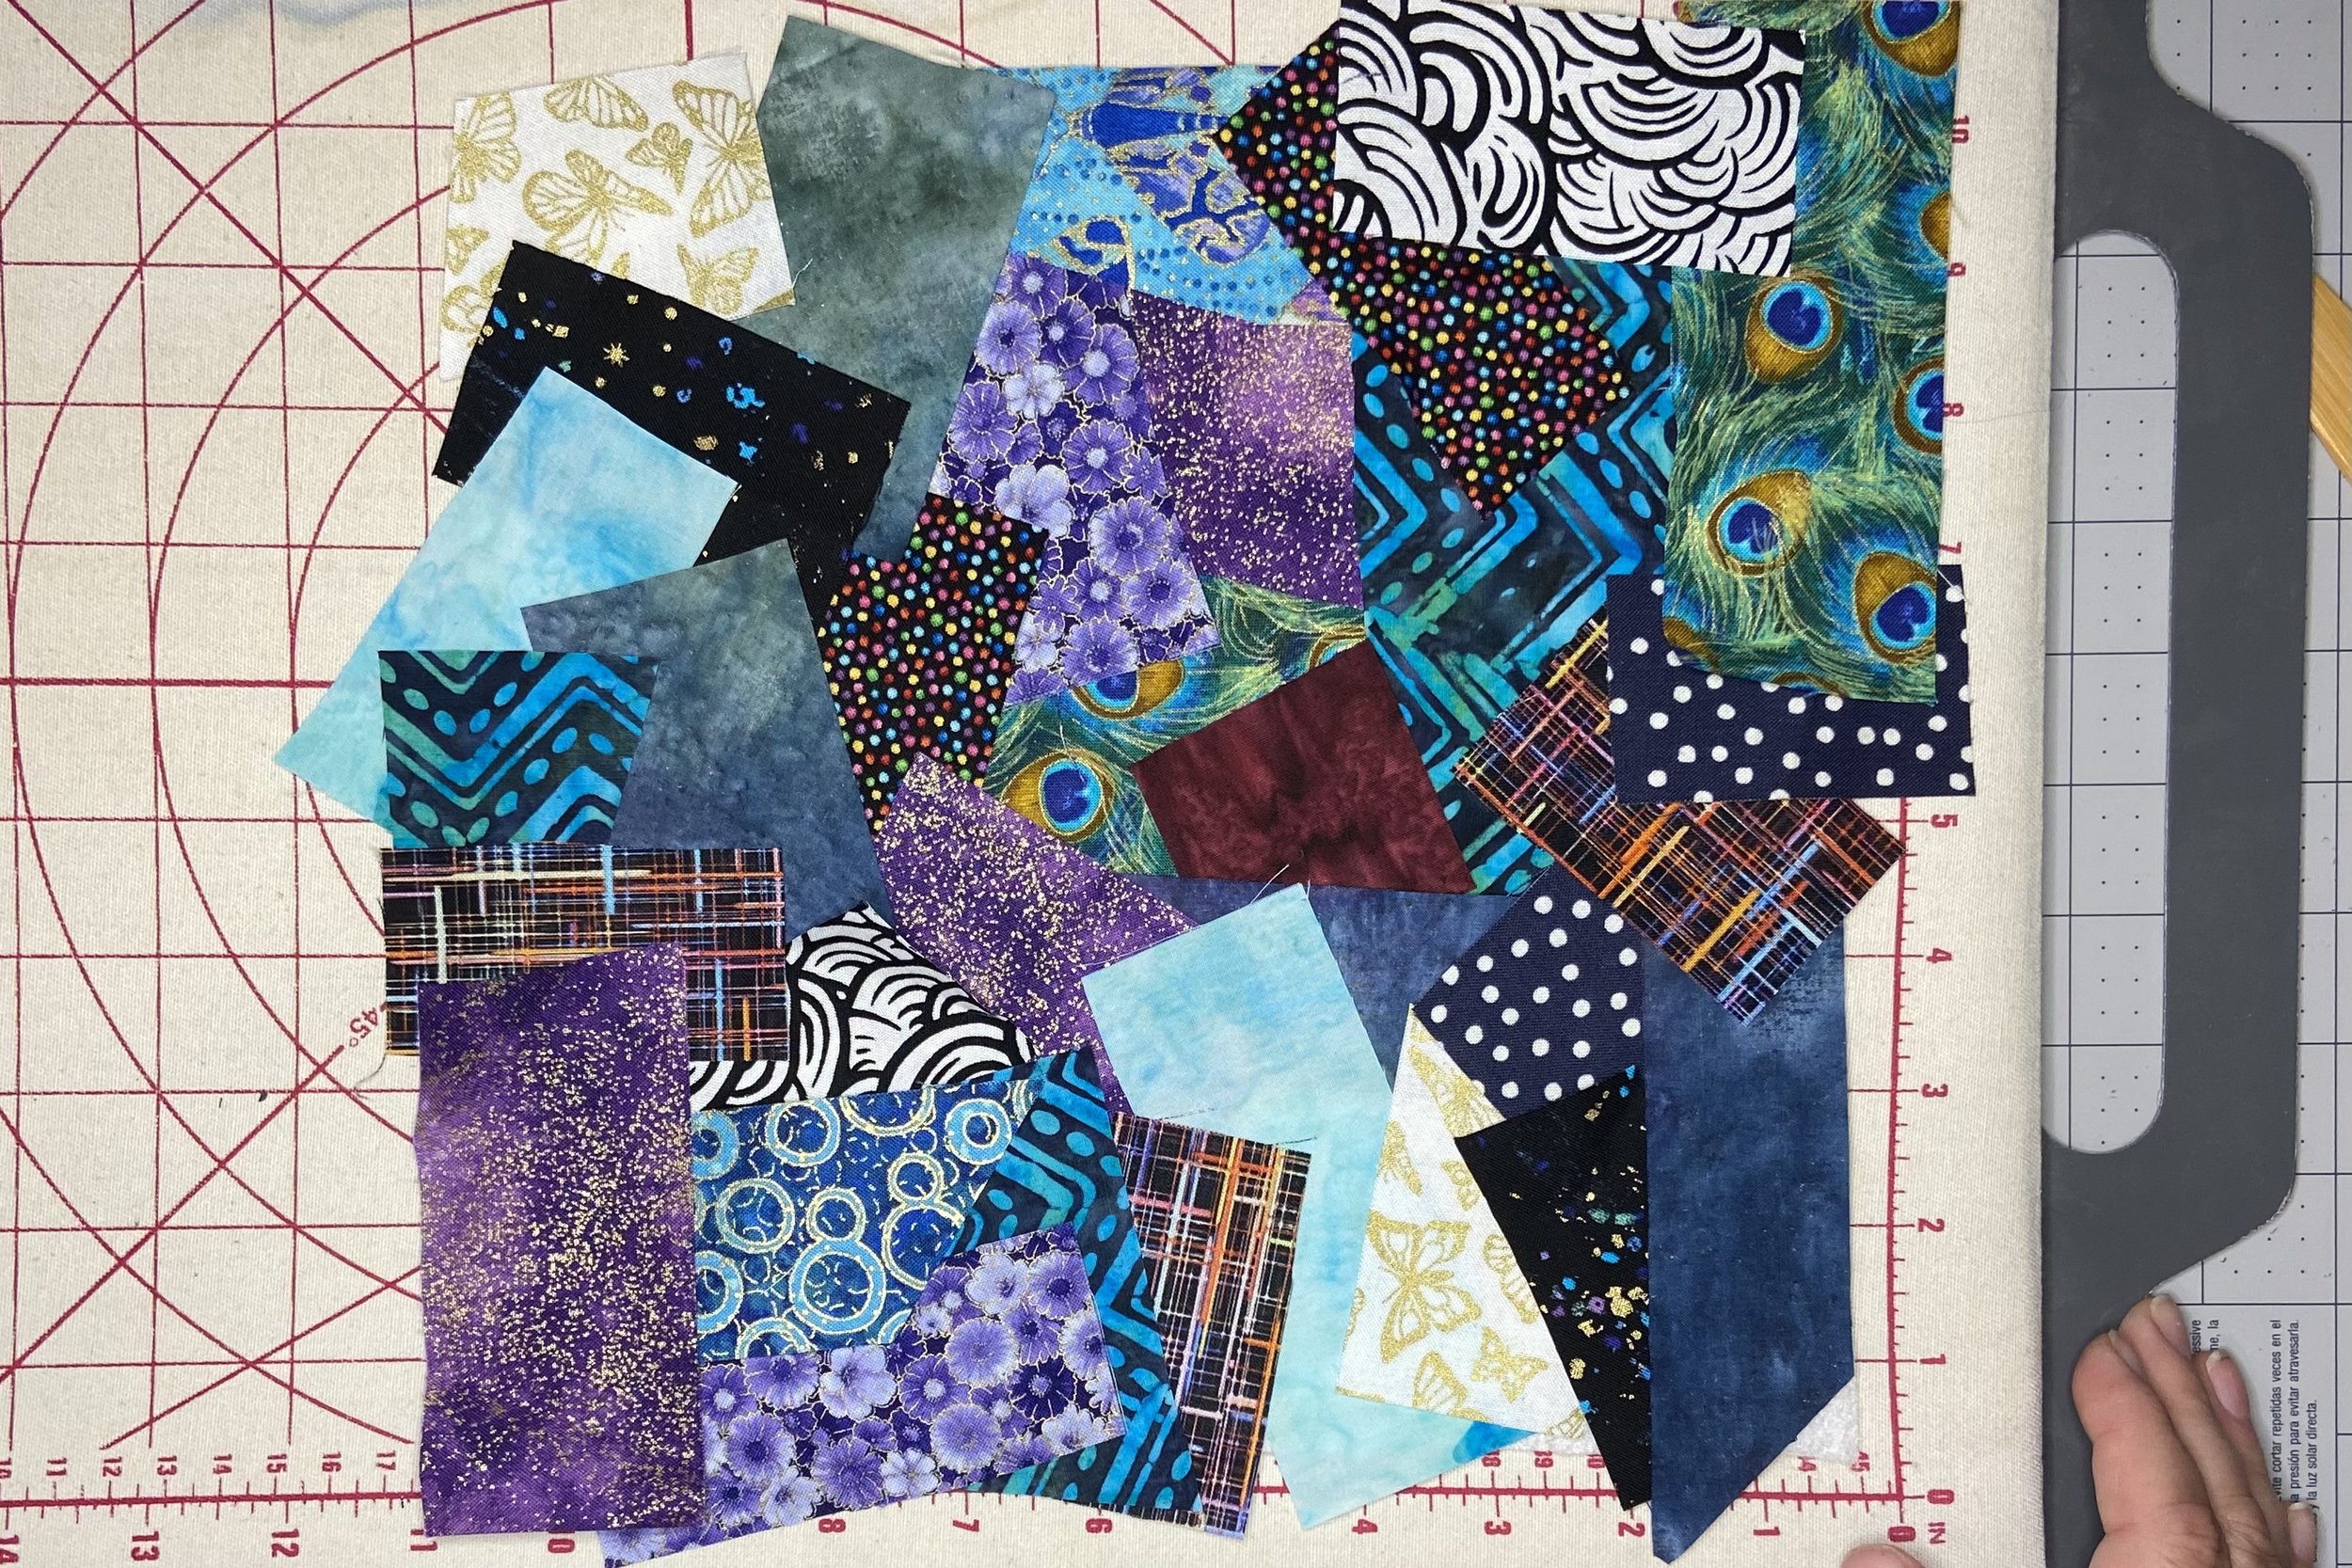
Now, for the other patchwork method…this one is so fun! Take out your bin of fabric scraps…what? What? You don’t have a bin of fabric scraps?? You need to get on that immediately. I suppose you could cut little pieces off larger bits of fabric, but scraps are better. Ahem. As I was saying…Start with a piece of fusible fleece that’s a little bigger than needed. Since my coasters were going to have a finished size of 4” square, I needed a piece that was at least 8x8” square. I went for 10x10” just to be safe. With the glue side facing up, start placing your fabric scraps on the fleece. It’s important to be sure that your pieces overlap at least a little bit, leaving absolutely no part of the fleece uncovered. Once you’ve got your fabric pieces laid out, use your iron over them, ensuring that every part of fabric in contact with the fleece is now stuck down. Then turn your fleece over and trim off any fabric that overlaps the edge.


Next is the part I particularly enjoy. Take the patchwork over to your sewing machine, set a wide zigzag with the stitches close together, and sew over all the places where you have raw edges showing on your patchwork. Once you’re sure you’ve got all the edges sewn down, have another careful look. It’s been my experience that I always miss at least one little raw edge. Get them all!


Next, you’ll want to cut your patchwork into 4 squares, each 4”. Along with those squares, you’ll also need 4 pieces of backing fabric, and those need to be 5.5” squares.


Take a backing square and lay it down wrong side up. Take a patchwork square and center it over the backing square, right side up. You should have about a .75” overhang of the backing fabric on all four sides, which you will use to wrap around the edge of the patchwork. Use a couple pins in the middle to secure the patchwork to the backing so it doesn’t wiggle about while you work on your binding. Starting with one edge, fold the overhang in half until the raw edge meets the edge of the patchwork. Then fold it over again, so that the raw edges are all contained and the fold comes over the top of the patchwork. Use clips or pins to hold this in place. Then do the same thing with the opposite side.


Now that you have two opposing sides of the binding folded down, it’s time to work on the adjacent sides in such a way that you end up with mitered corners. First, fold the corners in so that you end up with a 45° angle, where one edge rests right along the edge of the patchwork. I like to run my fingernail over this fold to sort of finger-press it into place for the next bit. Making sure that the angled folds stay in place, fold the rest of this overhang in half and then half again over the edge of the patchwork, just like you did for the first two (less complicated) edges. Clip or pin in the middle, and then put a pin or clip over each mitered corner. These corners WANT to miter themselves, but sometimes you have to wiggle the fabric a bit to make it work. This procedure is hard to explain…if it’s not what you want, just mess with it a little until it is.


Go to your sewing machine and stitch along the edge of the binding. For this, it’s quite helpful to use a small helper. I have a dainty little awl that I like to use, but you could find something else. The tip of a seam ripper would work…As you get to the mitered corner, hold it with the tip of the awl (or whatever) until your needle has locked it down.
And you’re done! Both these coaster sets make lovely gifts. And they are relatively quick and easy to make. I personally like the “crazy quilt” patchwork of the second set the best, but they both look nice. Also, I happened to use whatever fabric I had laying about and I used black thread to make sure it showed up in pictures. But both styles of coaster would undoubtedly look better with more carefully curated fabric choices and matching thread.
