Adventures In Reproductions
As an Amazon associate, I may earn a small commission if you navigate to Amazon from my site and buy something. This will not result in an extra cost to you.
I first saw the original store-bought C.C. Beanie hat on a co-worker, and took a bunch of pictures with the intention of reverse-engineering it myself for hand knitting. Imagine my delight to discover on Ravelry that someone else had already done that work!
If you want to buy the hat instead of knitting it, you can of course do that. You can buy it in the original configuration, or with a hole at the top for a ponytail to poke out (yuck; I’ve always hated that look), or you can get one with a Pom-Pom on top (Pom-Poms…bleh!). But since I like hand-knitting, especially smaller projects which are done quickly and make great gifts, I thought I’d give the Copy Cat pattern a try.


I followed the instructions for the Copy Cat C.C. Beanie and while they worked okay, I found the resulting hat to be a little small and also insufficiently slouchy for my tastes. So I adapted the pattern to my liking and wrote it up (click here for a printable PDF of the pattern). This is a fabulous pattern to make with a skein of really lovely worsted weight wool. I’ve made a couple in Cascade 220, an excellent and economical work-horse wool yarn that comes in lots of great colors. But I especially enjoyed the four hats I knit using Malabrigo Rios (if you don’t have a local yarn shop, try Webs online), which is lovely to handle while you’re knitting it and comes in sumptuous, rich colors. It’s also technically washing-machine friendly, although I still hand-wash all my woolen knits. I think it would survive well enough if you ran it through a cool, delicate cycle in the washing machine and then laid it flat to dry.
Before I get to the rest of the post, I want to explain why I am describing some steps in great (illustrated) detail and just glossing over others. I am writing this for people who already know at least something about knitting, so I am assuming a certain amount of knowledge. I’m being very specific about the steps I personally have struggled to master in the past; now that I have them down, I’d like to share what I learned. Also, I have to confess that in my rush to knock down my impressive yarn stash, I had used up all my worsted weight wool yarn. I actually had to buy two skeins of Knit Picks Wool of the Andes Superwash yarn (color is Garnet Heather) for this blog post’s hat. Okay…onward.
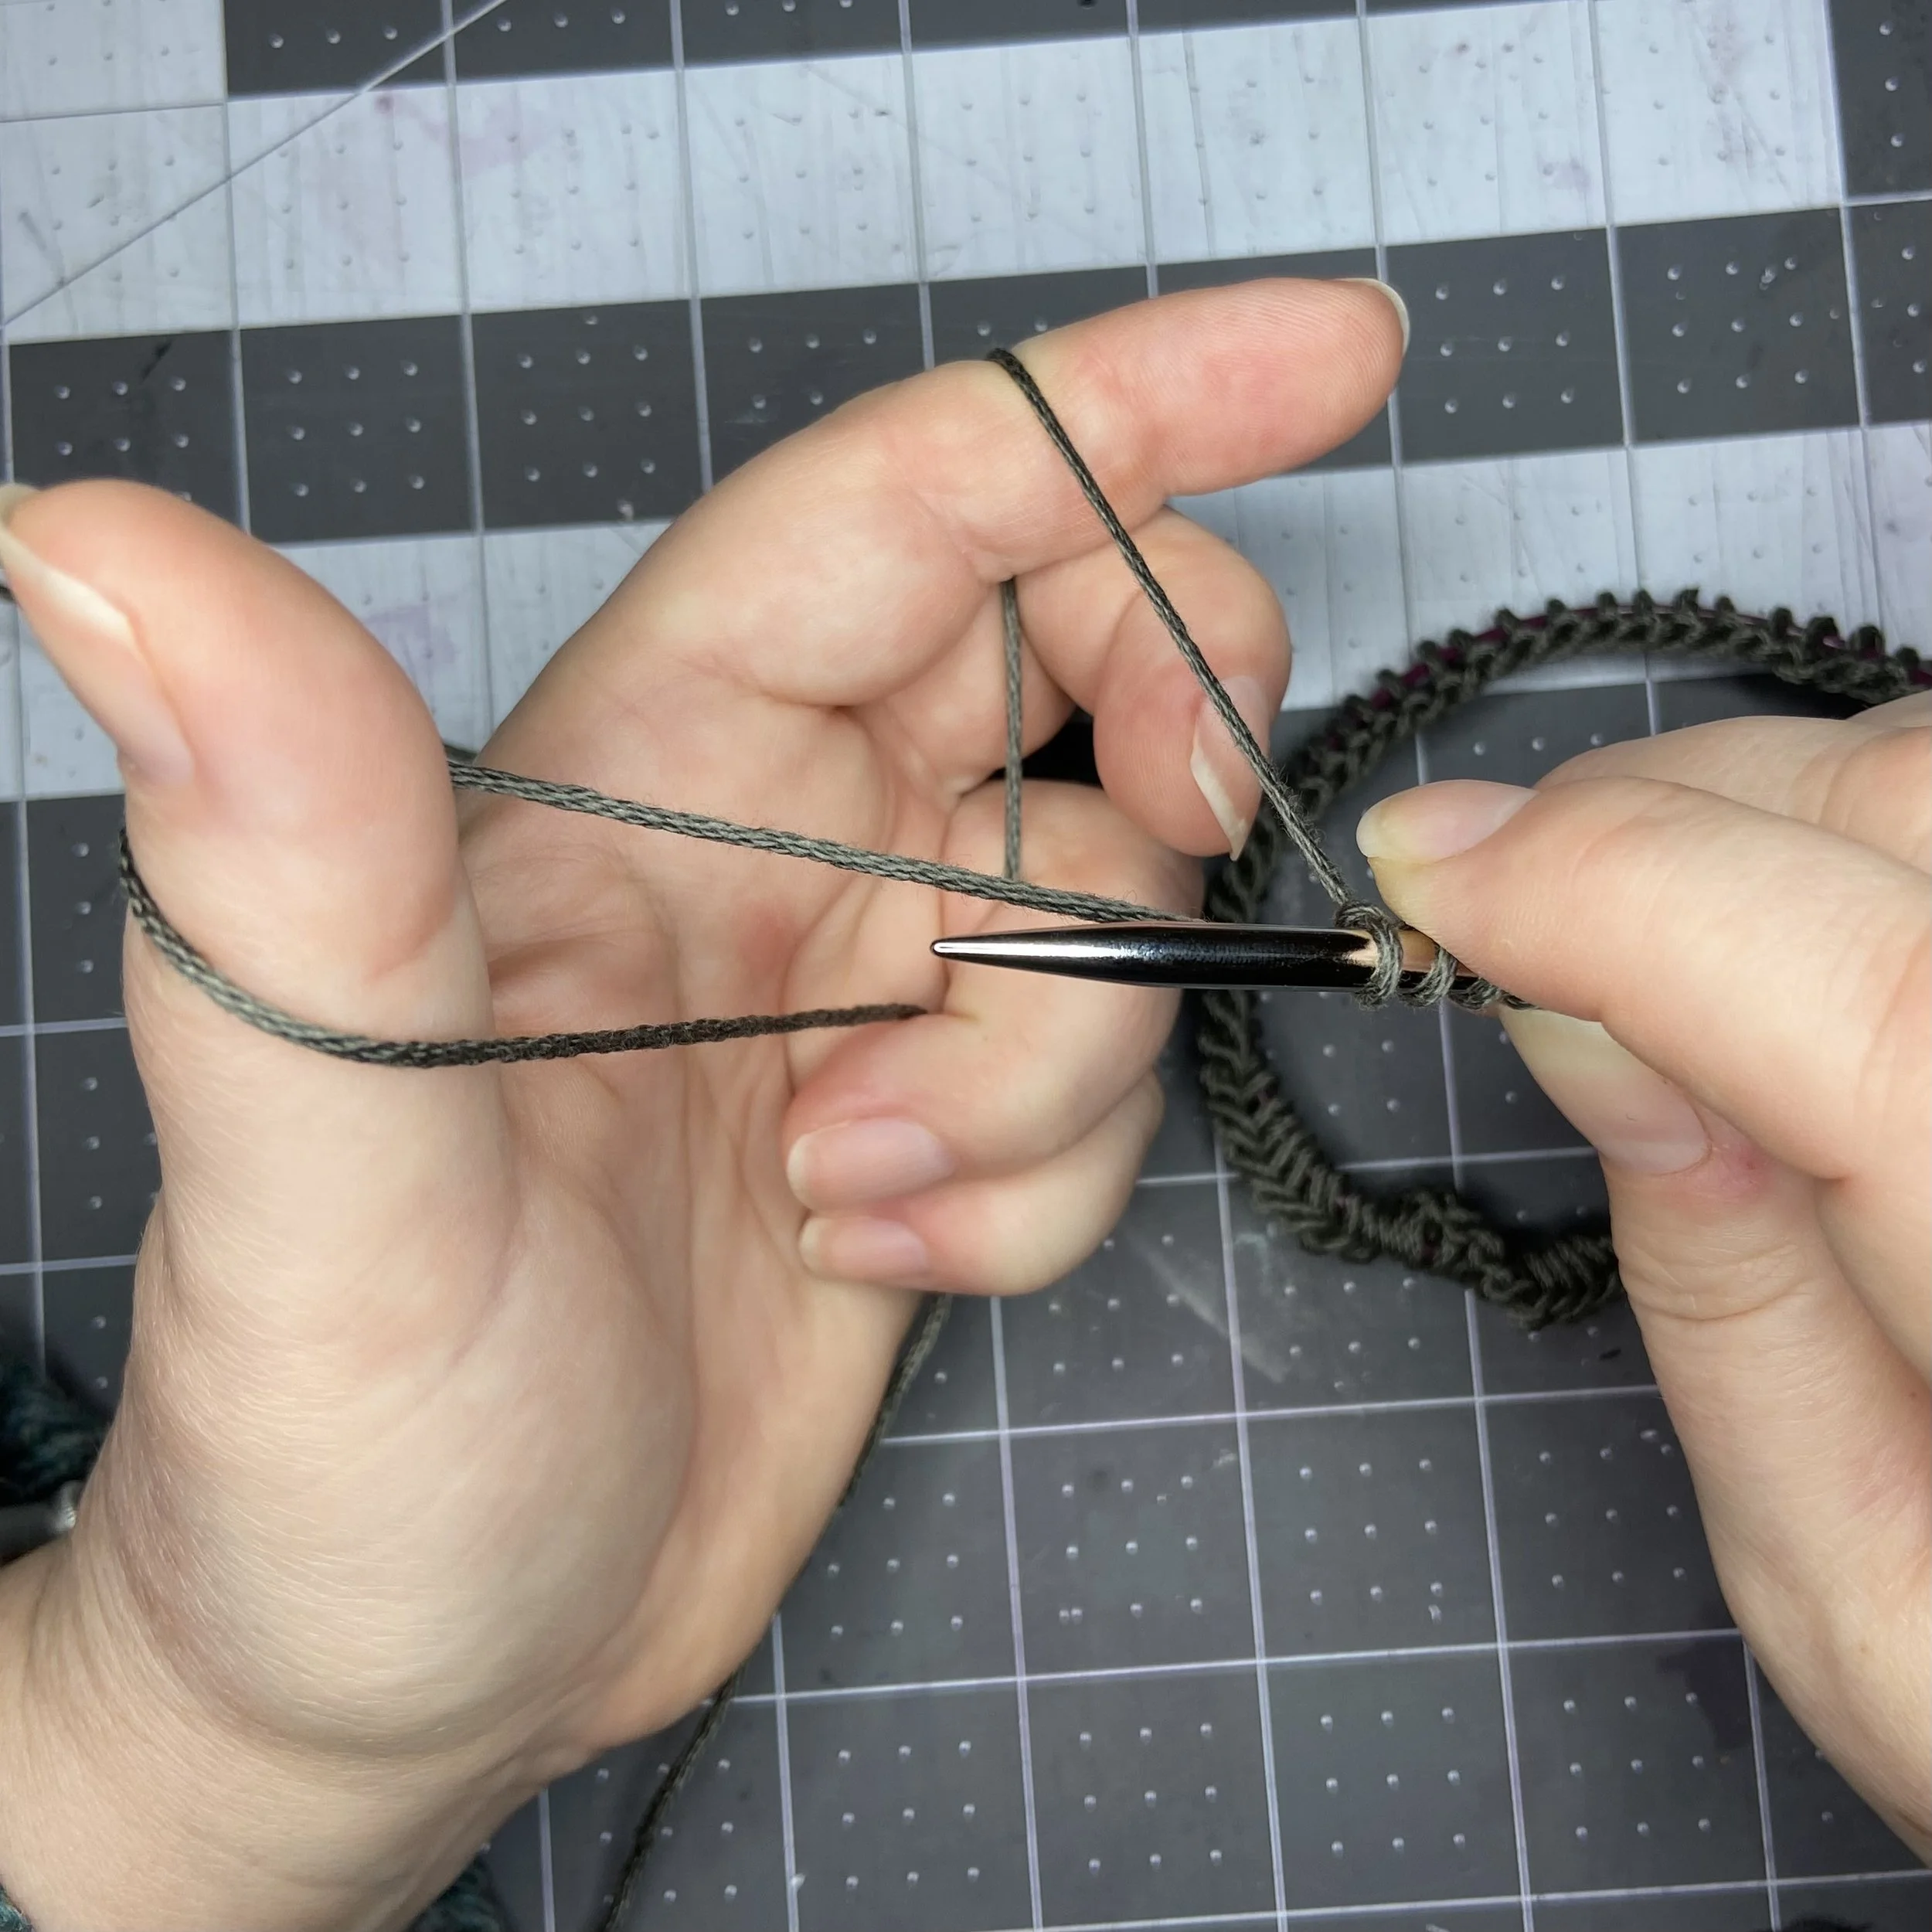
The hat starts out with a double thickness twisted-rib brim. I recommend knitting 2-4 rounds of plain stockinette stitch in a smooth waste yarn (I usually use cotton yarn for this) as a provisional cast-on before starting with the hat yarn. A contrasting color waste yarn makes it much easier to see your hat-yarn stitches later on, which is essential. Use any cast-on you like; it doesn’t have to be stretchy, because it’s going away and will not be part of your final hat. In fact, your final hat technically won’t have a cast-on edge at all because you’ll be joining live stitches to live stitches. Nice and stretchy! When you’re done with the scrap yarn, tie off the end strand to the beginning strand so that your stitches remain the same size. Then attach your hat yarn and work a couple rounds of stockinette in the hat yarn before you start with the twisted rib; this makes your life easier, as it holds the stitches in a clear (non-confusing!) orientation for later, when you’re joining the first row of hat-yarn stitches to the live stitches. When you have finished your first round in the hat yarn, again be sure to tie the working yarn to the beginning strand so that your stitches remain the same size.


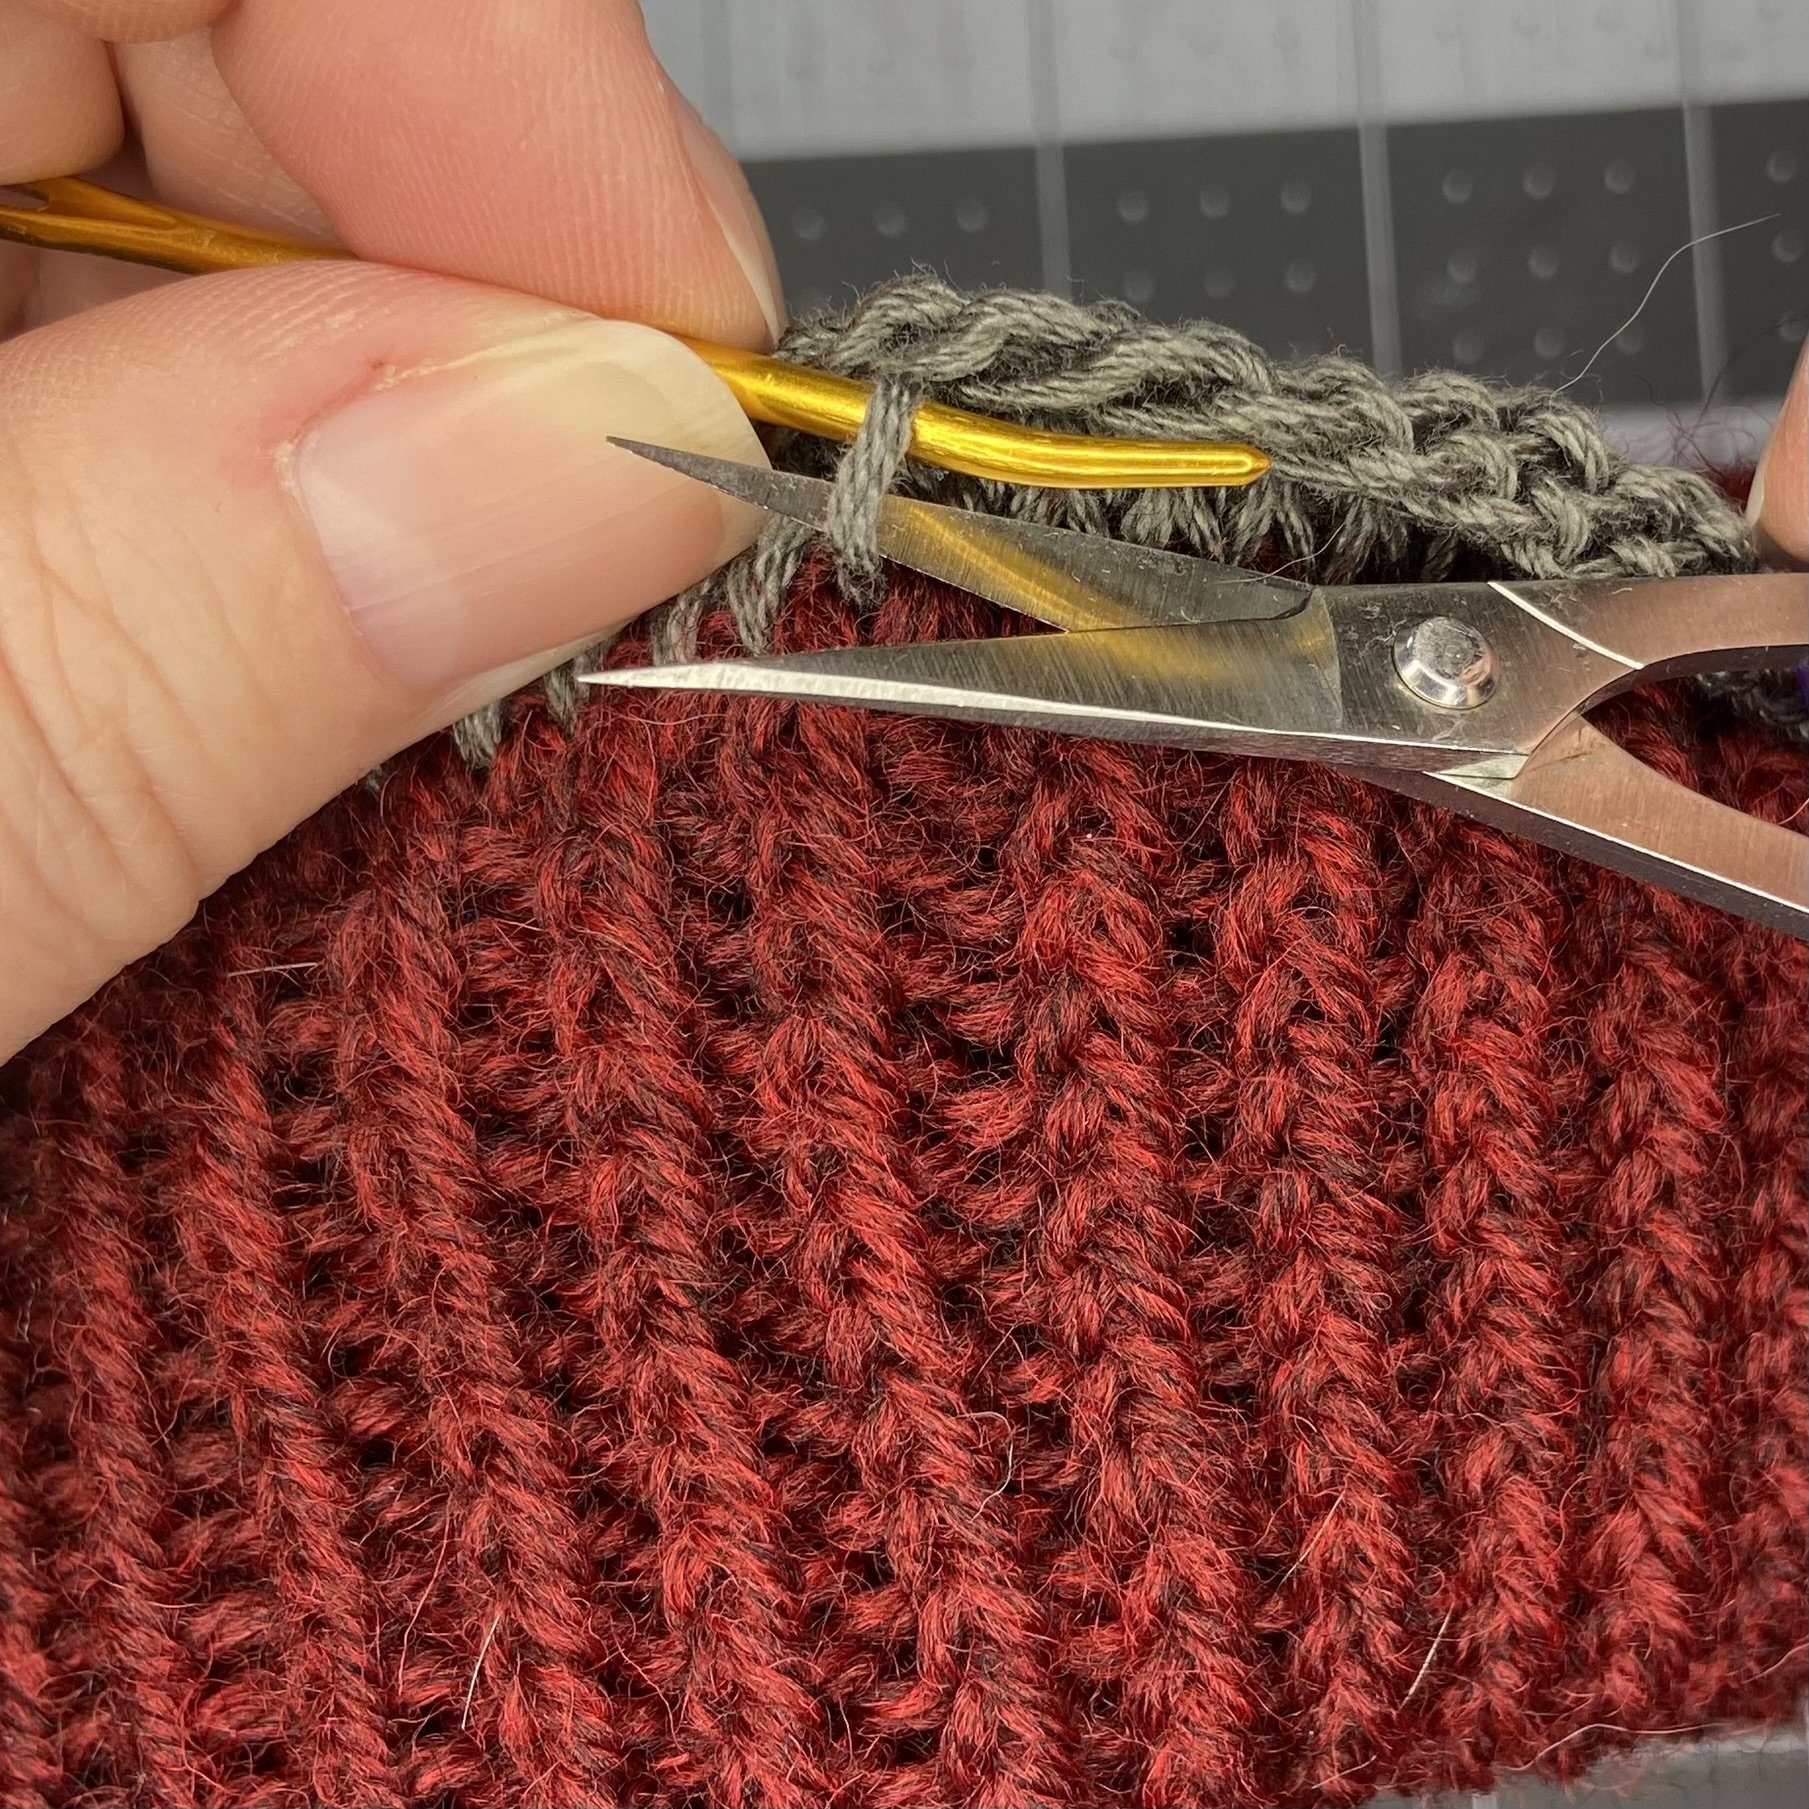
When you’ve knitted about 4.5” of 1x1 twisted-rib knitting, you’re ready to fold the brim over and join. Don’t try to “unzip” the waste yarn and don’t try to put all the stitches from the first row onto their own needle. Just fold the hem up to meet the live stitches and knit them together one at a time, leaving the waste yarn in place (for now). Be careful not to catch the waste yarn in the new stitches. Then just cut and pull out the waste yarn later. This is perhaps not the fastest way to do it, but I (something of a knitting fool) have found it to be foolproof.

Pick up the bottom of the stitch.

Lift it up and onto to left needle.

Knit both stitches together.

The next stitch to pick up might be hard to see, as it may have tightened/shrunk as you pulled on the stitch next to it.

This is how your work should be looking as you progress around the hat.
Pulling out the waste yarn is easy. Turn the hat inside out and go to the place where the waste yarn is now sort of hanging off your hat. Go slowly and be careful to cut and pull only on the waste yarn, not on your hat yarn. For a look at all this in motion, you can view the video at the end of this post.


And here is how it looks after you’ve picked out the waste yarn. Flawless!
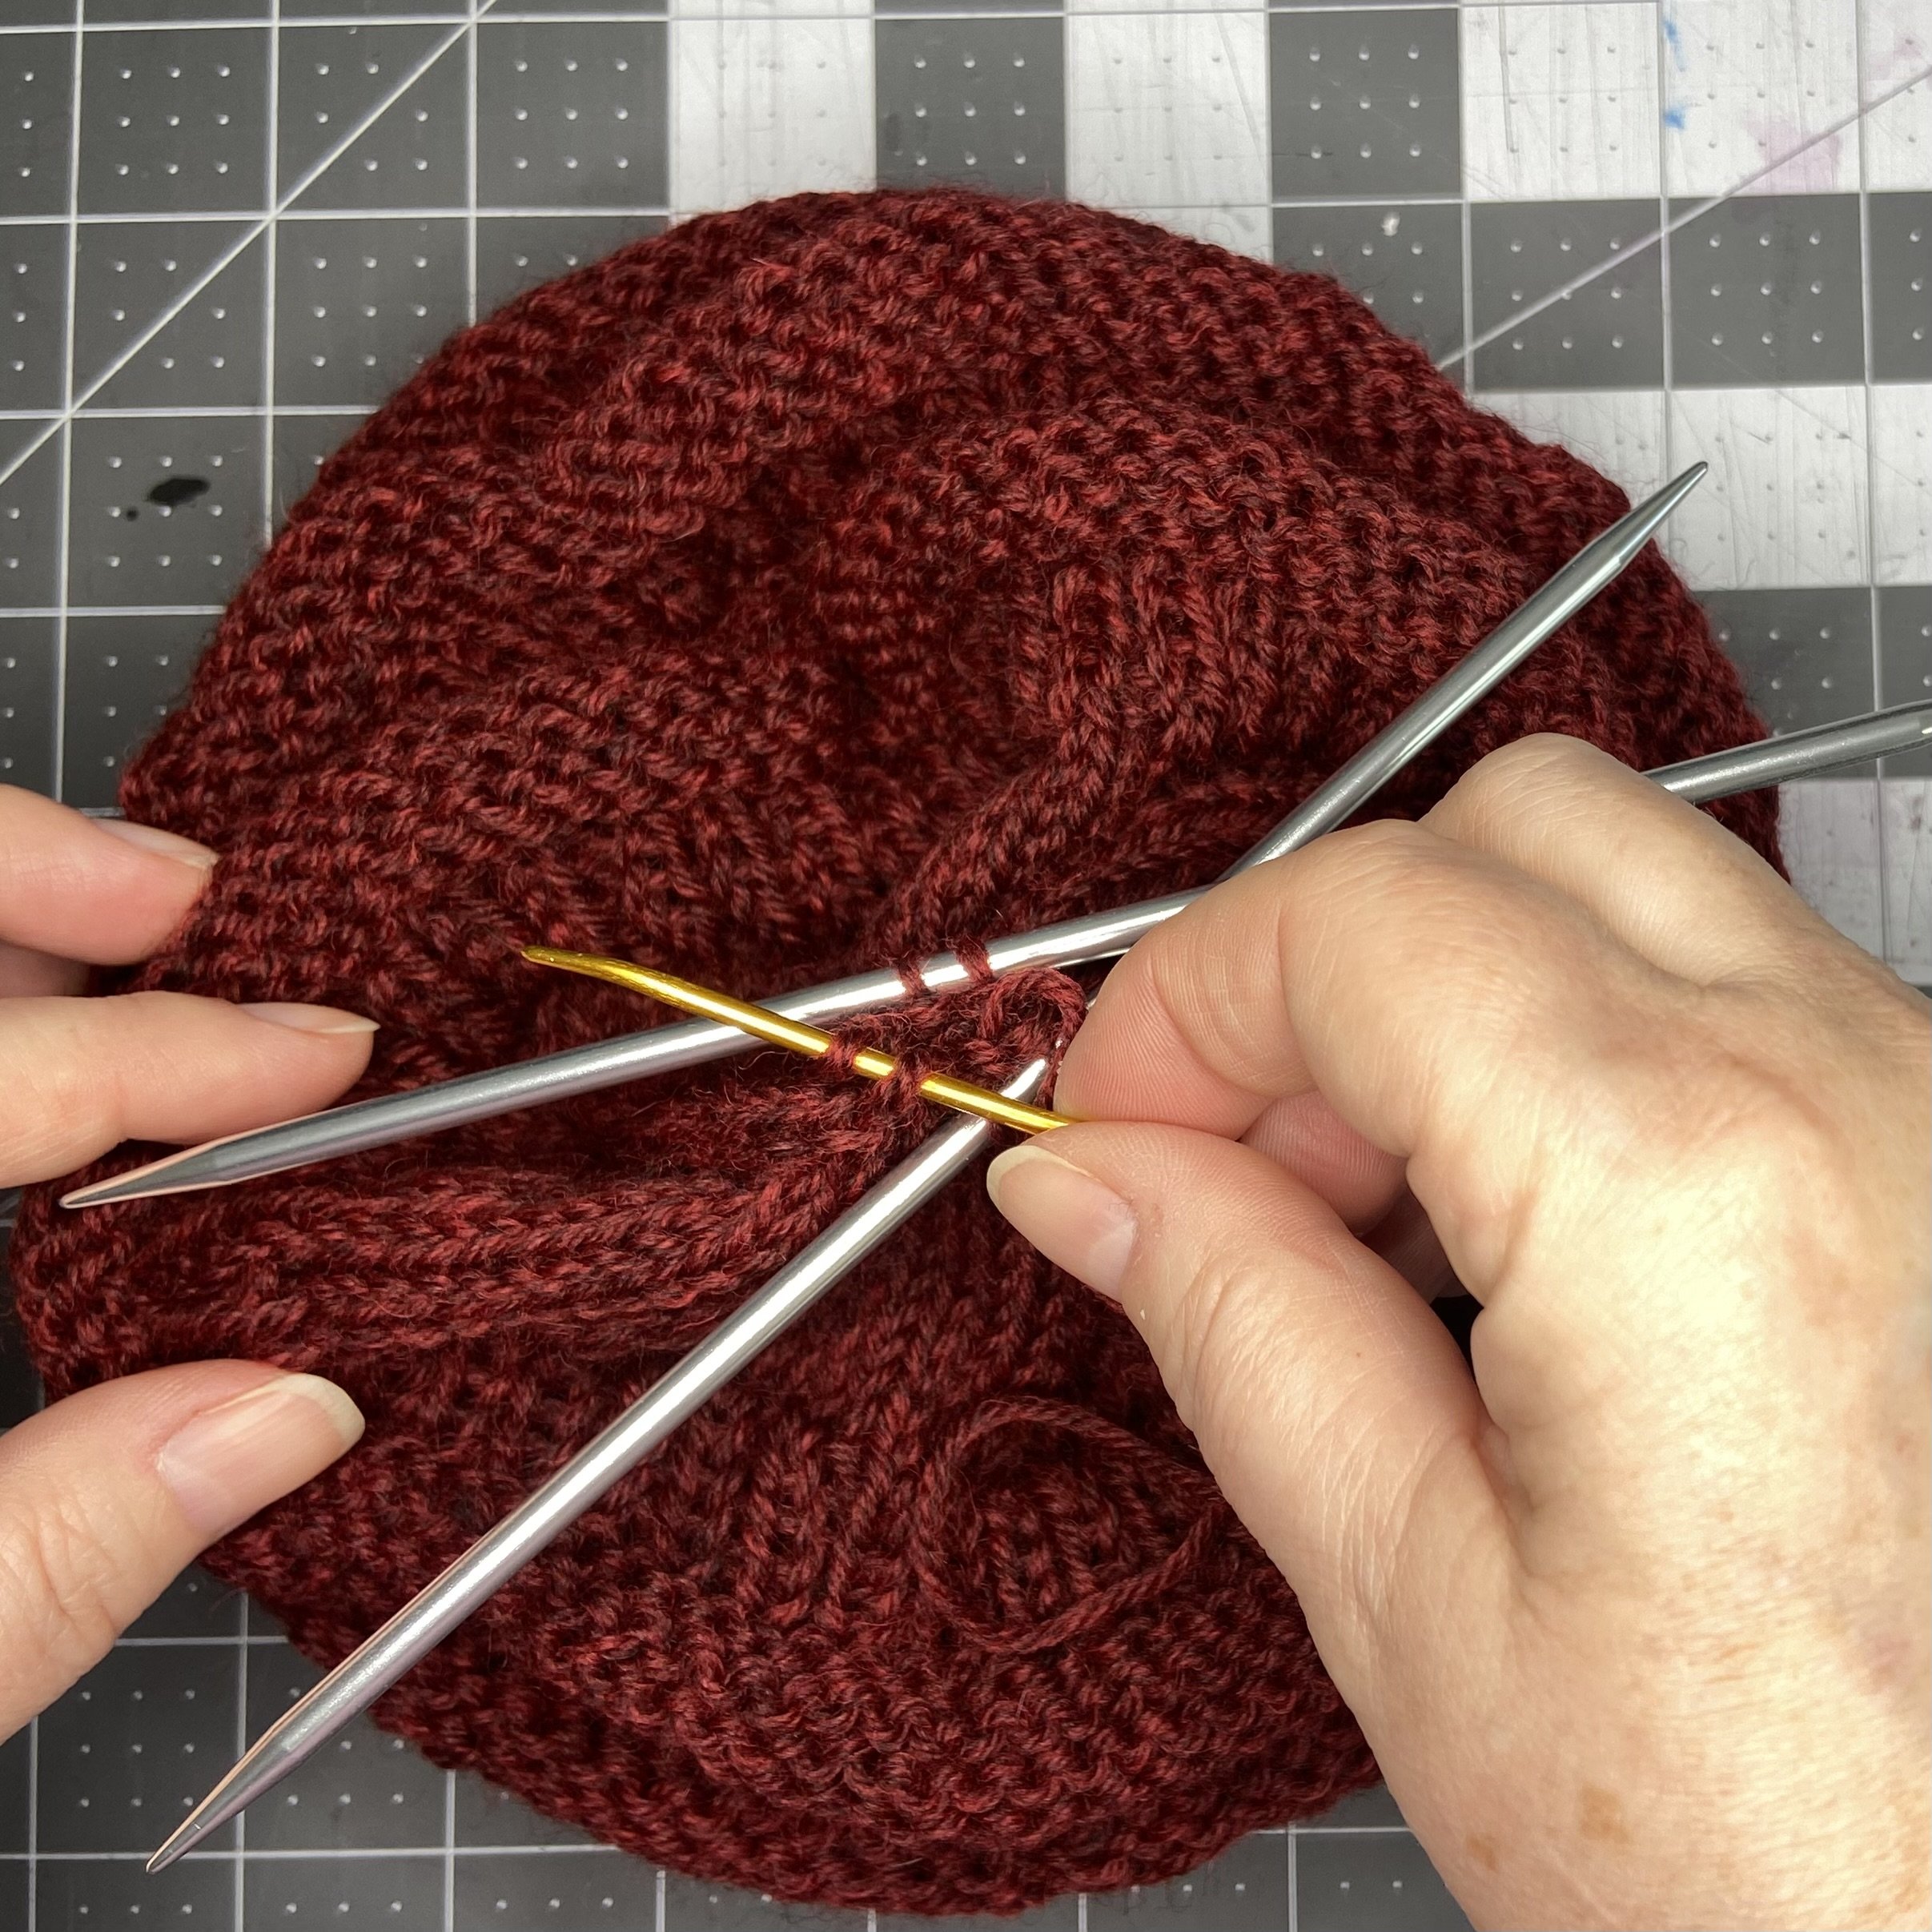
Knit one more round in plain stockinette stitch and then start the pattern, which gets repeated three times. Once the main pattern is done, it’s time to start closing the top. You will place more markers and decrease just before the markers on every round until you only have six stitches left. After a few rounds, you will need to switch to double-pointed needles as you will have too few stitches for your circular needle. Don’t forget to mark the beginning of the round (easiest with a locking marker on the first stitch, rather than on the needle). If all goes well, it will be unnecessary. However, if you make a mistake and have to go back, you will be very glad that you know where the round begins and ends.


Once you are down to just six stitches, you’ll need to stop knitting, cut the yarn with about a 12” tail left, and then use a blunt needle to thread the cut yarn through the last stitches, pulling out the double-pointed needles as you go. Tighten the thread to close the little hole at the top, and then poke the thread through the center to the inside. Turn the hat inside out, and weave the end securely to the stitches inside. Knots get a bad rap in some knitting circles but I’m a big fan. Knots are secure. You can be sure that the yarn tail won’t go walkabout and the hole at the top of your hat won’t open up. On this project, I tied three knots on that finishing tail as I wove along the inside of the hat. VERY secure.


Now, if you look at the hat, it looks uneven and lumpy and generally not awesome. Definitely doesn’t look like the pictures of the store bought hat. Never fear! It only needs to be washed and blocked, like any knitting project.


Give the hat a good soak in some tepid water and a little wool wash, gently squeeze out the water, then gently press it in a thick towel to take out the rest of the water. Gently, I said! Do not twist or wring the wet wool. Then carefully drape it over some form to dry, as the shape will be better if dried on a form. You can dry it flat if you have to. For my form, I use a 7” styrofoam ball that I found at some craft store a million years ago, but you can get something like it off Amazon. I left the plastic wrap on it, as it plays nicer with the wool that way. Then to let the bottom dangle free, I set the styrofoam ball on a bowl to elevate it off the counter.


And it’s done! Honestly, I’ve been knitting for years but the transformation of washing and blocking a finished project never fails to amaze me. It’s like magic every time. Beautiful!
Since these hats knit up very quickly, I might have made enough hats (four) for all the ladies in the family to have one for Christmas.

