Adventures In Germ Warfare
As an Amazon associate, I may earn a small commission if you navigate to Amazon from my site and buy something. This will not result in an extra cost to you.
Regardless of anyone’s opinion of COVID (leftist conspiracy theory, “bad cold,” world-threatening pandemic, etc), I think that no one can deny that the winters of 2020 and 2021 when we were all wearing masks were winters where fewer of us caught colds and flu…and COVID. When the new “mask reality” kicked in, I jumped on board and sewed a bunch of different kinds of masks until I finally found my chosen style. Once I was in the groove, I made so many that I lost count after fifty. I carried around a bag of masks in beautiful colors and gave them away with wild abandon.
Once the pandemic seemed to ease and everyone (for the most part) stopped wearing masks, I stopped making them. Pity, since I hadn’t used up all the fabulous fat quarters I bought in gorgeous fabrics, nor the “extras” that I bought for mask making (elastic in a wide array of colors, special “nose bridge” strips, and little silicon stoppers to adjust the fit of the elastic). But now that new and more contagious variants are on the rise again, I thought I’d go back to mask making. Hey, it would be nice to have another winter without colds or flu. Or COVID.
The pattern I am using now is closely adapted from a genuinely brilliant design made by a YouTuber who calls herself Midnight Baker. The video from which I adapted my technique can be viewed here; I highly recommend it.
I recommend using fat quarters, which will make two masks. And I recommend sewing them at the same time, sort of assembly line style. You can buy fat quarters at any fabric store (and I have), but I have really enjoyed the gorgeous prints that are carried by Jordan Fabrics. Also, you’ll want four 12” lengths of 1/4”elastic in your chosen color, matching or coordinating thread, light or medium weight fusible interfacing, and the silicon stoppers. Under the “not essential but very helpful” heading, a rotary cutter, and a self-healing mat with grids and angles on it are also desirable. Also useful are clear quilting rulers; I have several that I use, but if you need to buy one, you’ll likely get the most bang for your buck from this one.


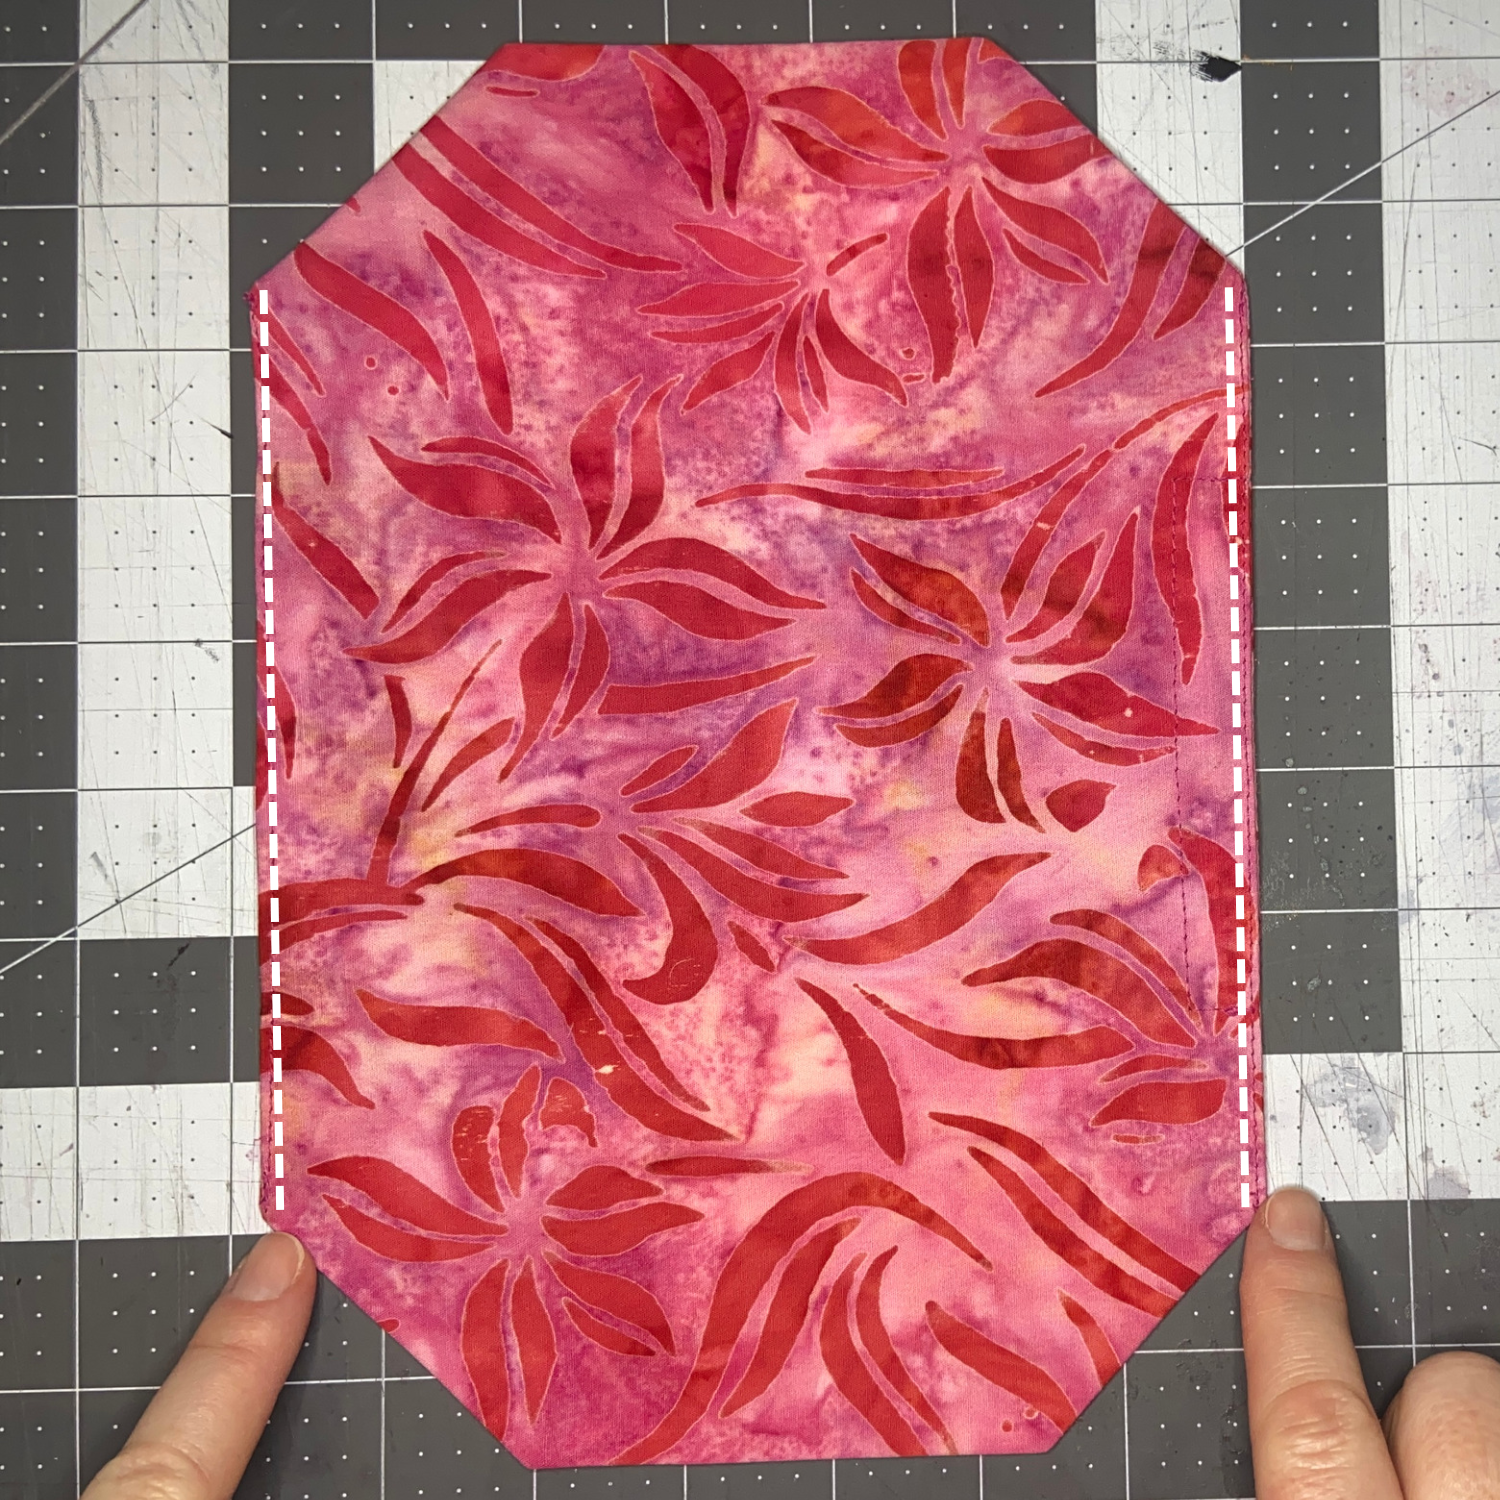
Iron your fabric, and then cut it into four pieces that are 10.5” x 7.5”. Then, you’ll need to take 2” triangles off the corners. For that, I like to collate all four pieces of fabric and pin them together, so I can cut all four at once. If you have the rotary cutter and the mat, the easiest way is to place your fabric 2” over the 45° mark and cut them that way. If you are using scissors, just measure/mark 2” on either side of each corner, draw a line connecting your marks, and cut along your line.


Next, cut two pieces of interfacing 10” x 7”. Lay them over your trimmed mask pieces and cut off the corners that way. You should have about 1/4”-1/2” of fabric along the edges that isn’t covered by the interfacing. Then fuse each piece of interfacing to the wrong side of one of your four pieces of mask fabric. Be sure to double check that the “glue” side of the interfacing is against the fabric and not, for example, against your pressing cloth. (I don’t want to talk about it.) Now you should have two pieces of fabric without interfacing and two pieces with.
You’re ready to start sewing! Pair up your interfaced fabric and non-interfaced fabric with right sides together and pin. On each mask, mark a section on the long side that you will leave un-sewn, so that you can turn it later. Then stitch around the perimeter of the mask, using 1/4” seam. When you are done, you should have two pieces now (since you’re doing two masks at once) sewn most of the way around but with an opening along the long side.


Before you do anything else, I recommend that you press both pieces; this helps the stitches relax and makes it less likely you’re going to end up with puckers later. I also recommend that you trim the excess fabric off the corners. This will make it easier for you to get crisp corners later. Then you’re ready to turn your masks. Reach through the opening, grab some fabric, and gently work it through until the mask is completely turned right side out. Then reach into the opening again with a skewer or bone folder or other appropriate tool (or just with your pointy finger) and poke out the corners, so they look relatively crisp. Where you have the opening, turn the edges under so that they line up with the rest of the seam and press again.


At this point, you have options. The mask fits reasonably well (and is easier to wash) without a nose wire. If you want to skip it, then you can skip this whole step and move on to top stitching. But I put them in because I want my masks to fit very well. Using the nose bridge strips of your choice (I got these on Amazon), slide one inside the mask all the way over to the closed side. From the outside, you can still maneuver the strip pretty easily, so snug it right up against the seam, centered along the long side, and then pin it in place. Off to the sewing machine again, and stitch along the three sides of the strip, securing it.


Now top stitch very close to the edge along the long sides of the mask. There’s no need to go all the way around…you will end up top stitching everything else later in the natural course of making the mask. This closes your opening as well as really securing the nose strip. Be careful when stitching alongside the nose strip…you don’t want your needle to be punching through that. The noise it makes is quite disturbing. (I still don’t want to talk about it.)
Next, fold up the long edges on both sides sort of like an envelope as seen here, and press. Then top stitch along both folded edges, starting and ending about 1/2” or so from the ends.


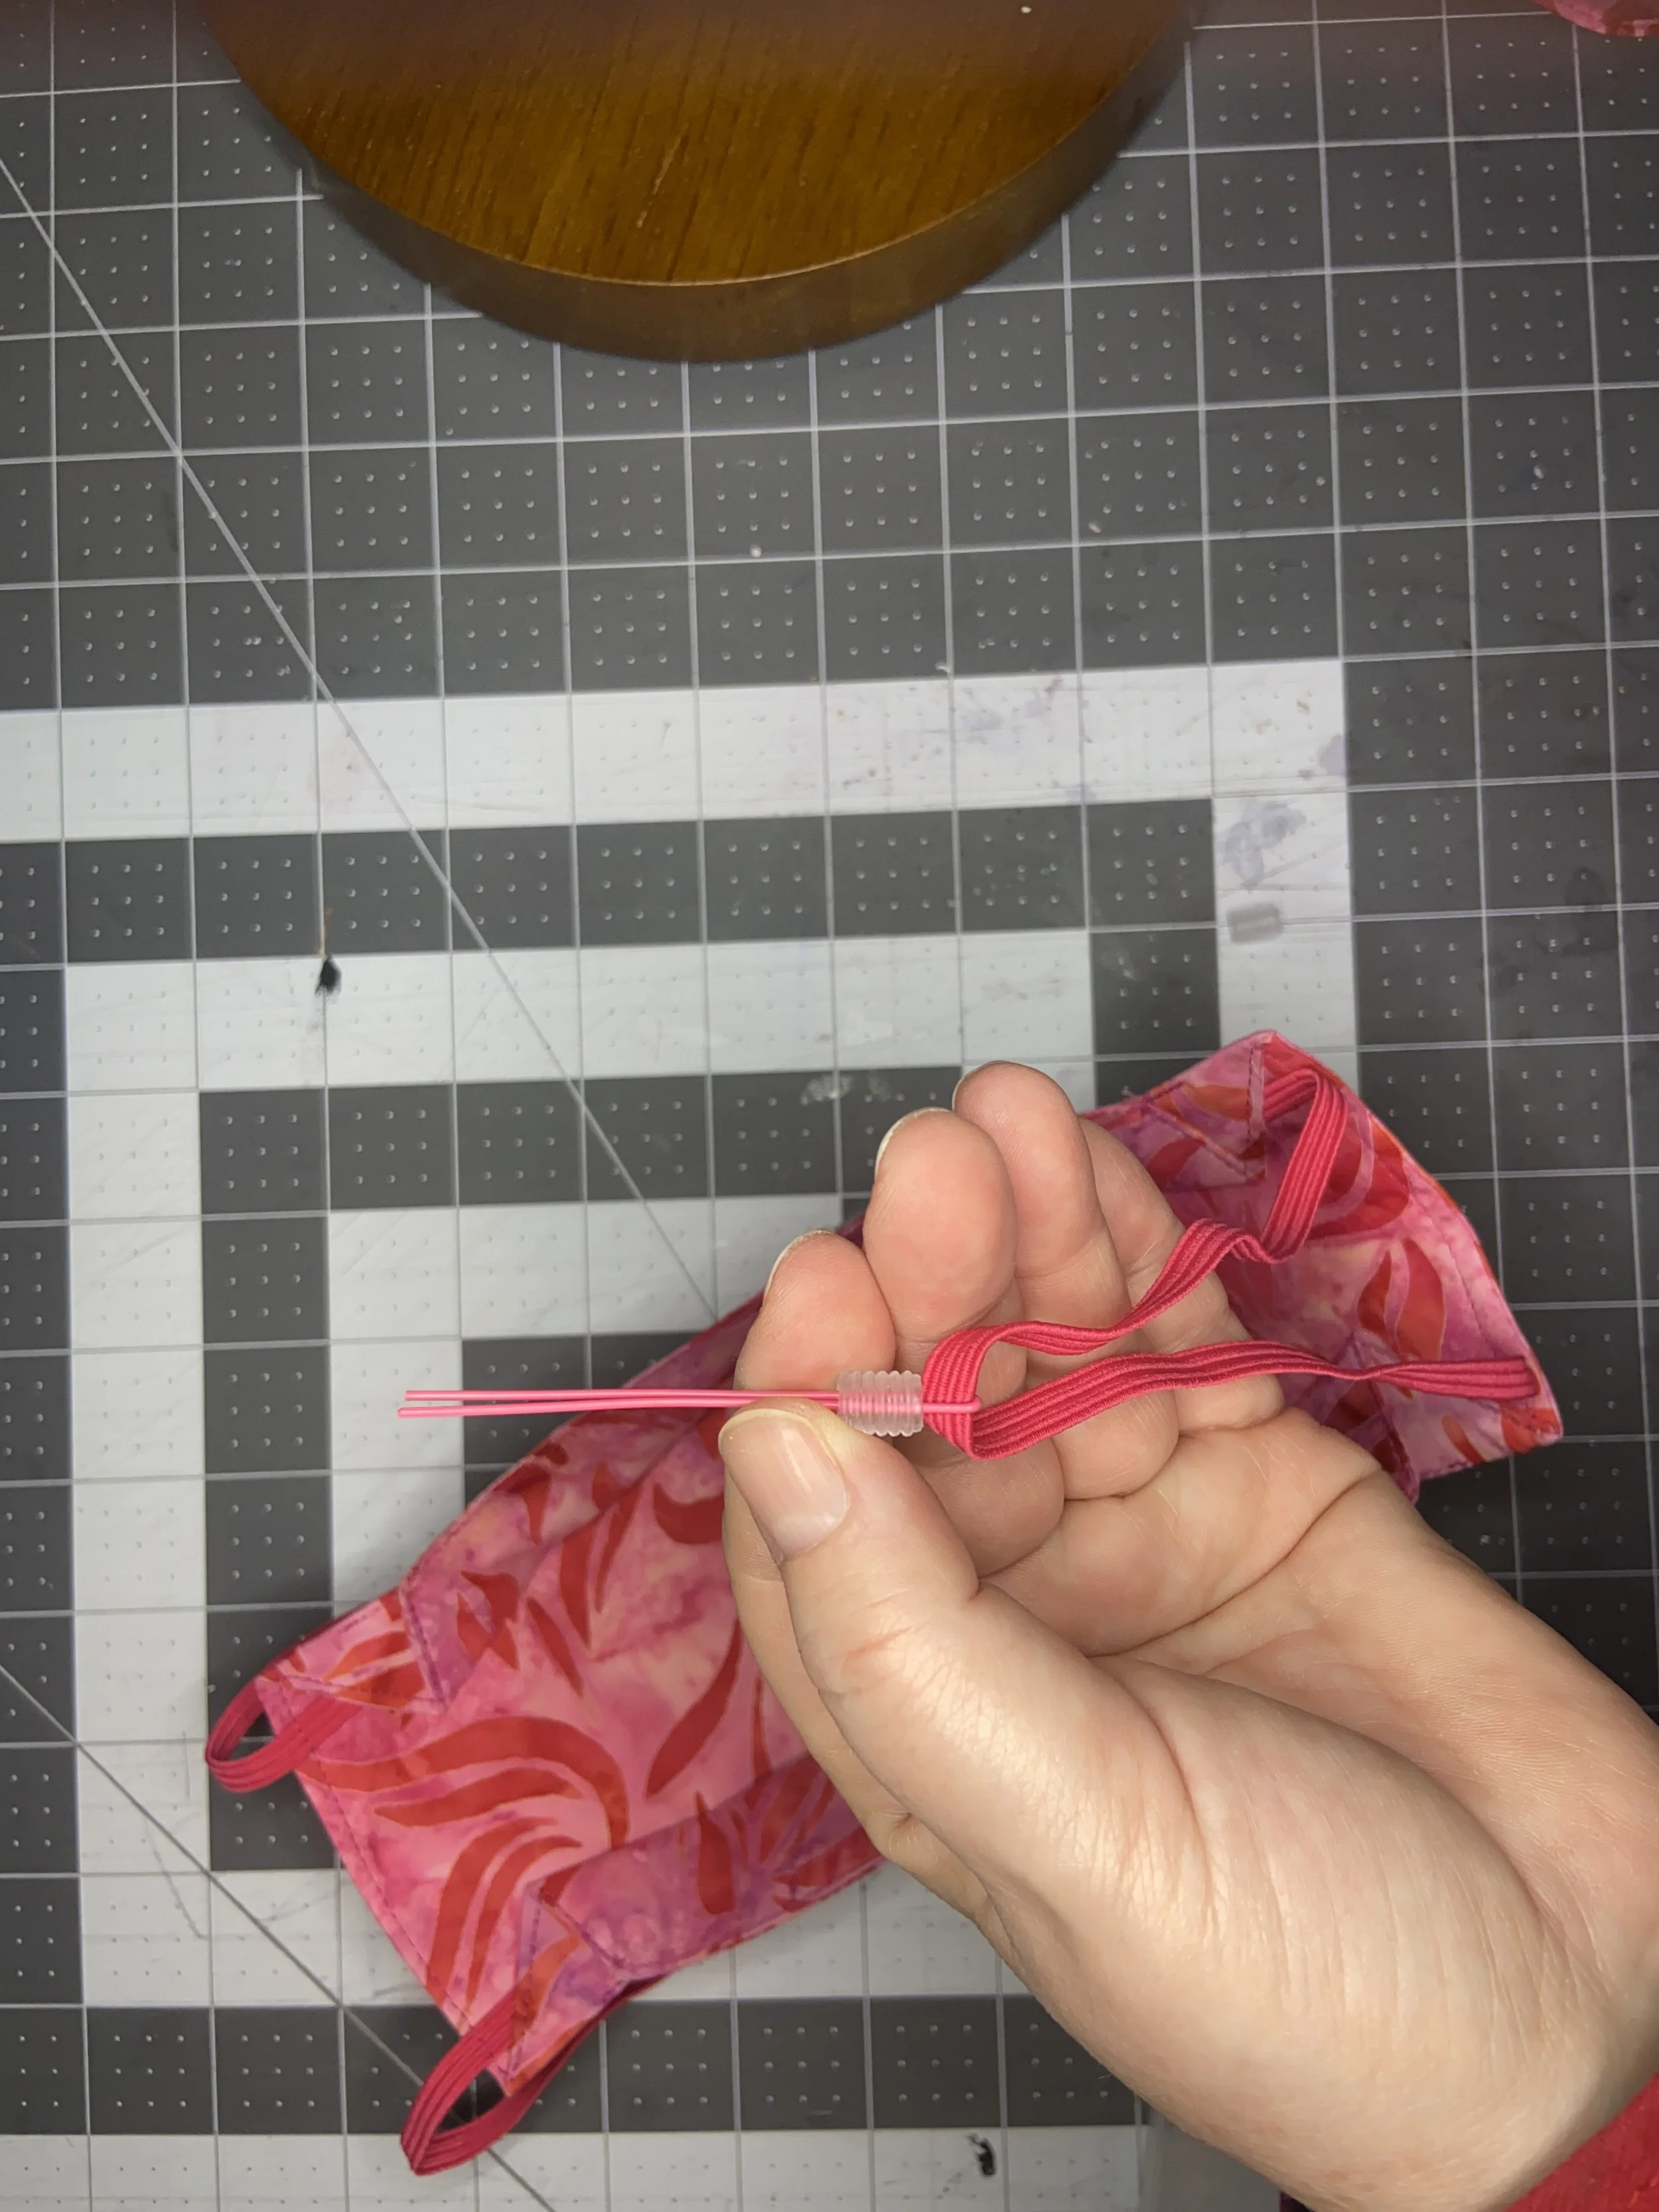
Now you’re going to do a bit of origami. If you find the explanation doesn’t make sense, even with the pictures, then go back up to the YouTube video I’ve linked above and watch that. But what you’re going to do is fold back the edge you just pressed/stitched and angle it so that its edge is parallel with the outer edge of the mask, as seen below. This is going to twist the rest of your mask. No need for panic: this is what we want, as this is what gives the mask its 3D shape. If your mask isn’t twisting, then probably you haven’t lined the fabric up correctly. Pin that first flap in place and then grab one of your pieces of elastic. The next picture shows roughly where you’re going to place it and how deep you’re going to insert it. Stick it under that flap and pin it in place. Then twist up the fabric at the bottom to mirror the top and pin it in place. Pin the other end of the elastic in place. Make sure you haven’t twisted the elastic. A warning: resist the urge to push the elastic all the way to the corners. The elastic ends need to have no more than 2.5” or so between them. If you spread them out farther than that, then your mask will have a gap at the cheeks when it’s being worn.


Then just stitch along the line indicated.
Now repeat this three more times and voila! You have two fabulous masks. The final step is to put the stoppers on the elastic. I bought black and white and clear stoppers from Amazon but I mostly use the clear ones (sadly, not currently available). Use a hairpin or unfolded paper clip to pull the elastic through the stopper and you now have a mask that will fit most any average adult.


If you don’t have stoppers, you could tie knots in the elastic to shorten it to the desired length. Or you could try to get the exact right length and sew that in. But that’s tricky, as every person will have a slightly different measurement, and when the mask inevitably shrinks a little with repeated washing, your once-perfect elastic will end up being too tight. But whatever you decide, you now have a lovely 3-layer mask (actually, hopefully you have two masks), with one of the layers being non-woven and therefore less permeable. Plus, they’re very satisfying to make. Give it a try; it’s fun!