Adventures In Sockitecture-Part 2
This blog article will not make much sense if you haven’t read part 1, which you can find here.
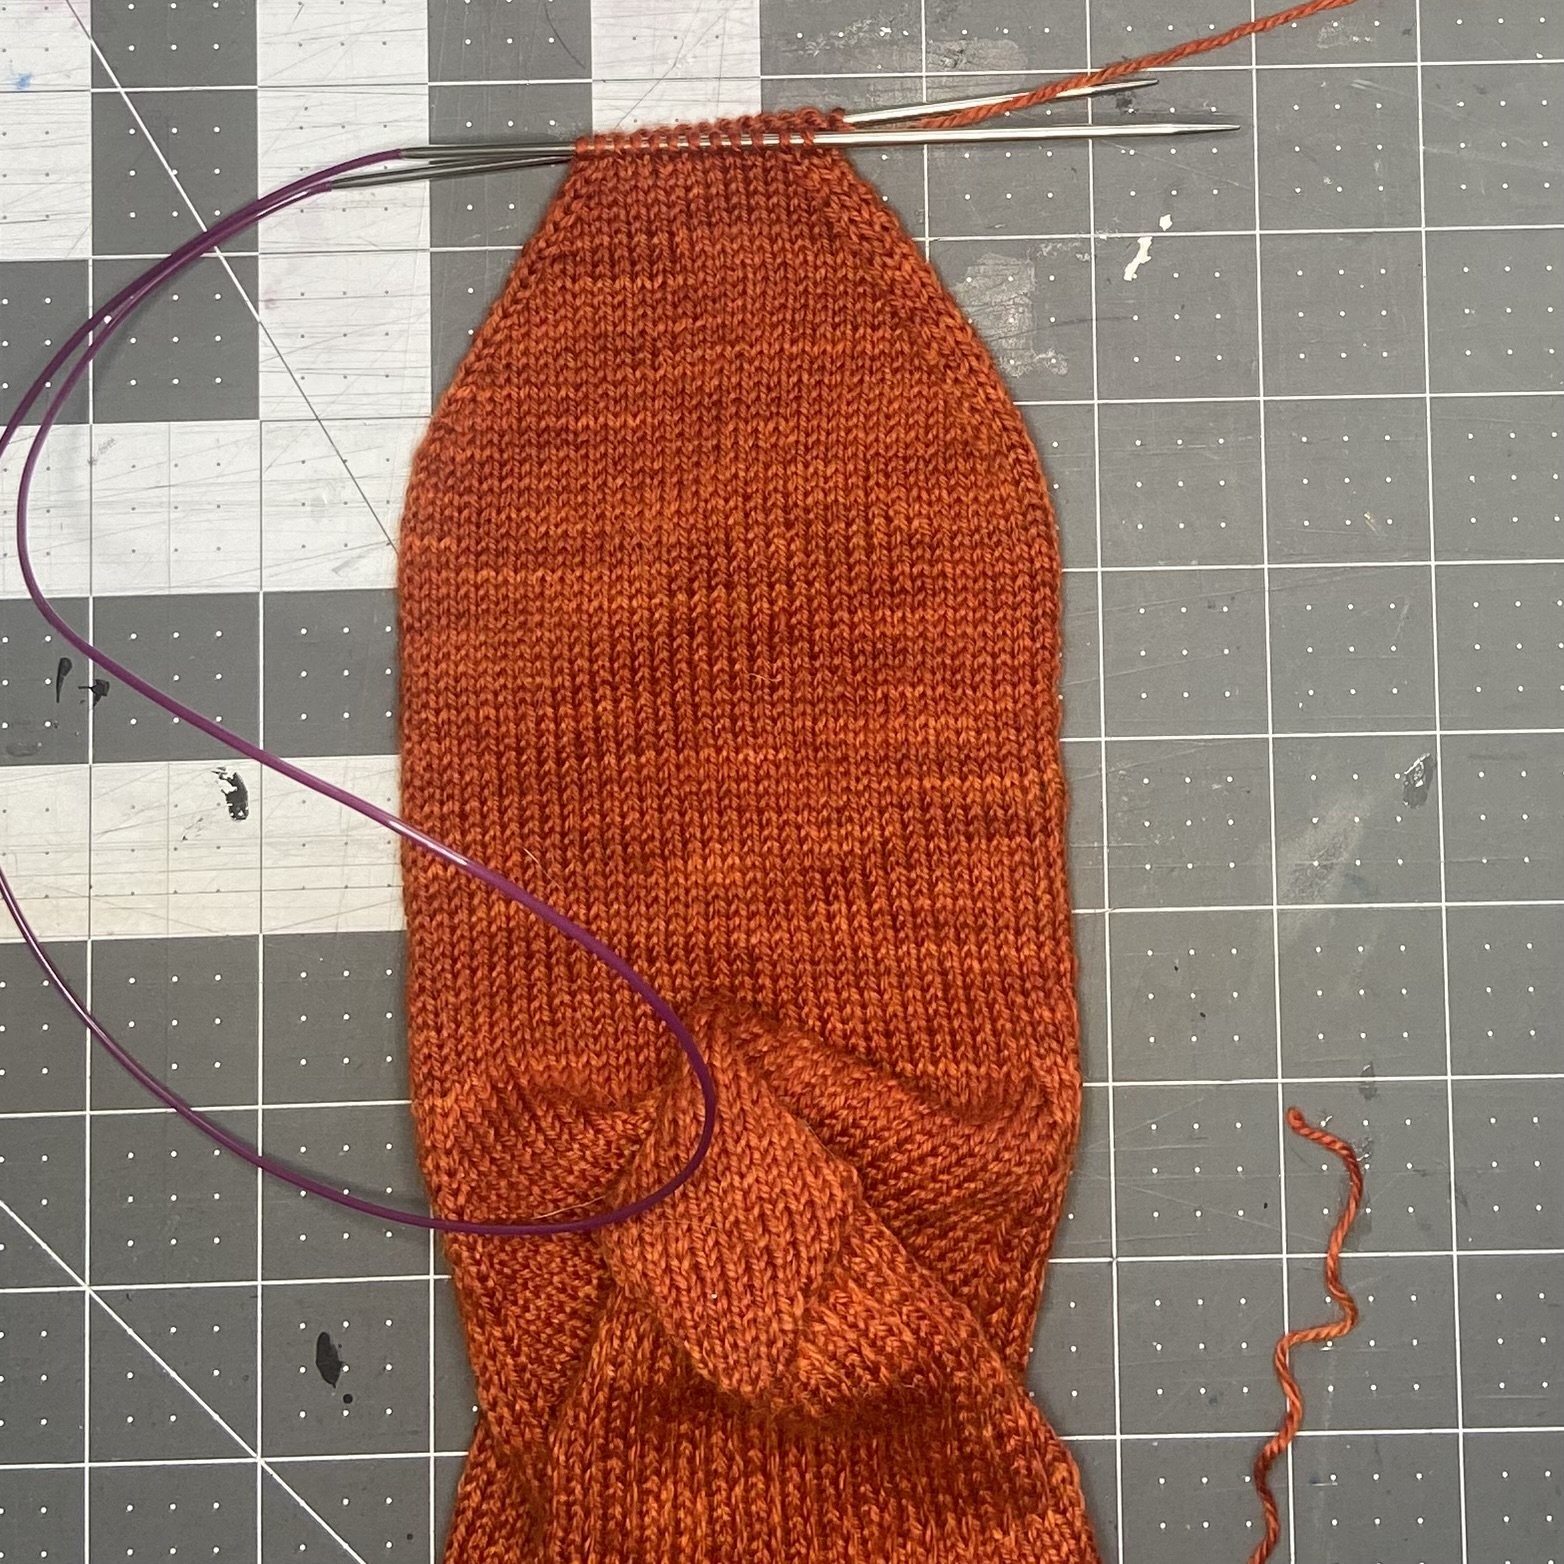
Now, be brave and cut your yarn, leaving at least a 6” tail. You’re going to pick up stitches along the heel flap to form the gusset and bring your knitting from back-and-forth rows back into a circle. Start at the bottom of the heel flap on the right side. Leaving at least a 6” tail, pick up a stitch between the slipped stitches on the edge of the heel flap and the stitches still waiting on the other half of your cable. Then continue picking up stitches along the slipped stitch edge of the heel flap until you get to the stitches for the heel turn. Count your stitches and write down this number! Then knit across your heel stitches, and pick up stitches along the left side of the heel flap. Don’t forget to pick up your last stitch in between the heel flap and the waiting stitches on the instep. You should have the same number of picked up stitches on either side. Refer to the note you made a few minutes ago for the correct number. It’s not uncommon to have one less stitch on the left side than the right. You can either force an extra stitch in there, or you can account for it later by doing one less decrease on that side, knitter’s choice. Continue knitting across the top of the foot/instep and now you’re back to circular knitting.


On the next round, you will begin your gusset decreases:
Row 1: K1, SSK, then knit across to the last 3 stitches, K2tog, K1. Knit across the instep
Row 2: Knit the entire round
Repeat rows 1 and 2 until you have decreased sufficiently that you have the same number of stitches on the bottom of the foot as you do on the instep of the foot.

Now that you’re done with the gusset, just keep knitting until you’re about 2” short of where you want the end of your sock to be. You can measure the foot of an intended sock recipient, and calculate from there. However, given that stretching the sock (to fit over a foot, for example) shortens it, unless you actually try it on the person, you might still get it wrong. I personally think the easiest way is to try the sock on the person, and when your knitting has reached the base of the big toe, you are ready to start decreasing to close the end of the sock.
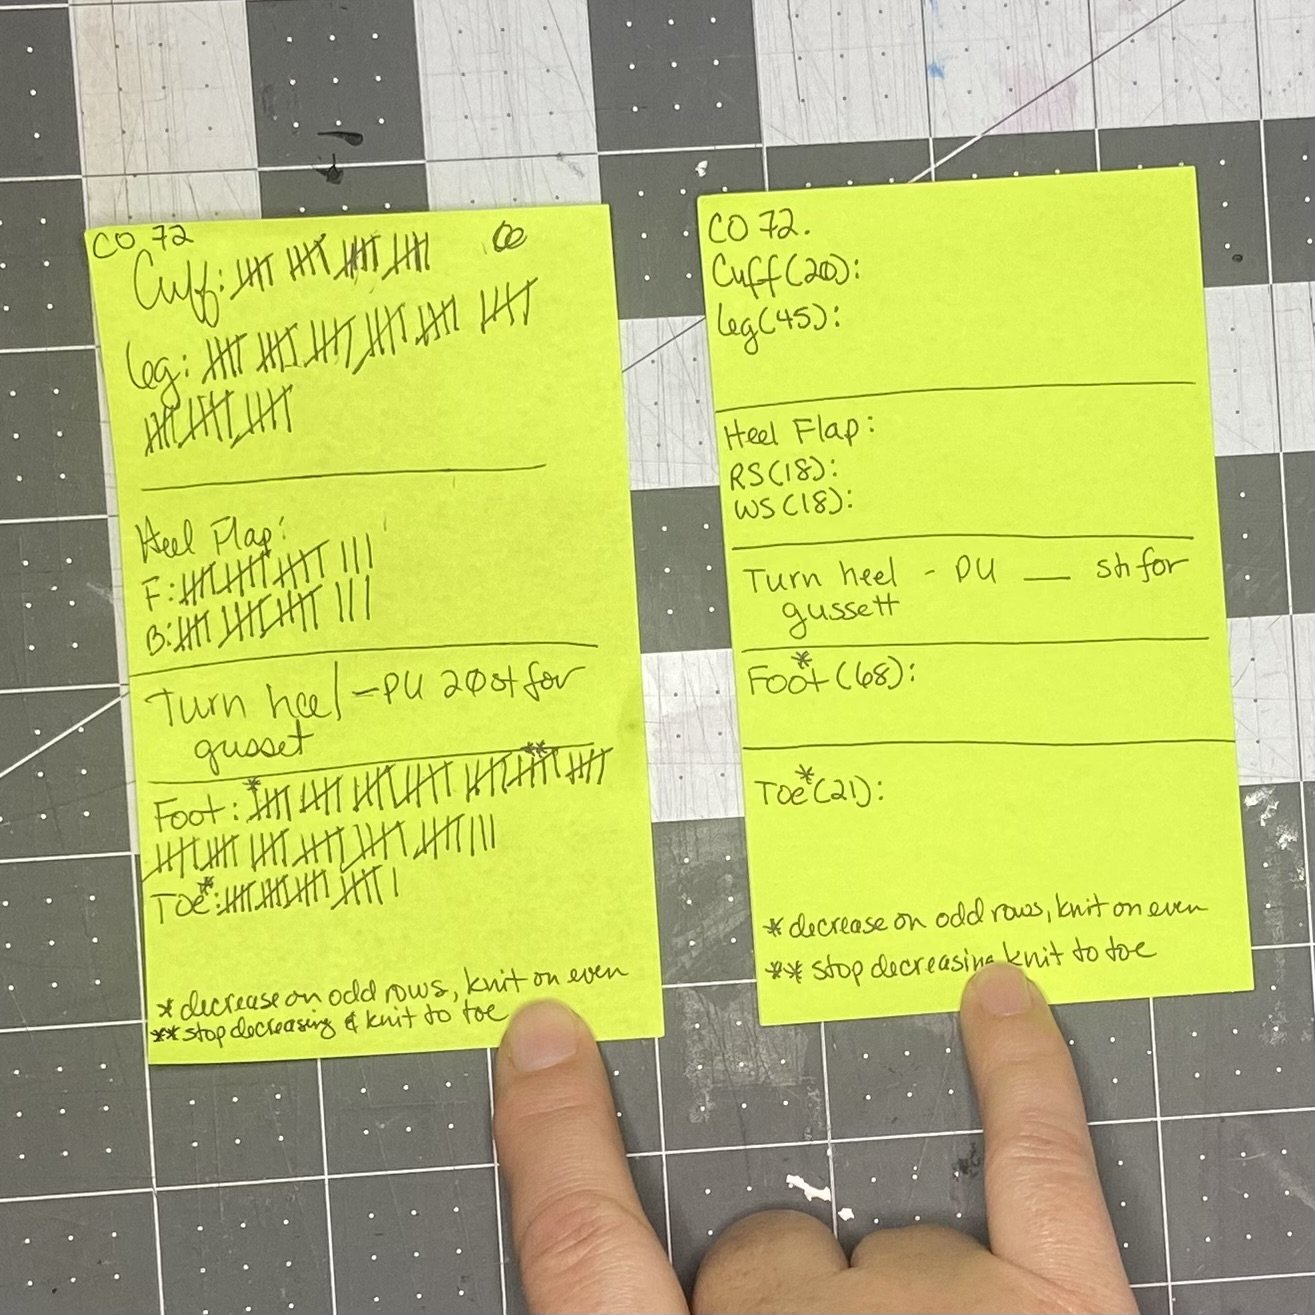
When I knitted socks as gifts on a regular basis, I kept a list of people’s measurements, including how many rows it took to get from the picked up edge of the gusset to the toe decreases. That way, once I’d tried a sock on someone, I knew exactly how many rows it took to get where I needed to be.
Now you’re ready to close the toe. The technique is similar to how you decreased stitches for the gusset, only you’re doing it on both the top and the bottom of the foot this time. It goes:
Row 1: K1, SSK, knit to last 3 stitches, K2tog, K1; repeat for the other needle
Row 2: knit the entire round
Repeat these two rows until you have somewhere between 10 and 14 stitches on each needle. The more stitches you leave for grafting, the less pointy your toe will be. I usually leave 12 stitches for grafting. End on a decrease round; don’t knit another round.
Finally, you’re going to graft the toe closed. This is also called Kitchener stitch. No, I don’t know why. But the end result will be beautiful and seamless. Start by having the sole of the foot facing you, as if you’re starting a new round. Cut your yarn, leaving at least a 12” tail. Thread the yarn through a darning needle (blunt-point, large eye), and you’re ready to start. You will do some setup first, and then the darning follows four repeating steps.
To set up, take your needle and pass it through the first stitch on the front (sole) needle as if to purl. Then pass it through the first stitch on the back (instep) needle as if to knit. There, setup done.
The four steps of Kitchener stitch/grafting are as follows:
Pass the needle through the first stitch on the front needle as if to knit and slip it off the needle
Pass the needle through the second stitch on the front needle as if to purl
Pass the needle through the first stitch on the back needle as if to purl and slip it off the needle
Pass the needle through the second stitch on the back needle as if to knit


That’s it. Repeat until you’ve no stitches left. A helpful hint…if you have to pause during your grafting, don’t pause halfway through your four steps or you are very likely to lose your place and end up with a mess. Trust me, I know. I mean, I’ve heard a friend had that problem a few times. So if you have to pause, work Kitchener through step 4 before you set your knitting down. If this explanation doesn’t make sense, try having a look at this video of the Kitchener in motion. There is an alternate method of doing Kitchener that is very similar but which leaves you without the pointy little “dog ears” on the ends of your graft. I don’t usually fuss about that, but if you’re interested, there’s an excellent short tutorial here.
When you’re done grafting, you might have some loose stitches in the graft. Starting on the right side of the graft (where you started grafting), carefully tighten the stitches one at a time with the tip of your darning needle until the stitch tension matches that of everything around it.
Weave in your ends and you’re done! Oops, I mean you’re done with one sock. Now you have to do the second one just like the first. I like to take notes as I’m making the first sock (number of rows, mostly) so that I can knit the second sock exactly like the first. There are some (unkind souls) who say that my OCD is not a good thing. I say, it yields me two identical, gorgeous, perfectly-fitting socks made of luscious yarn in a rich beautiful color. So the haters can push off.

Now, if you’re going to wear these socks yourself, put them on immediately and wander around the house, admiring your beautiful feet as you walk. However, if you’re going to give them as a gift, I recommend washing and blocking the socks for optimal presentation. I use these sock blockers (I have one set of each size), which are inexpensive but effective. And I like to gift a 2 oz bottle of KnitPicks Kookaburra Wool Wash along with hand washing instructions. Yes, theoretically, if knit in the correct yarn, hand knit socks can go in the washing machine and then be laid flat to dry. However, I like to encourage hand washing of knits. Hand washing shows proper respect for handmade knits.