Adventures In Terraforming-Part 2
As an Amazon associate, I may earn a small commission if you navigate to Amazon from my site and buy something. This will not result in an extra cost to you.
This post will not make much sense if you haven’t read part one. You can read it here.
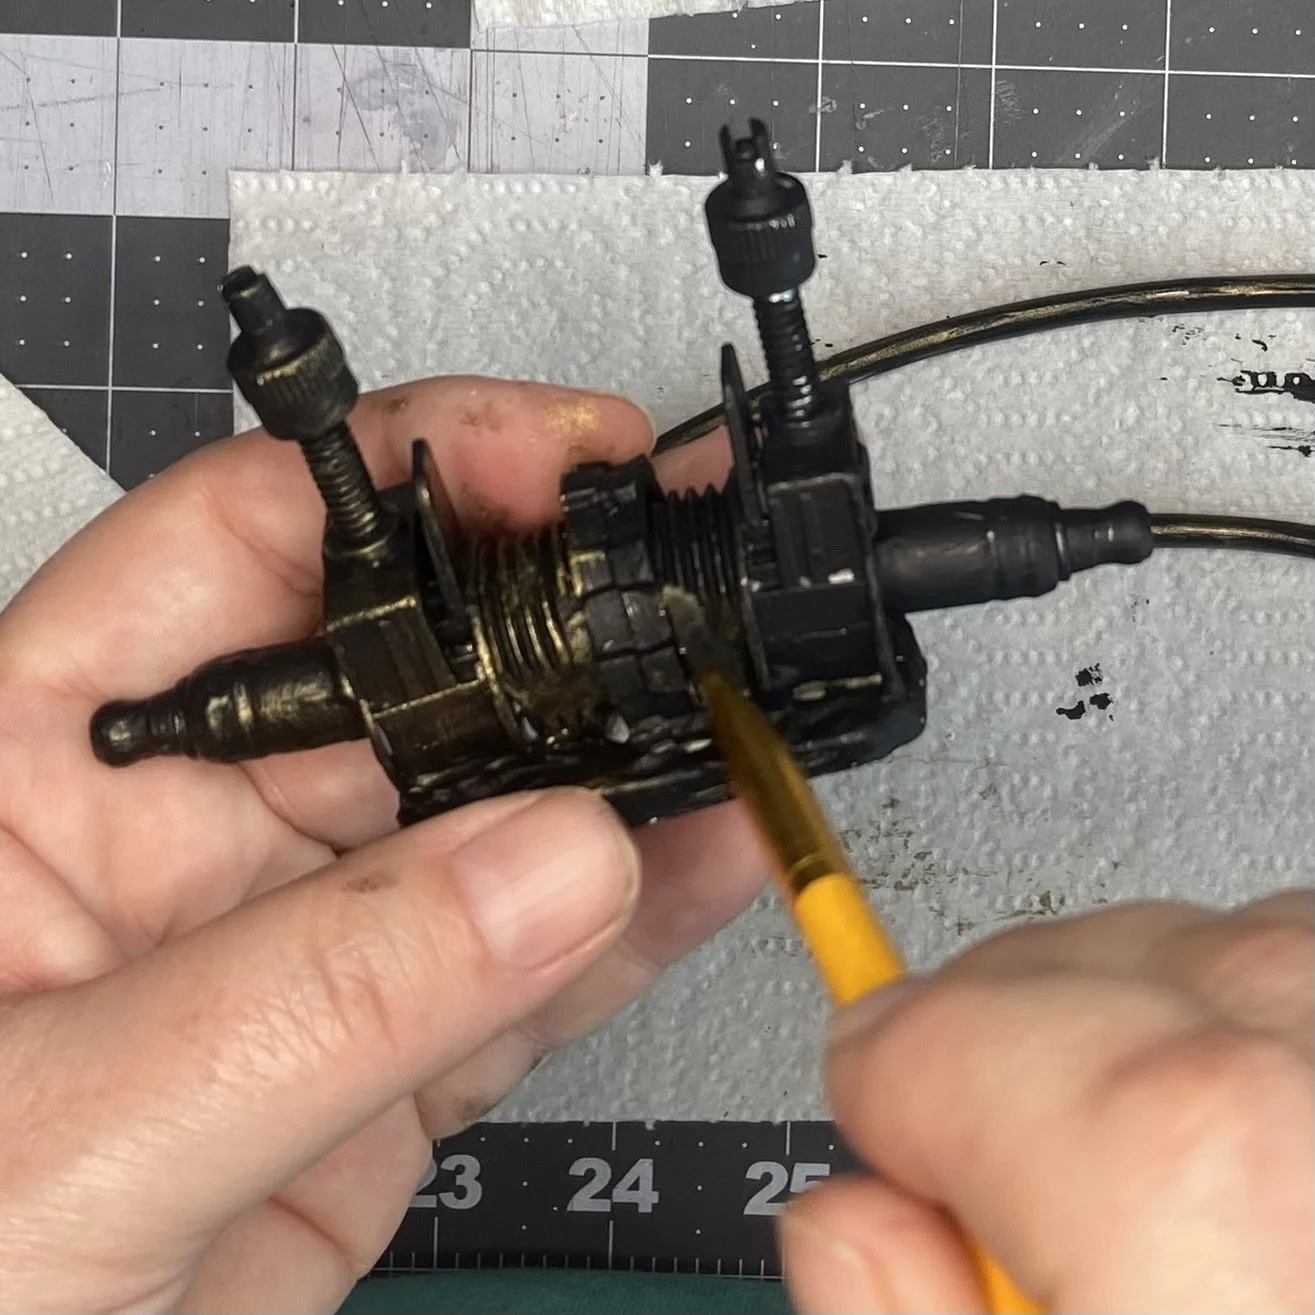
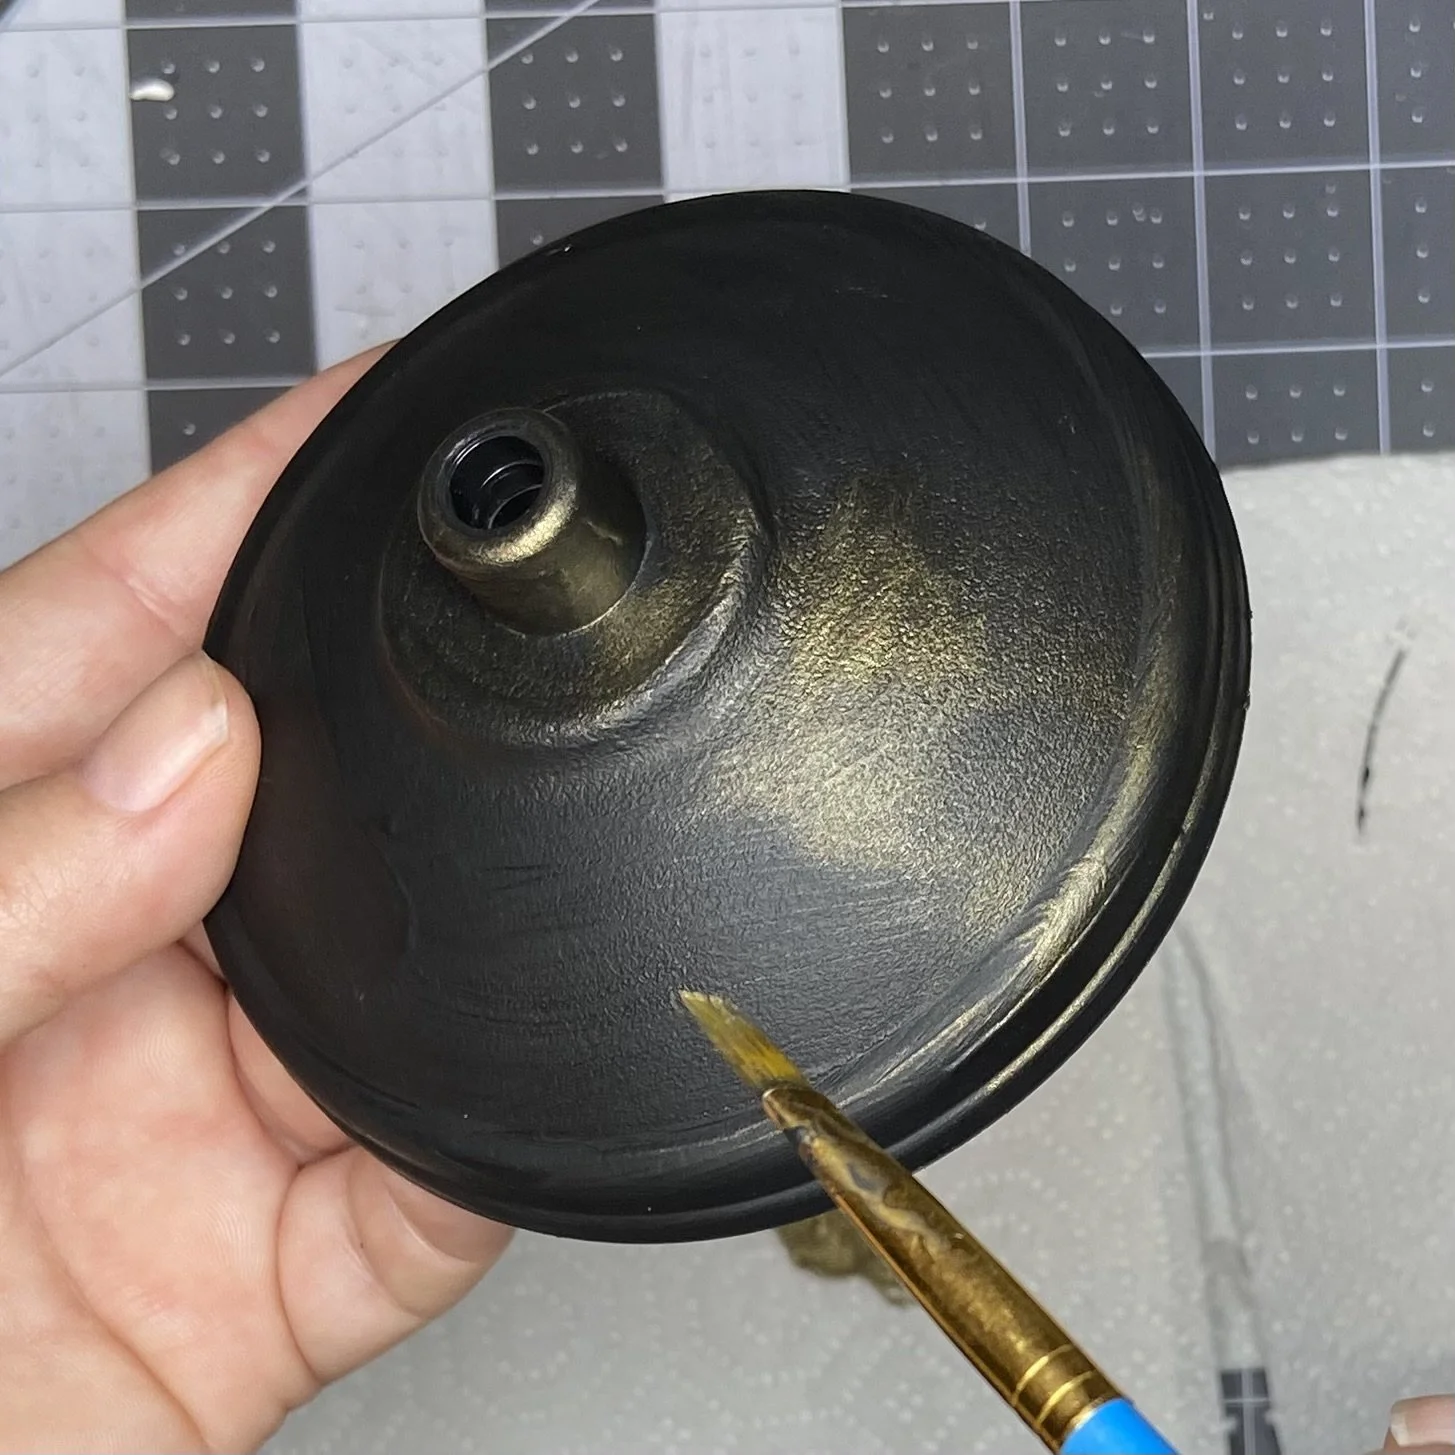
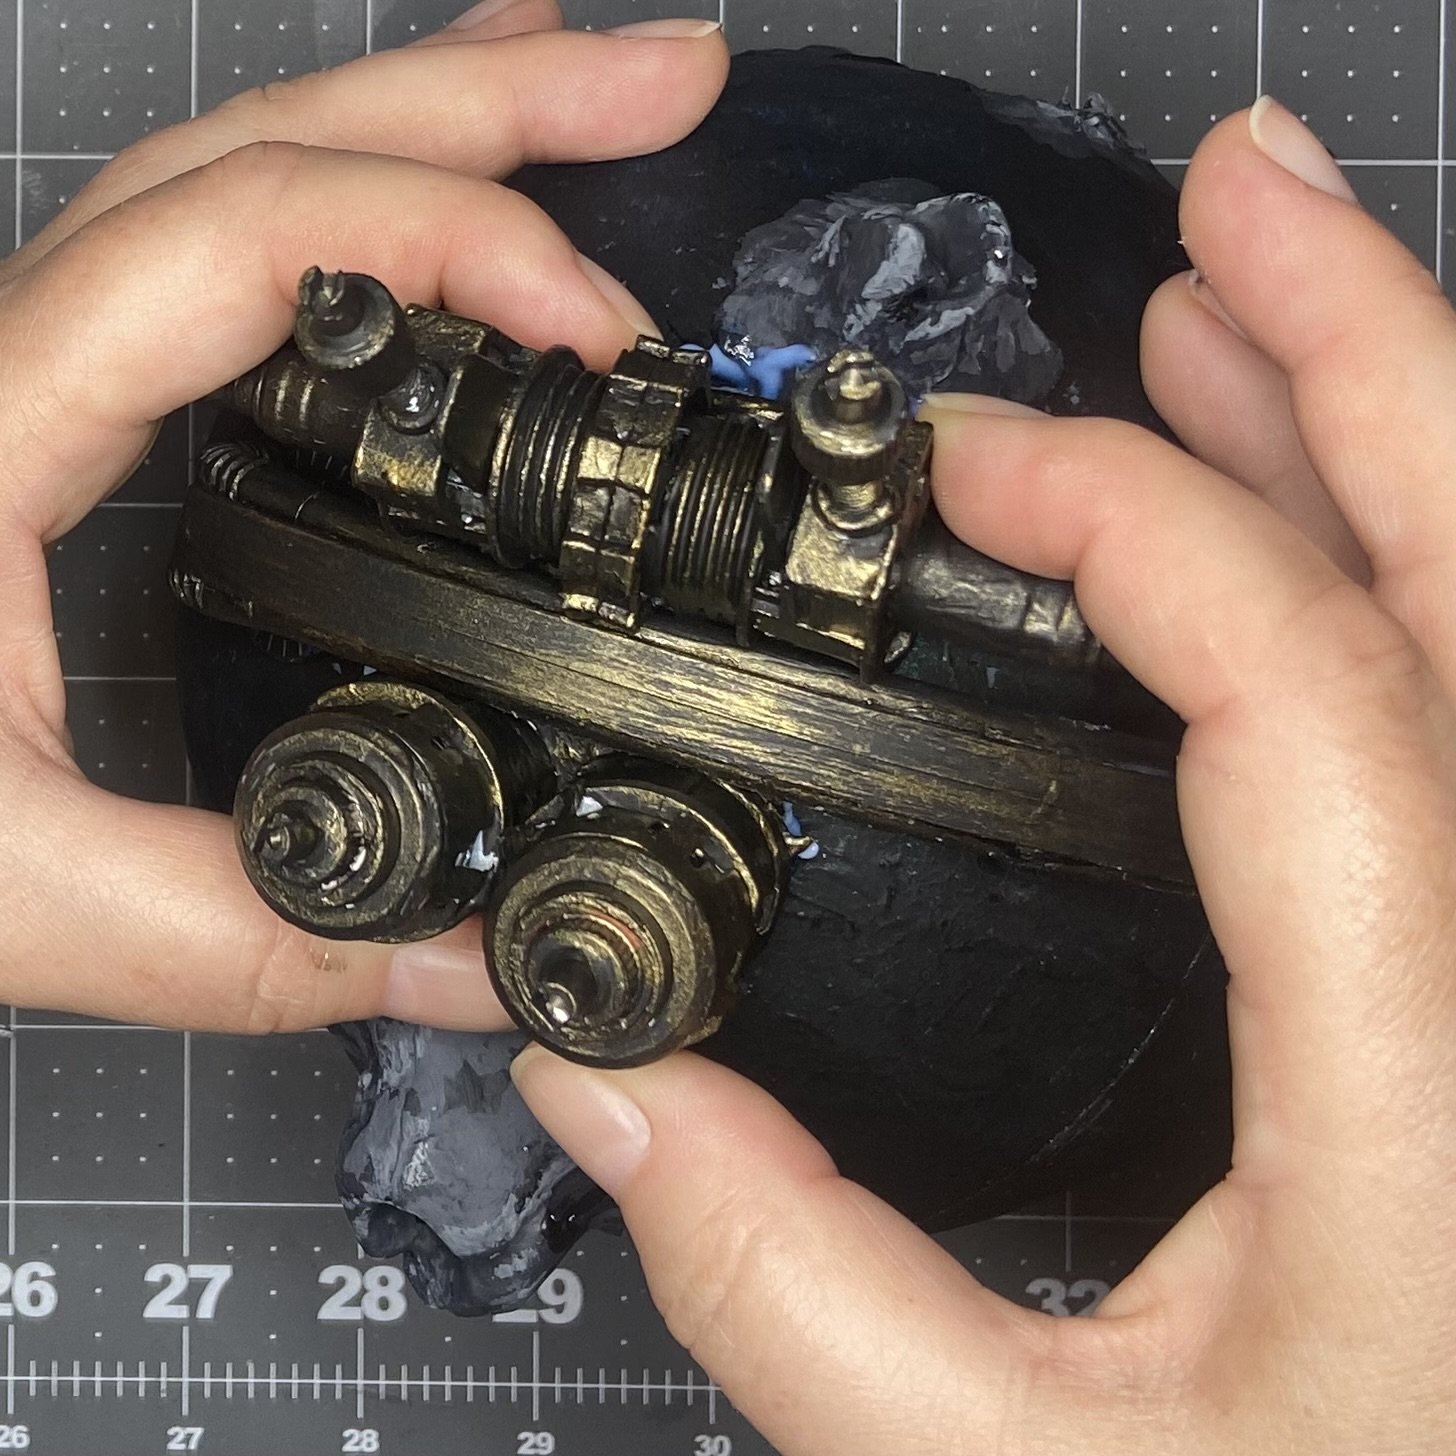
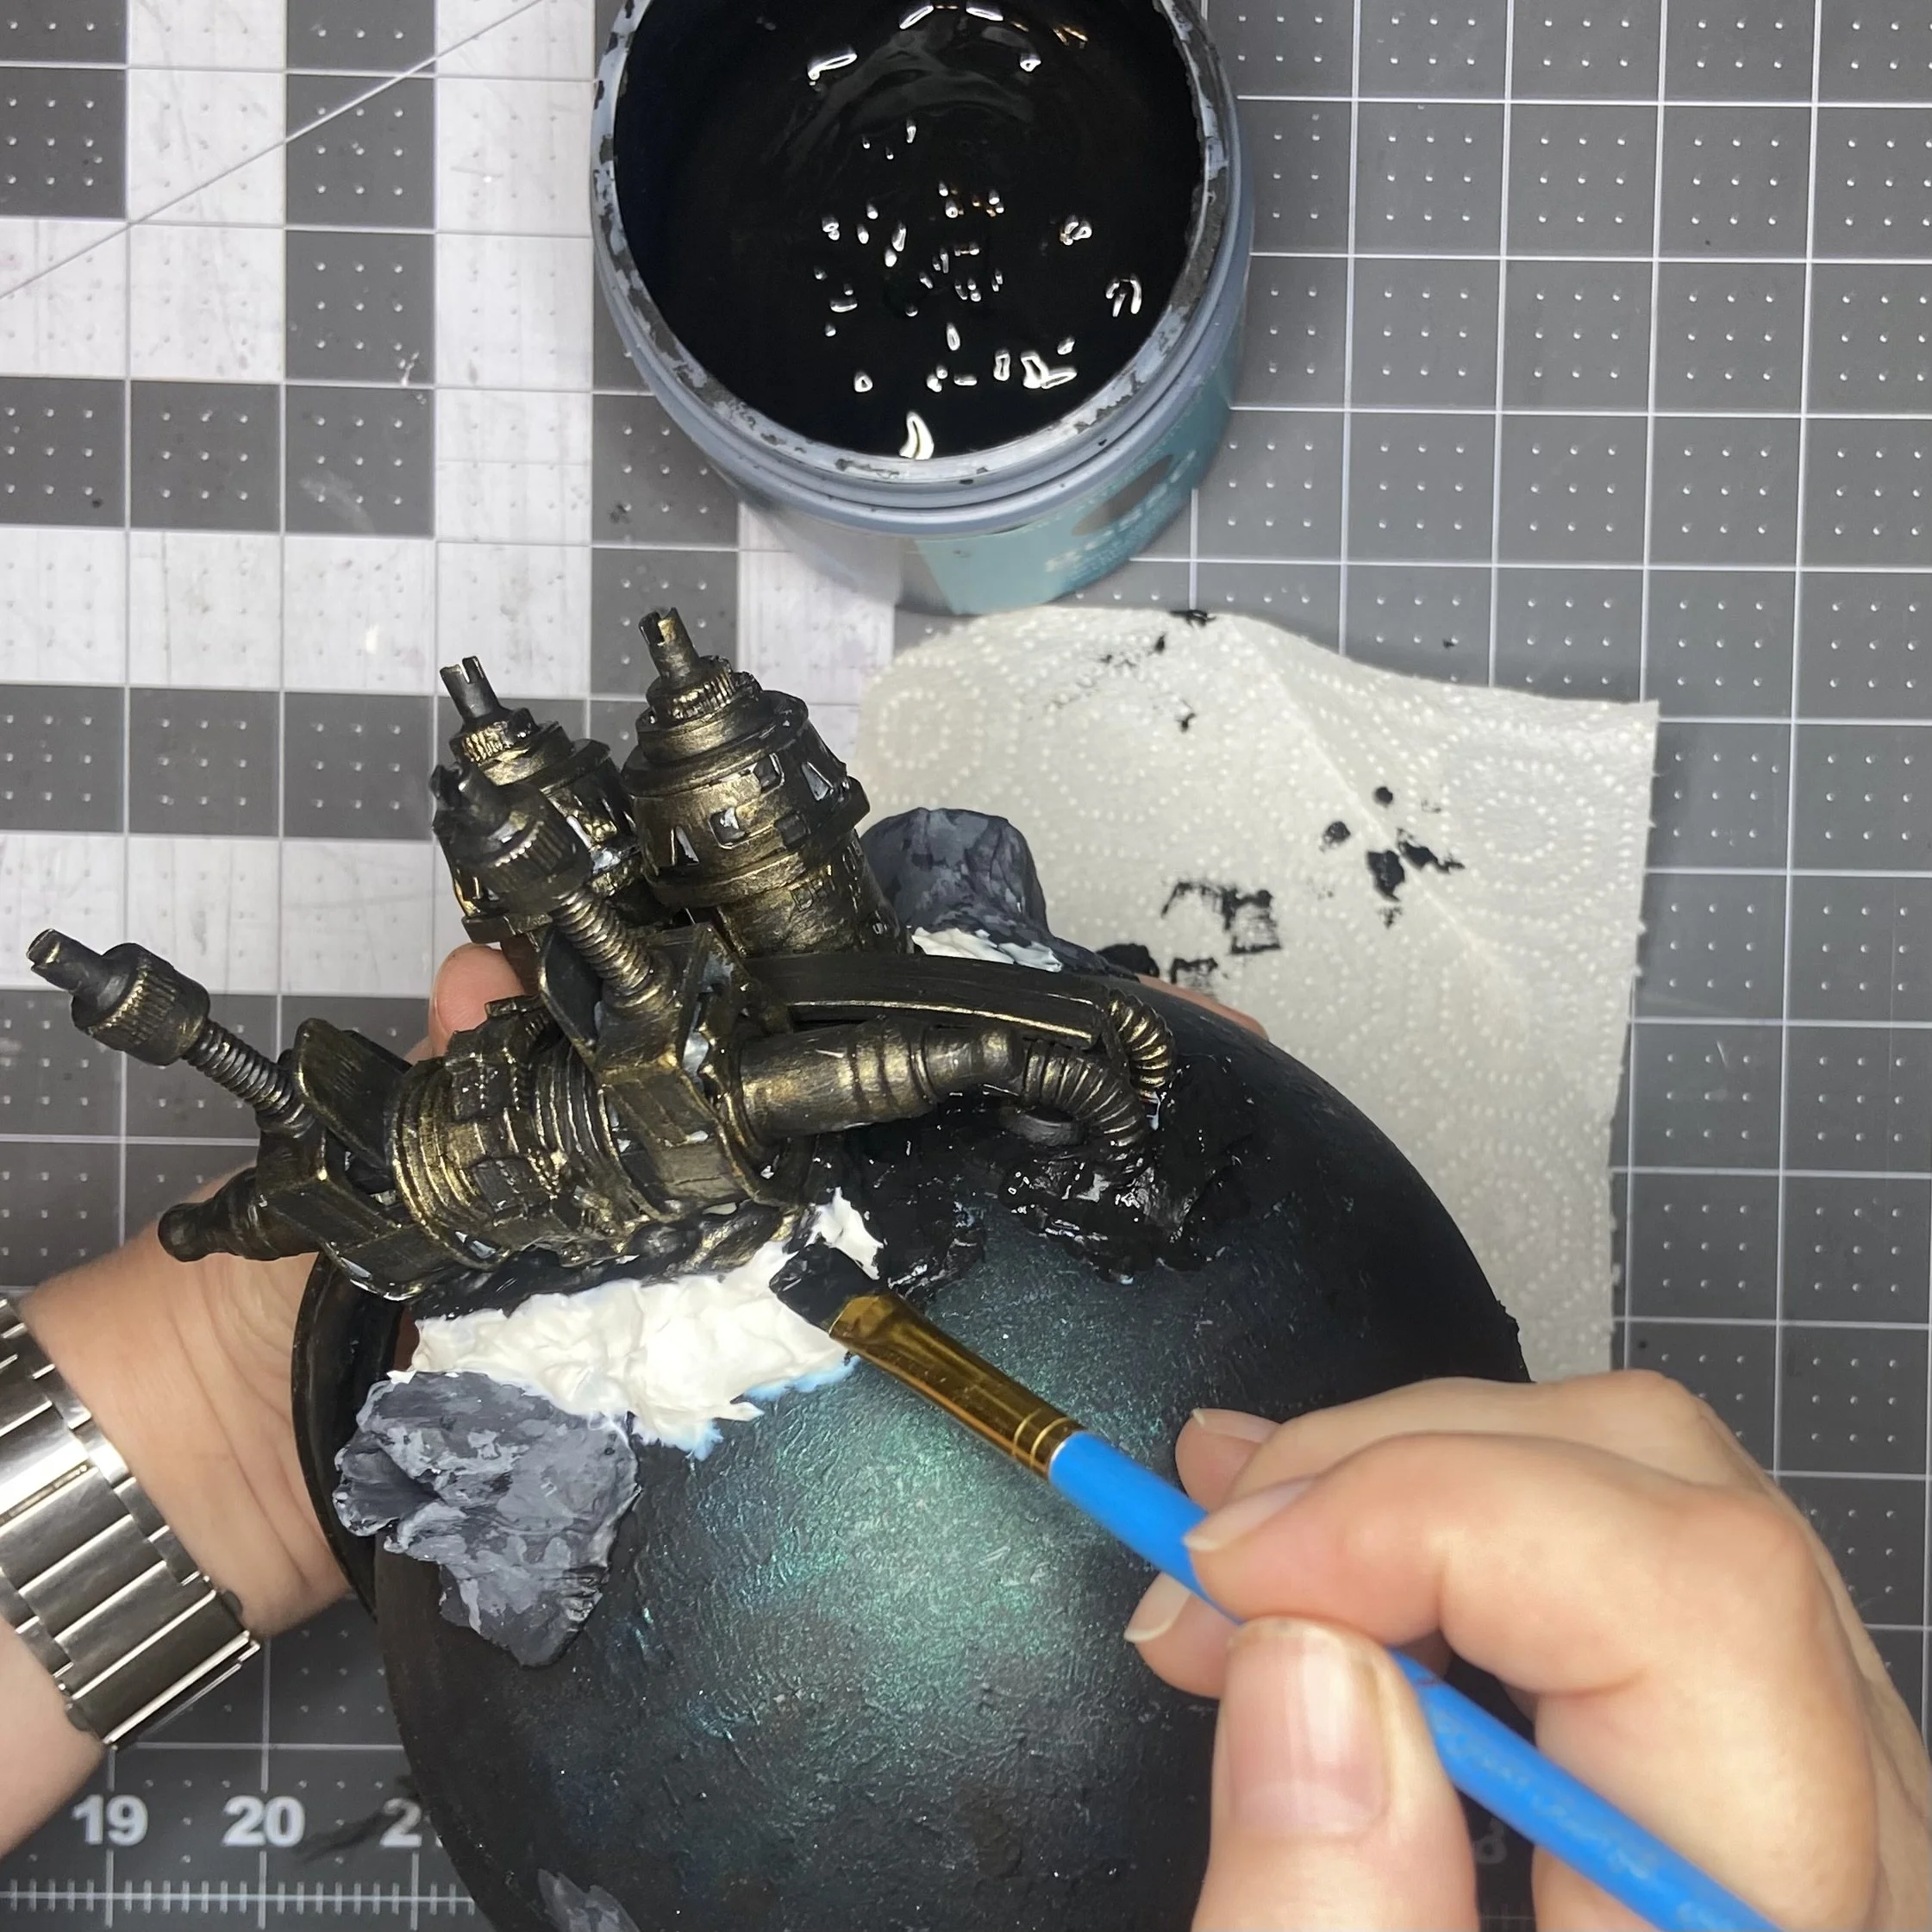
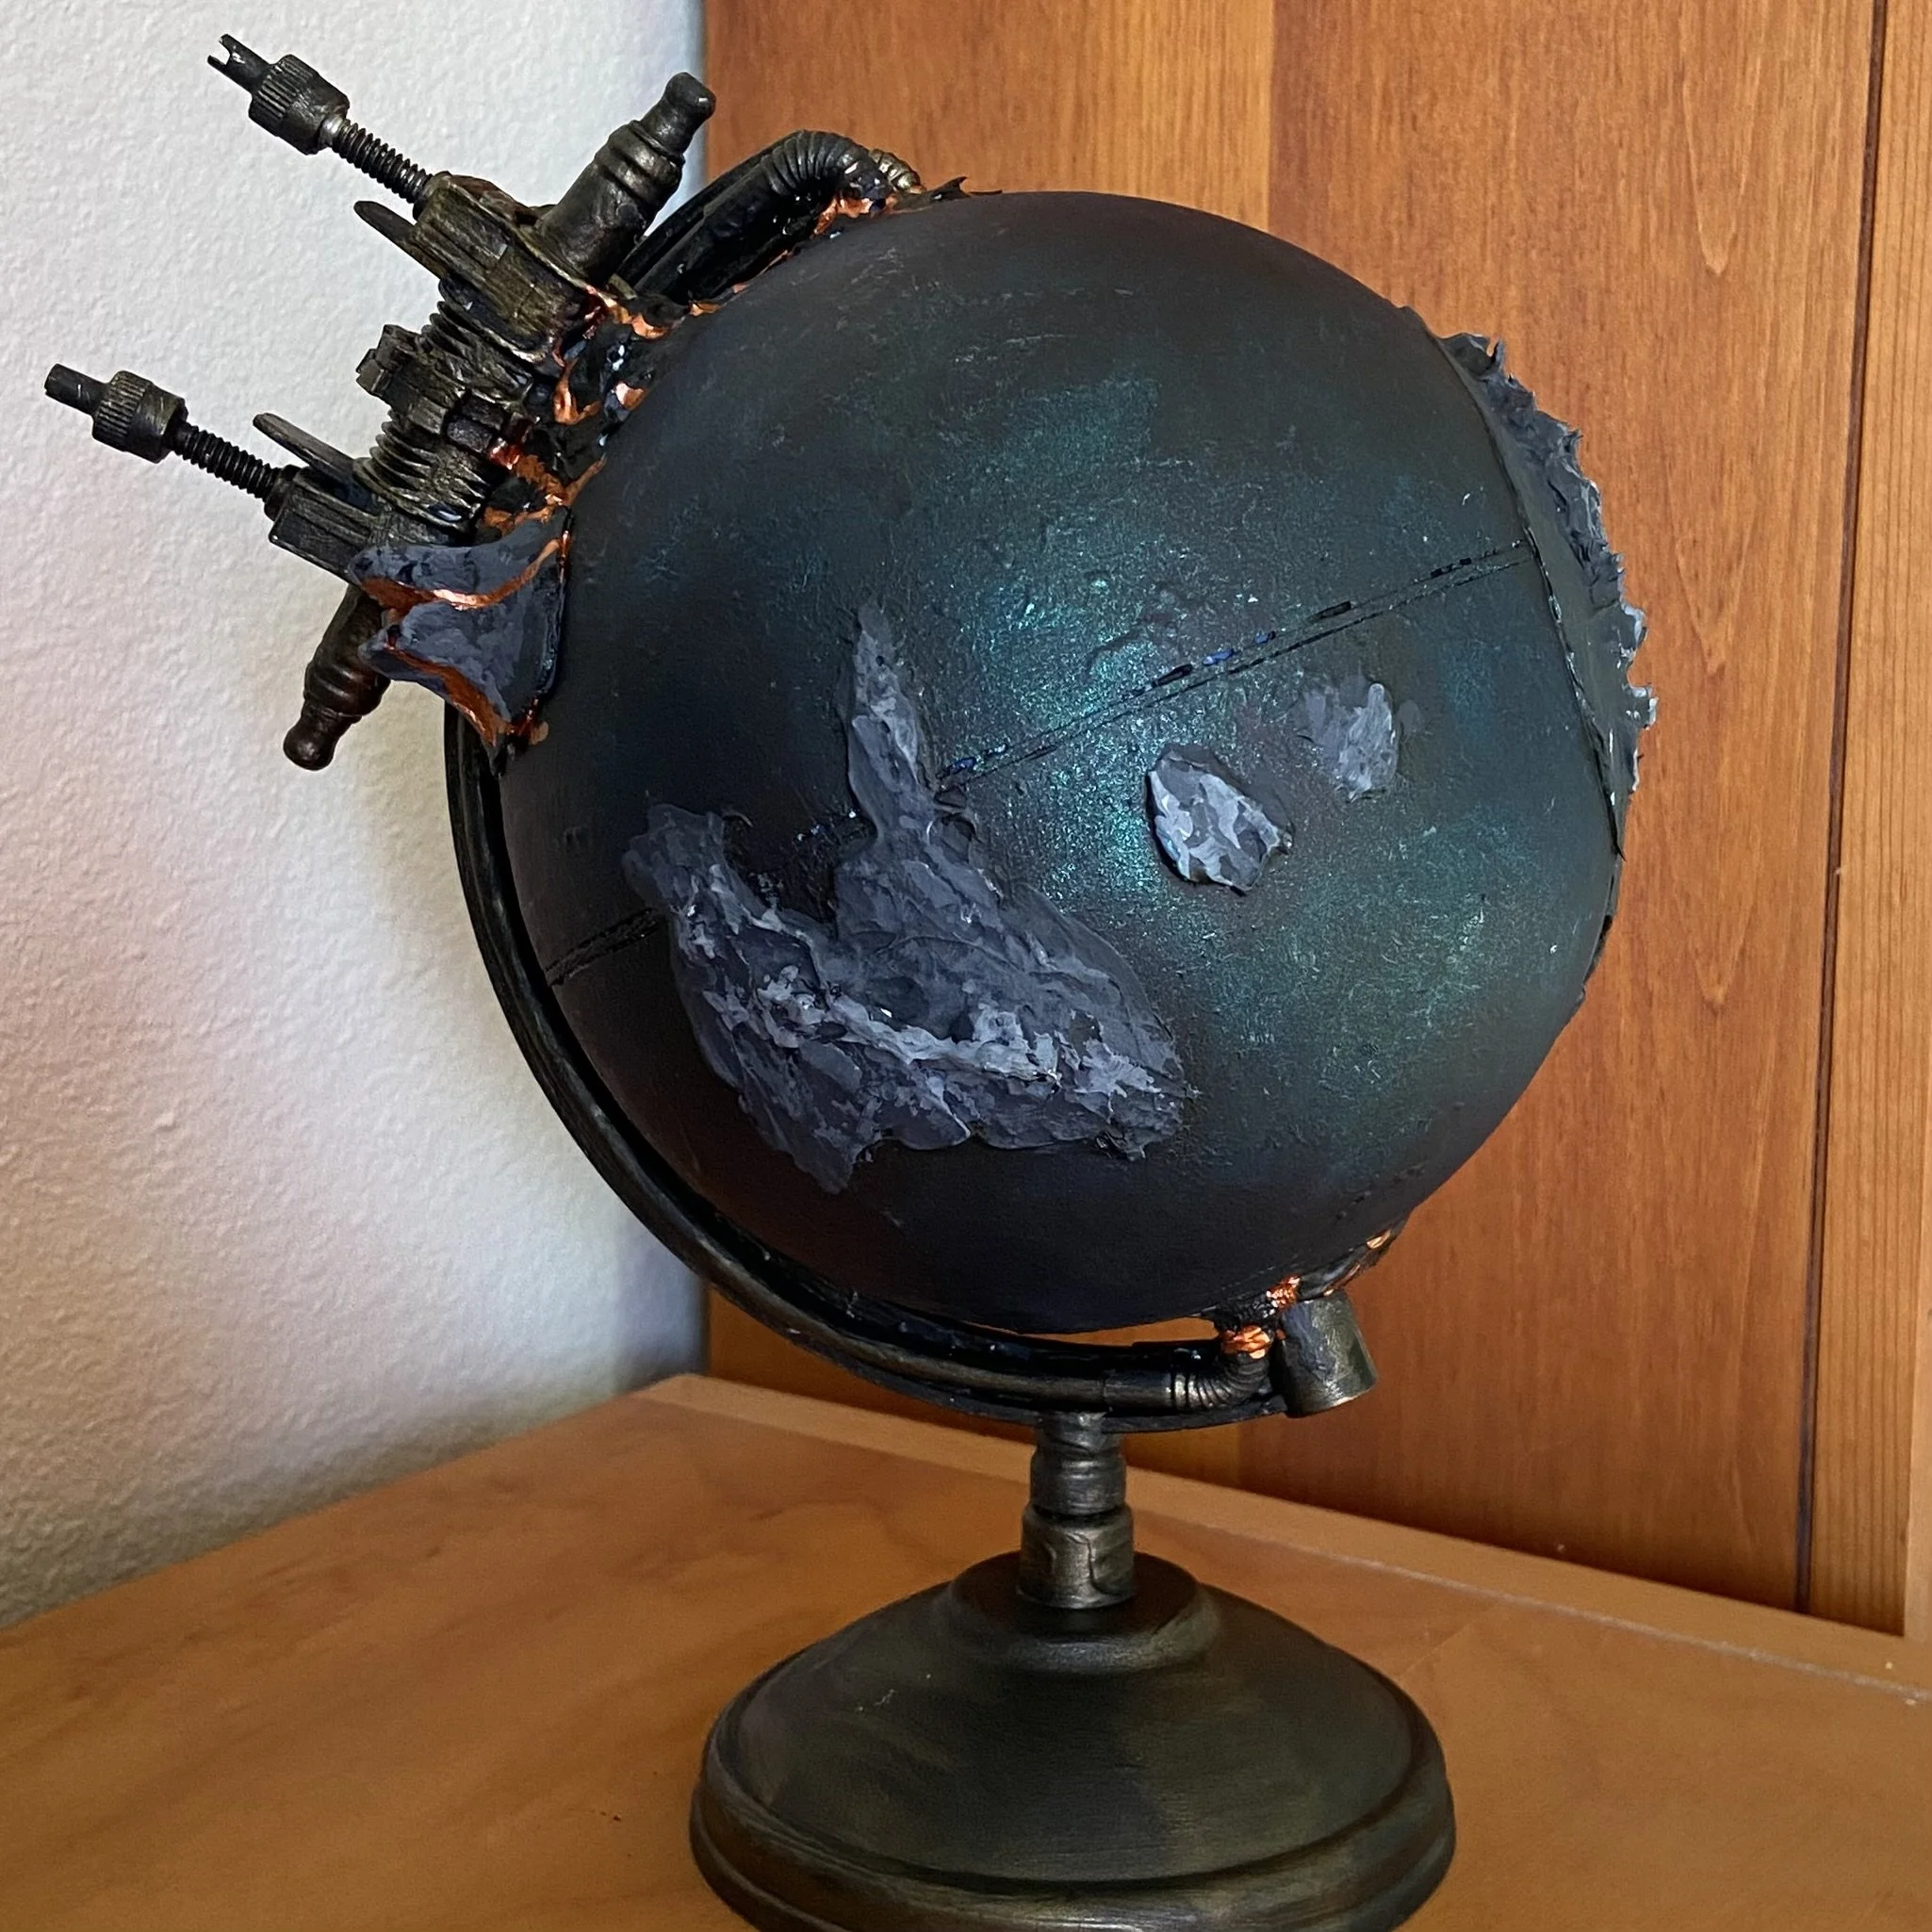
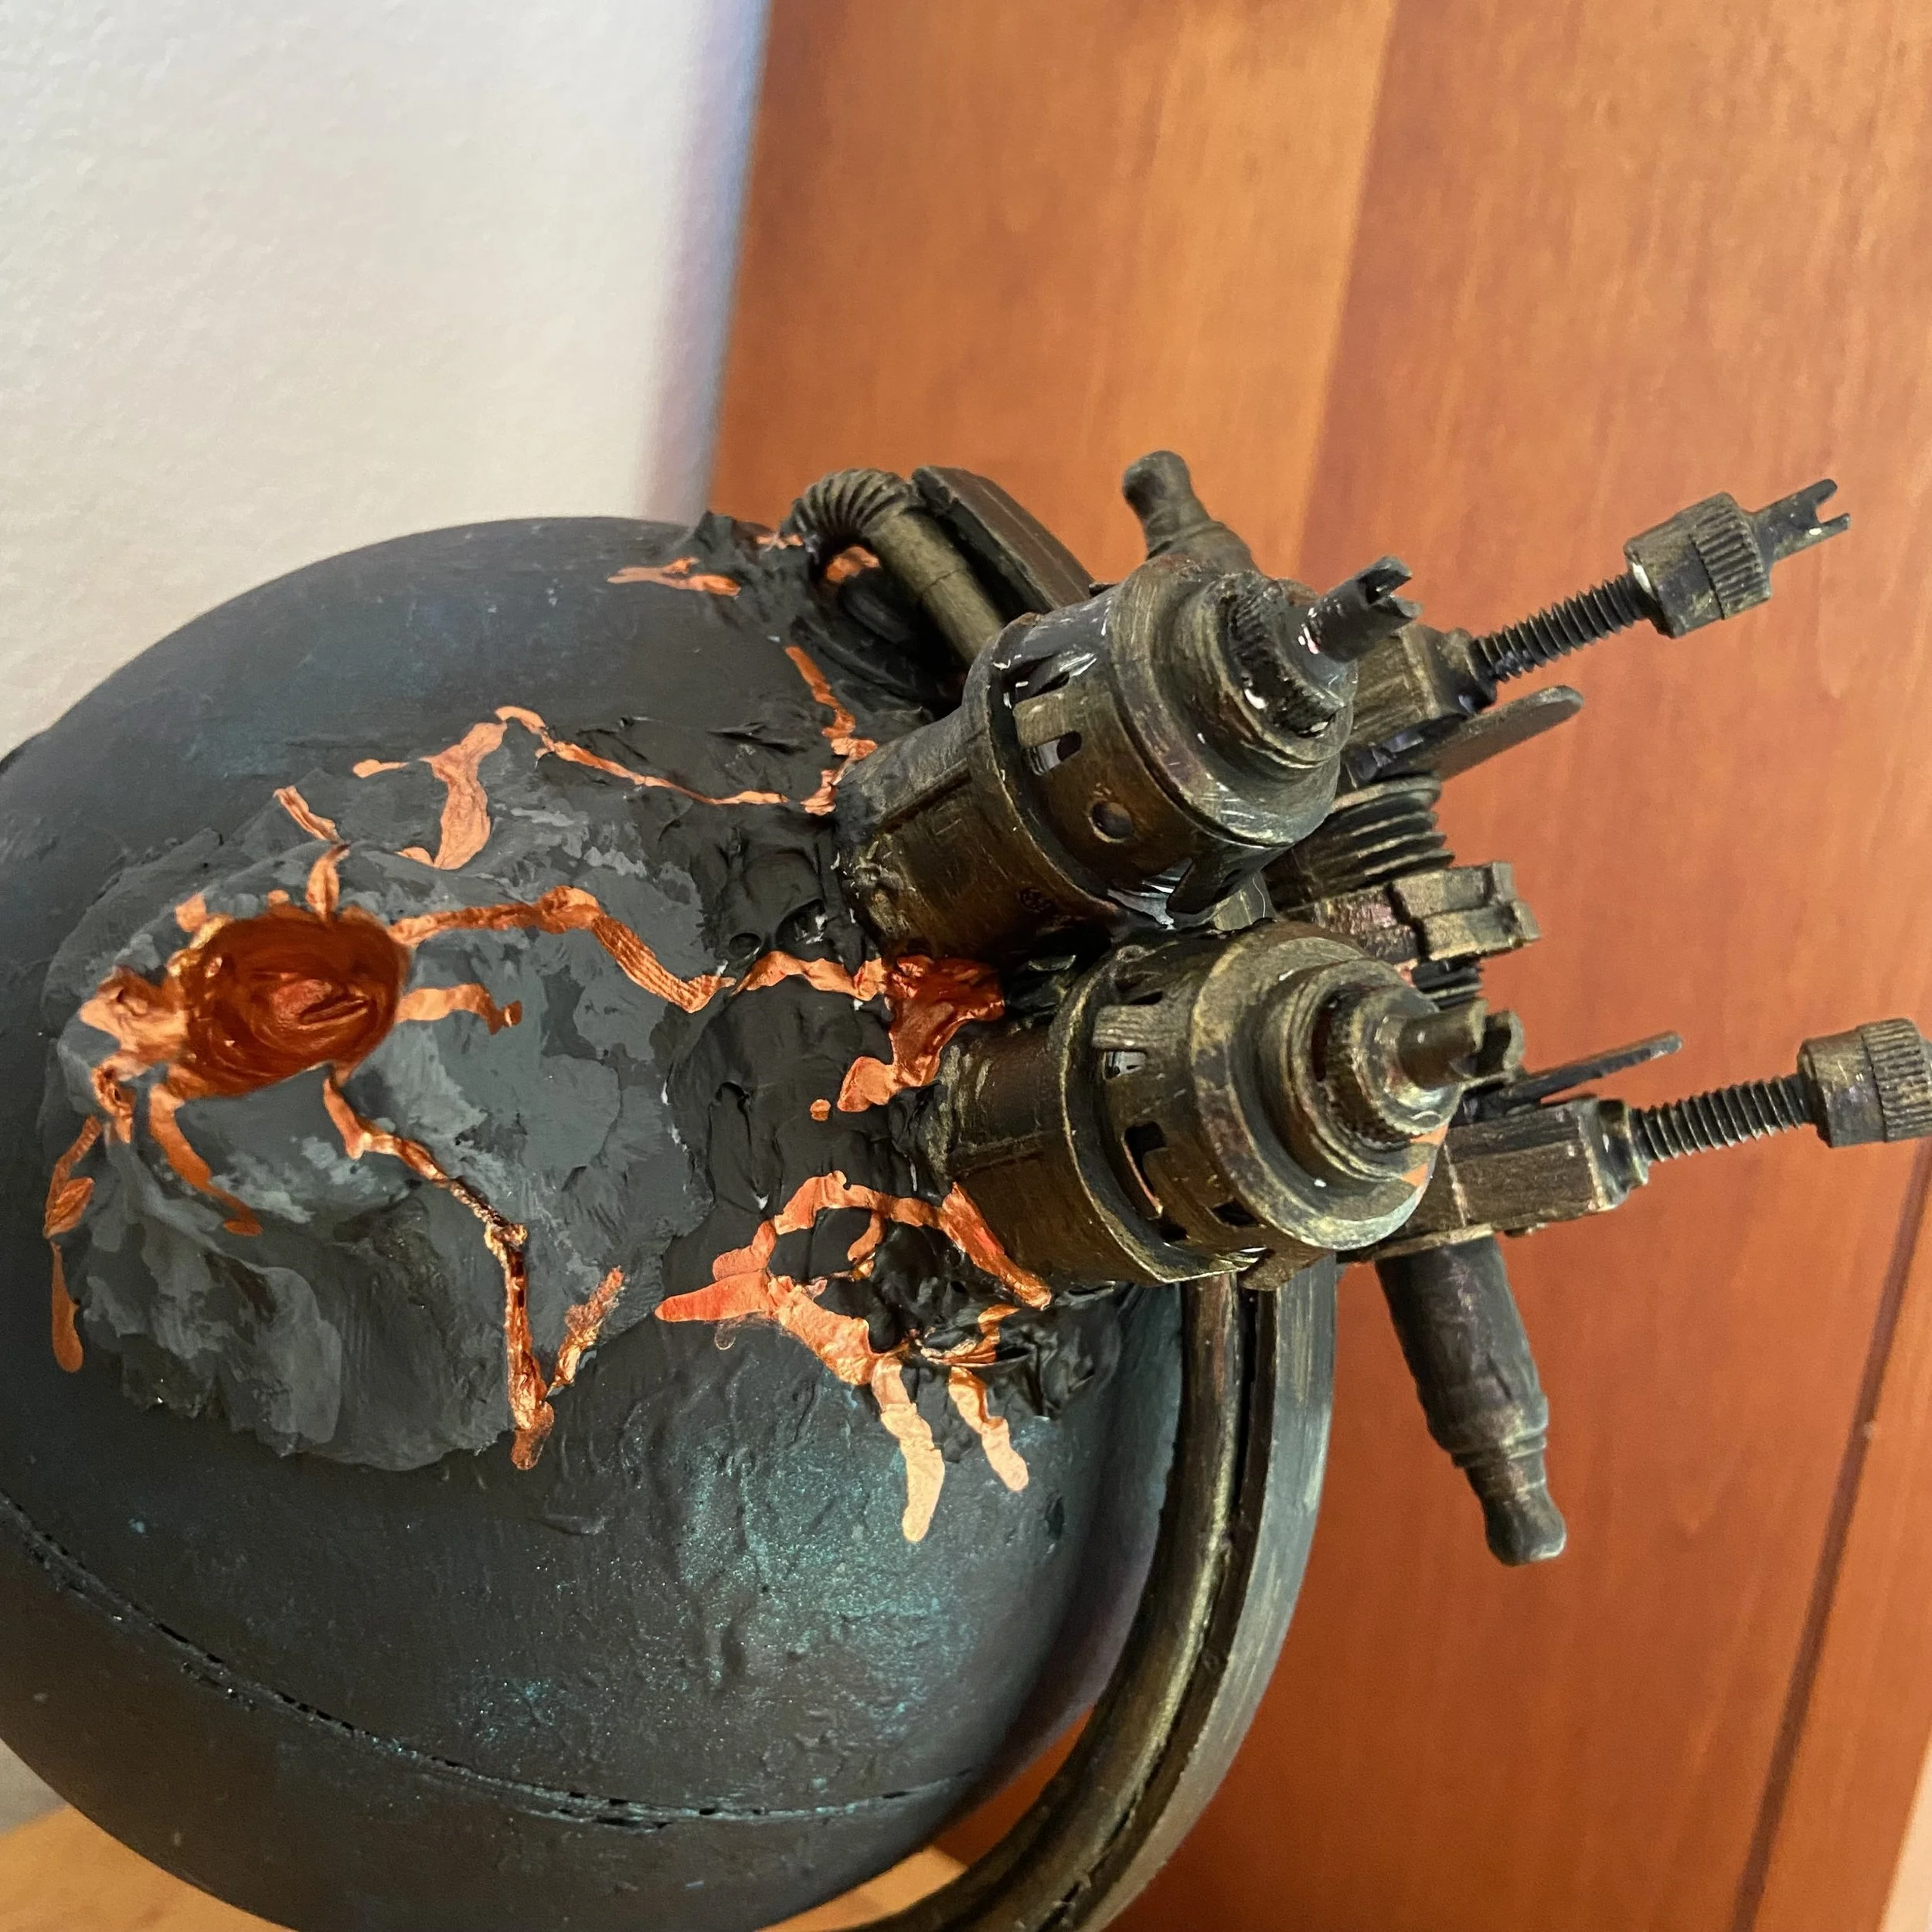
By this time, the clay and glue on my machinery bits were sufficiently dry, so I painted them and the pipes with black gesso. Once that was dry, I used some metallic bronze acrylic paint and dry-brushed all my machine parts so they would look like aged metal…even the pieces that were plastic. While I was at it, I gave the plastic arm and base of the globe the same treatment.
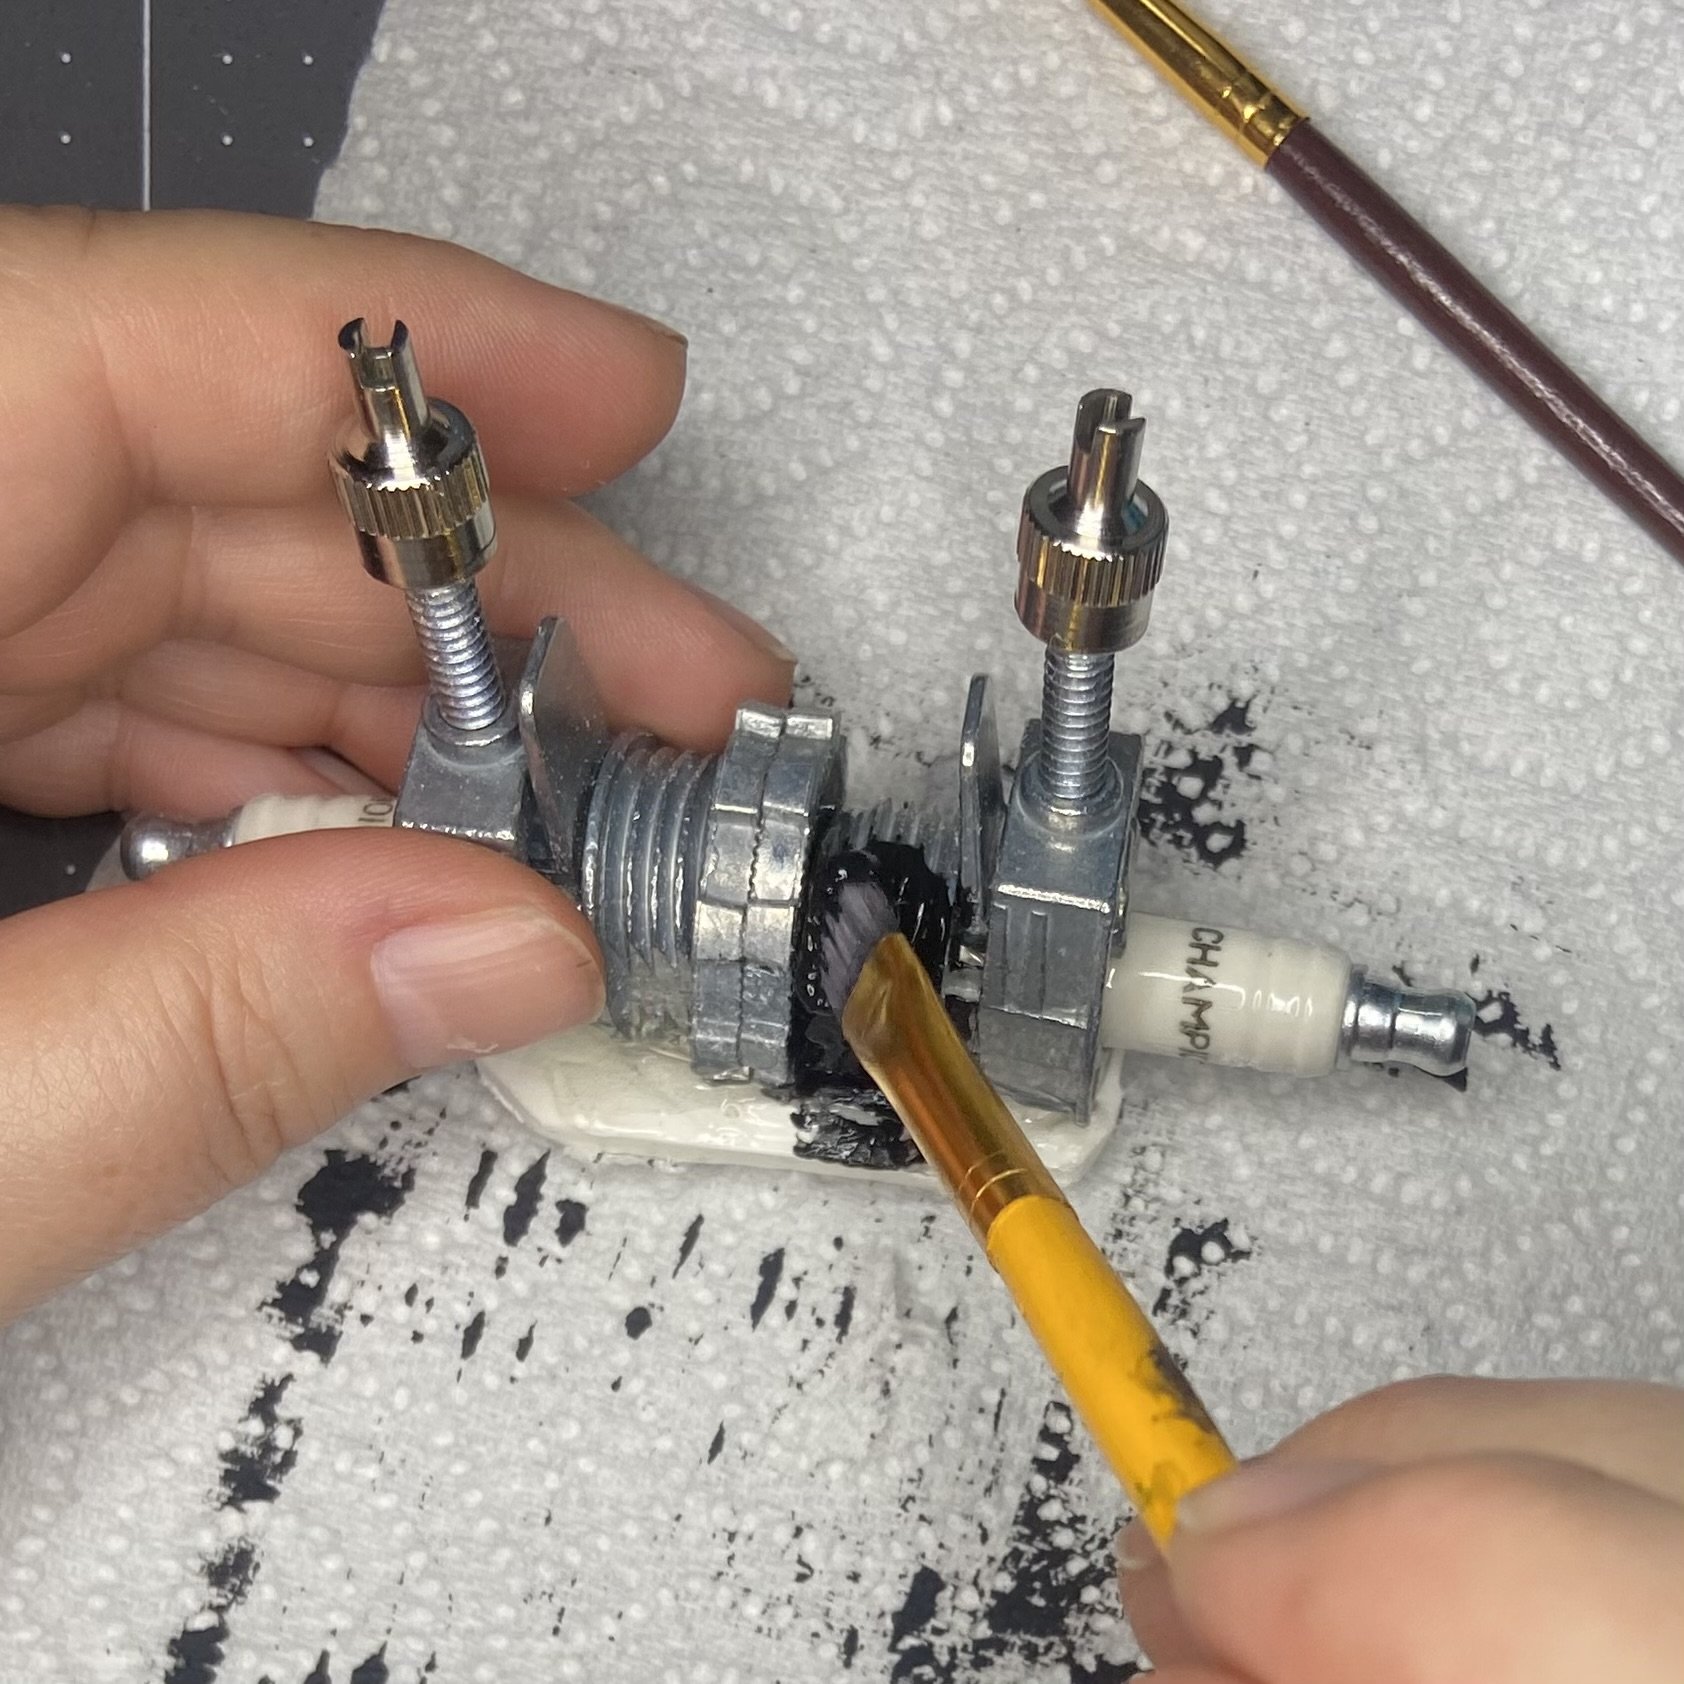
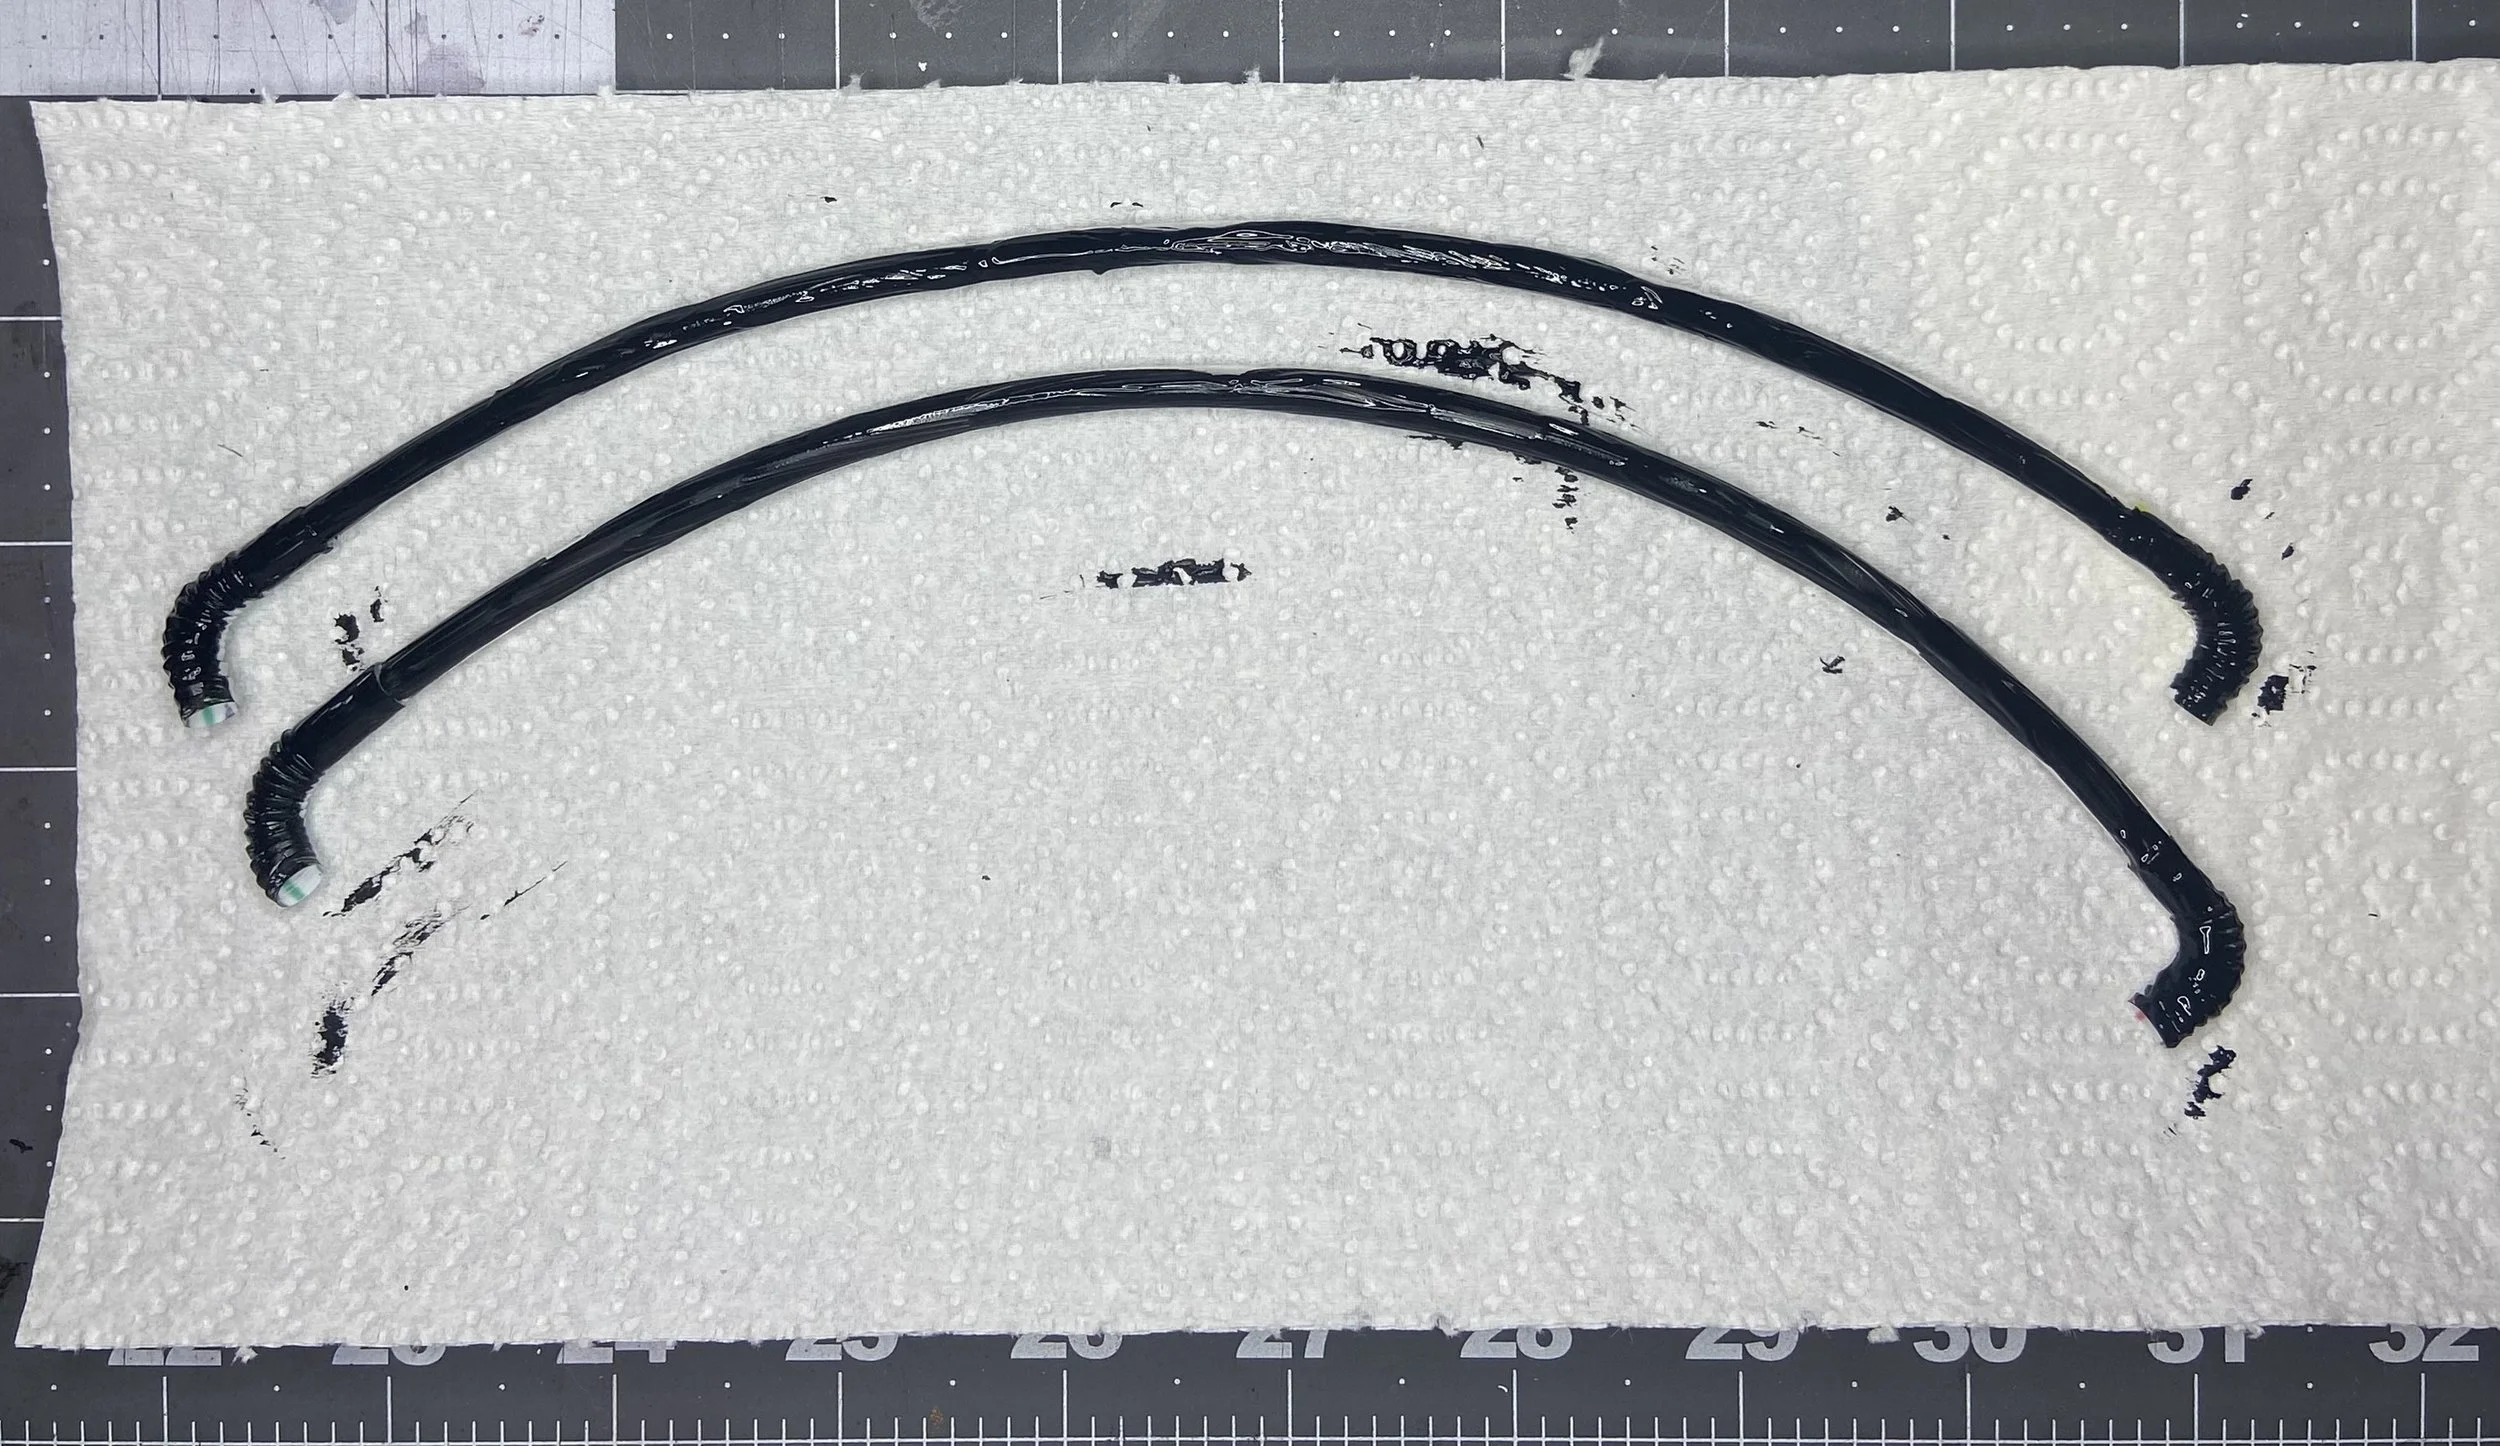
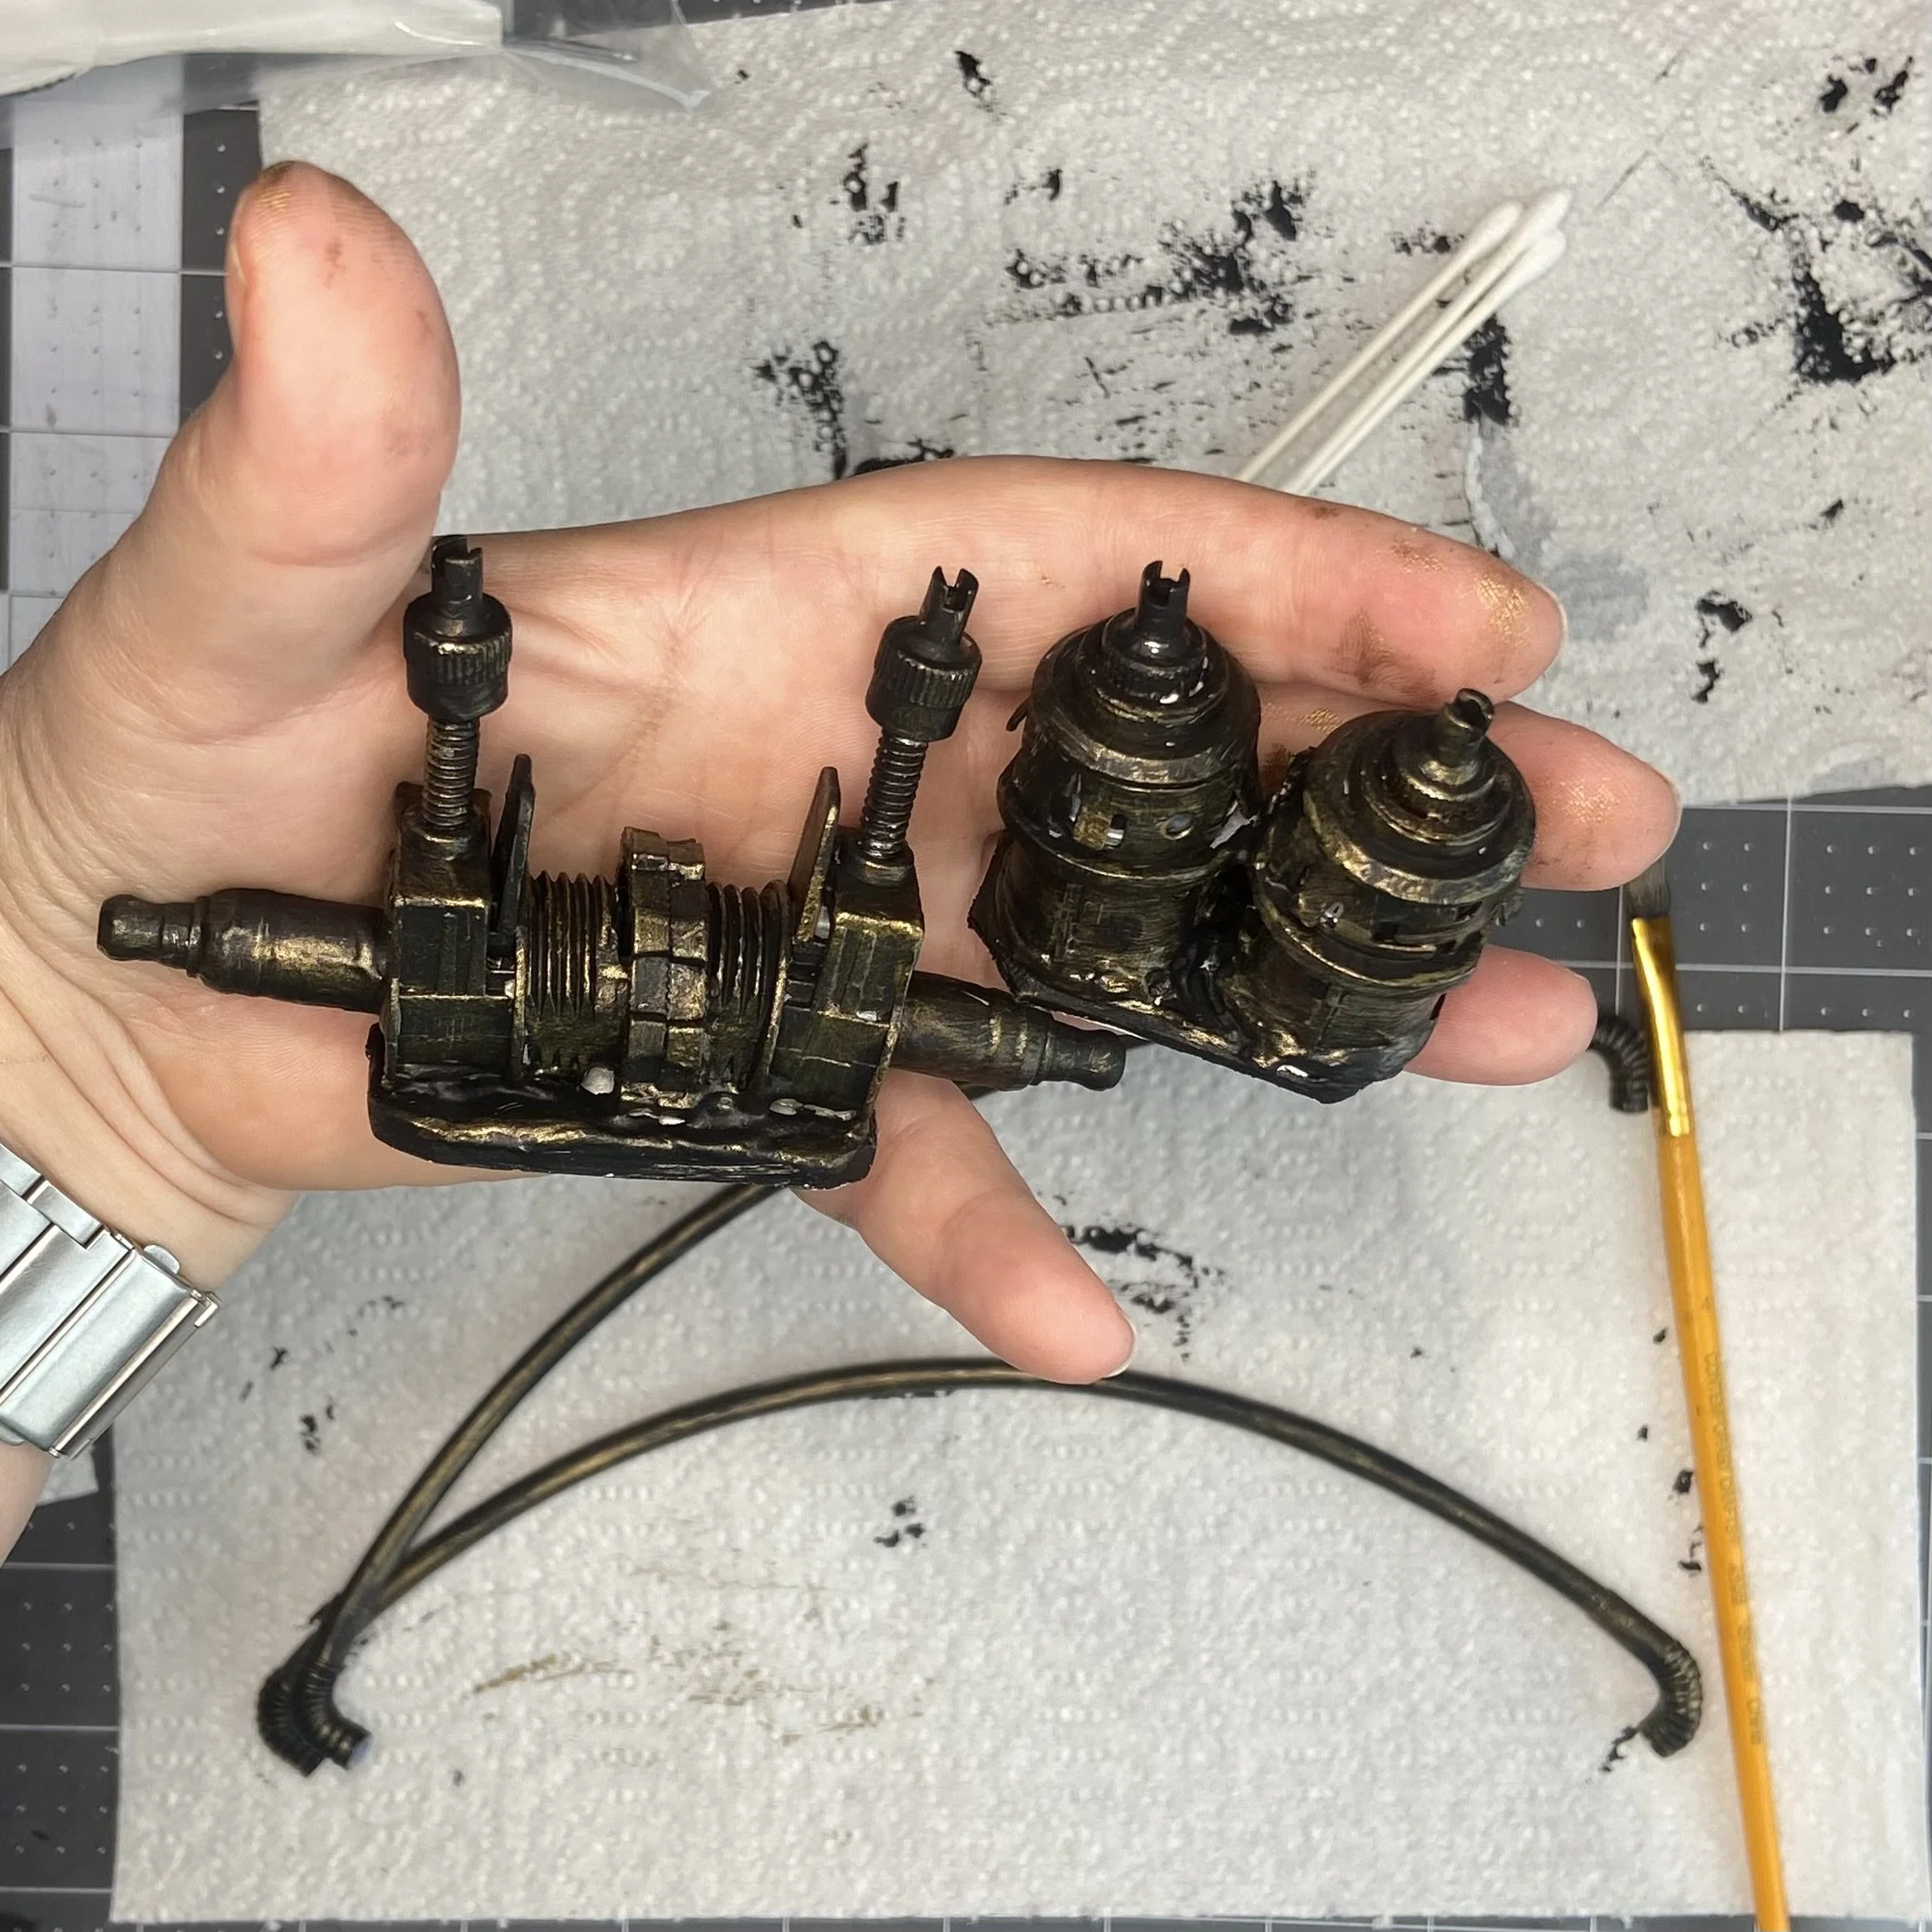

Next, I decided to glue my pipes along either side of the globe arm. Before I started this, I looked around for anything I could use to hold the plastic tubing in place along the curve of the arm while the glue dried. I came up with some office clips and some clothes pins, but in both cases, the grip was too tight and crushed my fragile plastic pipes. As I write this, it occurs to me that I could have used masking tape and that would likely have worked very well. But since I didn’t think of that at the time, I had to actually glue one side, and then go sit down for awhile, holding the pipes in place with my hands until the glued dried enough that I could let go. Then I did the same to the other side.
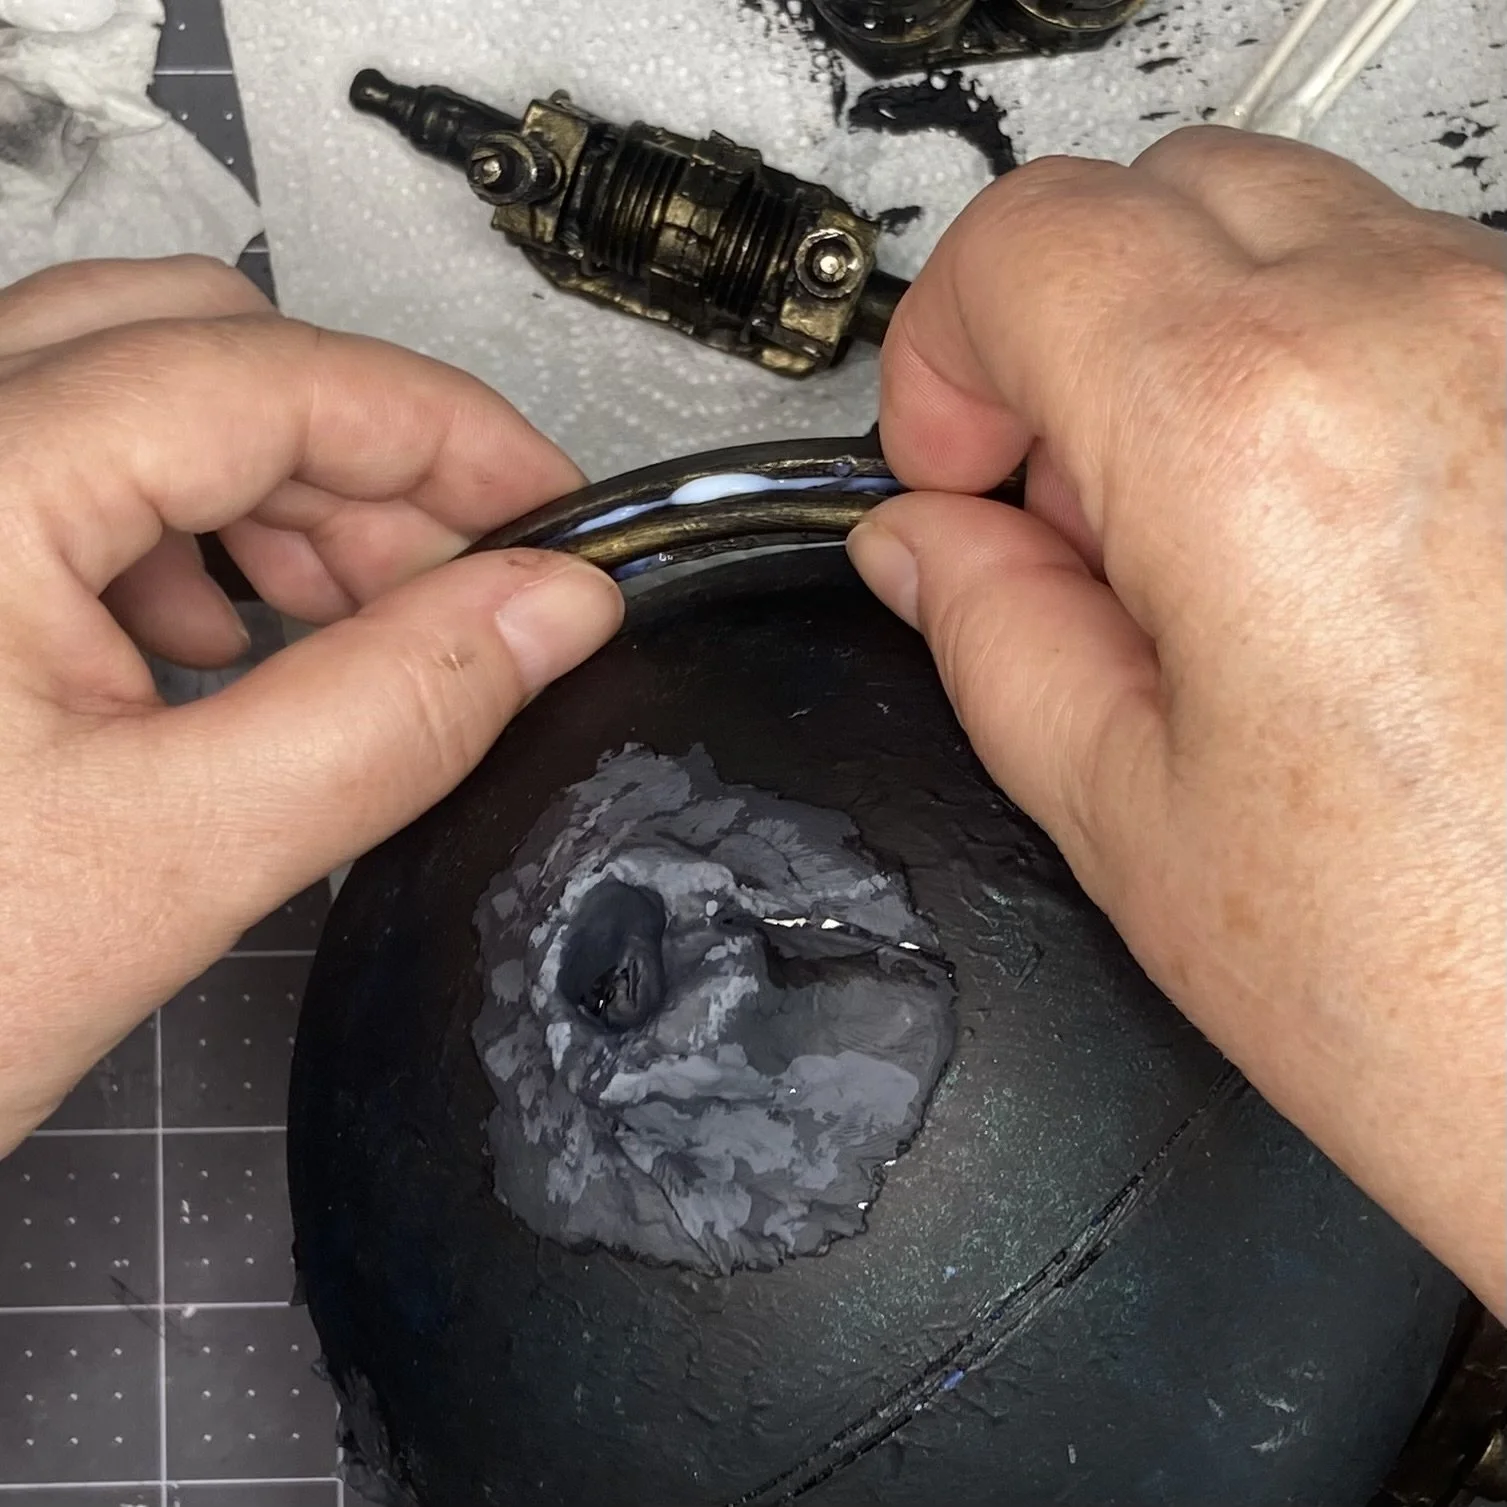
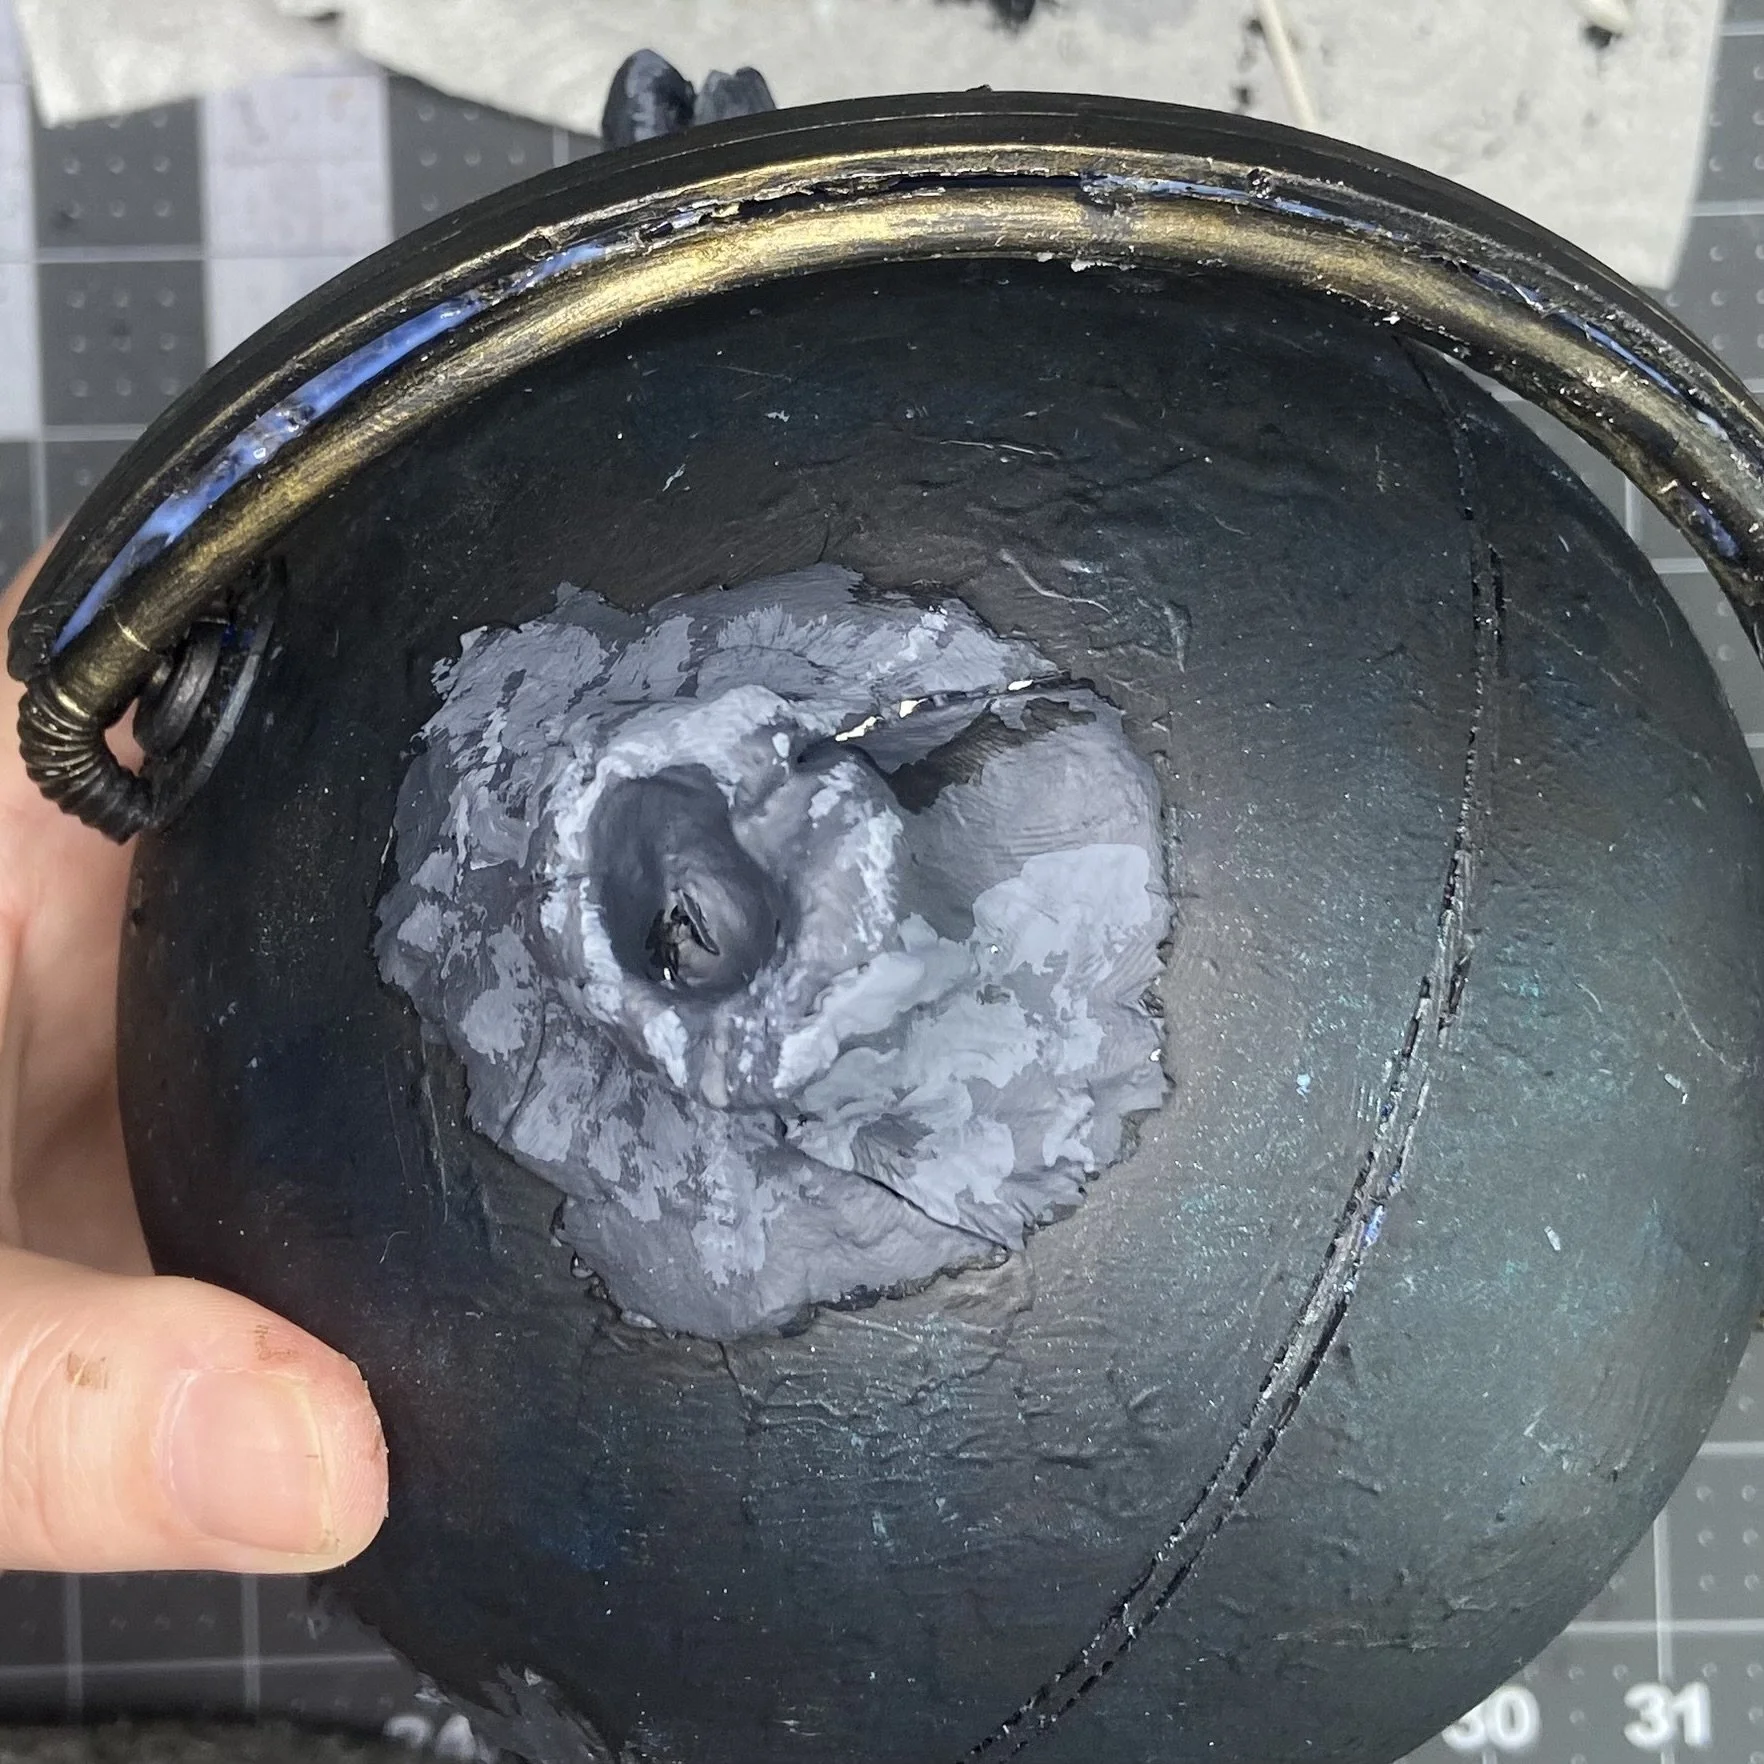
After the pipes were in place, I decided to glue my machinery snugged up tight to either side of the arm, toward the “North Pole” part of the globe. I used a massive amount of my heavy body gel, both to fill in the space between the flat bottom of my little clay platforms and the curve of the globe and also because these pieces were relatively heavy, being made of metal and clay. Once I got the pieces into the position I wanted, I propped the globe at an angle atop my tool box, so that the machinery sat as close to “on top of the world” as I could manage, and left it to dry for a day.
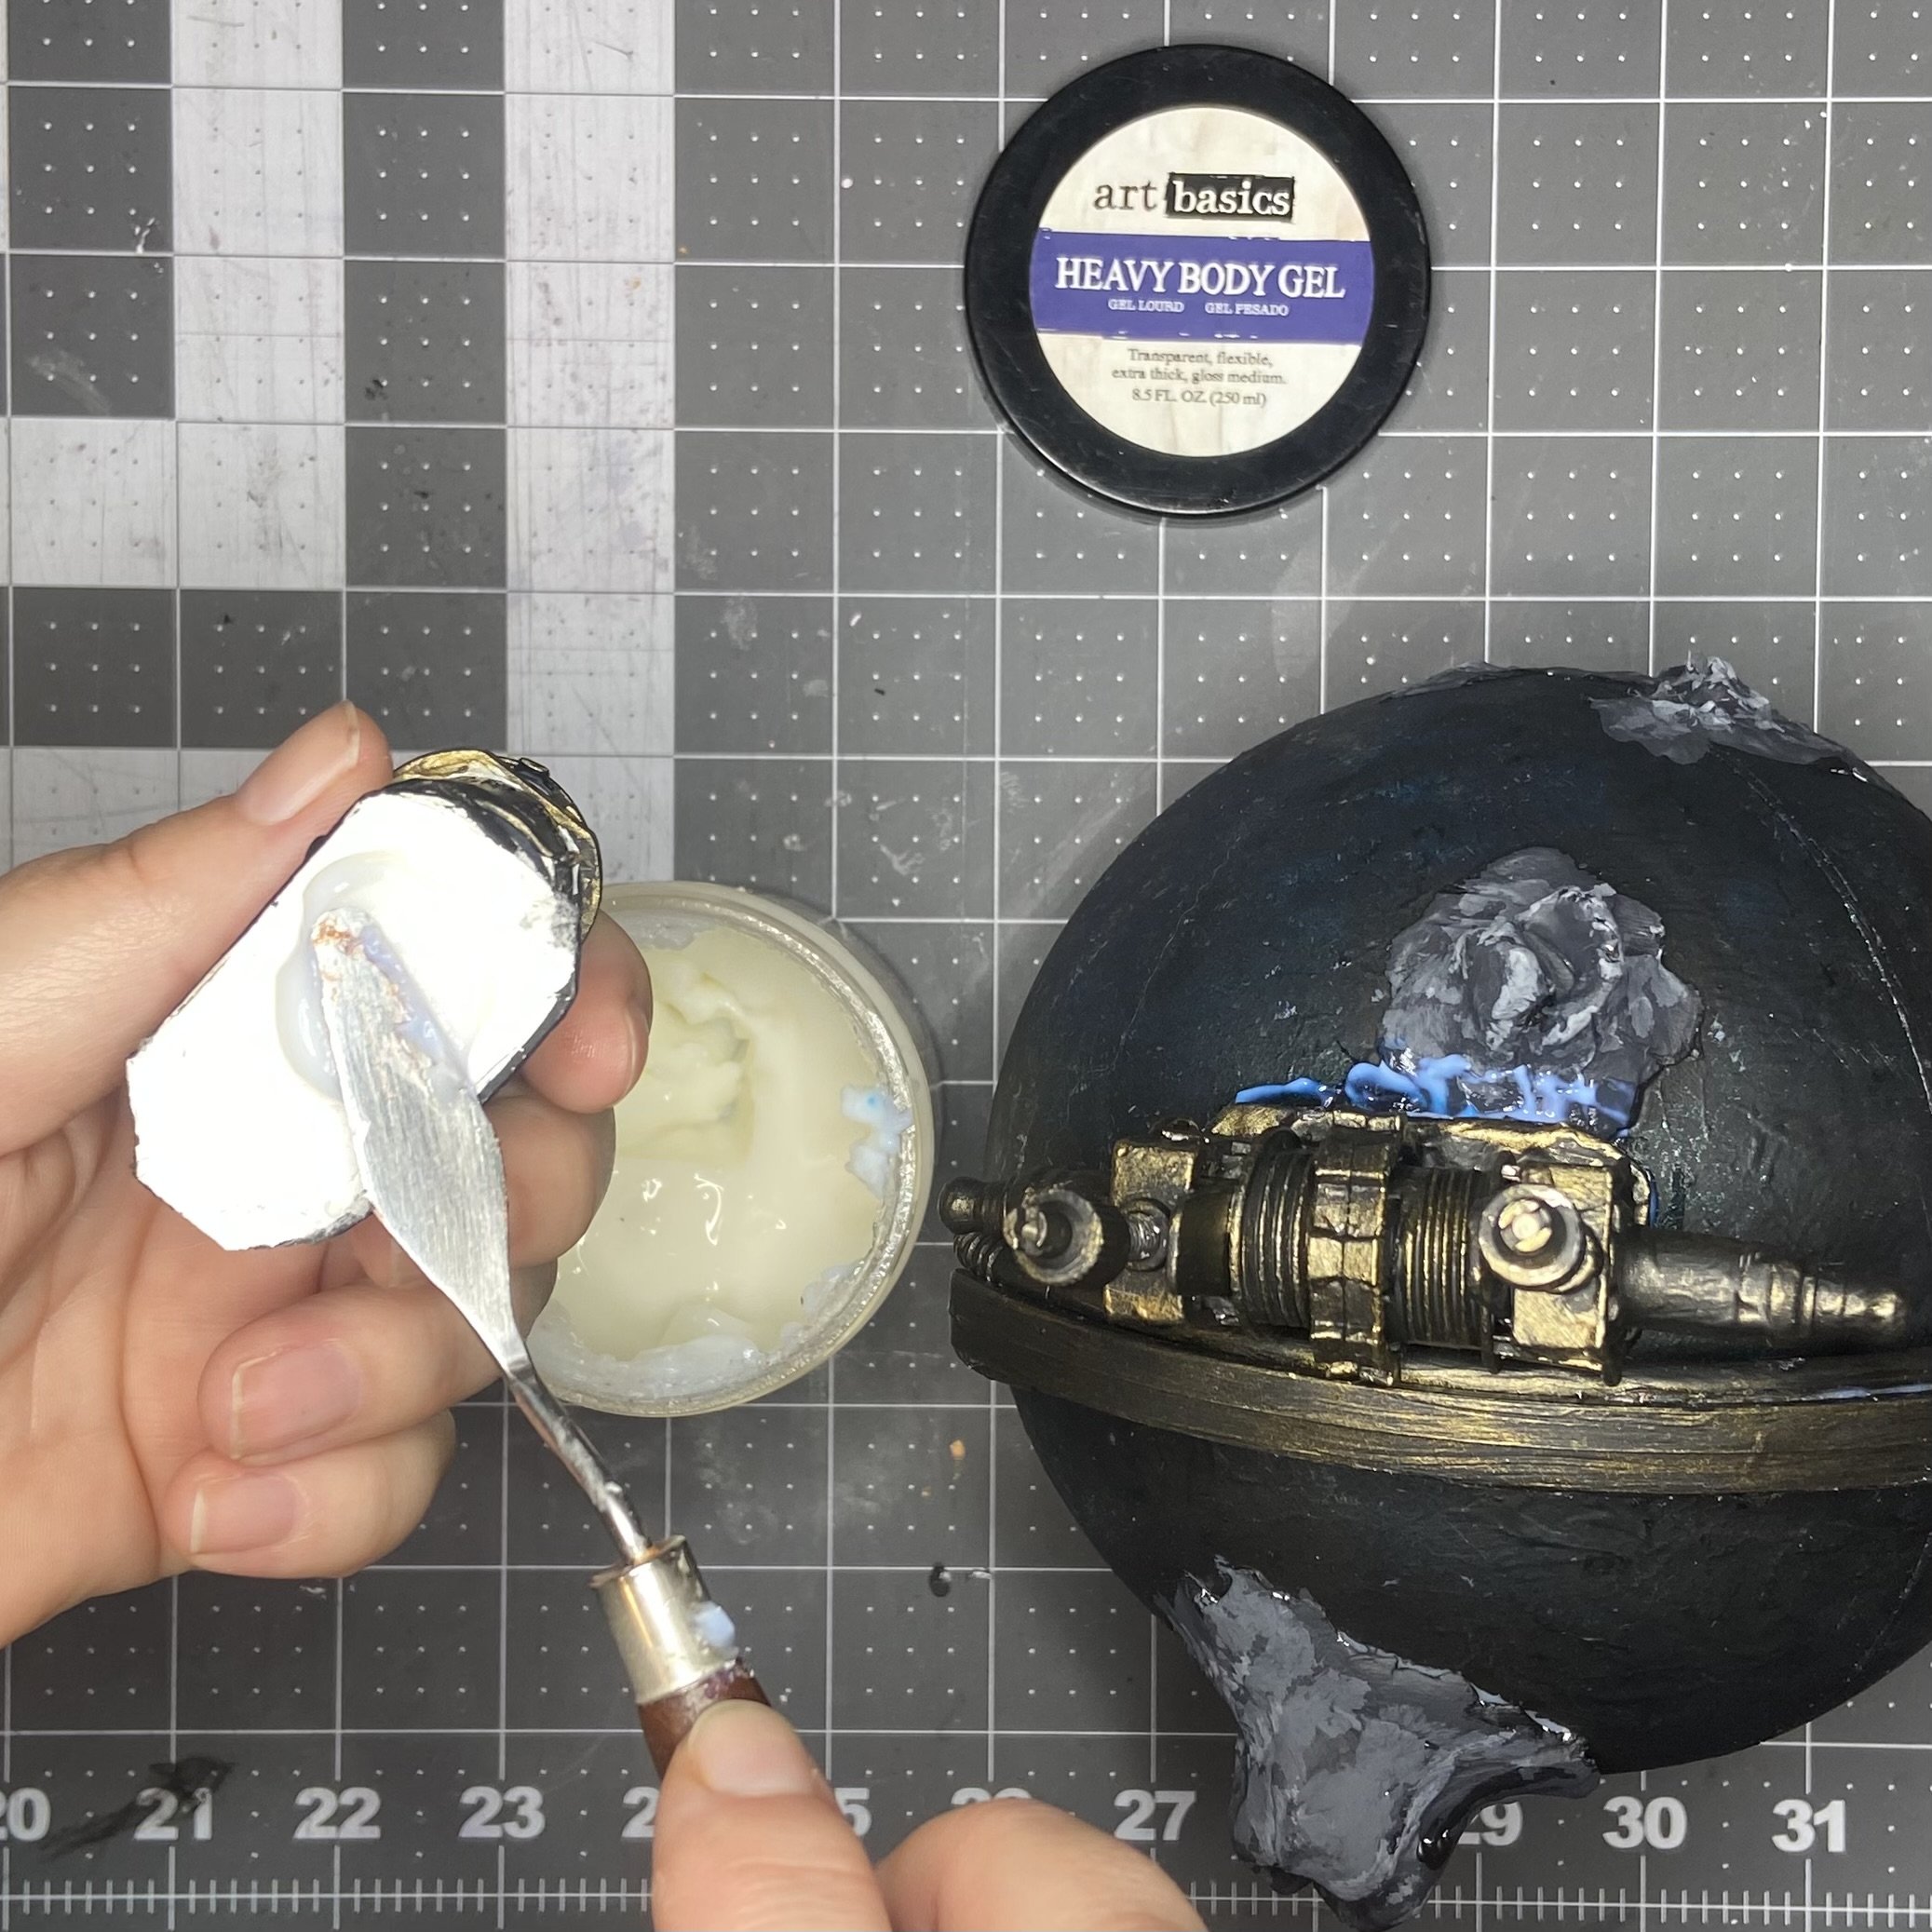
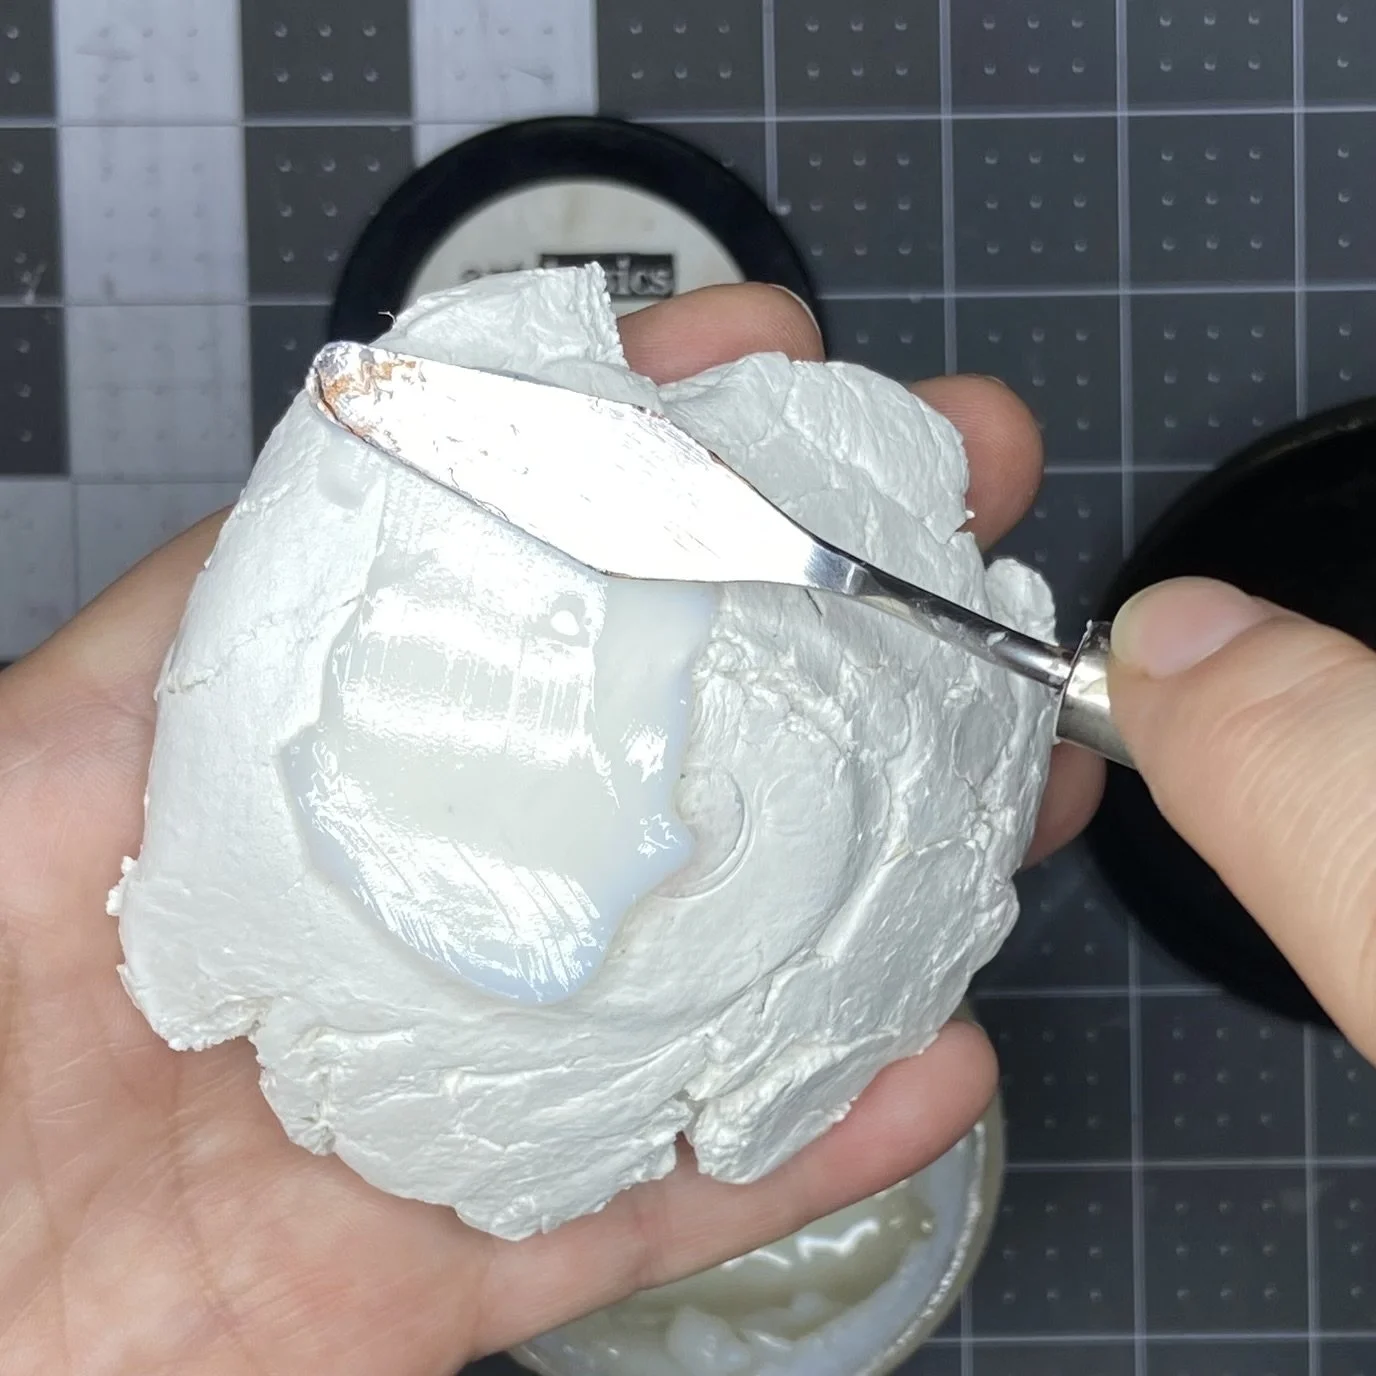
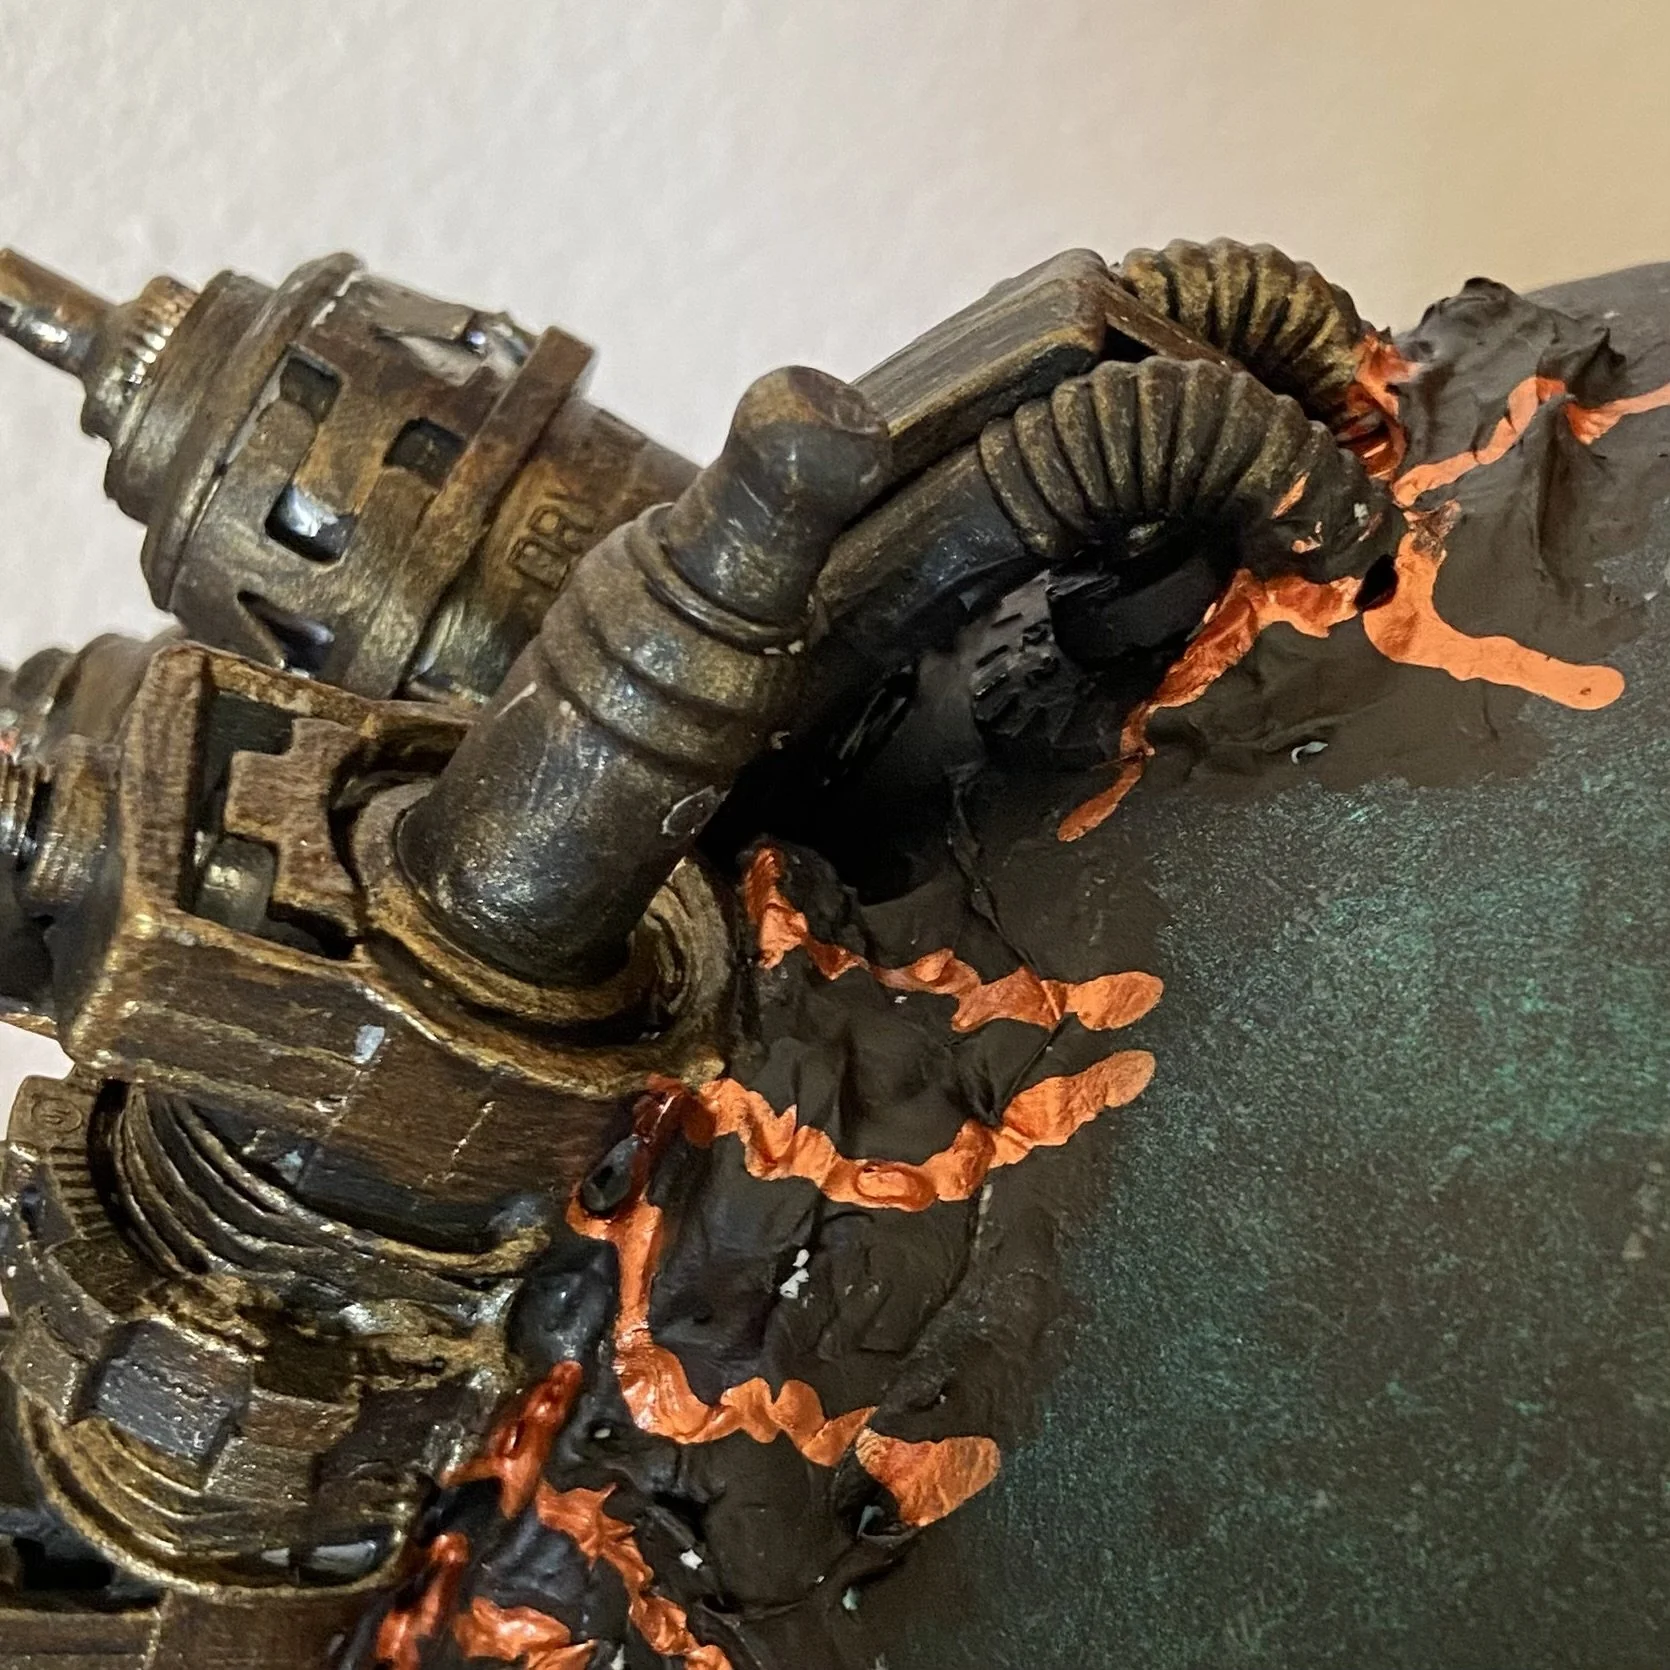
After the glue was dry and the machinery seemed secure, I used my modeling paste to build up around the base of the machines and also at the poles, where the pipes touched the globe. After that was dry, I painted all of the white parts with black gesso.
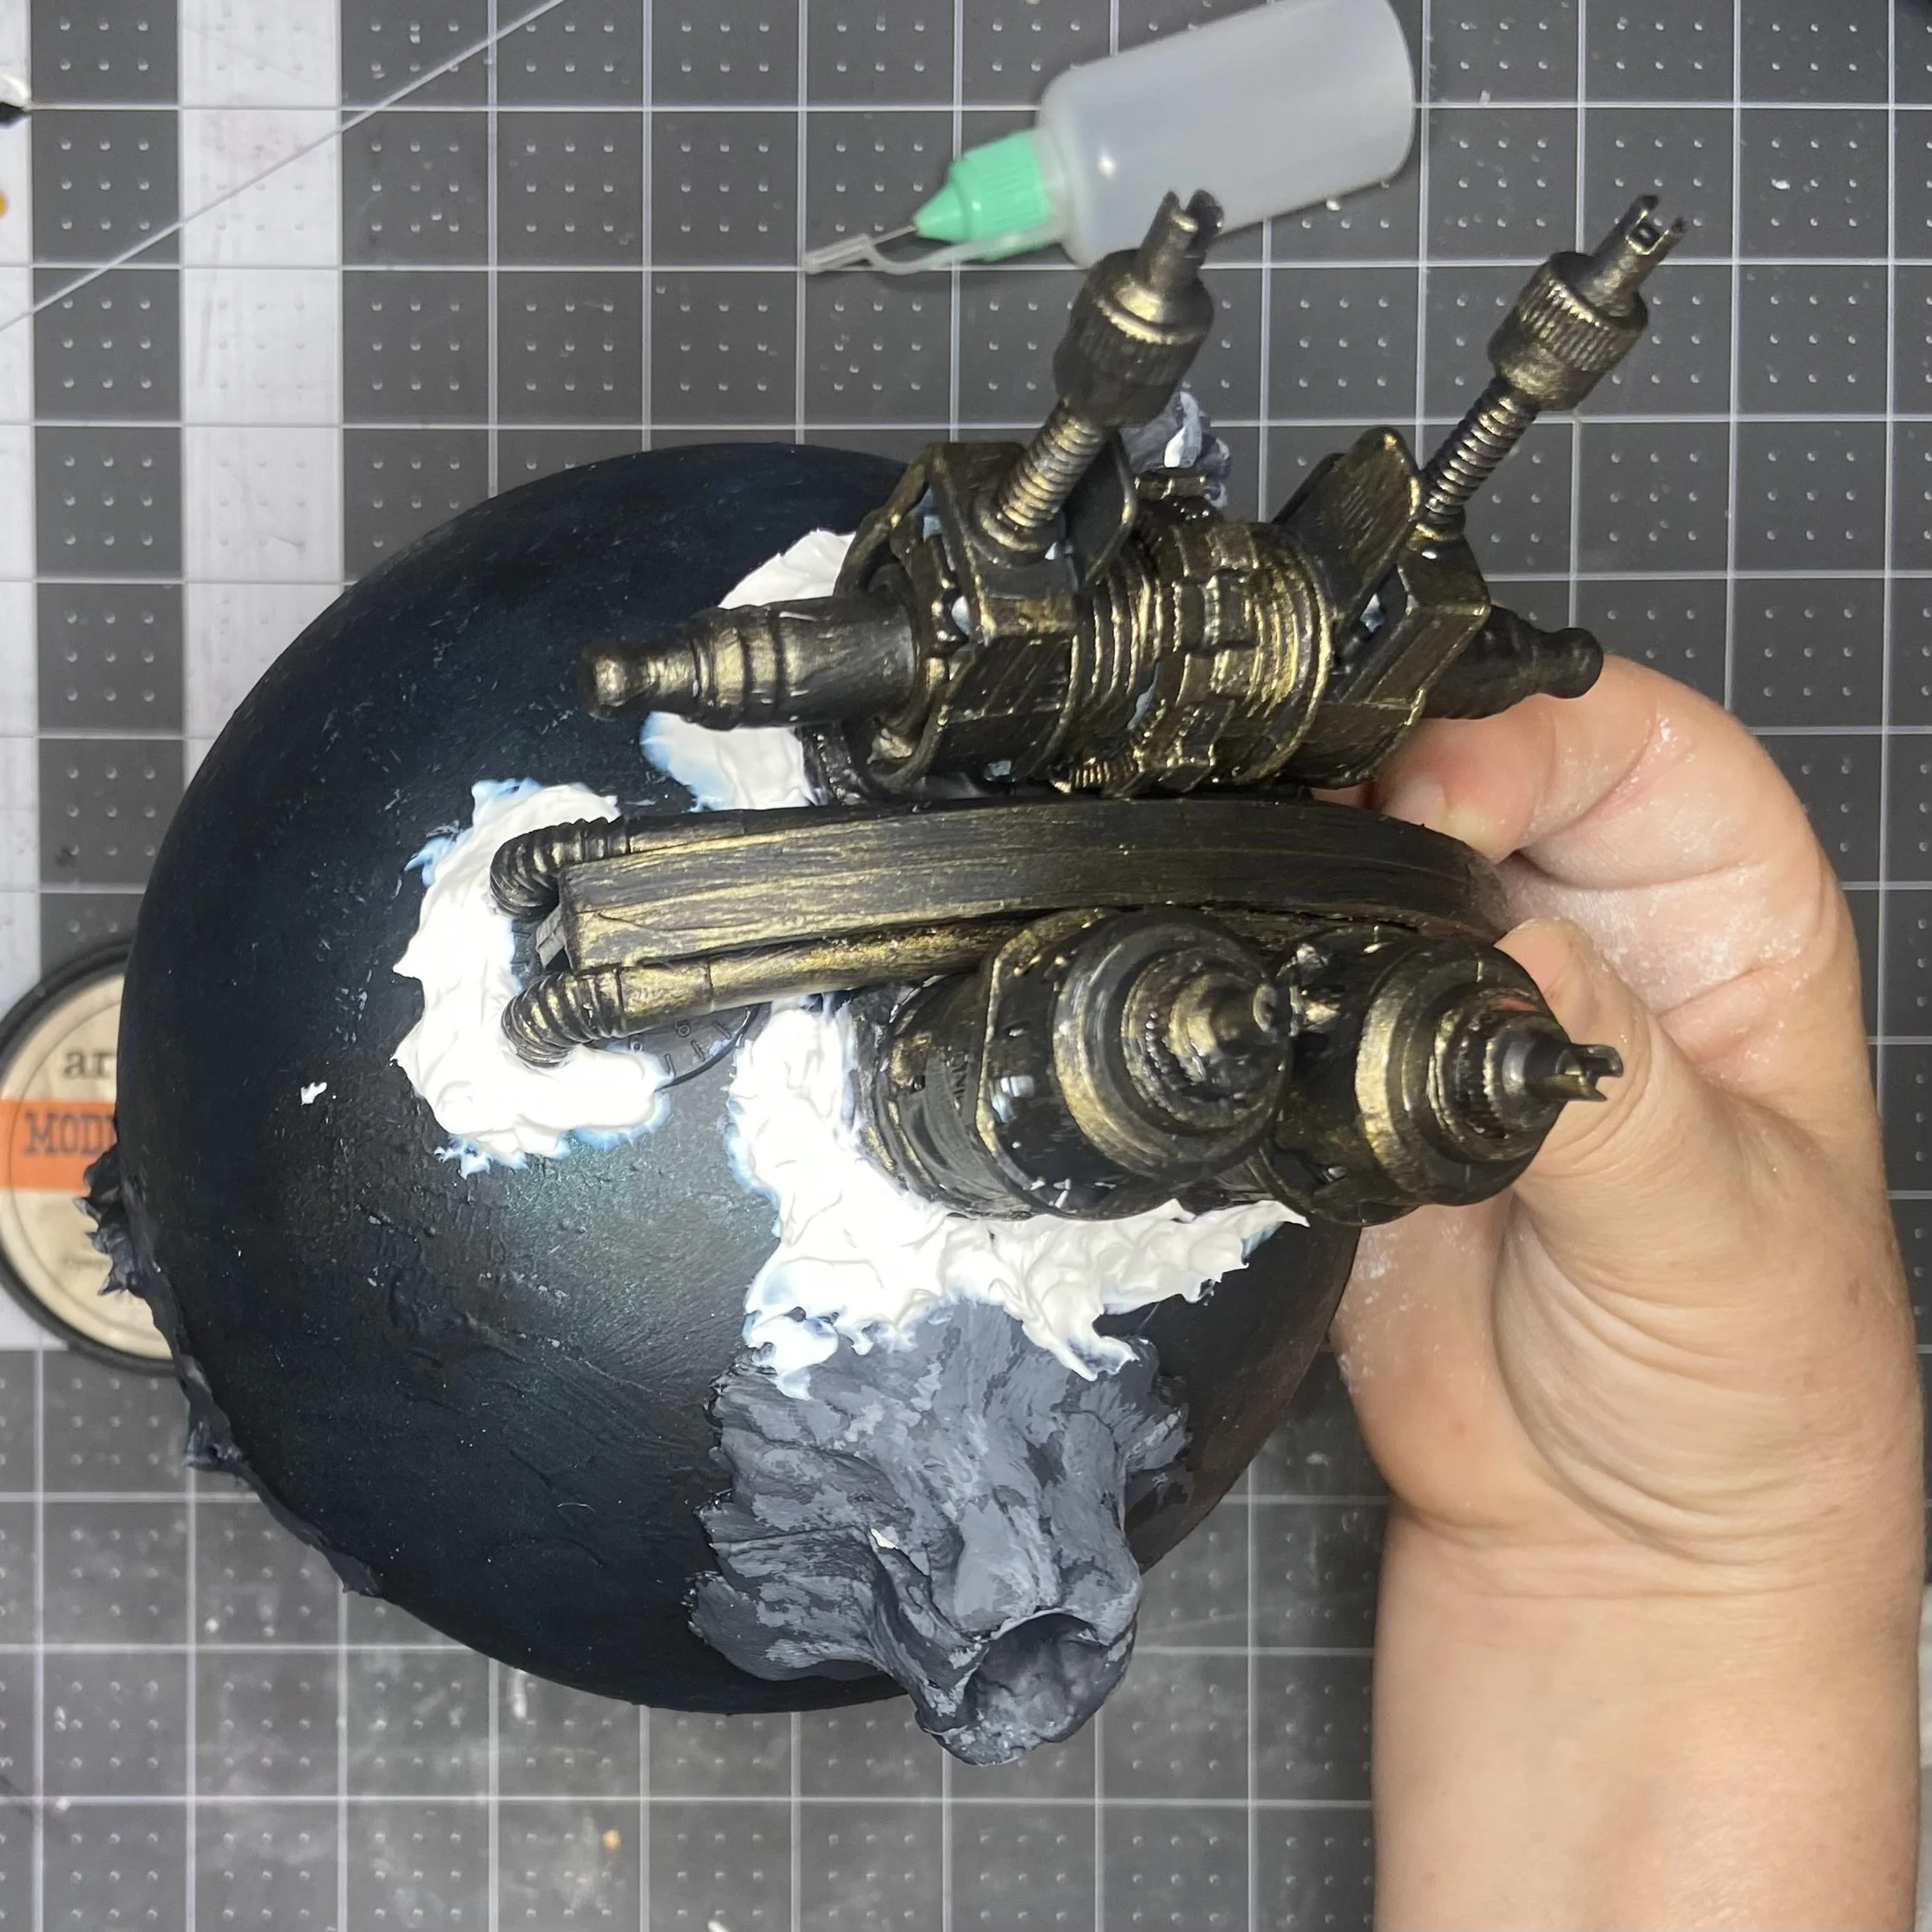
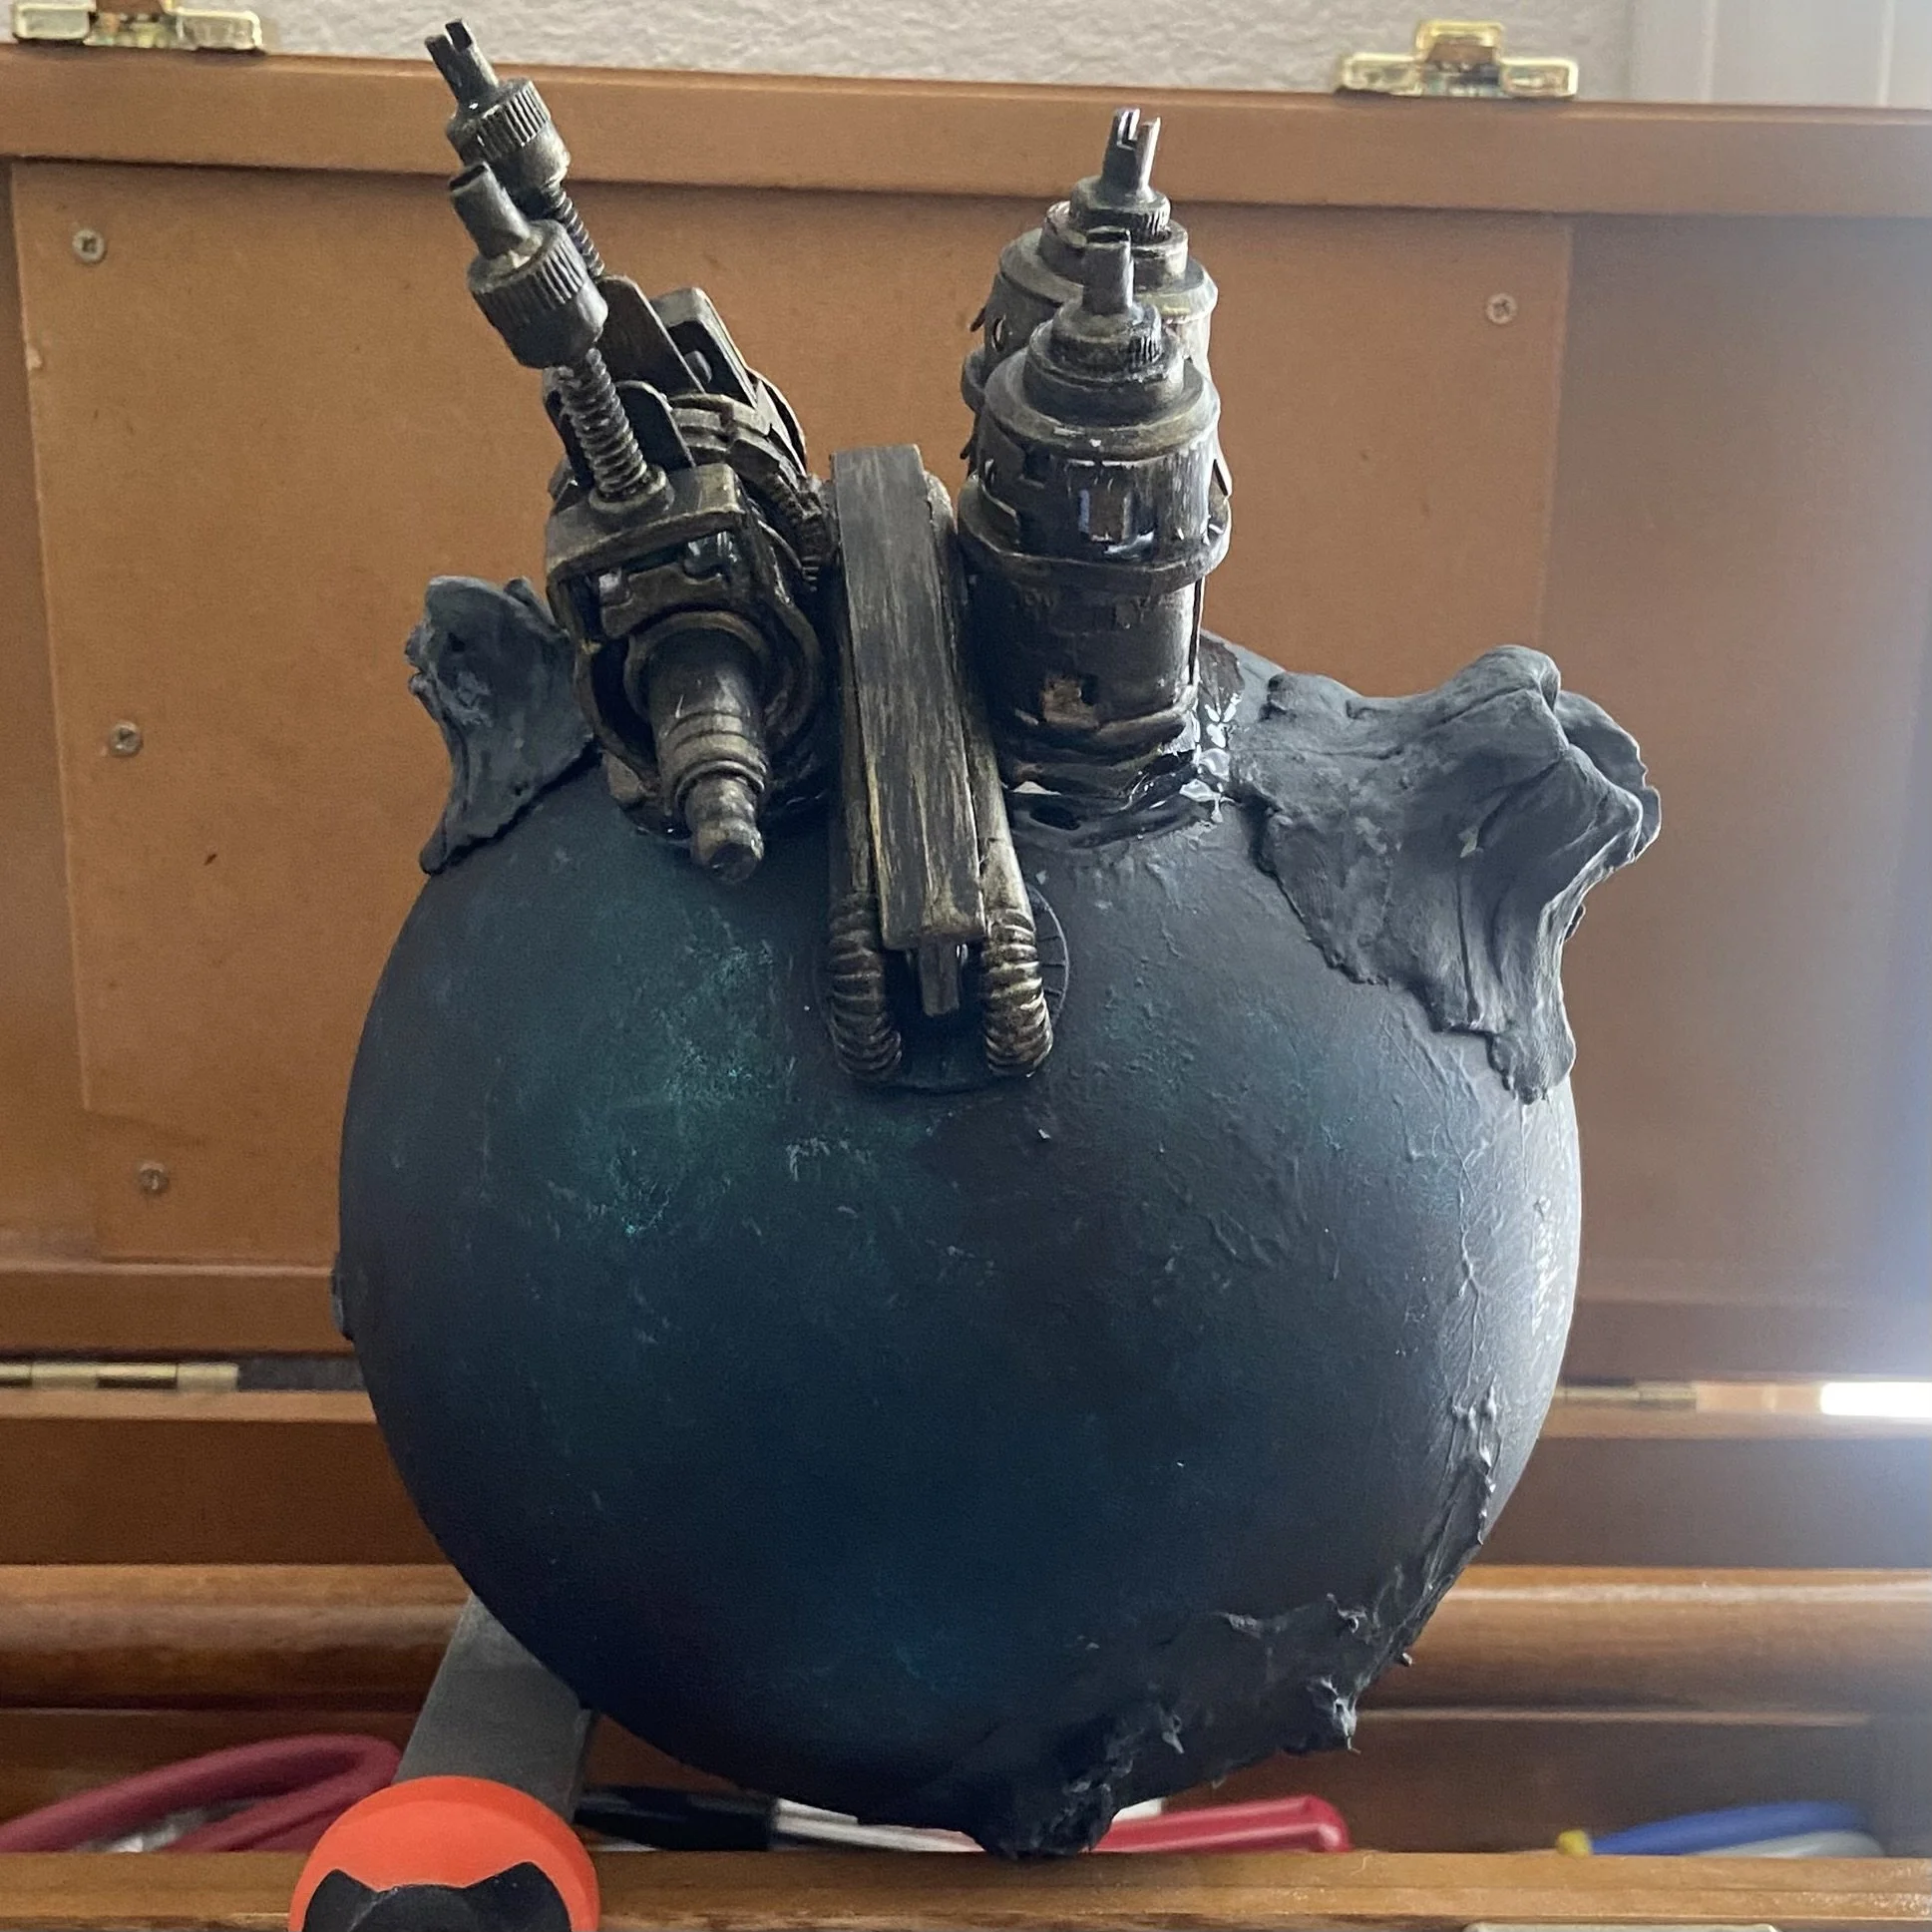
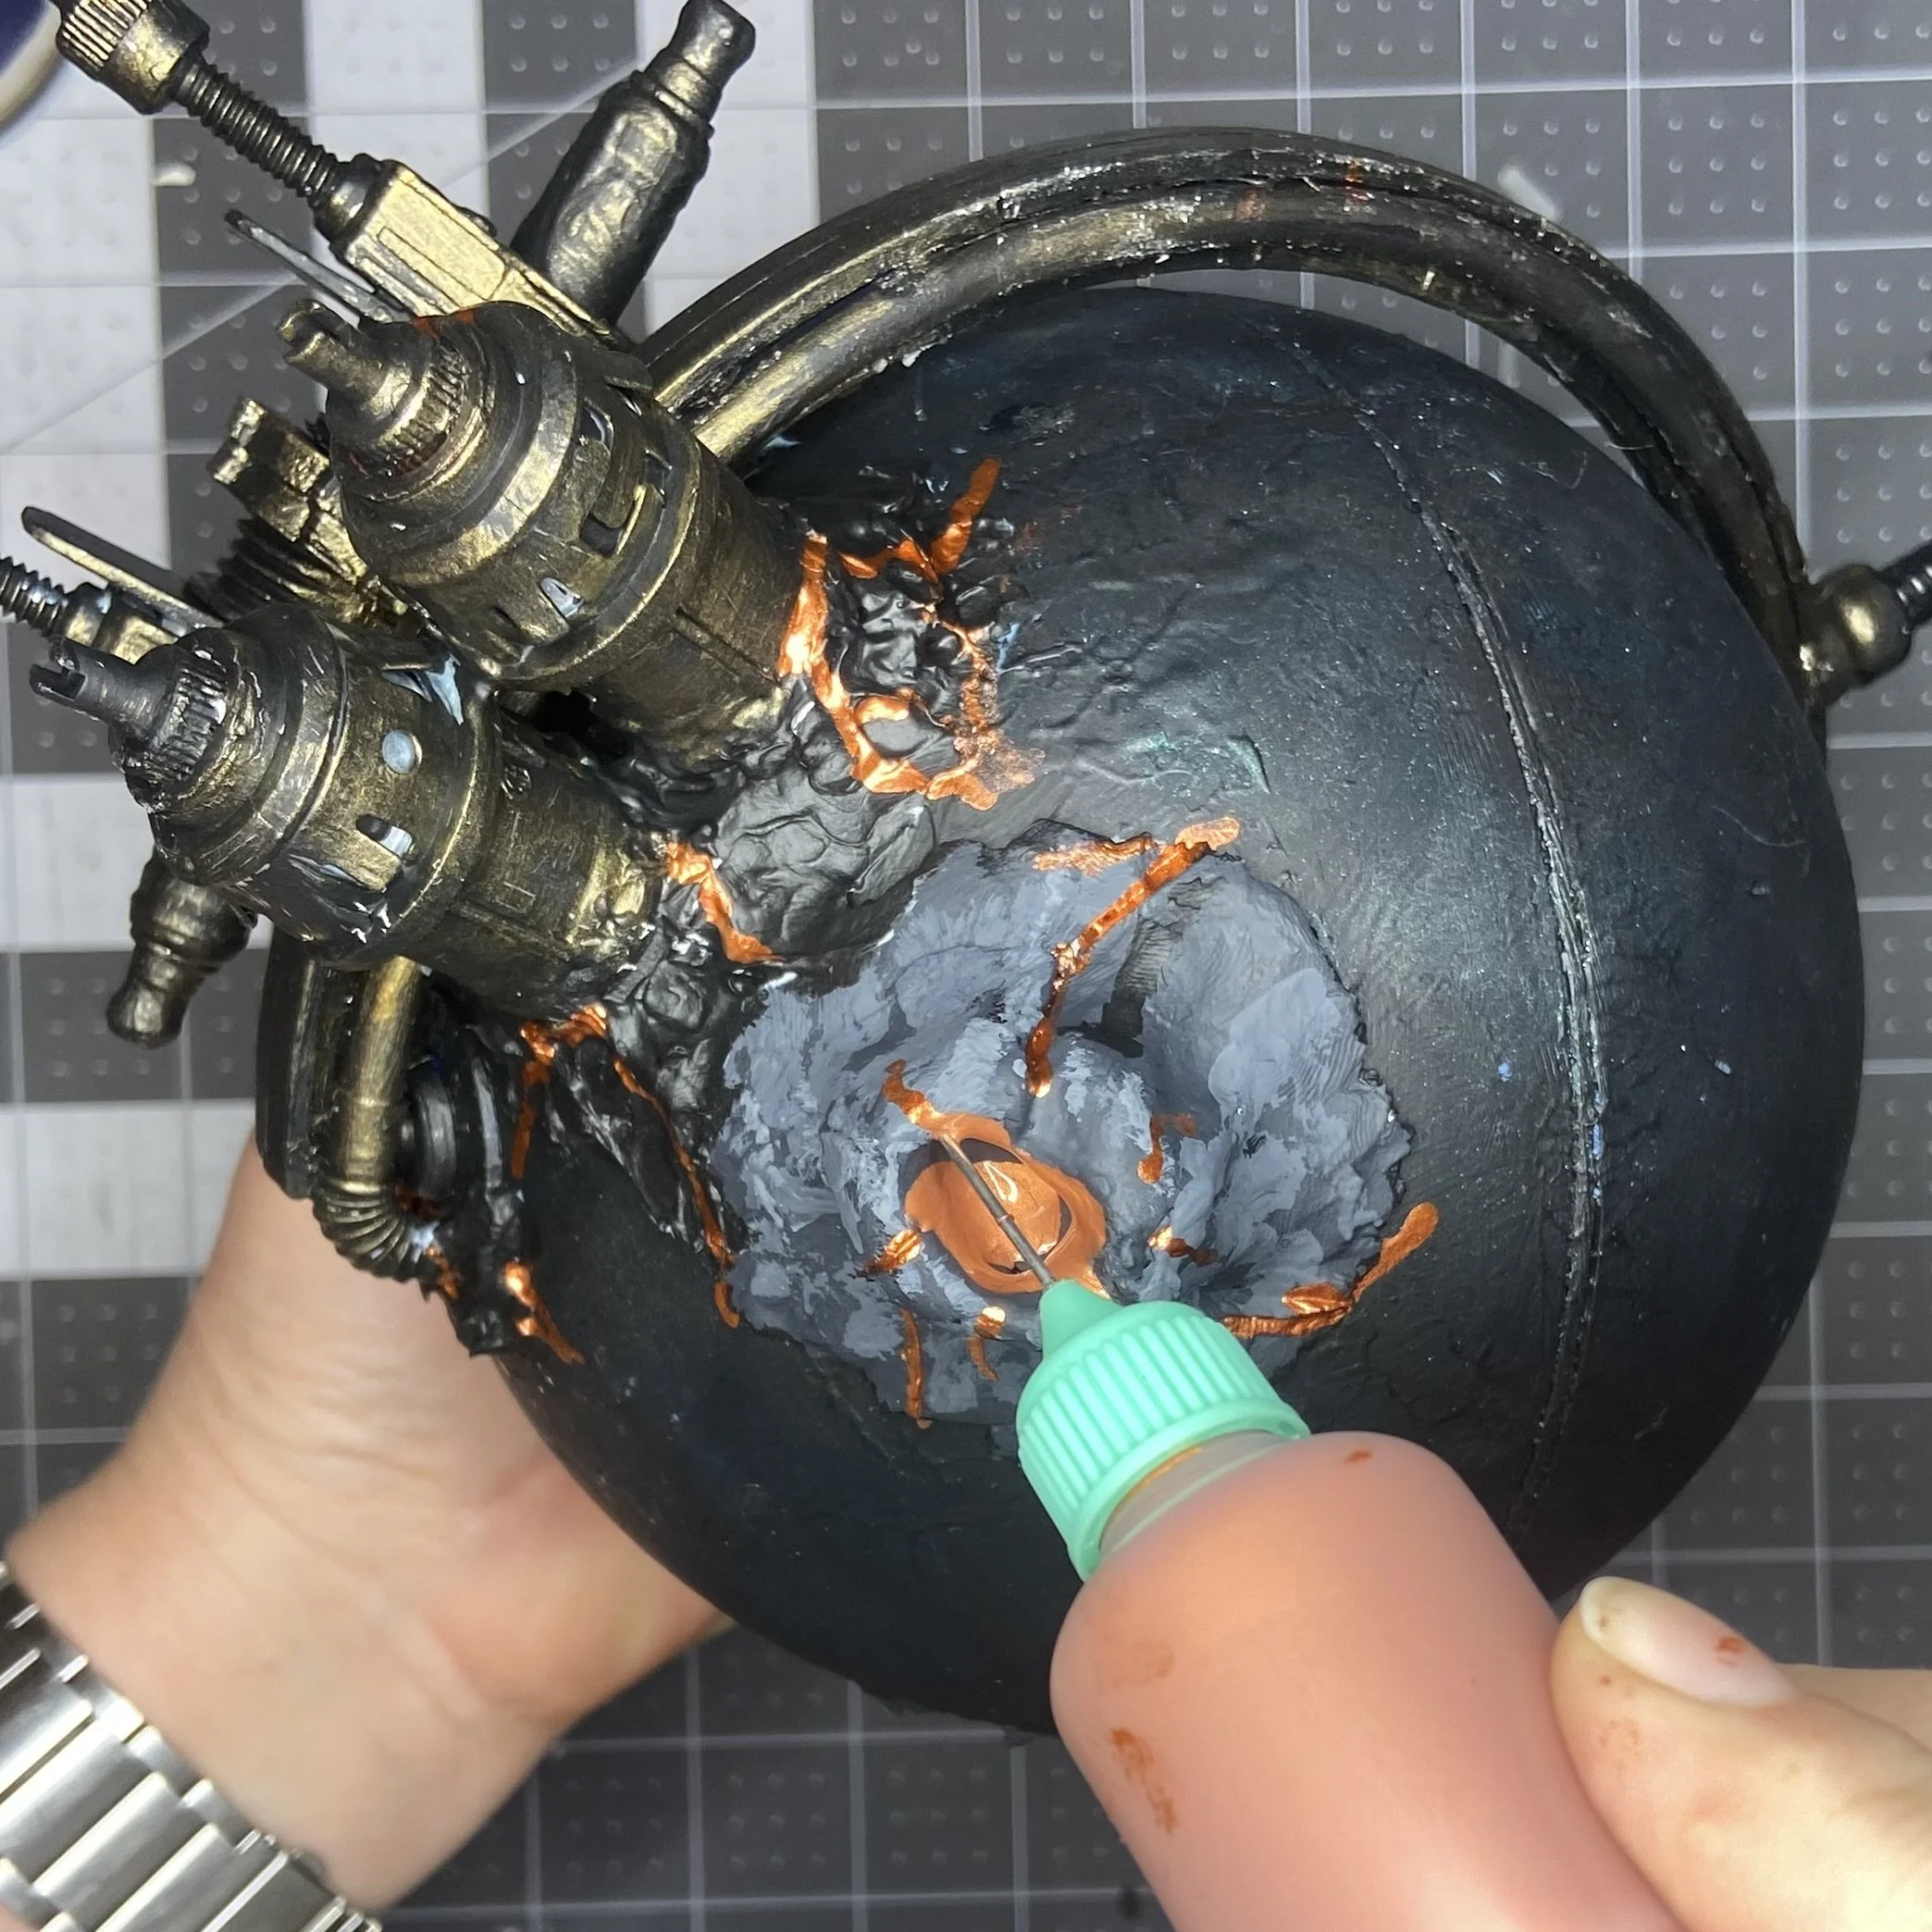
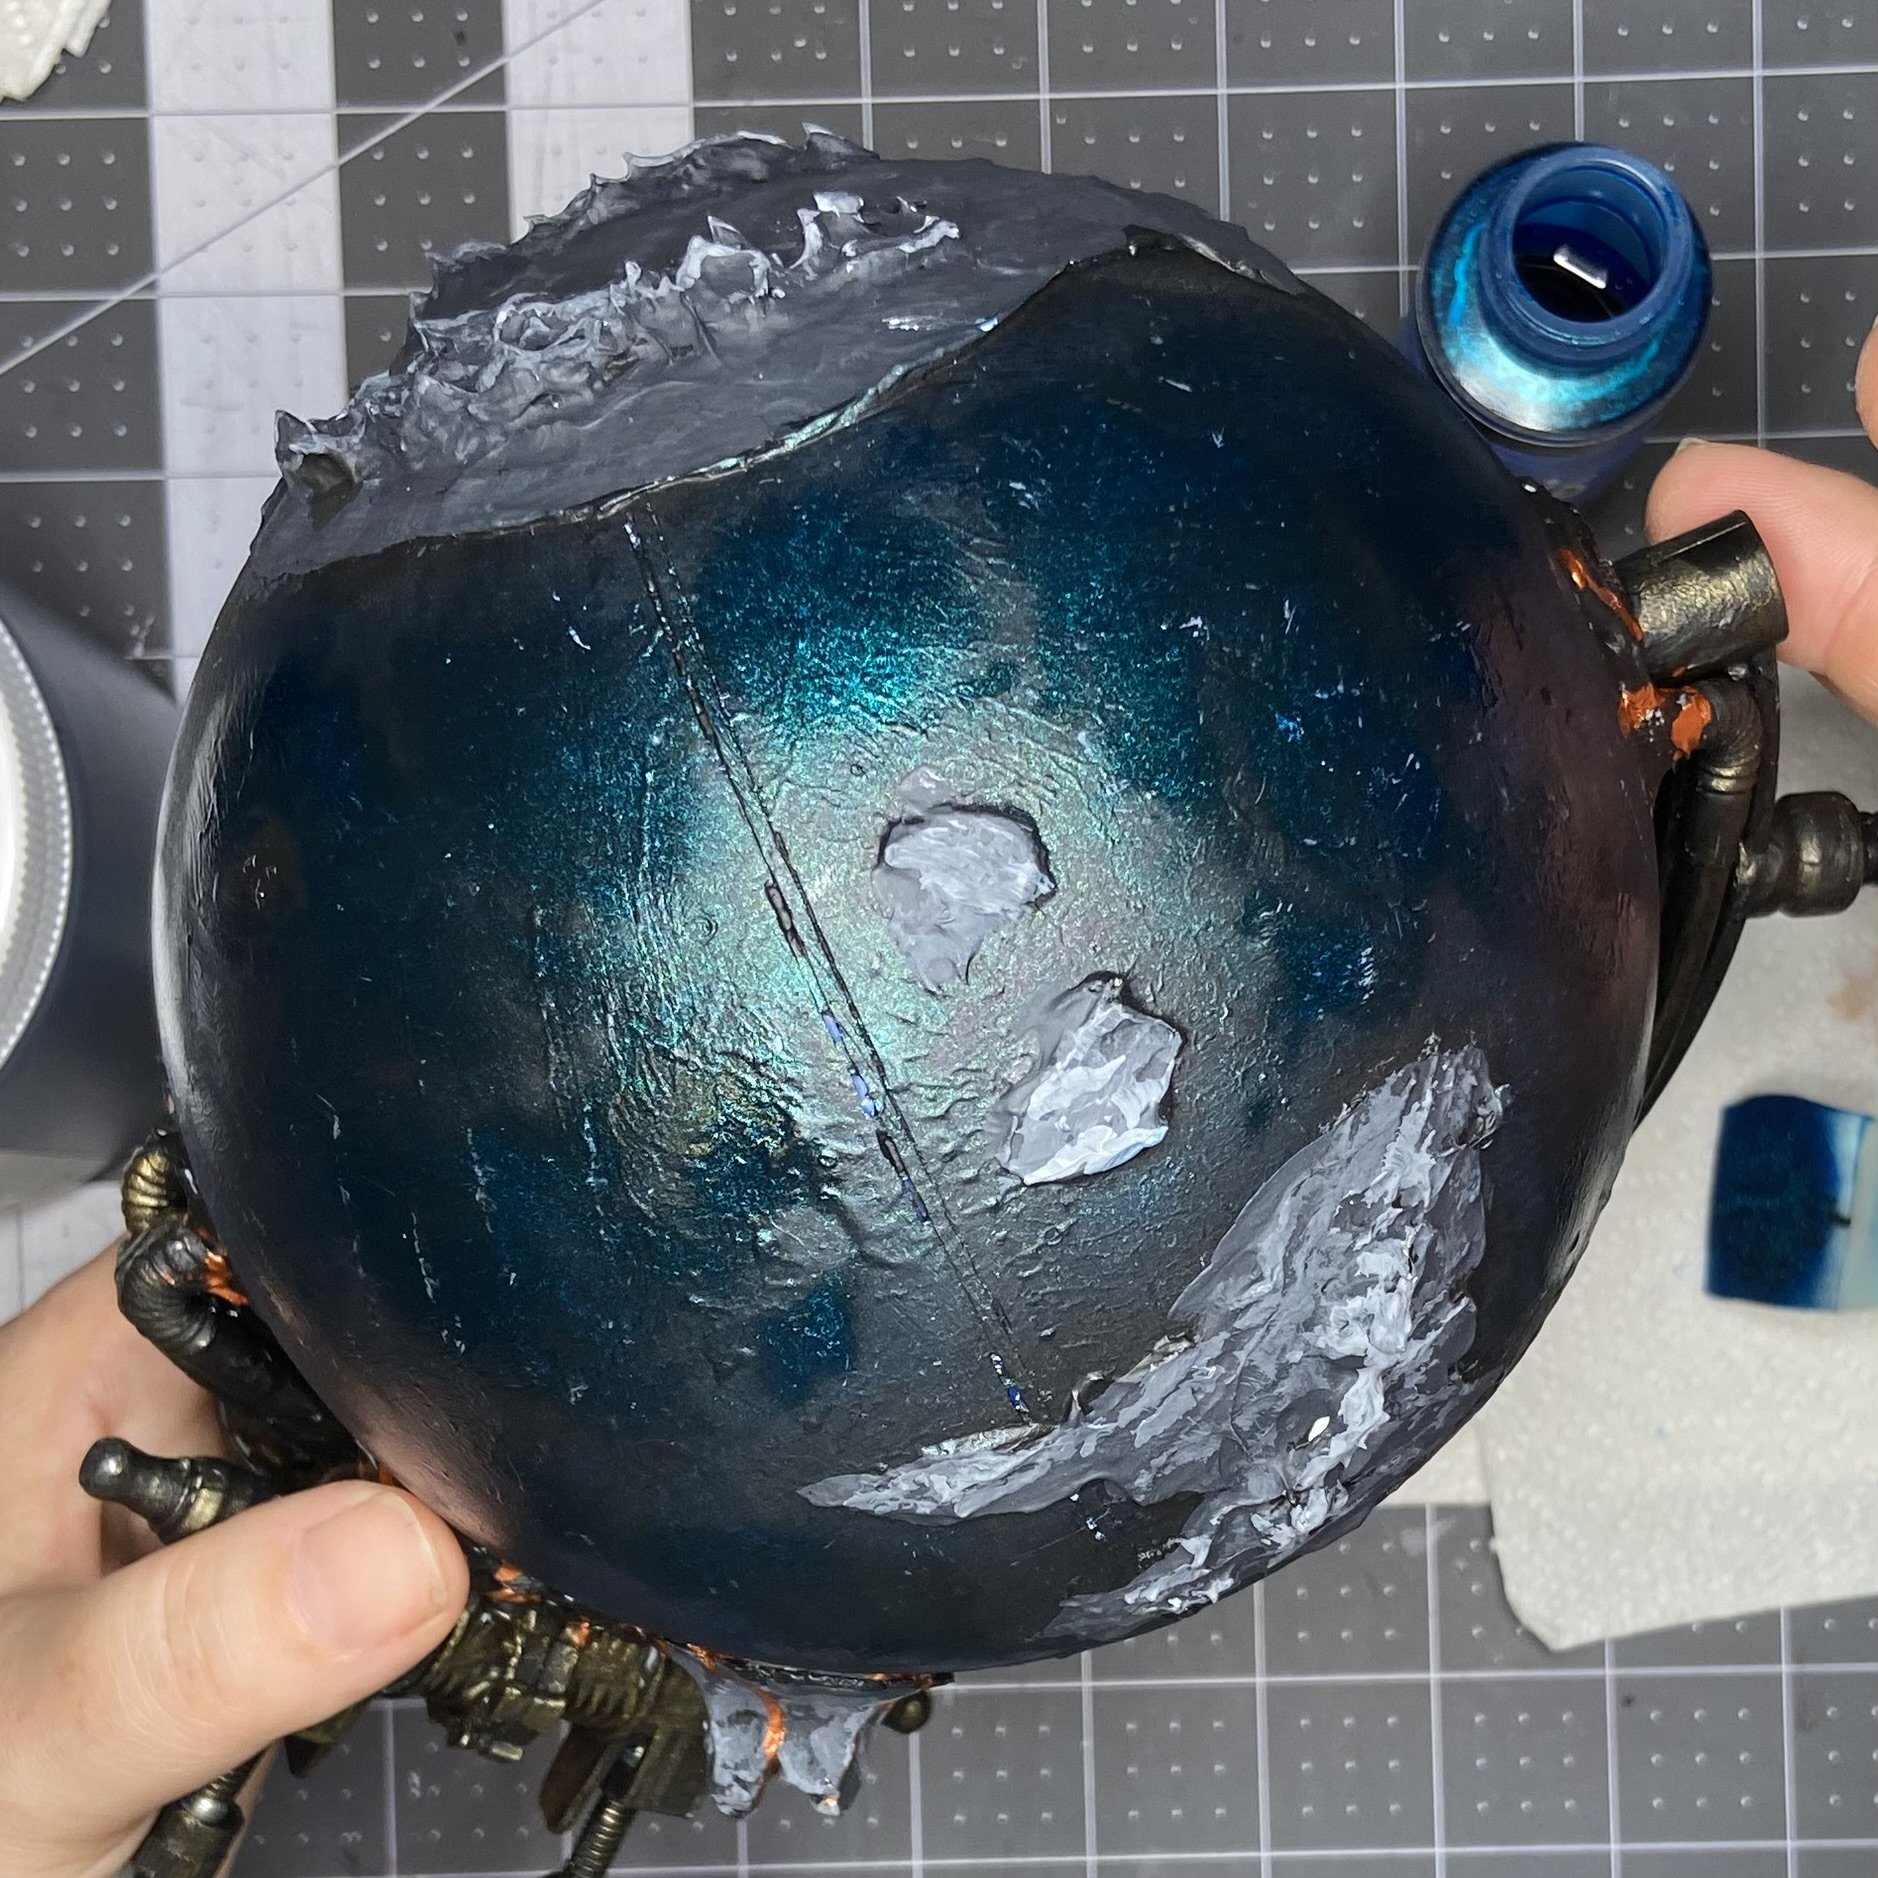
Now I was ready for the really fun bit…adding some lava. I wanted to use copper paint for this, and while I did have some, it was just a little too thick for me to be able to paint very thin lines, even with the teensiest paintbrush I had. But as fortune would have it, I had a pack of precision tip applicator bottles which I’d never even opened (no idea what I bought them for). The precision tip would be perfect for drawing very thin lines of paint, so I thinned my copper paint down with water (1 part water to 2 parts paint), mixed it up in the applicator, and went to work. I wanted the lava to convey geological activity (those machines are definitely doing something!), so I of course painted lava in and around my volcanoes, but also around the ends of the pipes at the poles, and in some places where the machinery touched the globe. I really like how it turned out.

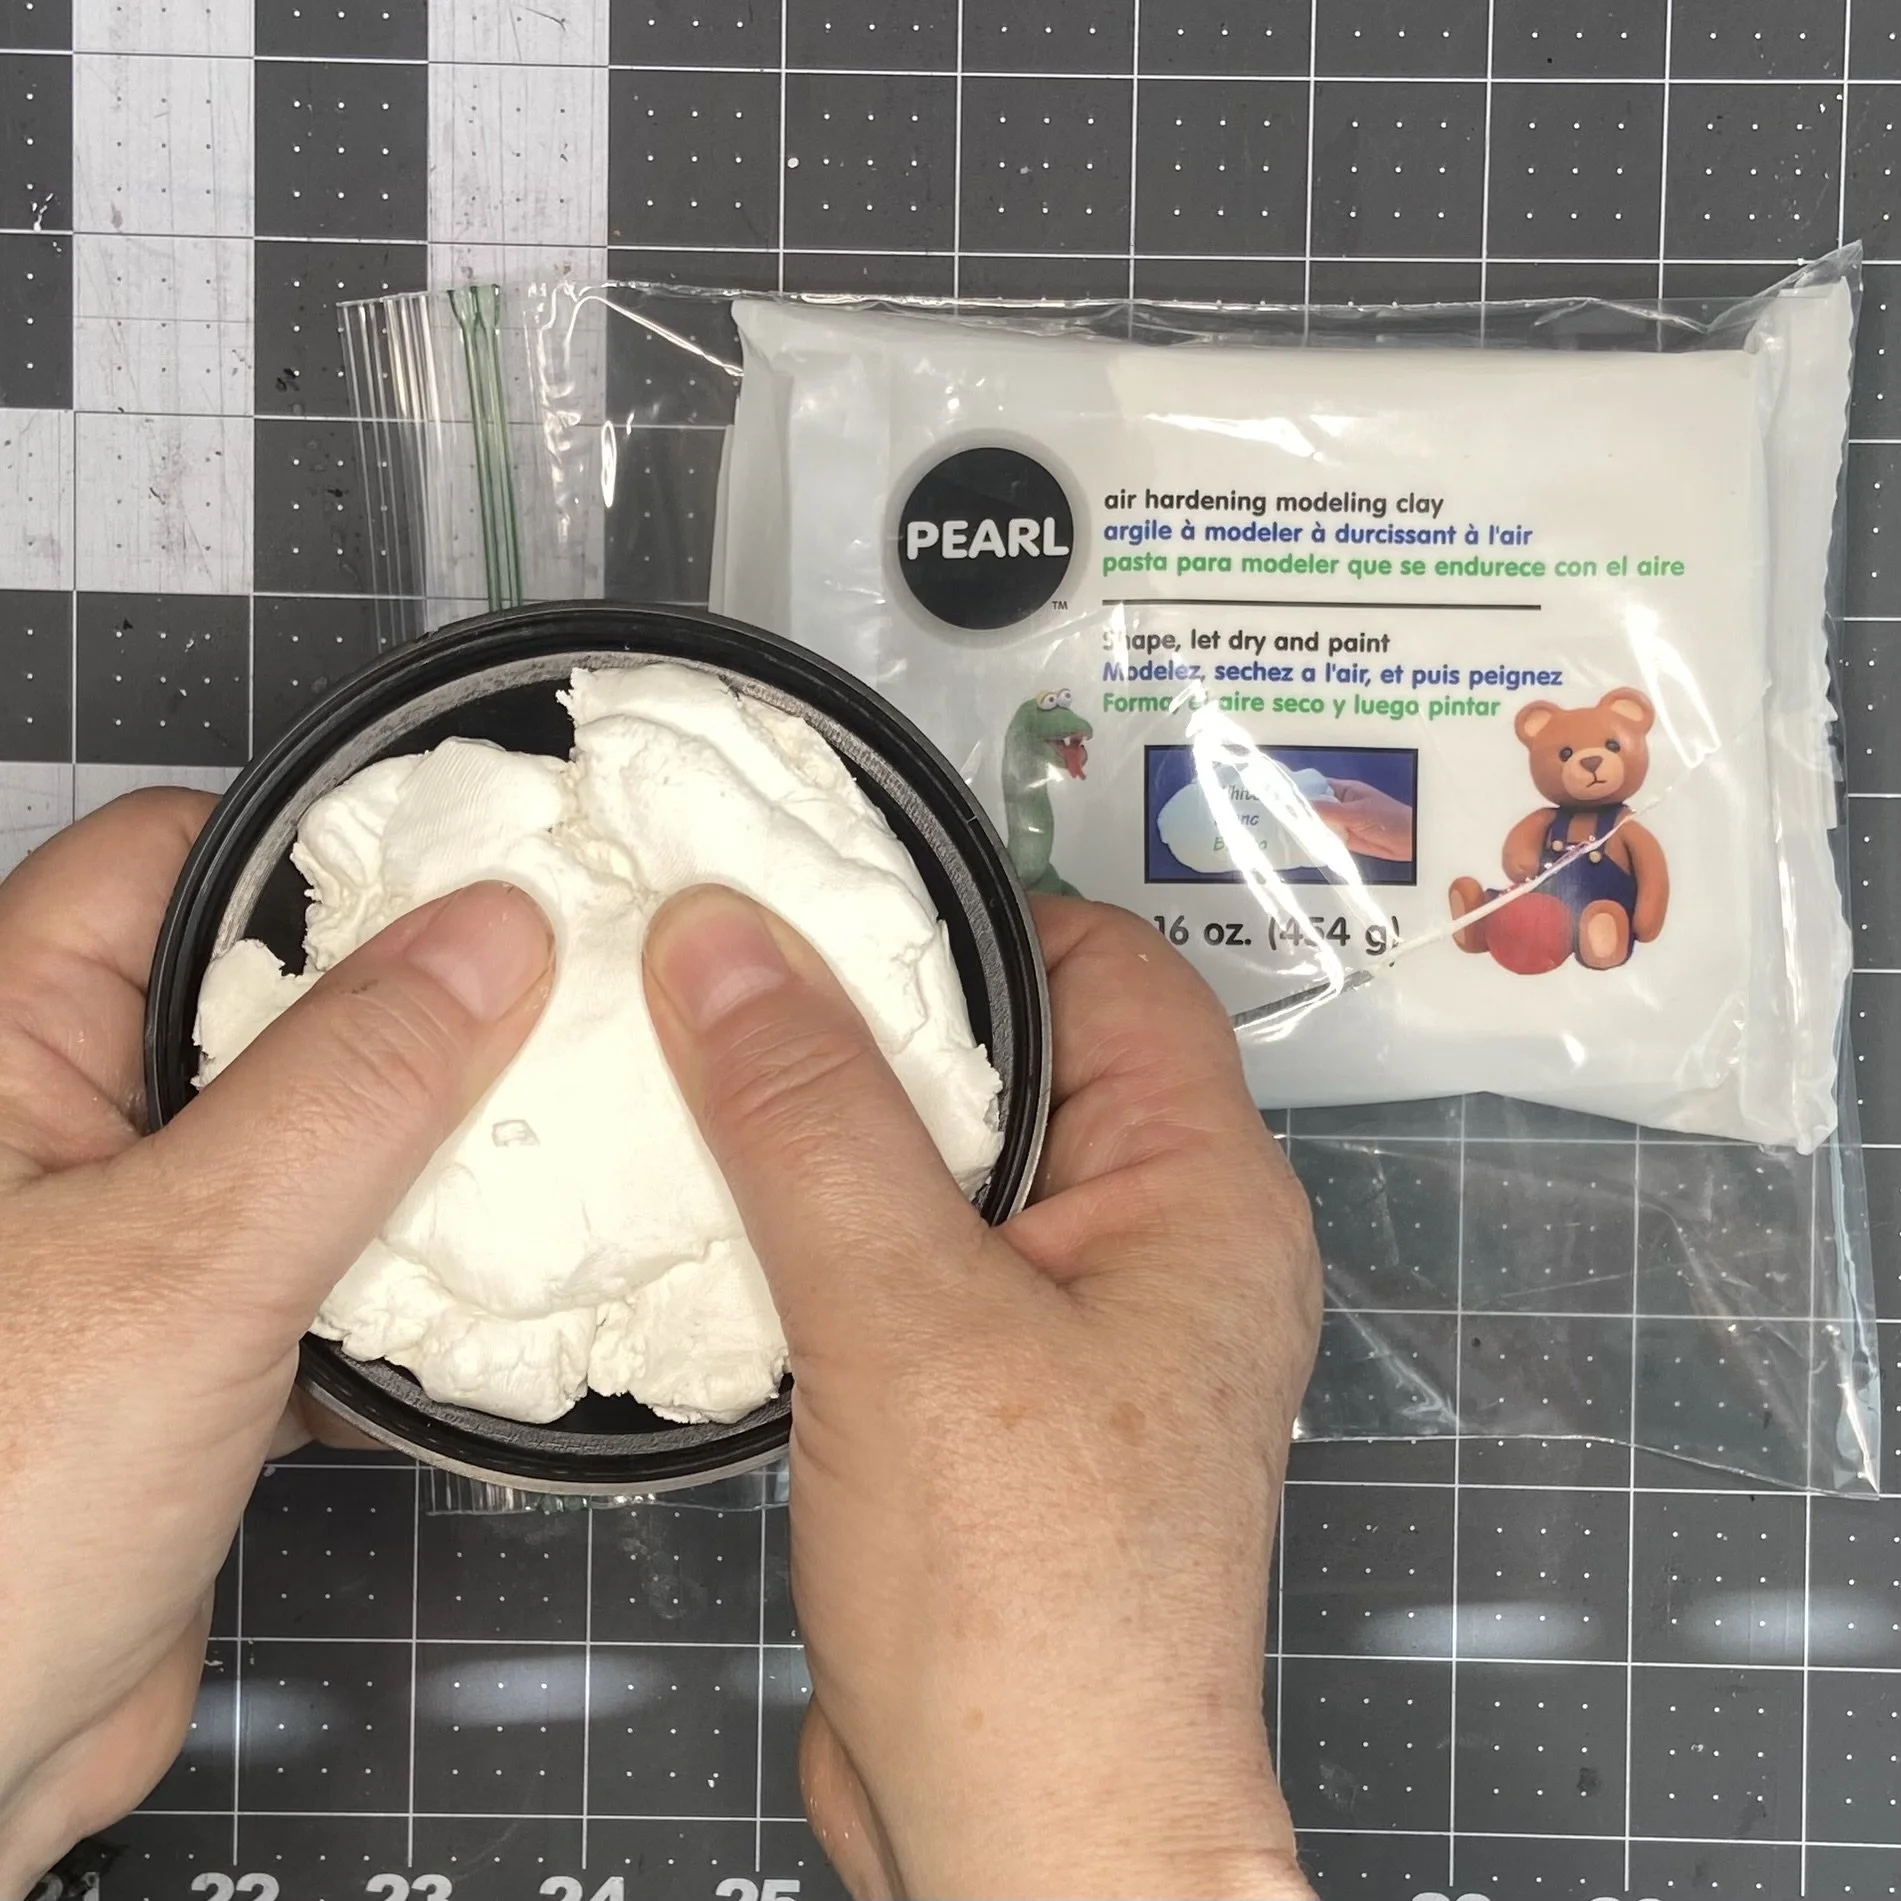
At this point, I went to screw on the base of the globe, and then realized that I’d have to put some weight in the base, as the heavy machinery hanging off the side of the globe kept tipping the whole installation over. I still had a little air-dry clay left, so I stuffed a bunch into the base to shape it properly, then dumped it out onto the work table to dry. It was a thick piece of clay, so it took a couple days to dry completely.
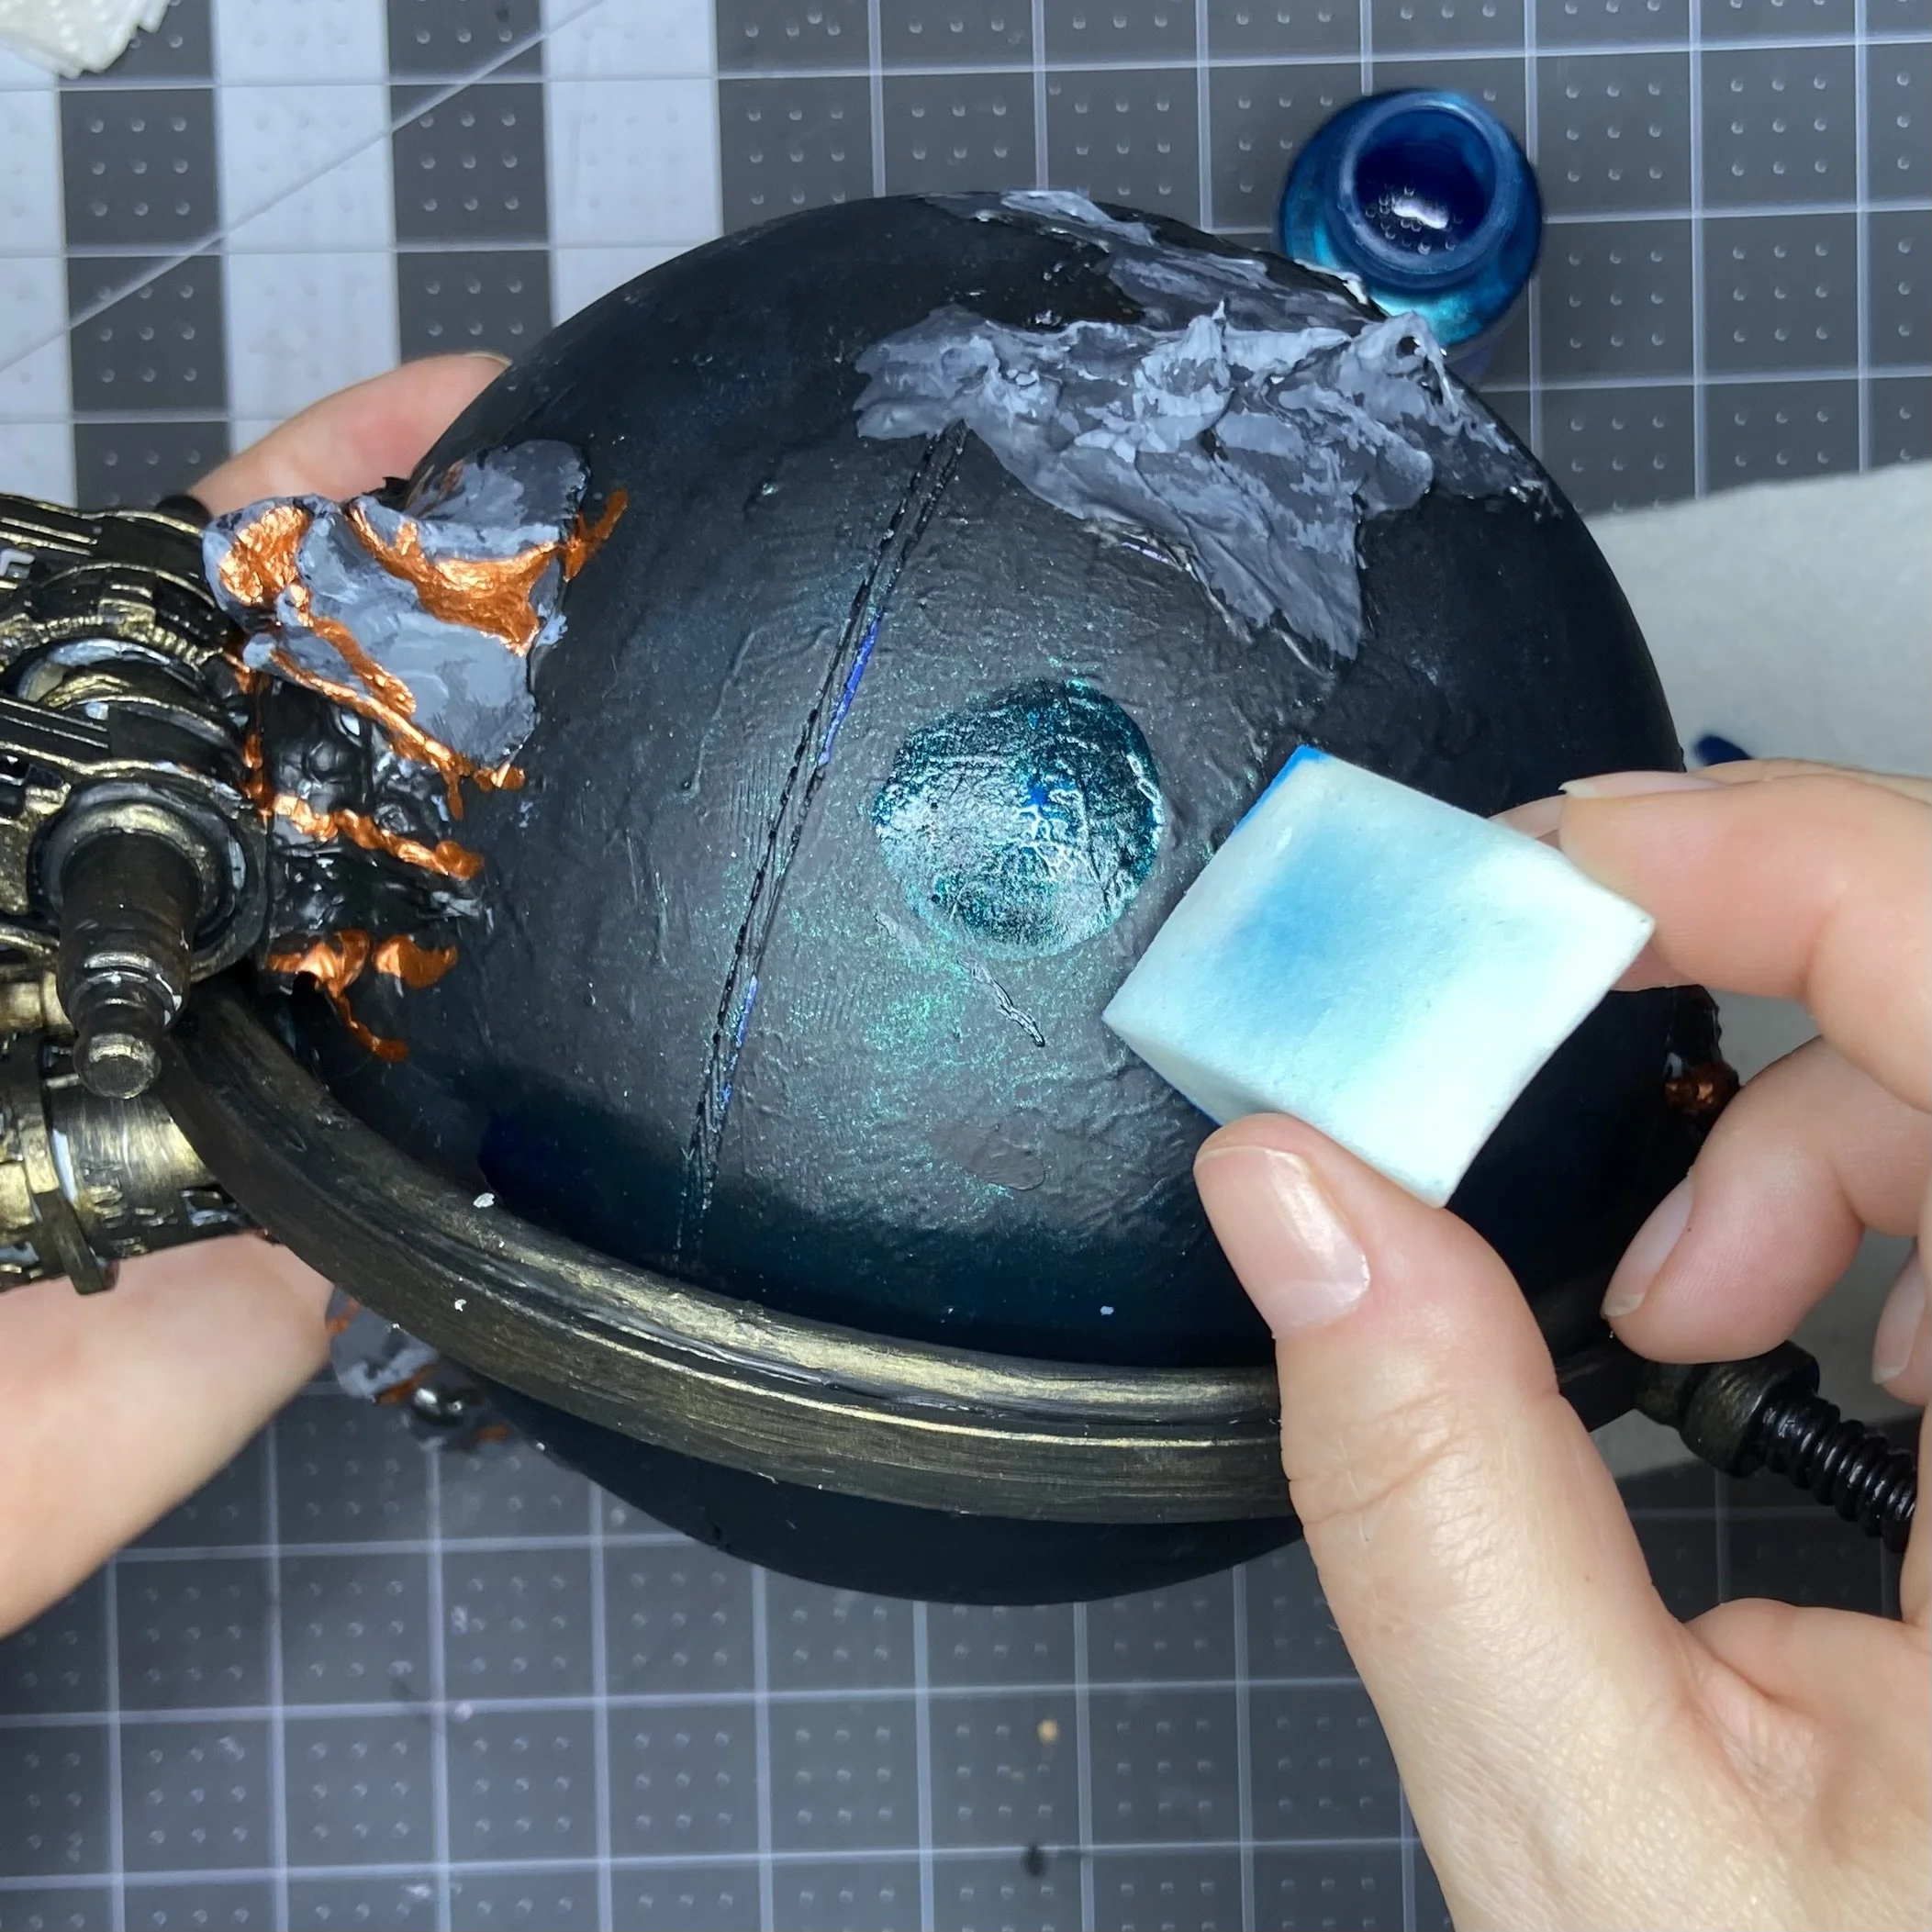
While I was waiting for that last bit of clay to dry, I noticed that all my handling of the globe had resulted in stray bits of paint here and there (copper or bronze paint smudges in the ocean) and that in other places, I’d scratched off the black gesso and white globe was showing through. So I took a cotton swab with a tiny bit of black gesso on it, and carefully touched up anyplace I could see white or stray colors of paint. When that was dry, I decided to re-paint the ocean, as it wasn’t quite as bright as I wanted it to be. I again used a makeup sponge to apply the Lindy’s Gang spray paint in Hydrangea Blue.
Finally, the clay was dry, and I glued it into the base, then screwed the base back onto the globe.

And it’s done! I’ve called it The World Engine. It makes me feel so darned artistic to name a piece I’ve created. Here are a few different angles on the finished product:

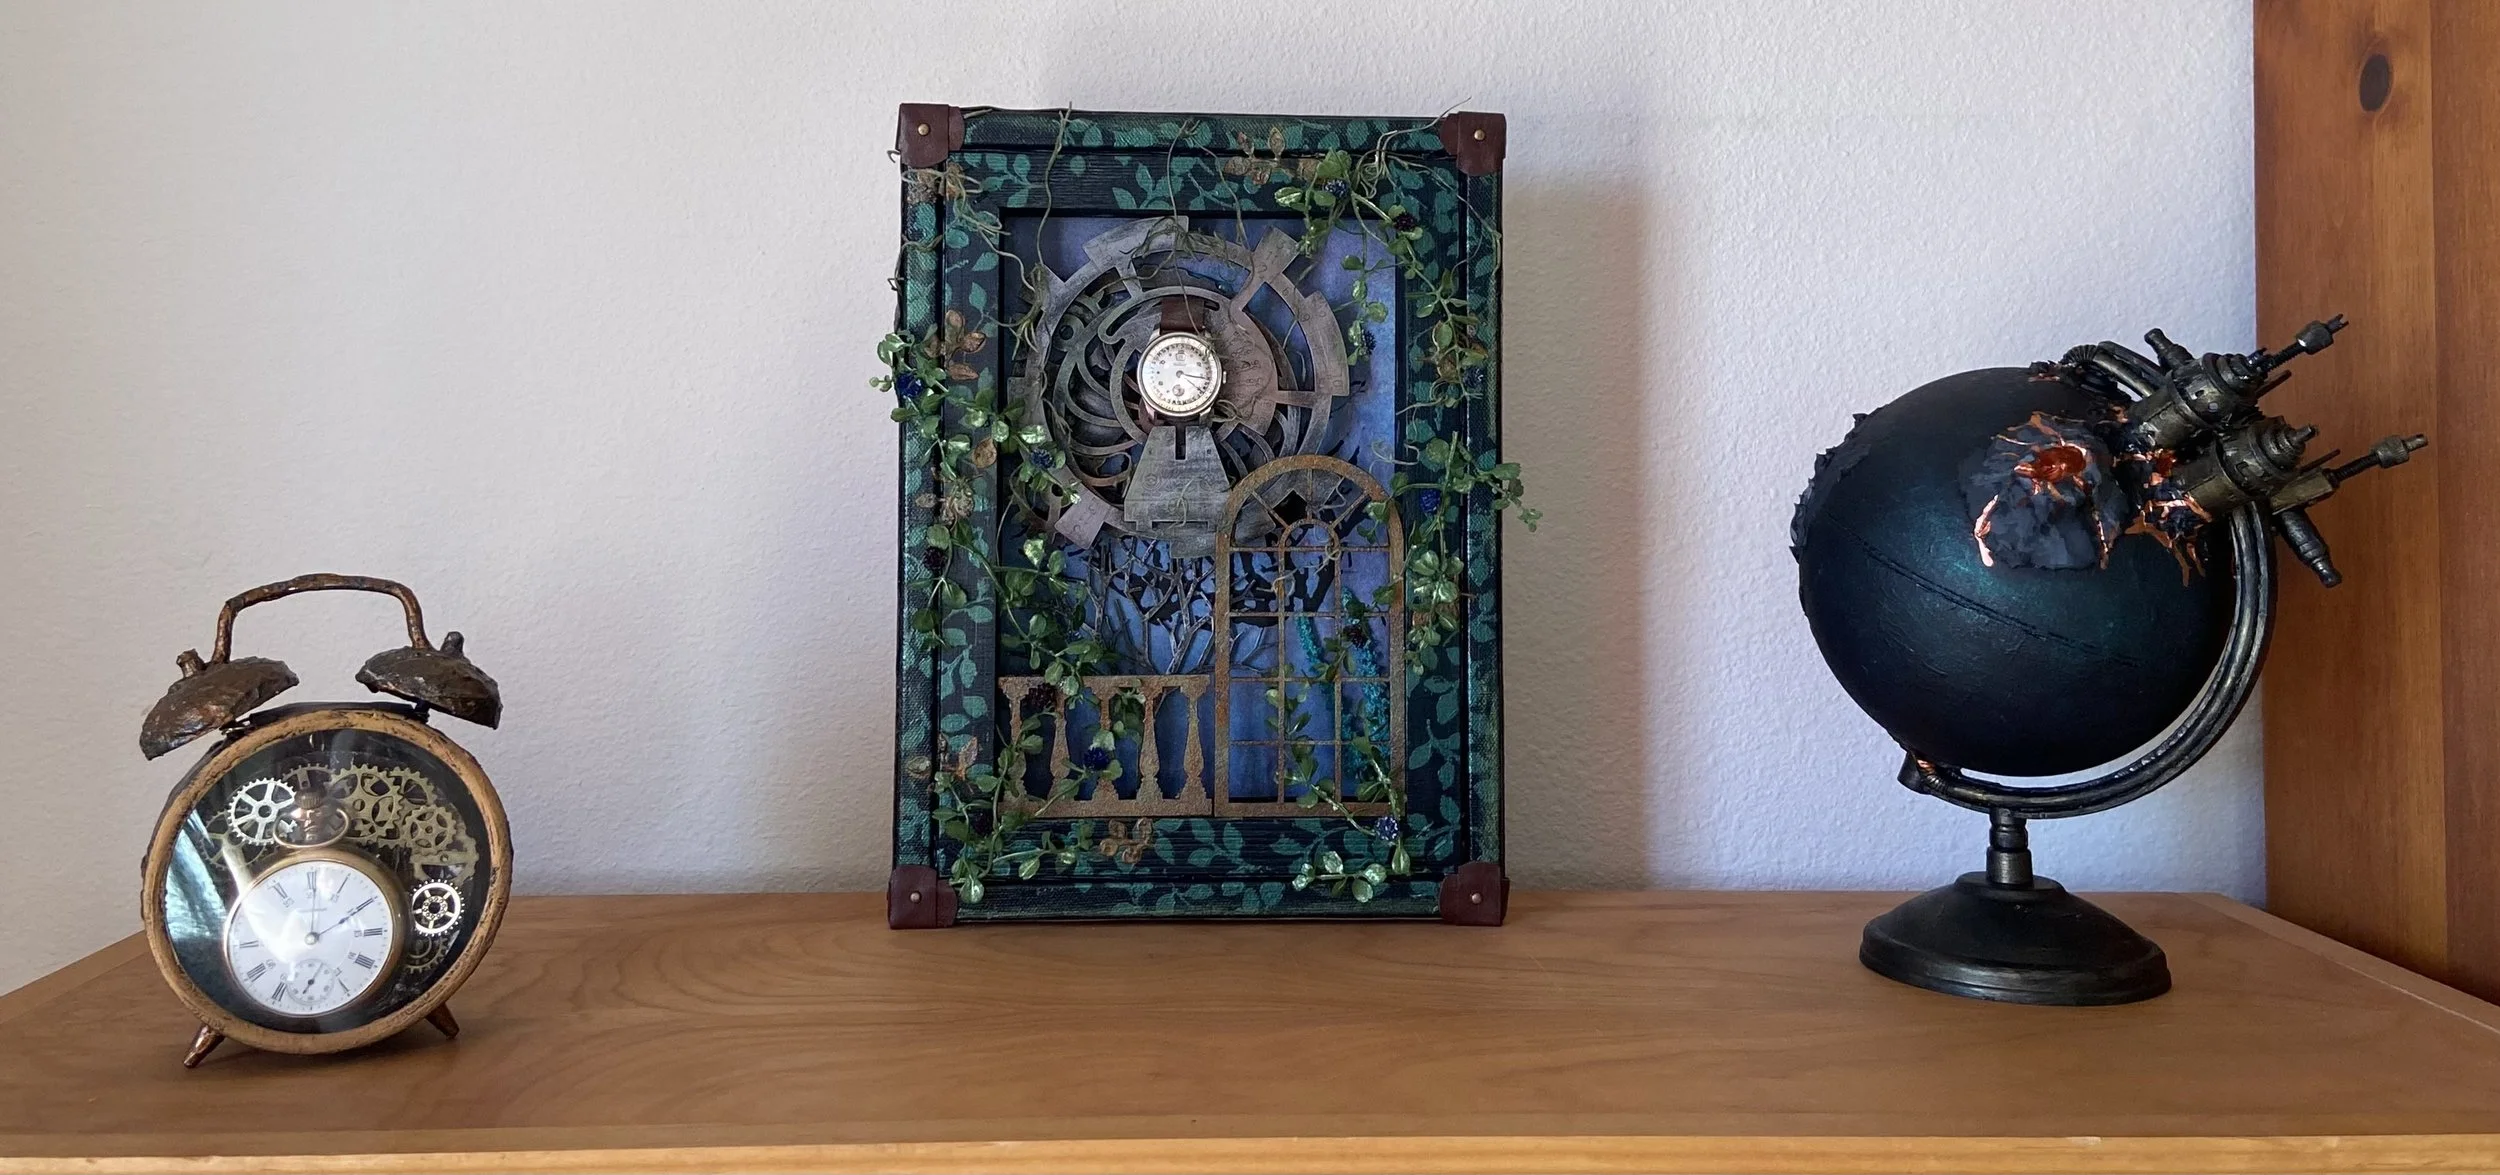
And here is The World Engine alongside my clock installation and my Tempus Fugit piece. I think I’ll call this my steampunk shelf.